在Ubuntu上如果像cenos一样安装httpd会出错
#cenos安装命令
yum -y install httpd
报错:There are no enabled repos. Run “yum repolist all“ to see the repos you have.。。。。
所以说在Ubuntu上不要使用yum,使用以下命令:
sudo apt-get install httpd
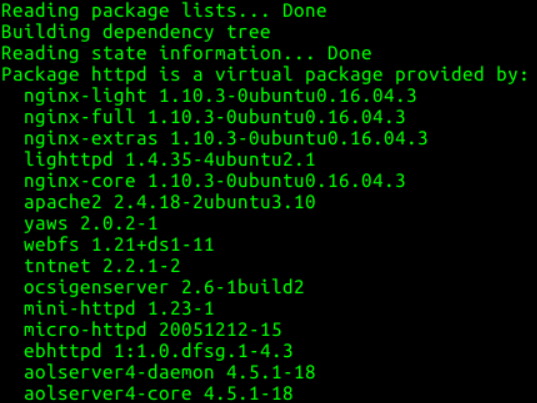
报错原因:让你选择一个安装,不能以httpd为名字进行安装
那么我们选择apache2安装
sudo apt-get install apache2
你可以使用systemctl命令来查看或改变apache2的运行状态
sudo systemctl status
estartstartstop apache2
当apache2运行中时,你可以打开浏览器访问localhost或者127.0.0.1,会出现下面页面
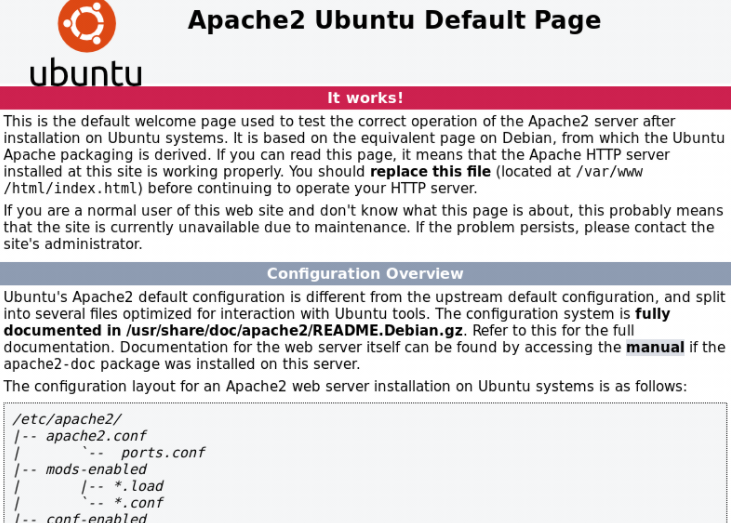
现在就可以将文件放在/var/www/html/下通过http访问了。
apache2配置文件主要在/etc/apache2/目录下:
apache2.conf : 主配置文件,会通过include的方式包含其他的配置文件
ports.cong : 可以配置你需要启用的端口号
mods-available : 可用模块
mods-enable : 已经启用的模块 (我所知道的启用模块的两种方法:ps:以mods-rewrite为例 1. sudo a2enmod rewrite 2.在mods-enable中建立mods-available中相关模块的软连接 sudo ln -s **** ####
在site-enable中配置多站点我已知的有两种方法:
1.通过不同的端口号来访问不同的网站,例如 http://localhost:80 http://localhost:81
配置方法为:
<VirtualHost *:80>
            DocumentRoot: 80端口对应的网站的目录
</VirtualHost>

<VirtualHost *:81>
            DocumentRoot: 81端口对应的网站的目录
</VirtualHost>
2.通过Alias来实现,例如 http://localhost/demo1 http://localhost/demo2
<VirtualHost *:80>
           Alias /demo1 "存放第一个网站的目录"
           Alias /demo2 "存放第二个网站的目录"
</VirtualHost>
参考链接:
https://www.cnblogs.com/lwmp/p/6381951.html
https://blog.csdn.net/ZXDDBK/article/details/108540767
https://blog.csdn.net/heiheiya/article/details/90693940