通过《一.spring boot初始化项目》我们已经会初始化spring boot项目,那本篇文章就说明下初始化项目的具体内容,并编写第一个Hello页面。
-
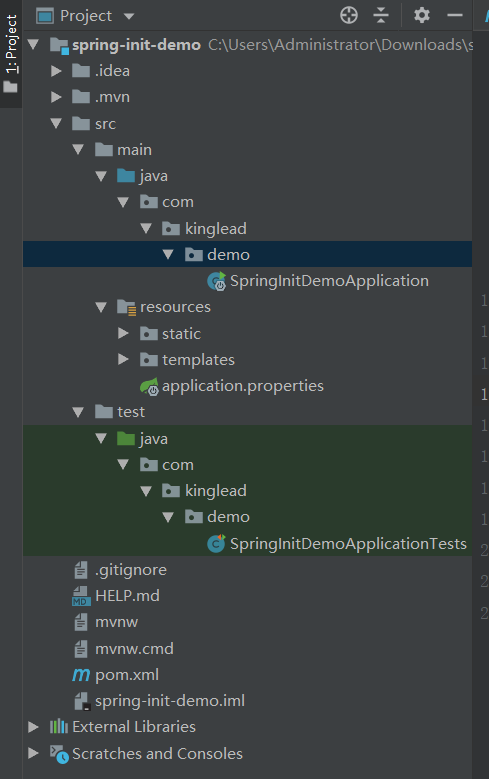
项目结构
-
mvnw、mvnw.cmd:Maven包装器脚本,实现本机不安装Maven,也可以构建项目
-
pom.xml文件:相信使用maven的同学们应该都知道这个文件的重要性,主要用于引入依赖。本文用例是web项目,所以初始化项目时,添加的依赖是web和thymeleaf,具体如下
<?xml version="1.0" encoding="UTF-8"?> <project xmlns="http://maven.apache.org/POM/4.0.0" xmlns:xsi="http://www.w3.org/2001/XMLSchema-instance" xsi:schemaLocation="http://maven.apache.org/POM/4.0.0 https://maven.apache.org/xsd/maven-4.0.0.xsd"> <!--POM使用的对象模型版本,强制性的,一般很少改变--> <modelVersion>4.0.0</modelVersion> <!--spring boot项目信息--> <groupId>com.kinglead</groupId> <artifactId>spring-init-demo</artifactId> <version>0.0.1-SNAPSHOT</version> <name>spring-init-demo</name> <description>Demo project for Spring Boot</description> <packaging>jar</packaging> <!--打包方式,默认是jar--> <!--spring boot信息--> <parent> <groupId>org.springframework.boot</groupId> <artifactId>spring-boot-starter-parent</artifactId> <version>2.3.3.RELEASE</version> <!--spring boot版本号--> <relativePath/> <!-- lookup parent from repository --> </parent> <!--版本号维护--> <properties> <java.version>1.8</java.version> </properties> <!--依赖信息--> <!--spring-boot-starter-xxx是对某一功能的依赖包的集合 用于解决3大问题:1.简化依赖配置,让依赖更易管理 2.针对某一功能统一管理,方便依赖引入 3.解决依赖版本冲突问题 --> <dependencies> <!--web项目依赖--> <dependency> <groupId>org.springframework.boot</groupId> <artifactId>spring-boot-starter-web</artifactId> </dependency> <!--thymeleaf依赖包--> <dependency> <groupId>org.springframework.boot</groupId> <artifactId>spring-boot-starter-thymeleaf</artifactId> </dependency> <!--test--> <dependency> <groupId>org.springframework.boot</groupId> <artifactId>spring-boot-starter-test</artifactId> <scope>test</scope> <exclusions> <exclusion> <groupId>org.junit.vintage</groupId> <artifactId>junit-vintage-engine</artifactId> </exclusion> </exclusions> </dependency> </dependencies> <!--插件--> <build> <plugins> <!--spring boot maven插件 作用:1.允许使用maven允许应用 2.将所有依赖打入到jar包中 3.在jar包中生成manifest文件,指明引导类 --> <plugin> <groupId>org.springframework.boot</groupId> <artifactId>spring-boot-maven-plugin</artifactId> </plugin> </plugins> </build> </project>
-
SpringInitDemoApplication:spring boot项目启动类
package com.kinglead.demo; import org.springframework.boot.SpringApplication; import org.springframework.boot.autoconfigure.SpringBootApplication; //@SpringBootApplication注解代表这是一个spring boot应用 //它是一个组合注解 //@SpringBootConfiguration注解将该类声明为配置类,相当于@Configuration的特殊形式 //@EnableAutoConfiguration启动spring boot的自动配置 //@ComponentScan启动组件扫描:将通过@Component、@Controller、@Service这样注解的类,注册为spring应用上下文的组件 @SpringBootApplication public class SpringInitDemoApplication { /** * @param args 命令行参数 */ public static void main(String[] args) { SpringApplication.run(SpringInitDemoApplication.class, args); } }
-
resources:资源文件
static:静态文件目录,如image、css
templates:模板文件,如html
application.properties:配置文件(开始是空的)
-
SpringInitDemoApplicationTests:测试类
package com.kinglead.demo; import org.junit.jupiter.api.Test; import org.springframework.boot.test.context.SpringBootTest; @SpringBootTest class SpringInitDemoApplicationTests { @Test void contextLoads() { } }
-
-
编写控制器(Controller)
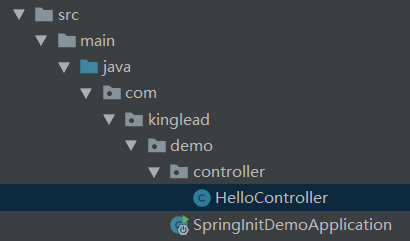
package com.kinglead.demo.controller; import org.springframework.stereotype.Controller; import org.springframework.web.bind.annotation.GetMapping; import org.springframework.web.bind.annotation.RequestMapping; /** * @author kinglead * @date 2020-09-08 下午 15:16 * @describe 欢迎页控制器 */ //@Controller标记类为控制器,能让spring自动扫描到它,添加到容器中 //另外@RestController = @Controller + @ResponseBody,@ResponseBody标记返回报文是json格式 //@RequestMapping是请求url路径映射 @Controller @RequestMapping("/") public class HelloController { //@GetMapping get请求方法路径映射 @GetMapping("/") public String hello(){ return "hello"; //返回的string值,将会被解析为视图的逻辑名 } }
-
编写欢迎页(Hello.html)
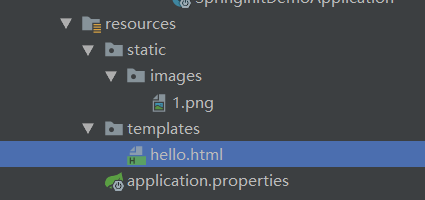
 <!DOCTYPE html>
 <html xmlns="http://www.w3.org/1999/xhtml"
       xmlns:th="http://www.thymelead.org">
 <head>
     <meta charset="UTF-8">
     <title>Spring Demo</title>
 </head>
 <body>
 <h1>Welcome to Spring</h1>
 <img th:src="@{/images/1.png}">
 </body>
 </html>
-
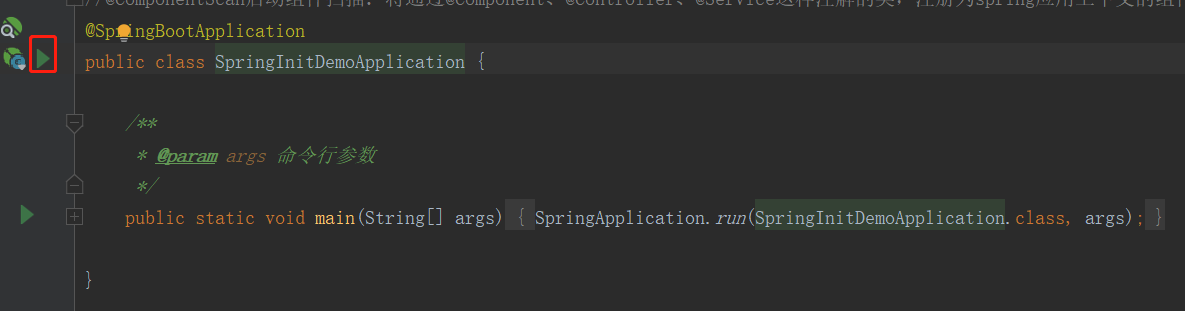
启动应用
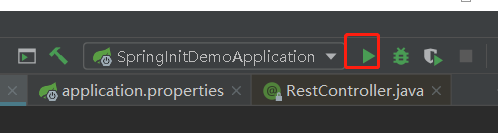
如果是使用IDEA开发,直接在启动类上Run或在工具类点击Run
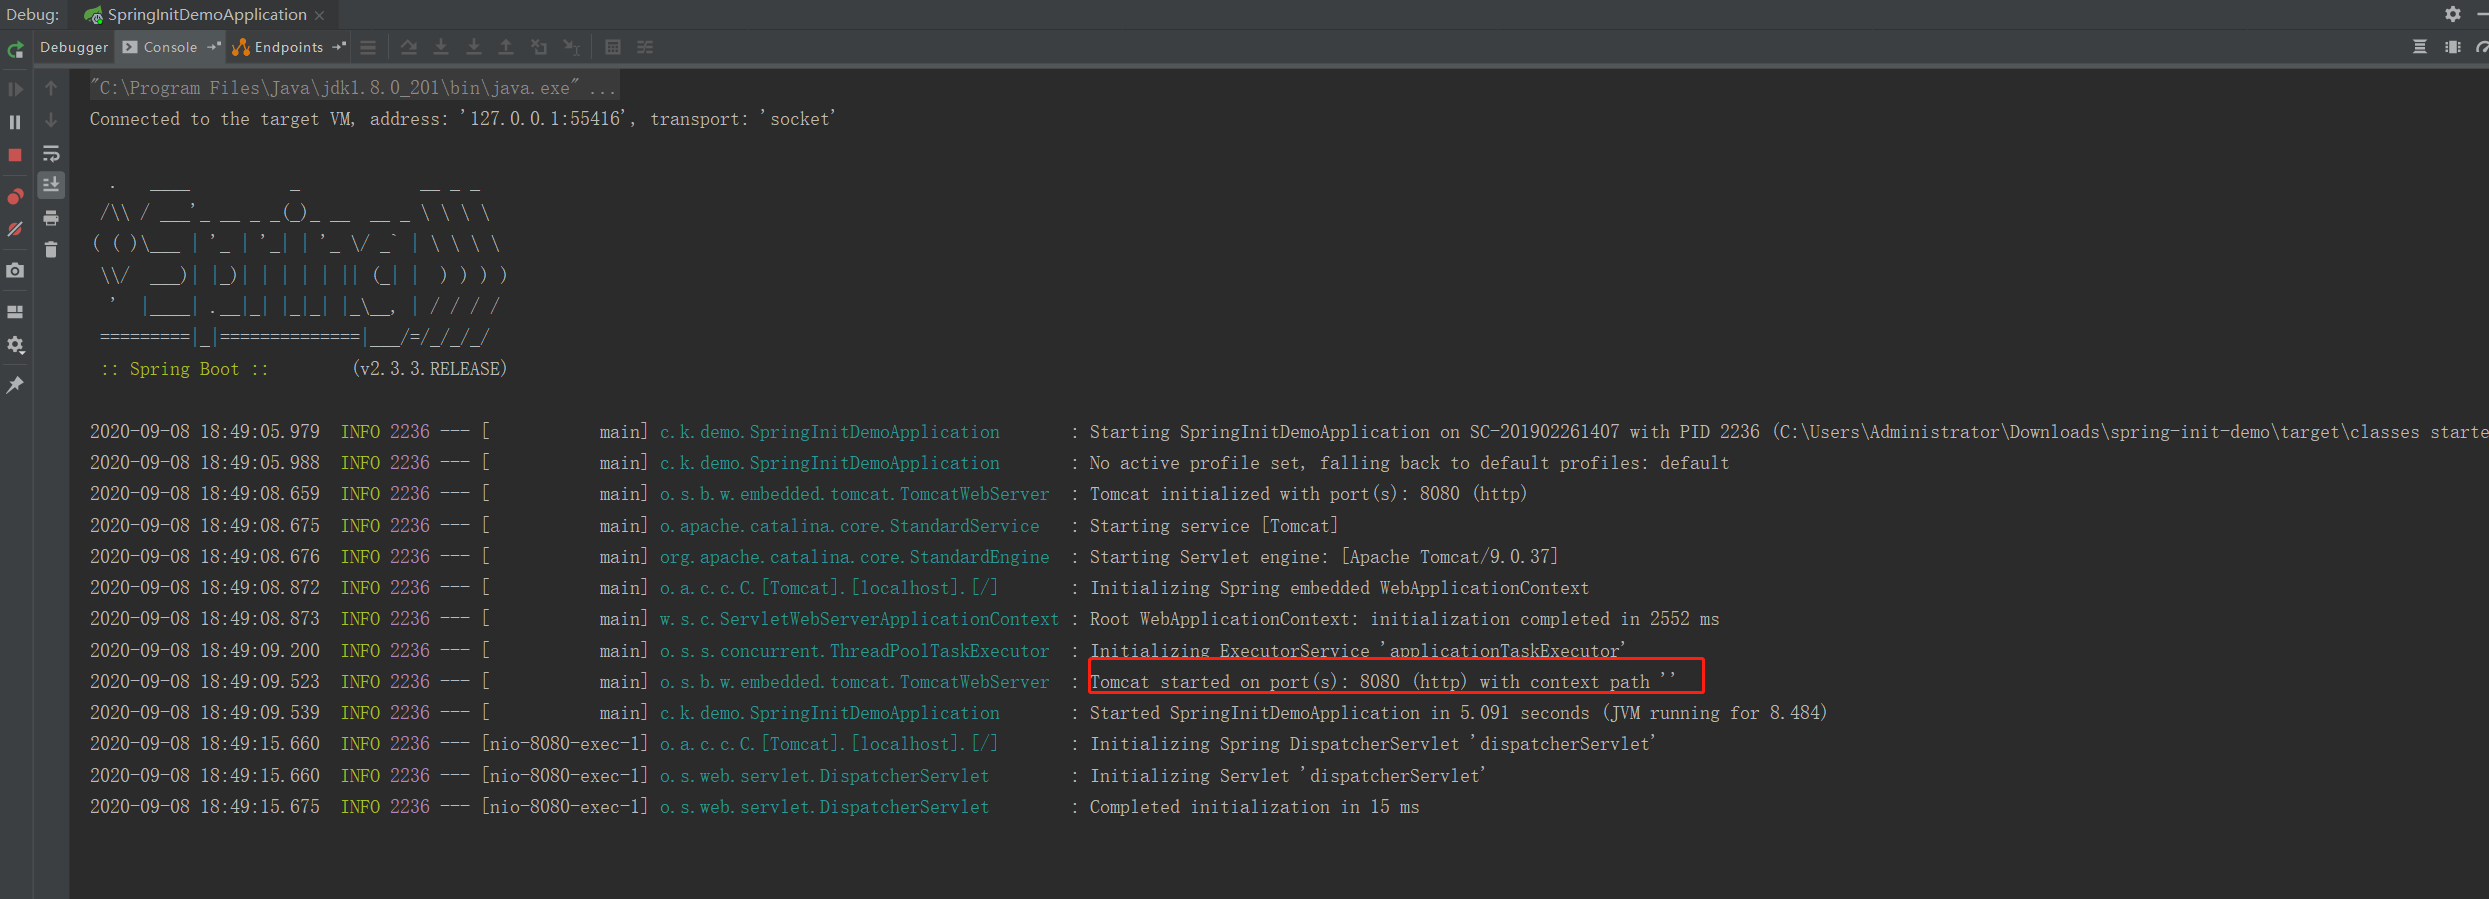
下面是启动日志
-
测试请求

网页正常显示hello欢迎界面。