在最初开始构建微服务系统的时候可能服务并不多,我们可以通过做一些静态配置来完成服务的调用。比如,有两个服务A和B,其中服务A需要调用服务B来完成一个业务操作时,为了实现服务B的高可用,不论采用服务端负载均衡还是客户端负载均衡,都需要手工维护服务B的具体实例清单。但是随着业务的发展,系统功能越来越复杂,相应的微服务应用也不断增加,我们的静态配置会变得越来越难以维护。并且面对不断发展的业务,我们的集群规模、服务的位置、服务的命名等都有可能发生变化,如果还是通过手工维护的方式,那么极易发生错误或是命名冲突问题。同事,对于这类静态内容的维护也必将消耗大量的人力。
为了解决上述问题,Spring Cloud Eureka 应运而生。Spring Cloud Eureka 是 Spring Cloud Netflix微服务套件中的一部分,它基于Netflix Eureka做了二次封装,主要负责完成微服务架构中的服务治理功能。它既包含了服务端组件,也包含了客户端组件,并且服务端与客户端均采用Java编写,所以Eureka主要适用于通过Java实现的分布式系统,或是与JVM兼容语言构建的系统。下面我们来构建一些简单实例,学习如何使用Eureka构建注册中心以及进行注册与发现服务。
一、搭建服务注册中心
首先,创建一个基础的Spring Boot工程,命名为eureka-server,并在pom.xml中引入必要的依赖内容,代码如下
 1   <parent>
 2         <groupId>org.springframework.boot</groupId>
 3         <artifactId>spring-boot-starter-parent</artifactId>
 4         <version>1.5.10.RELEASE</version>
 5         <relativePath/> <!-- lookup parent from repository -->
 6     </parent>
 7
 8     <dependencies>
 9         <!-- Eureka服务端开始 -->
10         <dependency>
         <groupId>org.springframework.cloud</groupId>
11             <artifactId>spring-cloud-starter-eureka-server</artifactId>
12         </dependency>
13         <!-- Eureka服务端结束 -->
14     </dependencies>
16
17     <dependencyManagement>
18         <dependencies>
19             <dependency>
20                 <groupId>org.springframework.cloud</groupId>
21                 <artifactId>spring-cloud-dependencies</artifactId>
22                 <version>Edgware.SR2</version>
23                 <type>pom</type>
24                 <scope>import</scope>
25             </dependency>
26         </dependencies>
27     </dependencyManagement>
通过@EnableEurekaServer注解启动一个服务注册中心提供给其他应用进行对话。这一步非常简单,只需在一个普通的Spring Boot应用中添加这个注解就能开启此功能,比如下面的例子:
1 @EnableEurekaServer
2 @SpringBootApplication(exclude={DataSourceAutoConfiguration.class,HibernateJpaAutoConfiguration.class})①
3 public class EurekaServerApplication {
4
5     public static void main(String[] args) {
6         SpringApplication.run(EurekaServerApplication.class, args);
7     }
8 }
在默认设置下,该服务注册中心也会将自己作为客户端来尝试注册它自己,所以我们需要禁用它的客户端注册行为,只需在application.properties中增加如下配置:
1 server.port=1111
2
3 eureka.instance.hostname=localhost
4 eureka.client.register-with-eureka=false   #由于该应用为注册中心,所以设置为false,代表不向注册中心注册自己
5 eureka.client.fetch-registry=false       #由于注册中心的职责就是维护服务实例,它并不需要去检索服务,所以也设置为false
6 eureka.client.serviceUrl.defaultZone=http://${eureka.instance.hostname}:${server.port}/eureka/
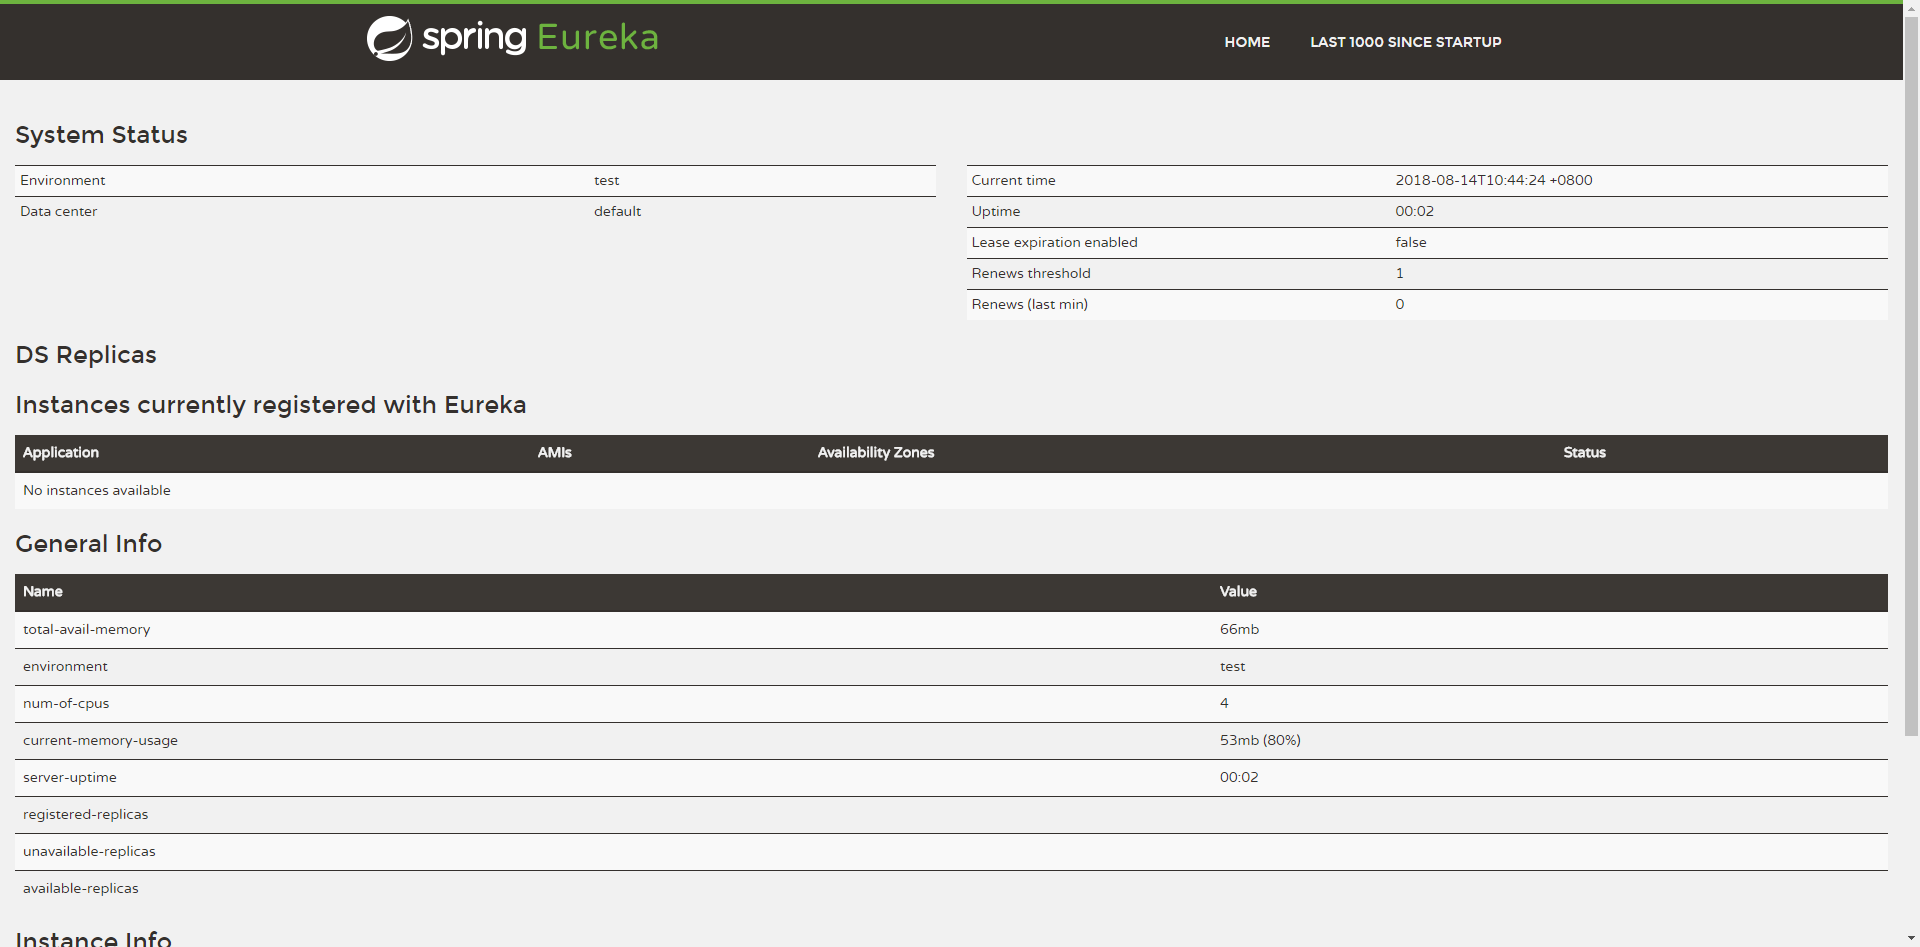
在完成了上面的配置后,启动应用并访问http://localhost:1111/。可以看到如下图所示的Eureka信息面板,其中Instances currently registered with Eureka栏是空的,说明该注册中心还没有注册任何服务。
二、注册服务提供者
在完成了服务注册中心的搭建之后,接下来我们尝试将一个既有的Spring Boot应用加入Eureka的服务治理体系中去。
 1    <parent>
 2         <groupId>org.springframework.boot</groupId>
 3         <artifactId>spring-boot-starter-parent</artifactId>
 4         <version>1.5.10.RELEASE</version>
 5         <relativePath/> <!-- lookup parent from repository -->
 6     </parent>
 7
 8     <properties>
 9         <project.build.sourceEncoding>UTF-8</project.build.sourceEncoding>
10         <project.reporting.outputEncoding>UTF-8</project.reporting.outputEncoding>
11         <java.version>1.8</java.version>
12     </properties>
13
14     <dependencies>
15         <dependency>
16             <groupId>org.springframework.boot</groupId>
17             <artifactId>spring-boot-starter</artifactId>
18         </dependency>
19         <dependency>
20             <groupId>org.springframework.boot</groupId>
21             <artifactId>spring-boot-starter-web</artifactId>
22         </dependency>
23         <dependency>
24             <groupId>org.springframework.cloud</groupId>
25             <artifactId>spring-cloud-starter-eureka</artifactId>
26         </dependency>
27         <dependency>
28             <groupId>org.springframework.boot</groupId>
29             <artifactId>spring-boot-starter-test</artifactId>
30             <scope>test</scope>
31         </dependency>
32     </dependencies>
33     <dependencyManagement>
34         <dependencies>
35             <dependency>
36                 <groupId>org.springframework.cloud</groupId>
37                 <artifactId>spring-cloud-dependencies</artifactId>
38                 <version>Edgware.SR2</version>
39                 <type>pom</type>
40                 <scope>import</scope>
41             </dependency>
42         </dependencies>
43     </dependencyManagement>
接着添加/hello接口
1 @RestController
2 public class HelloController {
3     @RequestMapping("/hello")
4     public String hello() {
5         return "hello eureka";
6     }
7 }
然后,在主类中通过加上@EnableDiscoveryClient 注解,激活Eureka对服务的发现
1 @EnableDiscoveryClient②
2 @SpringBootApplication
3 public class ProvideApplication {
4
5     public static void main(String[] args) {
6         SpringApplication.run(ProvideApplication.class, args);
7     }
8 }
最后,我们需要在application.properties配置文件中,通过spring.application.name属性来为服务命名,比如命名为hello-service。再通过eureka.client.serviceUrl.defaultZone属性来制定服务注册中心的地址,这里我们指定为上述构建的服务注册中心地址,完整配置如下所示:
1 server.port=8090
2
3 spring.application.name=hello-service
4
5 eureka.client.serviceUrl.defaultZone=http://localhost:1111/eureka/
下面我们分别启动服务注册中心以及这里改造后的hello-service服务,通过访问Eureka的信息面板,在Instances currently registered with Eureka可以看到

至此,服务注册成功!
注释一:springboot项目启动时,如果没有配置数据库配置,启动时会抛出如下异常。
Description:

Cannot determine embedded database driver class for database type NONE

Action:

If you want an embedded database please put a supported one on the classpath.
If you have database settings to be loaded from a particular profile you may
need to active it (no profiles are currently active).
因为springboot会自动注入数据源,而项目如果没有配,就会抛出该异常。
如果只是简单的想建个项目,并不需要数据库支持,那么可以添加exclude={DataSourceAutoConfiguration.class,HibernateJpaAutoConfiguration.class}不去注入数据源。
注释二:从Spring Cloud Edgware开始,@EnableDiscoveryClient 或@EnableEurekaClient 可省略。只需加上相关依赖,并进行相应配置,即可将微服务注册到服务发现组件上。
Spring Cloud为什么要这么设计/改进呢?
这是由于在实际项目中,我们可能希望实现“不同环境不同配置”的效果——例如:在开发环境中,不注册到Eureka Server上,而是服务提供者、服务消费者直连,便于调测;在生产环境中,我们又希望能够享受服务发现的优势——服务消费者无需知道服务提供者的绝对地址。为适应该需求,Spring Cloud Commons进行了改进
如不想将服务注册到Eureka Server,只需设置spring.cloud.service-registry.auto-registration.enabled=false ,或@EnableDiscoveryClient(autoRegister = false) 即可。