1、下载所需文件nagios-3.4.3.tar.gz,nagios-plugins-1.4.15.tar.gz,nrpe-2.14.tar.gz,sendEmail-v1.56.tar.gz
下载地址:http://pan.baidu.com/s/1ing0G
2、安装所需的依赖包
yum -y install httpd php gcc glibc glibc-common gd gd-devel openssl-devel perl make
3、配置用户
useradd nagios
groupadd nagcmd
usermod -a -G nagcmd nagios
usermod -a -G nagcmd apache
4、安装nagios-3.4.3.tar.gz
tar zxvf nagios-3.4.3.tar.gz
cd nagios
./configure --prefix=/usr/local/nagios --with-command-group=nagcmd --with-nagios-user=nagios --with-nagios-group=nagios
make all
make install
make install-init
make install-commandmode
make install-config
make install-webconf

htpasswd -c /usr/local/nagios/etc/htpasswd.users admin    #访问页面用的

chkconfig --add nagios
chkconfig nagios on
修改nagios配置文件cgi.cfg,将use_authentication=1改为use_authentication=0
vi /usr/local/nagios/etc/cgi.cfg
5、安装nagios-plugins-1.4.15.tar.gz
tar zxvf nagios-plugins-1.4.15.tar.gz
cd nagios-plugins-1.4.15
./configure --prefix=/usr/local/nagios --with-nagios-user=nagios --with-nagios-group=nagios
make && make install

chown -R nagios.nagios /usr/local/nagios/
6、安装nrpe-2.14.tar.gz
tar zxvf nrpe-2.14.tar.gz
cd nrpe-2.14
./configure
make all
make install-plugin
7、安装 sendEmail-v1.56.tar.gz,当主机或服务宕掉或恢复时发送邮件
参考:http://www.cnblogs.com/kgdxpr/p/3326190.html
8、开始配置
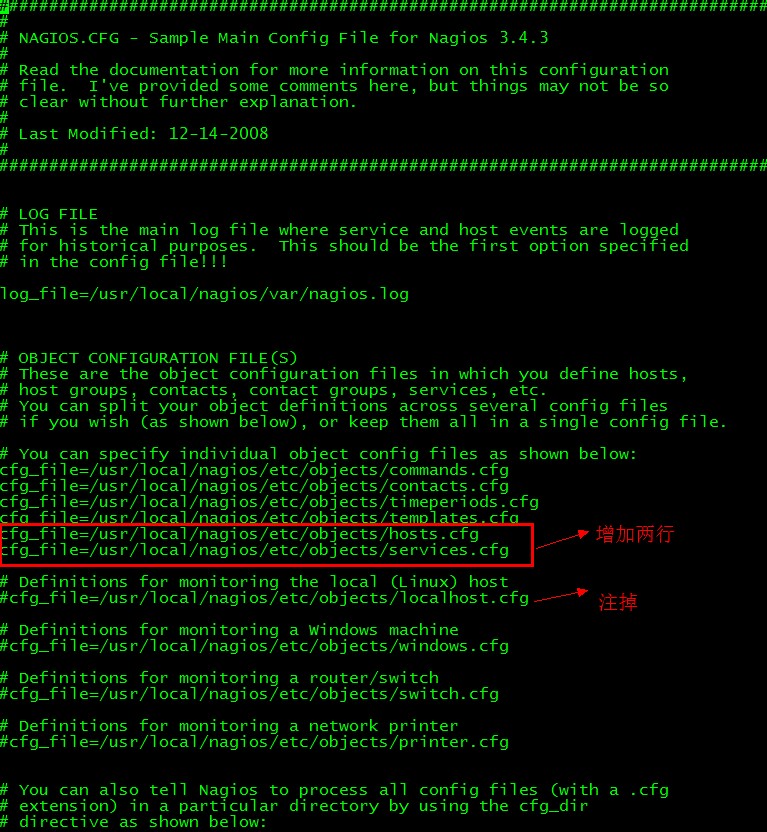
修改主配置文件
vi /usr/local/nagios/etc/nagios.cfg
配置文件说明
commands.cfg 命令定义配置文件
contacts.cfg 定义联系人
timeperiods.cfg 定义监控时间段的配置文件
templates.cfg 定义主机和服务的一个模板配置文件
hosts.cfg 定义主机配置文件
services.cfg 定义服务配置文件
配置commands.cfg文件
vi /usr/local/nagios/etc/objects/commands.cfg
先修改发送邮件的命令
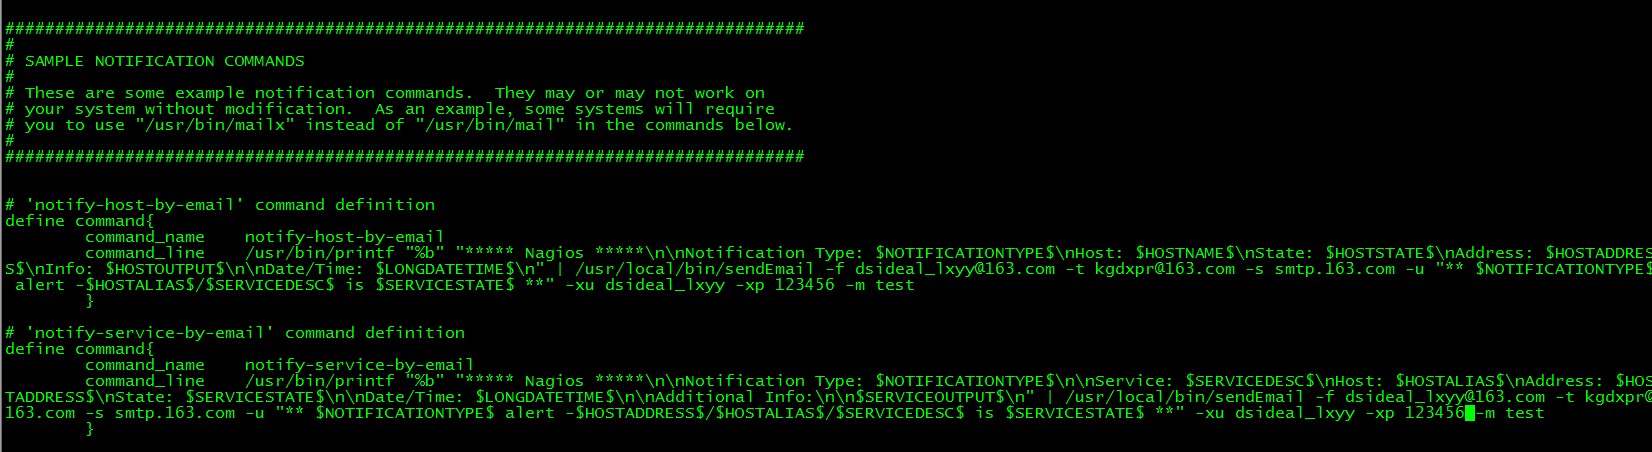
define command{
        command_name    notify-host-by-email
        command_line    /usr/bin/printf "%b" "***** Nagios *****

Notification Type: $NOTIFICATIONTYPE$
Host: $HOSTNAME$
State: $HOSTSTATE$
Address: $HOSTADDRESS$
Info: $HOSTOUTPUT$

Date/Time: $LONGDATETIME$
" | /usr/local/bin/sendEmail -f dsideal_lxyy@163.com -t kgdxpr@163.com -s smtp.163.com -u "** $NOTIFICATIONTYPE$ alert -$HOSTADDRESS$/$HOSTALIAS$/$SERVICEDESC$ is $SERVICESTATE$ **" -xu dsideal_lxyy -xp 123456 -m test
        }

define command{
        command_name    notify-service-by-email
        command_line    /usr/bin/printf "%b" "***** Nagios *****

Notification Type: $NOTIFICATIONTYPE$

Service: $SERVICEDESC$
Host: $HOSTALIAS$
Address: $HOSTADDRESS$
State: $SERVICESTATE$

Date/Time: $LONGDATETIME$

Additional Info:

$SERVICEOUTPUT$
" | /usr/local/bin/sendEmail -f dsideal_lxyy@163.com -t kgdxpr@163.com -s smtp.163.com -u "** $NOTIFICATIONTYPE$ alert -$HOSTADDRESS$/$HOSTALIAS$/$SERVICEDESC$ is $SERVICESTATE$ **" -xu dsideal_lxyy -xp 123456 -m test
        }
增加一个命令(用来监控memcache的端口)
define command{
        command_name    check_port
        command_line    $USER1$/check_tcp -H $HOSTADDRESS$ -p 11211 $ARG2$
        }
配置hosts.cfg文件
vi /usr/local/nagios/etc/objects/hosts.cfg
增加一个主机(注意:需要把注释删掉)
define host{
        use             linux-server        #调用的是templates.cfg中的配置
        host_name       memcached        #主机名
        alias           memcached_server        #描述
        address         10.10.3.13        #IP地址
}
配置services.cfg文件
vi /usr/local/nagios/etc/objects/services.cfg
增加一个服务(注意:需要把注释删掉)
define service {
        use                     generic-service        #调用的是templates.cfg中的配置
        host_name               memcached        #主机名,调用的是hosts.cfg中的配置
        service_description     test_service_description        #说明
        check_command           check_port        #用的命令,调用的是commands.cfg文件中的配置
}
9、启动Apache和nagios
为了不影响实验的结果,请关闭iptables和selinux
service iptables stop
vi /etc/sysconfig/selinux 将SELINUX=enforcing改为SELINUX=disabled (需要重启)
启动Apache前先修改一下配置,不修改的话启动时会报异常。
vi /usr/local/apache/conf/httpd.conf 找到#ServerName www.example.com:80 这行,把注释拿掉,然后改成ServerName localhost:80
chkconfig httpd on
service httpd start
service nagios start
10、访问:http://IP/nagios
用户名和密码是上面设置过的。