spring从2.5版本开始支持注解注入,注解注入可以省去很多的xml配置工作。由于注解是写入java代码中的,所以注解注入会失去一定的灵活性,我们要根据需要来选择是否启用注解注入。
我们首先看一个注解注入的实际例子,然后再详细介绍context:component-scan的使用。
如果你已经在用spring mvc的注解配置,那么你一定已经在使用注解注入了,本文不会涉及到spring mvc,我们用一个简单的例子来说明问题。
本例中我们会定义如下类:
- PersonService类,给上层提供Person相关操作
- PersonDao类,给PersonService类提供DAO方法
- Person类,定义Person相关属性,是一个POJO
- App类,入口类,调用注解注入的PersonService类
PersonService类实现如下:
package cn.outofmemory.spring;

import org.springframework.beans.factory.annotation.Autowired;
import org.springframework.stereotype.Service;

@Service
public class PersonService {

	@Autowired
	private PersonDao personDao;

	public Person getPerson(int id) {
		return personDao.selectPersonById(id);
	}
}
在Service类上使用了@Service注解修饰,在它的私有字段PersonDao上面有@Autowired注解修饰。@Service告诉spring容器,这是一个Service类,默认情况会自动加载它到spring容器里。而@Autowired注解告诉spring,这个字段是需要自动注入的。
PersonDao类:
package cn.outofmemory.spring;

import org.springframework.context.annotation.Scope;
import org.springframework.stereotype.Repository;

@Scope("singleton")
@Repository
public class PersonDao {

	public Person selectPersonById(int id) {
		Person p = new Person();
		p.setId(id);
		p.setName("Person name");
		return p;
	}
}
在PersonDao类上面有两个注解,分别为@Scope和@Repository,前者指定此spring bean的scope是单例,你也可以根据需要将此bean指定为prototype,@Repository注解指定此类是一个容器类,是DA层类的实现。这个类我们只是简单的定义了一个selectPersonById方法,该方法的实现也是一个假的实现,只是声明了一个Person的新实例,然后设置了属性,返回他,在实际应用中DA层的类肯定是要从数据库或者其他存储中取数据的。
Person类:
package cn.outofmemory.spring;

public class Person {
	private int id;
	private String name;
	public int getId() {
		return id;
	}
	public void setId(int id) {
		this.id = id;
	}
	public String getName() {
		return name;
	}
	public void setName(String name) {
		this.name = name;
	}
}
Person类是一个POJO。
App类:
package cn.outofmemory.spring;

import org.springframework.context.ApplicationContext;
import org.springframework.context.support.ClassPathXmlApplicationContext;
/**
 * Hello spring! from outofmemory.cn
 *
 */
public class App
{
    public static void main( String[] args )
    {
        ApplicationContext appContext = new ClassPathXmlApplicationContext("/spring.xml");
        PersonService service = appContext.getBean(PersonService.class);
        Person p = service.getPerson(1);
        System.out.println(p.getName());
    }
}
在App类的main方法中,我们初始化了ApplicationContext,然后从中得到我们注解注入的PersonService类,然后调用此对象的getPerson方法,并输出返回结果的name属性。
注解注入也必须在spring的配置文件中做配置,我们看下spring.xml文件的内容:
<?xml version="1.0" encoding="UTF-8"?>
<beans xmlns="http://www.springframework.org/schema/beans"
       xmlns:xsi="http://www.w3.org/2001/XMLSchema-instance"
       xmlns:context="http://www.springframework.org/schema/context"
       xsi:schemaLocation="http://www.springframework.org/schema/beans
           http://www.springframework.org/schema/beans/spring-beans.xsd
           http://www.springframework.org/schema/context
           http://www.springframework.org/schema/context/spring-context-3.0.xsd">
	<context:component-scan base-package="cn.outofmemory.spring" use-default-filters="false">
		<context:include-filter type="regex" expression="cn.outofmemory.spring.[^.]+(Dao|Service)"/>
	 </context:component-scan>
</beans>
这个配置文件中必须声明xmlns:context 这个xml命名空间,在schemaLocation中需要指定schema:
           http://www.springframework.org/schema/context
           http://www.springframework.org/schema/context/spring-context-3.0.xsd
这个文件中beans根节点下只有一个context:component-scan节点,此节点有两个属性base-package属性告诉spring要扫描的包,use-default-filters="false"表示不要使用默认的过滤器,此处的默认过滤器,会扫描包含Service,Component,Repository,Controller注解修饰的类,而此处我们处于示例的目的,故意将use-default-filters属性设置成了false。
context:component-scan节点允许有两个子节点<context:include-filter>和<context:exclude-filter>。filter标签的type和表达式说明如下:
| Filter Type | Examples Expression | Description |
| annotation | org.example.SomeAnnotation | 符合SomeAnnoation的target class |
| assignable | org.example.SomeClass | 指定class或interface的全名 |
| aspectj | org.example..*Service+ | AspectJ語法 |
| regex | org.example.Default.* | Regelar Expression |
| custom | org.example.MyTypeFilter | Spring3新增自訂Type,實作org.springframework.core.type.TypeFilter |
在我们的示例中,将filter的type设置成了正则表达式,regex,注意在正则里面.表示所有字符,而.才表示真正的.字符。我们的正则表示以Dao或者Service结束的类。
我们也可以使用annotaion来限定,如下:
<?xml version="1.0" encoding="UTF-8"?>
<beans xmlns="http://www.springframework.org/schema/beans"
       xmlns:xsi="http://www.w3.org/2001/XMLSchema-instance"
       xmlns:context="http://www.springframework.org/schema/context"
       xsi:schemaLocation="http://www.springframework.org/schema/beans
           http://www.springframework.org/schema/beans/spring-beans.xsd
           http://www.springframework.org/schema/context
           http://www.springframework.org/schema/context/spring-context-3.0.xsd">
	<context:component-scan base-package="cn.outofmemory.spring" use-default-filters="false">
		<context:include-filter type="annotation" expression="org.springframework.stereotype.Repository"/>
		<context:include-filter type="annotation" expression="org.springframework.stereotype.Service"/>
	 </context:component-scan>
</beans>
这里我们指定的include-filter的type是annotation,expression则是注解类的全名。
另外context:conponent-scan节点还有<context:exclude-filter>可以用来指定要排除的类,其用法和include-filter一致。
最后我们要看下输出的结果了,运行App类,输出:
2014-5-18 21:14:18 org.springframework.context.support.AbstractApplicationContext prepareRefresh
信息: Refreshing org.springframework.context.support.ClassPathXmlApplicationContext@1cac6db: startup date [Sun May 18 21:14:18 CST 2014]; root of context hierarchy
2014-5-18 21:14:18 org.springframework.beans.factory.xml.XmlBeanDefinitionReader loadBeanDefinitions
信息: Loading XML bean definitions from class path resource [spring.xml]
2014-5-18 21:14:18 org.springframework.beans.factory.support.DefaultListableBeanFactory preInstantiateSingletons
信息: Pre-instantiating singletons in org.springframework.beans.factory.support.DefaultListableBeanFactory@1fcf790: defining beans [personDao,personService,org.springframework.context.annotation.internalConfigurationAnnotationProcessor,org.springframework.context.annotation.internalAutowiredAnnotationProcessor,org.springframework.context.annotation.internalRequiredAnnotationProcessor,org.springframework.context.annotation.internalCommonAnnotationProcessor]; root of factory hierarchy
Person name
前几行都是spring输出的一些调试信息,最后一行是我们自己程序的输出。
本文源码下载:spring-DI-annotation.zip
项目结构
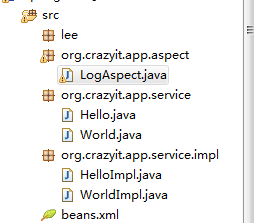
业务代码
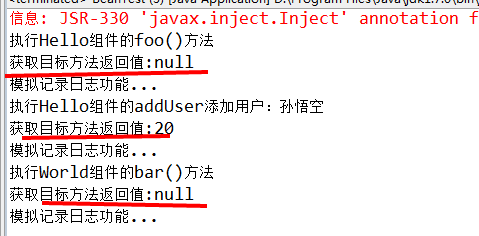
定义切面Bean
说明:returing属性所指定的形参名必须对应增强处理中的一个形参名,当目标方法执行返回后,返回值作为相应的参数值传入增强处理方法中。
虽然AfterReturning增强处理可以访问到目标方法的返回值,但它不可以改变目标方法的返回值。
配置文件
测试代码