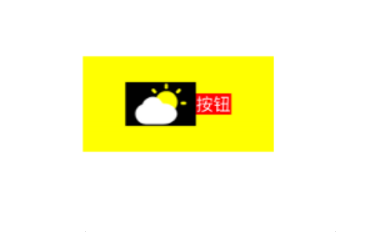
先声明一个普通的按钮,看看正常情况下的样子
1 UIButton *testBtn=[UIButton buttonWithType:UIButtonTypeCustom];
2     testBtn.frame=CGRectMake(100, 100, 200, 100);
3     testBtn.backgroundColor=[UIColor yellowColor];
4     [testBtn setTitle:@"按钮" forState:UIControlStateNormal];
5     testBtn.titleLabel.backgroundColor=[UIColor redColor];
6     testBtn.imageView.backgroundColor=[UIColor blackColor];
7     //设置内容图片
8     [testBtn setImage:[UIImage imageNamed:@"1.png"] forState:UIControlStateNormal];
9     [self.view addSubview: testBtn];

如果我们调整按钮内部控件,imageview和title,直接xxx.frame是改不掉的,按钮的内部会覆盖掉。
如果想要修改,需要自己写一个按钮类,也就是继承button类,重写其中的一些方法
重新创建一个类,继承类,重写如下两个方法,可以改变image和title的frame。或者直接重写layoutSubviews方法也是可以的,这里我就全写出来放一起了
 1 - (CGRect)titleRectForContentRect:(CGRect)contentRect{
 2
 3     return CGRectMake(0, 0, 100, 70);
 4 }
 5  - (CGRect)imageRectForContentRect:(CGRect)contentRect
 6 {
 7
 8     return CGRectMake(100, 0, 70, 70);
 9 }
10
11 - (void)layoutSubviews{
12     [super layoutSubviews];
13     self.imageView.frame=CGRectMake(100, 0, 70, 70);
14     self.titleLabel.frame=CGRectMake(0, 0, 100, 70);
15 }

此外,也可以设置文本的显示模式和图片的显示模式
 1 - (instancetype)initWithFrame:(CGRect)frame
 2 {
 3     self = [super initWithFrame:frame];
 4     if (self) {
 5       //文本居中
 6         self.titleLabel.textAlignment=NSTextAlignmentCenter;
 7        //改变图片的内容模式
 8         self.imageView.contentMode=UIViewContentModeCenter;
 9     }
10     return self;
11 }

-------------------------------
按钮内边距设置
xxBtn.contentEdgeInsets=UIedgeInsetsMake();
xxBtn.imageEdgeInsets=UIedgeInsetsMake();