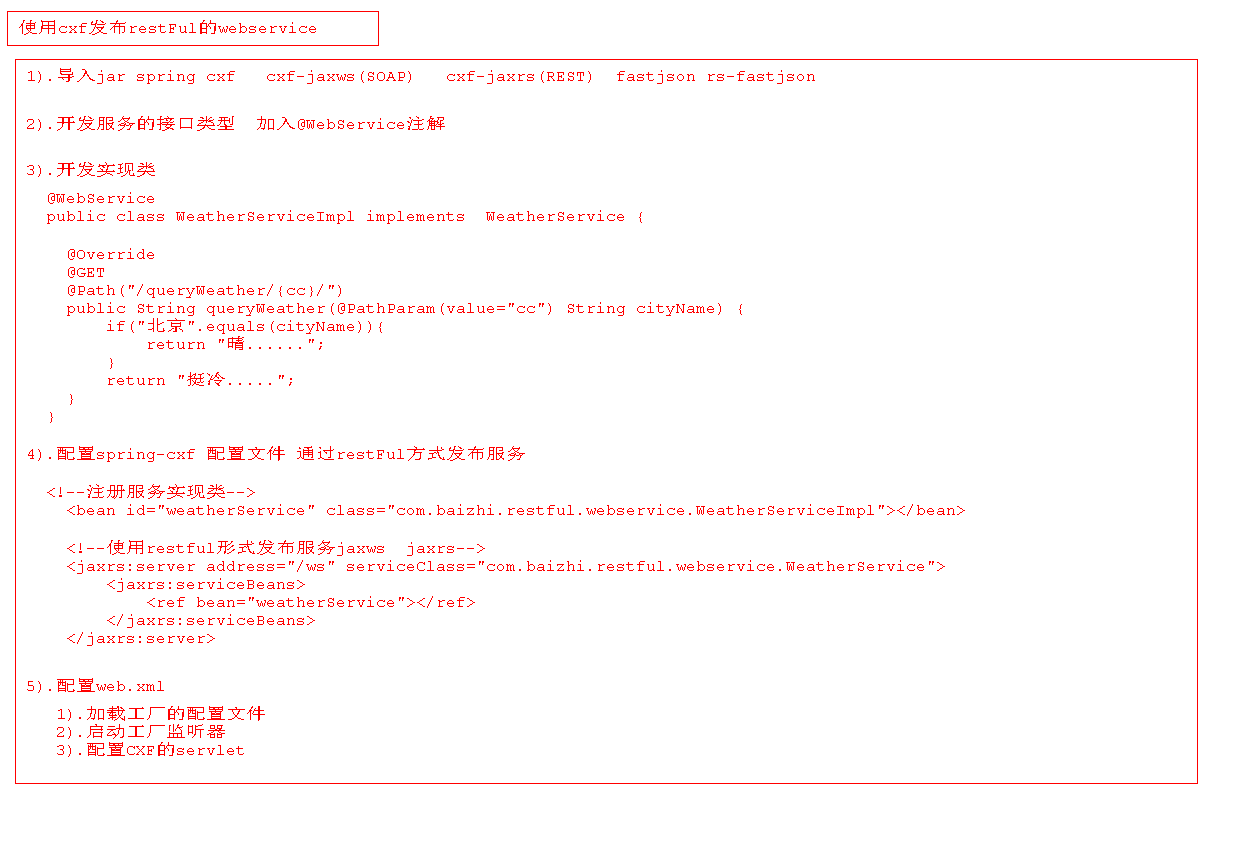
restful的webservice开发
创建项目

第一步:导入相关的依赖
<properties>
        <project.build.sourceEncoding>UTF-8</project.build.sourceEncoding>
        <maven.compiler.source>1.7</maven.compiler.source>
        <maven.compiler.target>1.7</maven.compiler.target>
        <org.springframework.version>4.3.2.RELEASE</org.springframework.version>
    </properties>

    <dependencies>


        <!--junit-->
        <dependency>
            <groupId>junit</groupId>
            <artifactId>junit</artifactId>
            <version>4.12</version>
            <scope>test</scope>
        </dependency>

        <!--javaEE规范-->
        <dependency>
            <groupId>javax.servlet</groupId>
            <artifactId>servlet-api</artifactId>
            <version>2.5</version>
            <scope>provided</scope>
        </dependency>

        <!--jstl-->
        <dependency>
            <groupId>jstl</groupId>
            <artifactId>jstl</artifactId>
            <version>1.2</version>
        </dependency>


        <!--spring相关jar-->
        <dependency>
            <groupId>org.springframework</groupId>
            <artifactId>spring-core</artifactId>
            <version>${org.springframework.version}</version>
        </dependency>

        <dependency>
            <groupId>org.springframework</groupId>
            <artifactId>spring-context</artifactId>
            <version>${org.springframework.version}</version>
        </dependency>

        <dependency>
            <groupId>org.springframework</groupId>
            <artifactId>spring-context-support</artifactId>
            <version>${org.springframework.version}</version>
        </dependency>

        <dependency>
            <groupId>org.springframework</groupId>
            <artifactId>spring-aop</artifactId>
            <version>${org.springframework.version}</version>
        </dependency>
        <dependency>
            <groupId>org.springframework</groupId>
            <artifactId>spring-expression</artifactId>
            <version>${org.springframework.version}</version>
        </dependency>

        <dependency>
            <groupId>org.springframework</groupId>
            <artifactId>spring-aspects</artifactId>
            <version>${org.springframework.version}</version>
        </dependency>

        <dependency>
            <groupId>org.springframework</groupId>
            <artifactId>spring-tx</artifactId>
            <version>${org.springframework.version}</version>
        </dependency>

        <dependency>
            <groupId>org.springframework</groupId>
            <artifactId>spring-jdbc</artifactId>
            <version>${org.springframework.version}</version>
        </dependency>

        <dependency>
            <groupId>org.springframework</groupId>
            <artifactId>spring-beans</artifactId>
            <version>${org.springframework.version}</version>
        </dependency>

        <dependency>
            <groupId>org.springframework</groupId>
            <artifactId>spring-web</artifactId>
            <version>${org.springframework.version}</version>
        </dependency>

        <dependency>
            <groupId>org.springframework</groupId>
            <artifactId>spring-test</artifactId>
            <version>${org.springframework.version}</version>
            <scope>test</scope>
        </dependency>


        <!--引入springmvc-->
        <dependency>
            <groupId>org.springframework</groupId>
            <artifactId>spring-webmvc</artifactId>
            <version>${org.springframework.version}</version>
        </dependency>


        <!--引入CXF开发SOAP的webservicejar-->
        <dependency>
            <groupId>org.apache.cxf</groupId>
            <artifactId>cxf-rt-frontend-jaxws</artifactId>
            <version>3.1.6</version>
        </dependency>
        <dependency>
            <groupId>org.apache.cxf</groupId>
            <artifactId>cxf-rt-transports-http</artifactId>
            <version>3.1.6</version>
        </dependency>
        <dependency>
            <groupId>org.apache.cxf</groupId>
            <artifactId>cxf-core</artifactId>
            <version>3.1.6</version>
        </dependency>

        <!--引入CXF开发RestFulwebservice 的jar-->
        <dependency>
            <groupId>org.apache.cxf</groupId>
            <artifactId>cxf-rt-frontend-jaxrs</artifactId>
            <version>3.1.6</version>
        </dependency>
        <!--restful的对象转为json的数据格式依赖jar-->
        <dependency>
            <groupId>com.colobu</groupId>
            <artifactId>fastjson-jaxrs-json-provider</artifactId>
            <version>0.1.0</version>
        </dependency>

        <dependency>
            <groupId>com.alibaba</groupId>
            <artifactId>fastjson</artifactId>
            <version>1.2.47</version>
        </dependency>


    </dependencies>
    <build>
        <finalName>cxf_restful_webservice_server</finalName>
        <pluginManagement><!-- lock down plugins versions to avoid using Maven defaults (may be moved to parent pom) -->
            <plugins>
                <plugin>
                    <artifactId>maven-clean-plugin</artifactId>
                    <version>3.0.0</version>
                </plugin>
                <!-- see http://maven.apache.org/ref/current/maven-core/default-bindings.html#Plugin_bindings_for_war_packaging -->
                <plugin>
                    <artifactId>maven-resources-plugin</artifactId>
                    <version>3.0.2</version>
                </plugin>
                <plugin>
                    <artifactId>maven-compiler-plugin</artifactId>
                    <version>3.7.0</version>
                </plugin>
                <plugin>
                    <artifactId>maven-surefire-plugin</artifactId>
                    <version>2.20.1</version>
                </plugin>
                <plugin>
                    <artifactId>maven-war-plugin</artifactId>
                    <version>3.2.0</version>
                </plugin>
                <plugin>
                    <artifactId>maven-install-plugin</artifactId>
                    <version>2.5.2</version>
                </plugin>
                <plugin>
                    <artifactId>maven-deploy-plugin</artifactId>
                    <version>2.8.2</version>
                </plugin>
            </plugins>
        </pluginManagement>
    </build>
第二步:创建webservice接口和实现类
@WebService
public interface WeatherService {

    public String queryWeather(String cityName);


}
==
/**
 * @path : 用在方法上 代表当前服务方法的访问路径  ""
 * @GET  : 用在方法上 代表当前服务方法只能通过GET方式访问
 * @PathParam : 用来方法的参数上 代表获取请求路径中的参数  value属性用来书写路径的中参数的别名
 * @Produces  : 用在方法上  用来控制方法的响应类型
 */
@WebService
public class WeatherServiceImpl implements  WeatherService {


    @Override
    @POST
    @Path("/queryWeather/{cc}/")
    @Produces("text/plain;charset=UTF-8")
    public String queryWeather(@PathParam(value="cc") String cityName) {
        if("北京".equals(cityName)){
            return "晴......";
        }
        return "挺冷.....";
    }
}
=============================================================
@WebService
public interface UserWebService {

    Result save(User user);

    Result update(User user);

    Result delete(String id);

    Result findOne(String id);

    Result findAll();

}
===
@WebService
public class UserWebServiceImpl implements UserWebService {


    @Override
    @POST
    @Path("/save")
    @Produces("application/json;charset=UTF-8")
    public Result save(User user) {
        Result result = new Result();
        try {
            System.out.println("接收用户:" +user);
            result.setStatus(1);
        } catch (Exception e) {
            e.printStackTrace();
            result.setStatus(0);
            result.setMessage(e.getMessage());
        }
        return result;
    }

    @Override
    @PUT
    @Path("/update")
    @Produces("application/json;charset=UTF-8")
    public Result update(User user) {
        Result result = new Result();
        try {
            System.out.println("更新的用户信息:" +user);
            result.setStatus(1);
        } catch (Exception e) {
            e.printStackTrace();
            result.setStatus(0);
            result.setMessage(e.getMessage());
        }
        return result;
    }

    @Override
    @DELETE
    @Path("/delete/{id}/")
    @Produces("application/json;charset=UTF-8")
    public Result delete(@PathParam("id") String id) {
        Result result = new Result();
        try {
            System.out.println("删除的对象的id: "+id);
            result.setStatus(1);
        } catch (Exception e) {
            e.printStackTrace();
            result.setStatus(0);
            result.setMessage(e.getMessage());
        }
        return result;
    }

    @Override
    @GET
    @Path("/findOne/{id}/")
    @Produces("application/json;charset=UTF-8")
    public Result findOne(@PathParam("id") String id) {
        Result result;
        try {
            System.out.println("查询对象的id: "+id);
            User user = new User(id, "小黑", 23, new Date());
            result  = new Result();
            result.getResult().add(user);
            result.setStatus(1);
        } catch (Exception e) {
            e.printStackTrace();
            result = new Result();
            result.setStatus(0);
            result.setMessage(e.getMessage());
        }
        return result;
    }

    @Override
    @GET
    @Path("/findAll")
    @Produces("application/json;charset=UTF-8")
    public Result findAll() {
        Result result = new Result();
        try {
            System.out.println("查询所有对象信息.......");
            List<User> users = new ArrayList<>();
            users.add(new User("21","小三",23,new Date()));
            users.add(new User("22","小四",23,new Date()));
            users.add(new User("23","小五",23,new Date()));
            users.add(new User("24","小六",23,new Date()));
            users.add(new User("25","小七",23,new Date()));
            result.getResult().addAll(users);
            result.setStatus(1);
        } catch (Exception e) {
            e.printStackTrace();
            result.setStatus(0);
            result.setMessage(e.getMessage());
        }
        return result;
    }
}
第三步:配置spring-cxf.xml配置文件,通过restful方式发布服务
<?xml version="1.0" encoding="UTF-8"?>
<beans xmlns="http://www.springframework.org/schema/beans"
       xmlns:xsi="http://www.w3.org/2001/XMLSchema-instance" xmlns:jaxrs="http://cxf.apache.org/jaxrs"
       xsi:schemaLocation="http://www.springframework.org/schema/beans http://www.springframework.org/schema/beans/spring-beans.xsd http://cxf.apache.org/jaxrs http://cxf.apache.org/schemas/jaxrs.xsd">


    <!--注册服务实现类-->
    <bean id="weatherService" class="com.baizhi.restful.webservice.WeatherServiceImpl"></bean>

    <bean id="userWebService" class="com.baizhi.restful.webservice.UserWebServiceImpl"></bean>

    <!--使用restful形式发布服务jaxws  jaxrs

        服务地址:http://localhost:8989/cxf_restful_webservice_server/cxf/ws/queryWeather/北京/
    -->
    <jaxrs:server address="/ws" serviceClass="com.baizhi.restful.webservice.WeatherService">
        <jaxrs:serviceBeans>
            <ref bean="weatherService"></ref>
        </jaxrs:serviceBeans>
    </jaxrs:server>


    <jaxrs:server address="/userservice" serviceClass="com.baizhi.restful.webservice.UserWebService">
        <jaxrs:serviceBeans>
            <ref bean="userWebService"/>
        </jaxrs:serviceBeans>
        <!--配置底层转换json的工具包-->
        <jaxrs:providers>
            <bean class="com.alibaba.fastjson.support.jaxrs.FastJsonProvider"/>
        </jaxrs:providers>
    </jaxrs:server>


</beans>
第四步:在spring配置文件中引入xcf子配置文件
<?xml version="1.0" encoding="UTF-8"?>
<beans xmlns="http://www.springframework.org/schema/beans"
       xmlns:xsi="http://www.w3.org/2001/XMLSchema-instance"
       xsi:schemaLocation="http://www.springframework.org/schema/beans http://www.springframework.org/schema/beans/spring-beans.xsd">


    <!--引入子配置文件-->
    <import resource="classpath:spring-cxf.xml"/>
</beans>
第五步:配置web.xml
<!DOCTYPE web-app PUBLIC
 "-//Sun Microsystems, Inc.//DTD Web Application 2.3//EN"
 "http://java.sun.com/dtd/web-app_2_3.dtd" >

<web-app>
  <display-name>Archetype Created Web Application</display-name>


  <!--初始化工厂的配置文件-->
  <context-param>
    <param-name>contextConfigLocation</param-name>
    <param-value>classpath:spring-basic.xml</param-value>
  </context-param>

  <!--配置工厂启动的监听器-->
  <listener>
    <listener-class>org.springframework.web.context.ContextLoaderListener</listener-class>
  </listener>

  <!--配置CXF的Servlet-->
  <servlet>
    <servlet-name>cxf</servlet-name>
    <servlet-class>org.apache.cxf.transport.servlet.CXFServlet</servlet-class>
  </servlet>

  <servlet-mapping>
    <servlet-name>cxf</servlet-name>
    <url-pattern>/cxf/*</url-pattern>
  </servlet-mapping>
</web-app>
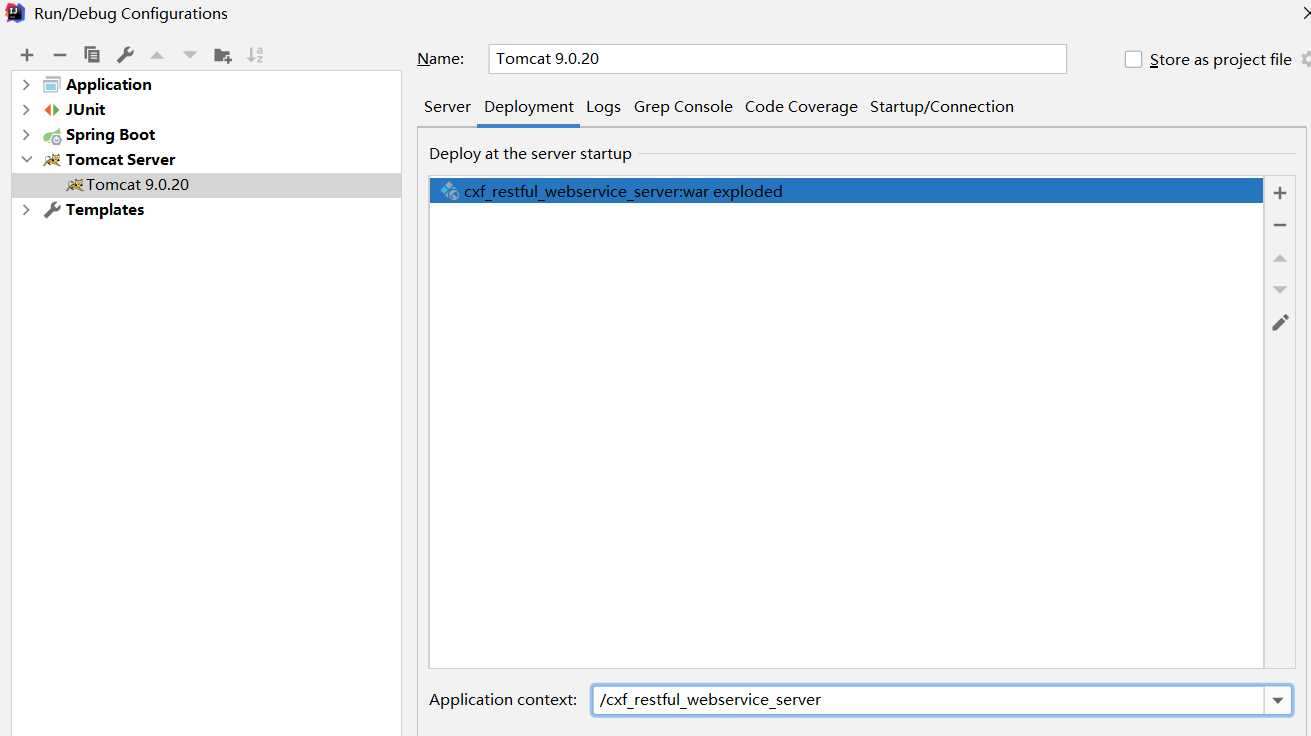
第六步:配置tomcat启动项目
第七步:访问swdl
地址:http://localhost:9999/cxf_restful_webservice_server/cxf/ws/queryWeather/北京/