在上一篇中,我们基本已经把整个框架都搭建出来了,下面进行代码重构一下。
思路:
- 导航按钮,按下时,会变灰,那是系统自带了,通过自定义UIButton,实现按下按钮立即切换效果。
- MJTabBarController管得太多了,只需要传图片过去,即创建好一个TabBar.
- 通过代理实现底部tabbar的切换。
一.自定义UIButton,继承自UIButton。MJTabBarButton.m
#import "MJTabBarButton.h"

@implementation MJTabBarButton

- (id)initWithFrame:(CGRect)frame
{
    self = [super initWithFrame:frame];
    if (self) {
        // Initialization code
    }
    return self;
}

/**
 *  只要覆盖了这个方法,按钮就不存在高亮状态
 */
- (void)setHighlighted:(BOOL)highlighted
{
    //
}
@end
二.定义一个View,封装创建tarbar按钮的方法。
MJTabBar.h
#import <UIKit/UIKit.h>

@interface MJTabBar : UIView
-(void)addTabBarWithName:(NSString *)name selName:(NSString *)selName;
@end
MJTabBar.m
//
//  MJTabBar.m
//  Lottery
//
//  Created by jiangys on 15/8/30.
//  Copyright (c) 2015年 weconex. All rights reserved.
//

#import "MJTabBar.h"
#import "MJTabBarButton.h"

@implementation MJTabBar

//创建tabBar按钮
-(void)addTabBarWithName:(NSString *)name selName:(NSString *)selName
{
    MJTabBarButton *button=[MJTabBarButton buttonWithType:UIButtonTypeCustom];

    //设置图片
    [button setBackgroundImage:[UIImage imageNamed:name] forState:UIControlStateNormal];
    [button setBackgroundImage:[UIImage imageNamed:selName] forState:UIControlStateSelected];

    //添加
    [self addSubview:button];
}

//该方法通常是设置控件的尺寸,initWithFrame负责创建控件,initWithFrame下的frame是没有值的。
-(void)layoutSubviews
{
    [super layoutSubviews];
    NSUInteger count=self.subviews.count;
    for (NSUInteger i=0; i<count; i++) {
        MJTabBarButton *button=self.subviews[i];
        button.tag=i;

        //设置frame
        CGFloat buttonY=0;
        CGFloat buttonW=self.frame.size.width/count;
        CGFloat buttonH=self.frame.size.height;
        CGFloat buttonX=i*buttonW;
        button.frame=CGRectMake(buttonX, buttonY, buttonW, buttonH);
    }
}

@end
那么,MJTabBarController.m里加载底部的tabBar就很简单了
//
//  MJTabBarController.m
//  Lottery
//
//  Created by apple on 15/8/27.
//  Copyright (c) 2015年 weconex. All rights reserved.
//

#import "MJTabBarController.h"
#import "MJTabBar.h"

@interface MJTabBarController ()@end

@implementation MJTabBarController

- (void)viewDidLoad {
    [super viewDidLoad];

    // 1.添加自己的tabbar
    MJTabBar *myTabBar = [[MJTabBar alloc] init];
    myTabBar.frame = self.tabBar.bounds;
    [self.tabBar addSubview:myTabBar];

    // 2.添加5个按钮
    for (int i = 0; i<self.viewControllers.count; i++) {
        NSString *name=[NSString stringWithFormat:@"TabBar%d",i+1];
        NSString *selName=[NSString stringWithFormat:@"TabBar%dSel",i+1];
        [myTabBar addTabBarWithName:name selName:selName];
    }
}
@end
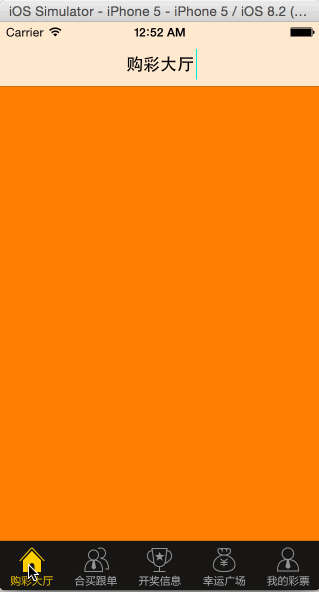
运行后的效果:

目前还不能点击底部的那几个tarBar按钮,拉下来,我们通过代理的方式来实现。
三.通过代理方式实现底部按钮点击切换
1.定义协议。在MJTabBar.h文件最上边声明协议
@class MJTabBar;

@protocol MJTabBarDelegate <NSObject>
-(void)tabBar:(MJTabBar *)tabBar didSelectButtonFrom:(int)from to:(int)to;
@end
2.定义代理。继续在MJTabBar.h中声明一个委托的变量
//声明委托变量
@property(nonatomic,weak)id<MJTabBarDelegate> delegate;
MJTabBar.h完整代码
#import <UIKit/UIKit.h>
@class MJTabBar;

@protocol MJTabBarDelegate <NSObject>
-(void)tabBar:(MJTabBar *)tabBar didSelectButtonFrom:(int)from to:(int)to;
@end

@interface MJTabBar : UIView
//声明委托变量
@property(nonatomic,weak)id<MJTabBarDelegate> delegate;
-(void)addTabBarWithName:(NSString *)name selName:(NSString *)selName;
@end
3.通知代理。在MJTabBar.m完整代码
//
//  MJTabBar.m
//  Lottery
//
//  Created by jiangys on 15/8/30.
//  Copyright (c) 2015年 weconex. All rights reserved.
//

#import "MJTabBar.h"
#import "MJTabBarButton.h"

@interface MJTabBar()
/**
 *  记录当前选中的按钮
 */
@property (nonatomic, weak) UIButton *selectedButton;
@end

@implementation MJTabBar

//创建tabBar按钮
-(void)addTabBarWithName:(NSString *)name selName:(NSString *)selName
{
    MJTabBarButton *button=[MJTabBarButton buttonWithType:UIButtonTypeCustom];

    //设置图片
    [button setBackgroundImage:[UIImage imageNamed:name] forState:UIControlStateNormal];
    [button setBackgroundImage:[UIImage imageNamed:selName] forState:UIControlStateSelected];

    //添加
    [self addSubview:button];

    //监听
    [button addTarget:self action:@selector(buttonClick:) forControlEvents:UIControlEventTouchDown];

    //默认选中第0个按钮
    if (self.subviews.count==1) {
        [self buttonClick:button];
    }
}

//该方法通常是设置控件的尺寸,initWithFrame负责创建控件,initWithFrame下的frame是没有值的。
-(void)layoutSubviews
{
    [super layoutSubviews];
    NSUInteger count=self.subviews.count;
    for (NSUInteger i=0; i<count; i++) {
        MJTabBarButton *button=self.subviews[i];
        button.tag=i;

        //设置frame
        CGFloat buttonY=0;
        CGFloat buttonW=self.frame.size.width/count;
        CGFloat buttonH=self.frame.size.height;
        CGFloat buttonX=i*buttonW;
        button.frame=CGRectMake(buttonX, buttonY, buttonW, buttonH);
    }
}

/**
 *  监听按钮点击
 */
-(void)buttonClick:(UIButton *)button
{
    //通知代理
    if ([self.delegate respondsToSelector:@selector(tabBar:didSelectButtonFrom:to:)]) {
        [self.delegate tabBar:self didSelectButtonFrom:self.selectedButton.tag to:button.tag];
    }

    // 1.让当前选中的按钮取消选中
    self.selectedButton.selected = NO;

    // 2.让新点击的按钮选中
    button.selected = YES;

    // 3.新点击的按钮就成为了"当前选中的按钮"
    self.selectedButton = button;
}

@end
4.委托页面,实现代理协议。MJTabBarController.m 实现
@interface MJTabBarController () <MJTabBarDelegate>
@end
5.委托页面,先让自己成为代理,并实现代理方法。MJTabBarController.m 实现:
myTabBar.delegate = self;
- (void)tabBar:(MJTabBar *)tabBar didSelectButtonFrom:(int)from to:(int)to
{
    // 选中最新的控制器
    self.selectedIndex = to;
}
委托页面的完整代码:
#import "MJTabBarController.h"
#import "MJTabBar.h"

@interface MJTabBarController () <MJTabBarDelegate>
@end

@implementation MJTabBarController

- (void)viewDidLoad
{
    [super viewDidLoad];

    // 1.添加自己的tabbar
    MJTabBar *myTabBar = [[MJTabBar alloc] init];
    myTabBar.delegate = self;
    myTabBar.frame = self.tabBar.bounds;
    [self.tabBar addSubview:myTabBar];

    // 2.添加对应个数的按钮
    for (int i = 0; i < self.viewControllers.count; i++) {
        NSString *name = [NSString stringWithFormat:@"TabBar%d", i + 1];
        NSString *selName = [NSString stringWithFormat:@"TabBar%dSel", i + 1];
        [myTabBar addTabButtonWithName:name selName:selName];
    }
}

/**
 normal : 普通状态
 highlighted : 高亮(用户长按的时候达到这个状态)
 disable : enabled = NO
 selected :  selected = YES
 */

#pragma mark - MJTabBar的代理方法
- (void)tabBar:(MJTabBar *)tabBar didSelectButtonFrom:(int)from to:(int)to
{
    // 选中最新的控制器
    self.selectedIndex = to;
}
@end
最终运行后的效果:
源代码下载:点击下载