@
- 注
- help ,帮助
- numpy.genfromtxt,导入文件
- array,创建数组(1,2维数组)
- array,创建行列向量
- numpy.shape,看numpy数据的行列信息
- numpy.dtype,查看numpy数据的类型
- 切片读取
- == , 矩阵元素等号判断
- &,与操作
- |,或操作
- 字符串 ==> 数据类型
- min,最小值
- sum
- shape,arange,reshape
- ndim
- size,查看矩阵的元素多少
- zeros,生成0矩阵
- ones,生成单位矩阵
- random
- linspace, 在指定范围内等间距生成指定的数据个数
- sin, 对矩阵中的数据求三角函数sin值
- 矩阵的减-,平方**,范围判断<
- A * B,矩阵之间对应元素相乘
- A.dot(B),np.dot(A, B)),矩阵相乘
- exp,自然指数e
- sqrt,开方运算
- floor,向下取整
- ravel,水平铺开矩阵
- T,矩阵的转置
- vstack,按照列的方向拼接两个矩阵
- hstack,按照行的方向拼接两个矩阵
- hsplit,垂直方向上等数量分割矩阵数据
- vsplit,水平方向上等数量分割矩阵数据
- a=b,复制
- view,浅复制
- copy,深拷贝
- argmax,垂直方向上找出最大值的索引
- tile,重复数据
- sort,按顺序排列数据
- argsort,向量中元素从小到大排列
注
- 下面的代码是使pyhton3.6写的,有些可能是使用python2.7写的
- 1维数组叫矢量,2维数组叫矩阵,3维及大于3维的数组就叫多维数组了
help ,帮助
# 打印 numpy.genfromtxt 帮助文档
print (help(numpy.genfromtxt))
# 打印range 帮助文档
print(help(range))
numpy.genfromtxt,导入文件
示例
import numpy
# 读入文本文件
# "world_alcohol.txt"      == >  读入的文件
# delimiter=","            == >  文件内容之间的分割符
# dtype=str                == >  读入的文件的数据类型
# skip_header=1            == >  跳过第一行,即第一行数据不读取
world_alcohol = numpy.genfromtxt("world_alcohol.txt", delimiter=",",dtype=str, skip_header=1)
# 打印类型
print(type(world_alcohol))
# 打印读入的内容
print (world_alcohol)
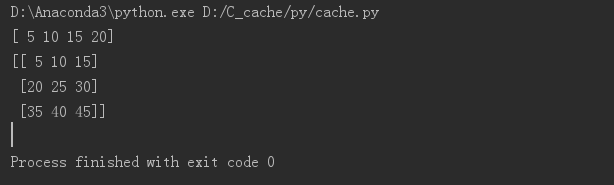
array,创建数组(1,2维数组)
import numpy
#The numpy.array() function can take a list or list of lists as input. When we input a list, we get a one-dimensional array as a result:

vector = numpy.array([5, 10, 15, 20])

#When we input a list of lists, we get a matrix as a result:

matrix = numpy.array([[5, 10, 15], [20, 25, 30], [35, 40, 45]])
# 一维数组
print(vector)
# 二维数组
print(matrix)
结果
array,创建行列向量
Numpy中的行向量和列向量 - Suprecat的博客 - CSDN博客
https://blog.csdn.net/wintersshi/article/details/80489258
numpy.shape,看numpy数据的行列信息
	#We can use the ndarray.shape property to figure out how many elements are in the array
	vector = numpy.array([1, 2, 3, 4])
	print(vector.shape)
	#For matrices, the shape property contains a tuple with 2 elements.
	matrix = numpy.array([[5, 10, 15], [20, 25, 30]])
	print(matrix.shape)
结果
	(4,)
	(2, 3)
numpy.dtype,查看numpy数据的类型
import numpy
#Each value in a NumPy array has to have the same data type
#NumPy will automatically figure out an appropriate data type when reading in data or converting lists to arrays.
#You can check the data type of a NumPy array using the dtype property.
numbers = numpy.array([1, 2, 3, 4])
print (numbers)
numbers.dtype
结果
[1 2 3 4]
dtype('int32')
切片读取
示例一
- 说明
[0:3], 范围包括0,但是不包括3 ,共3
import numpy
vector = numpy.array([5, 10, 15, 20])
print(vector[0:3])
结果
[ 5 10 15]
示例二
import numpy
matrix = numpy.array([
                    [5, 10, 15],
                    [20, 25, 30],
                    [35, 40, 45]
                 ])
# 读取所有的行,第1列(共0,1,2列)的数
print(matrix[:,1])
结果
[10 25 40]
示例三
import numpy
matrix = numpy.array([
                    [5, 10, 15],
                    [20, 25, 30],
                    [35, 40, 45]
                 ])
# 读取所有的行,第0,1(共0,1,2列)列的数据
print(matrix[:,0:2])
结果
[[ 5 10]
 [20 25]
 [35 40]]
- 示例四
matrix = numpy.array([
                    [5, 10, 15],
                    [20, 25, 30],
                    [35, 40, 45]
                 ])
# 矩阵的行1,2,列 0 ,1(共0,1,2列)
print(matrix[1:3,0:2])
结果
[[20 25]
 [35 40]]
== , 矩阵元素等号判断
- 示例一
import numpy
#it will compare the second value to each element in the vector
# If the values are equal, the Python interpreter returns True; otherwise, it returns False
vector = numpy.array([5, 10, 15, 20])
vector == 10
结果
array([False, True, False, False], dtype=bool)
- 示例二
import numpy
matrix = numpy.array([
                    [5, 10, 15],
                    [20, 25, 30],
                    [35, 40, 45]
                 ])
matrix == 25
结果
array([[False, False, False],
       [False,  True, False],
       [False, False, False]], dtype=bool)
- 示例三
import numpy
# Compares vector to the value 10, which generates a new Boolean vector [False, True, False, False]. It assigns this result to equal_to_ten
# 生成矩阵向量
vector = numpy.array([5, 10, 15, 20])
# 与 10 相等 进行布尔运算
equal_to_ten = (vector == 10)
print equal_to_ten
# 得到原来的数据
print(vector[equal_to_ten])
结果
[False  True False False]
[10]
- 示例四
import numpy
matrix = numpy.array([
                [5, 10, 15],
                [20, 25, 30],
                [35, 40, 45]
             ])
# 对所有行的第1列与  25 进行相等布尔运算
second_column_25 = (matrix[:,1] == 25)
# 布尔运算的结果
print(second_column_25)
# 还原   原来     的列
print(matrix[:, second_column_25])
# 将布尔结果对  行   进行求数
print(matrix[second_column_25, :])
结果
[False  True False]
[[10]
 [25]
 [40]]
[[20 25 30]]
- 示例五,对二维矩阵中的数一个指定的数据进行修改
import numpy

matrix = numpy.array([
    [5, 10, 15],
    [20, 25, 30],
    [35, 40, 45]
])
# 所有行的第1列(共0,1,2列)的数据与25进行布尔运算
second_column_25 = matrix[:, 1] == 25
print(second_column_25)
# 数据第1行第一列(共0,1,2列),25 ===> 10
matrix[second_column_25, 1] = 10
print(matrix)
结果
[False  True False]
[[ 5 10 15]
 [20 10 30]
 [35 40 45]]
&,与操作
import numpy
#We can also perform comparisons with multiple conditions
vector = numpy.array([5, 10, 15, 20])
# 与10进行布尔运算
print(vector == 10)
# 与 5进行布尔运算
print(vector == 5)
# 与操作
equal_to_ten_and_five = (vector == 10) & (vector == 5)
print(equal_to_ten_and_five)
结果
[False  True False False]
[ True False False False]
[False False False False]
|,或操作
- 示列一
import numpy
vector = numpy.array([5, 10, 15, 20])
# 与10进行布尔运算
print(vector == 10)
# 与 5进行布尔运算
print(vector == 5)
# 或操作
equal_to_ten_and_five = (vector == 10) | (vector == 5)
print(equal_to_ten_and_five)
结果
[False  True False False]
[ True False False False]
[ True  True False False]
- 示例二
import numpy
vector = numpy.array([5, 10, 15, 20])
# 与10进行布尔运算
print(vector == 10)
# 与 5进行布尔运算
print(vector == 5)
# 或操作
equal_to_ten_or_five = (vector == 10) | (vector == 5)
# 或操作后的数据进行修改
# 5, 10 ==> 50
vector[equal_to_ten_or_five] = 50
print(vector)
结果
[False  True False False]
[ True False False False]
[50 50 15 20]
字符串 ==> 数据类型
import numpy

# We can convert the data type of an array with the ndarray.astype() method.
vector = numpy.array(["1", "2", "3"])
# 原来的类型
print(vector.dtype)
print(vector)
# 字符串 ==> 数据类型
vector = vector.astype(float)
# 现在的类型
print(vector.dtype)
print(vector)
结果
<U1
['1' '2' '3']
float64
[1. 2. 3.]
min,最小值
import numpy

vector = numpy.array([5, 10, 15, 20])
vector.min()
print (vector.min())
结果
5
sum
-
说明
axis=1,每一行求和
axis=0,每一列求和 -
示例一
import numpy

# The axis dictates which dimension we perform the operation on
#1 means that we want to perform the operation on each row, and 0 means on each column
matrix = numpy.array([
                [5, 10, 15],
                [20, 25, 30],
                [35, 40, 45]
             ])
print(matrix.sum(axis=1))
结果
[ 30 75 120]
- 示例二
import numpy

matrix = numpy.array([
                [5, 10, 15],
                [20, 25, 30],
                [35, 40, 45]
             ])
print(matrix.sum(axis=0))
结果
[60 75 90]
shape,arange,reshape
-
shape, 查看维度信息
-
arange,生成一组向量
-
reshape,对一组向量修改成新一矩阵分布
-
示例一,shape
import numpy as np

a =  np.array([
 [6., 9., 1., 5.],
 [3., 6., 4., 0.],
 [3., 9., 5., 7.]
    ])
print("a
", a)
print("a.shape
", a.shape)
a.shape = (2,6)
print("a.shape = (2,6)
", a)
a.shape = (1,12)
print("a.shape = (1,12)
", a)
结果
a
 [[6. 9. 1. 5.]
 [3. 6. 4. 0.]
 [3. 9. 5. 7.]]
a.shape
 (3, 4)
a.shape = (2,6)
 [[6. 9. 1. 5. 3. 6.]
 [4. 0. 3. 9. 5. 7.]]
a.shape = (1,12)
 [[6. 9. 1. 5. 3. 6. 4. 0. 3. 9. 5. 7.]]
- 示例二,arange
import numpy as np

# 生成 10 到 30 之间的数据,不包括30,间距为5的数据
print(np.arange( 10, 30, 5 ))
# 生成 10 到 11 之间的数据,不包括11,间距为0.2的数据
print(np.arange( 10, 11, 0.2))
结果
[10 15 20 25]
[10.  10.2 10.4 10.6 10.8]
- 示例三,shape,reshape
import numpy as np

# 生成一组向量
# To create sequences of numbers
print(np.arange(15))
# 查看矩阵的信息
print(np.arange(15).shape)
# 修改成新3行5列的矩阵数据
a = np.arange(15).reshape(3, 5)
print(a)
# 查看矩阵的信息
print(a.shape)
结果
[ 0  1  2  3  4  5  6  7  8  9 10 11 12 13 14]
(15,)
[[ 0  1  2  3  4]
 [ 5  6  7  8  9]
 [10 11 12 13 14]]
(3, 5)
ndim
- 说明: 用来查看矩阵的维度信息,1维,2维等
import numpy as np

# 生成一组向量
print(np.arange(15))
# 查看矩阵的维度信息
print(np.arange(15).ndim)
# 修改成新3行5列的矩阵数据
a = np.arange(15).reshape(3, 5)
print(a)
# 查看矩阵的维度信息
print(a.ndim)
结果
[ 0  1  2  3  4  5  6  7  8  9 10 11 12 13 14]
1
[[ 0  1  2  3  4]
 [ 5  6  7  8  9]
 [10 11 12 13 14]]
2
size,查看矩阵的元素多少
import numpy as np

# 生成一组向量
print(np.arange(15))
# 查看矩阵的信息
print(np.arange(15).dtype)
print(np.arange(15).dtype.name)
结果
[ 0  1  2  3  4  5  6  7  8  9 10 11 12 13 14]
int32
int32
import numpy as np

# 生成一组向量
print(np.arange(15))
# 查看矩阵总共有多少元素
print(np.arange(15).size)
# 修改成新3行5列的矩阵数据
a = np.arange(15).reshape(3, 5)
print(a)
# 查看矩阵总共有多少元素
print(a.size)
结果
[ 0  1  2  3  4  5  6  7  8  9 10 11 12 13 14]
15
[[ 0  1  2  3  4]
 [ 5  6  7  8  9]
 [10 11 12 13 14]]
15
zeros,生成0矩阵
- 说明:生成的0矩阵是一个float64类型的,注意到0后面有一个小数点
import numpy as np
# 3行4列
print(np.zeros ((3,4)) )
print(np.zeros ((3,4)).dtype )
结果
[[0. 0. 0. 0.]
 [0. 0. 0. 0.]
 [0. 0. 0. 0.]]
float64
ones,生成单位矩阵
- 说明
numpy.ones(shape, dtype=None, order='C')
Parameters:
# 形状
shape : int or sequence of ints
Shape of the new array, e.g., (2, 3) or 2.
# 数据类型
dtype : data-type, optional
The desired data-type for the array, e.g., numpy.int8. Default is numpy.float64.
# 存储順序
order : {‘C’, ‘F’}, optional, default: C
Whether to store multi-dimensional data in row-major (C-style) or column-major (Fortran-style) order in memory.
Returns:
out : ndarray
Array of ones with the given shape, dtype, and order.
示例一
import numpy as np

# 生成float64类型
print(np.ones(5))
结果
[1. 1. 1. 1. 1.]
示例二
import numpy as np

# 生成 int 类型
print(np.ones((5,), dtype=int))
结果
[1, 1, 1, 1, 1]
示例三
import numpy as np

# 生成2行3列的float64类型数据
s = (2,3)
print( np.ones(s))
结果
[[1. 1. 1.]
 [1. 1. 1.]]
示例四
- 说明
np.ones(2,3,4)含义:2个3X4矩阵,所有元素为1
又如,np.ones(4,5,3)含义:4个5X3矩阵,所有元素为1
==> np.ones(a,b,c):a个b*c矩阵
import numpy as np

print(np.ones( (2,3,4), dtype=np.int32 ))
结果
[[[1 1 1 1]
  [1 1 1 1]
  [1 1 1 1]]

 [[1 1 1 1]
  [1 1 1 1]
  [1 1 1 1]]]
- 扩展阅读
numpy 中ones,zeros函数 - mmr598146920的专栏 - CSDN博客
https://blog.csdn.net/mmr598146920/article/details/80539733
random
import numpy as np

# 2行3列随机数
print(np.random.random((2, 3)))
结果
[[0.69509627 0.04046586 0.26786661]
 [0.44120144 0.05091389 0.44784084]]
linspace, 在指定范围内等间距生成指定的数据个数
import numpy as np
from numpy import pi

# 在 0 到时 2*pi 区间(不包括右端点 2*pi)内,等间距生成 5 个数据
print(np.linspace( 0, 2*pi, 5 ))
结果
[0. 1.57079633 3.14159265 4.71238898 6.28318531]
sin, 对矩阵中的数据求三角函数sin值
import numpy as np
from numpy import pi

# 求三角函数sin值
print(np.sin(np.linspace( 0, 2*pi, 5 )))
结果
[ 0.0000000e+00  1.0000000e+00  1.2246468e-16 -1.0000000e+00
 -2.4492936e-16]
矩阵的减-,平方**,范围判断<
import numpy as np

# the product operator * operates elementwise in NumPy arrays
a = np.array([20, 30, 40, 50])
b = np.arange(4)
print("a:", a)
print("b", b)

# 矩阵相减
c = a - b
print("c = a - b", c)
# 矩阵减1
c = c - 1
print("c = c - 1", c)
# 矩阵中的每一个元素的平方
print("b ** 2", b ** 2)
# 范围判断
print("a < 35", a < 35)
结果
a: [20 30 40 50]
b [0 1 2 3]
c = a - b [20 29 38 47]
c = c - 1 [19 28 37 46]
b ** 2 [0 1 4 9]
a < 35 [ True  True False False]
A * B,矩阵之间对应元素相乘
import numpy as np

A = np.array([[1, 1],
              [0, 1]])
B = np.array([[2, 0],
              [3, 4]])
print('---A----')
print(A)
print('---B----')
print(B)
# 矩阵之间对应元素相乘
print('---A * B----')
print(A * B)
结果
---A----
[[1 1]
 [0 1]]
---B----
[[2 0]
 [3 4]]
---A * B----
[[2 0]
 [0 4]]
A.dot(B),np.dot(A, B)),矩阵相乘
import numpy as np

# The matrix product can be performed using the dot function or method
A = np.array([[1, 1],
              [0, 1]])
B = np.array([[2, 0],
              [3, 4]])
print('---A----')
print(A)
print('---B----')
print(B)
print('---A * B----')
print(A * B)
# 矩阵相乘
print('---A.dot(B)----')
print(A.dot(B))
# 矩阵相乘
print('---np.dot(A, B)----')
print(np.dot(A, B))
结果
---A----
[[1 1]
 [0 1]]
---B----
[[2 0]
 [3 4]]
---A.dot(B)----
[[5 4]
 [3 4]]
---np.dot(A, B)----
[[5 4]
 [3 4]]
exp,自然指数e
import numpy as np

B = np.arange(3)
print(B)
# 求自然指数e的次幂,B中的元素为e每一幂次方
print(np.exp(B))
结果
[0 1 2]
[1.         2.71828183 7.3890561 ]
sqrt,开方运算
import numpy as np

B = np.arange(3)
print(B)
# 对B中的每一个元素求根号,即1/2次幂
print(np.sqrt(B))
结果
[0 1 2]
[0.         1.         1.41421356]
floor,向下取整
示例一
import numpy as np

a = np.array([-1.7, -1.5, -0.2, 0.2, 1.5, 1.7, 2.0])
np.floor(a)
结果
[-2., -2., -1., 0., 1., 1., 2.]
示例二
import numpy as np

# Return the floor of the input
a = 10 * np.random.random((3, 4))
print(a)
a = np.floor(a)
print(a)
结果
[[6.6143481  9.9613796  1.30947854 5.6078685 ]
 [3.10948678 6.83076618 4.92651686 0.15127964]
 [3.3036663  9.44427669 5.25021126 7.66229507]]
[[6. 9. 1. 5.]
 [3. 6. 4. 0.]
 [3. 9. 5. 7.]]
ravel,水平铺开矩阵
- 说明
2维矩阵 ==> 1维向量,水平方向进行转化
import numpy as np

# Return the floor of the input
a = 10 * np.random.random((3, 4))
print(a)
a = np.floor(a)
print(a)
print('--------')
# 2维矩阵 ==>   1维向量,水平方向进行转化
# flatten the array
print(a.ravel() )
结果
[[6.6143481  9.9613796  1.30947854 5.6078685 ]
 [3.10948678 6.83076618 4.92651686 0.15127964]
 [3.3036663  9.44427669 5.25021126 7.66229507]]
[[6. 9. 1. 5.]
 [3. 6. 4. 0.]
 [3. 9. 5. 7.]]
--------
[6. 9. 1. 5. 3. 6. 4. 0. 3. 9. 5. 7.]
T,矩阵的转置
- 说明
在这种方式下,行向量无法直接转化为列向量
具体的转化方式见:
[numpy] np.newaxis 如何将行向量转换成列向量 - doufuxixi的博客 - CSDN博客
https://blog.csdn.net/doufuxixi/article/details/80356946
import numpy as np

# Return the floor of the input
a = 10 * np.random.random((3, 4))
print(a)
# 向下取整
a = np.floor(a)
print("a = np.floor(a)")
print(a)
# a 的转置
print("--------a.T")
print(a.T)

print('--------b = a.ravel()')
# a 水平方向铺平
b = a.ravel()
print(b)

# b 的转置
print('--------b.T')
print(b.T)
结果
[[6.8977933  6.5823566  2.70240107 4.48524208]
 [0.96507135 4.58781425 6.2868975  7.39792458]
 [6.18095442 4.62072618 5.73384294 8.45966937]]
a = np.floor(a)
[[6. 6. 2. 4.]
 [0. 4. 6. 7.]
 [6. 4. 5. 8.]]
--------a.T
[[6. 0. 6.]
 [6. 4. 4.]
 [2. 6. 5.]
 [4. 7. 8.]]
--------b = a.ravel()
[6. 6. 2. 4. 0. 4. 6. 7. 6. 4. 5. 8.]
--------b.T
[6. 6. 2. 4. 0. 4. 6. 7. 6. 4. 5. 8.]
vstack,按照列的方向拼接两个矩阵
import numpy as np

a = np.floor(10 * np.random.random((2, 2)))
b = np.floor(10 * np.random.random((2, 2)))
print('---a')
print(a)
print('---b')
print(b)
print('---np.vstack((a, b)')
print(np.vstack((a, b)))
结果
---a
[[4. 3.]
 [8. 6.]]
---b
[[8. 2.]
 [6. 0.]]
---np.vstack((a, b)
[[4. 3.]
 [8. 6.]
 [8. 2.]
 [6. 0.]]
hstack,按照行的方向拼接两个矩阵
import numpy as np

a = np.floor(10 * np.random.random((2, 2)))
b = np.floor(10 * np.random.random((2, 2)))
print('---a')
print(a)
print('---b')
print(b)
print('---np.hstack((a, b)')
print(np.hstack((a, b)))
结果
---a
[[1. 9.]
 [3. 6.]]
---b
[[9. 6.]
 [5. 0.]]
---np.hstack((a, b)
[[1. 9. 9. 6.]
 [3. 6. 5. 0.]]
hsplit,垂直方向上等数量分割矩阵数据
import numpy as np

x = np.arange(16.0).reshape(2, 8)
print(x)
# 等个数分割为2份
print(np.hsplit(x, 2))
# 等个数分割为4份
print(np.hsplit(x, 4))
结果
[[ 0.  1.  2.  3.  4.  5.  6.  7.]
 [ 8.  9. 10. 11. 12. 13. 14. 15.]]
[array([[ 0.,  1.,  2.,  3.],
       [ 8.,  9., 10., 11.]]), array([[ 4.,  5.,  6.,  7.],
       [12., 13., 14., 15.]])]
[array([[0., 1.],
       [8., 9.]]), array([[ 2.,  3.],
       [10., 11.]]), array([[ 4.,  5.],
       [12., 13.]]), array([[ 6.,  7.],
       [14., 15.]])]
结果( 重新排版后)
[[ 0.  1.  2.  3.  4.  5.  6.  7.]
 [ 8.  9. 10. 11. 12. 13. 14. 15.]]

[array([[ 0.,  1.,  2.,  3.],
        [ 8.,  9., 10., 11.]]),
 array([[ 4.,  5.,  6.,  7.],
	    [12., 13., 14., 15.]])]

[array([[0., 1.],
  	    [8., 9.]]),
 array([[ 2.,  3.],
 	    [10., 11.]]),
 array([[ 4.,  5.],
	    [12., 13.]]),
array([[ 6.,  7.],
	    [14., 15.]])]
vsplit,水平方向上等数量分割矩阵数据
import numpy as np

x = np.arange(16.0).reshape(8, 2)
print(x)
# 等数量分割为2份
print(np.vsplit(x, 2))
# 等数量分割为4份
print(np.vsplit(x, 4))
结果
[[ 0.  1.]
 [ 2.  3.]
 [ 4.  5.]
 [ 6.  7.]
 [ 8.  9.]
 [10. 11.]
 [12. 13.]
 [14. 15.]]
[array([[0., 1.],
       [2., 3.],
       [4., 5.],
       [6., 7.]]), array([[ 8.,  9.],
       [10., 11.],
       [12., 13.],
       [14., 15.]])]
[array([[0., 1.],
       [2., 3.]]), array([[4., 5.],
       [6., 7.]]), array([[ 8.,  9.],
       [10., 11.]]), array([[12., 13.],
       [14., 15.]])]
结果( 重新排版后)
[[ 0.  1.]
 [ 2.  3.]
 [ 4.  5.]
 [ 6.  7.]
 [ 8.  9.]
 [10. 11.]
 [12. 13.]
 [14. 15.]]

[array([
	   [0., 1.],
       [2., 3.],
       [4., 5.],
       [6., 7.]]),

array([
       [ 8.,  9.],
       [10., 11.],
       [12., 13.],
       [14., 15.]])]

[array([[0., 1.],
   	    [2., 3.]]),
  array([[4., 5.],
 	     [6., 7.]]),
  array([[ 8.,  9.],
         [10., 11.]]),
  array([[12., 13.],
         [14., 15.]])]
a=b,复制
- 说明
复制就是使用“=”。使用“=”的时候,实际上是传递的是对象的引用,当对象发生修改的时候,复制体也会发生同等的改变,无论何种改变。
import numpy as np

#Simple assignments make no copy of array objects or of their data.
a = np.arange(12)
b = a
# a and b are two names for the same ndarray object
print (b is a)
# b的形状改变,a也跟着改变
b.shape = 3,4
print (a.shape)
print (id(a))
print (id(b))
结果
True
(3, 4)
1974659569504
1974659569504
view,浅复制
- 说明
view相当于传引用,view和原始数据共享一份数据,修改一个会影响另一个。
import numpy as np

a = np.arange(12)
# The view method creates a new array object that looks at the same data.
c = a.view()
# 判断c a 是否共用一个内存id
print("c is a")
print(c is a)

#  查看a,c 的id
print("id(a)")
print(id(a))
print("id(c)")
print(id(c))

# 对c 的形状进行修改
c.shape = 2, 6
# a的形状不发生改变
print("a.shape")
print(a.shape)
print("c.shape")
print(c.shape)

# 对c 的元素进行修改,a中的对应位置的元素也跟着修改
c[0, 4] = 1234
print(a)
print("a")
print(c)
print("c")
结果
c is a
False
id(a)
34629952
id(c)
36175504
a.shape
(12,)
c.shape
(2, 6)
[   0    1    2    3 1234    5    6    7    8    9   10   11]
a
[[   0    1    2    3 1234    5]
 [   6    7    8    9   10   11]]
c
- 拓展阅读
numpy中的copy和view - 大泽之国 - CSDN博客
https://blog.csdn.net/z0n1l2/article/details/83116775
copy,深拷贝
- 说明
将对象中的所有的元素全都拷贝,拷贝后,两者这件的独立的,互不影响
import numpy as np
a = np.arange(12)
#The copy method makes a complete copy of the array and its data.
# 完全拷贝
d = a.copy()
print (d is a)
# 修改d 中的元素
d[0] = 9999
print (d)
print (a)
结果
[9999    1    2    3    4    5    6    7    8    9   10   11]
[ 0  1  2  3  4  5  6  7  8  9 10 11]
- 拓展阅读
numpy中的copy和view - 大泽之国 - CSDN博客
https://blog.csdn.net/z0n1l2/article/details/83116775
python复制,浅拷贝,深拷贝理解 - Young的博客 - CSDN博客
https://blog.csdn.net/dearyangjie/article/details/71533615
Python中复制,浅拷贝,深拷贝的区别详解 - H845165367的博客 - CSDN博客
https://blog.csdn.net/H845165367/article/details/79687387
argmax,垂直方向上找出最大值的索引
- 说明
垂直方向上,找出最大值的位置
如果某一列中,有两个元素是相同的大小,那么就取靠前的数值的索引
import numpy as np

# data = 100*np.sin(np.arange(20)).reshape(5, 4)
# data = np.floor(data)
# 5行4列
data = np.array(
[[   0.,   84.,   90.,   14.,],
 [ -76.,  -96.,  -28.,   65.,],
 [  98.,   41.,  -55., -100.,],
 [ -54.,   42.,   99.,   65.,],
 [ -29.,  -97.,  -76.,   14.,]]
)
print("data")
print(data)
# 垂直方向上,找出最大值的位置
# 结果:[2 0 3 1],分别对应第0列的第2个,第1列的第0个,第2列的3个,第3列的第1个(这里是与第3个等值,故取靠前的数值)
ind = data.argmax(axis=0)
print("ind")
print(ind)
# 在1行中,还原最大值的数据
data_max = data[ind, range(data.shape[1])]
print("data_max")
print(data_max)
结果
data
[[   0.   84.   90.   14.]
 [ -76.  -96.  -28.   65.]
 [  98.   41.  -55. -100.]
 [ -54.   42.   99.   65.]
 [ -29.  -97.  -76.   14.]]
ind
[2 0 3 1]
data_max
[98. 84. 99. 65.]
tile,重复数据
import numpy as np

a = np.arange(0, 40, 10)
print(a)
# 对a中的数据进行重复,以a为单位生成新的4行3列的矩阵
# 由于a是1行4列的数据,因此最终生成 4*3 =12列数据
b = np.tile(a, (4, 3))
print(b)
print(b.shape)
结果
[ 0 10 20 30]
[[ 0 10 20 30  0 10 20 30  0 10 20 30]
 [ 0 10 20 30  0 10 20 30  0 10 20 30]
 [ 0 10 20 30  0 10 20 30  0 10 20 30]
 [ 0 10 20 30  0 10 20 30  0 10 20 30]]
(4, 12)
sort,按顺序排列数据
- 说明
axis=0,垂直排列数据,从小到大
axis=1,水平排列数据,从小到大
示例一,axis=1
import numpy as np

a = np.array([[4, 3, 5], [1, 2, 1]])
print(a)
# 方式一
print('方式一--------b = np.sort(a, axis=1)')
b = np.sort(a, axis=1)
print(b)
print('--------a')
print(a)
# 方式二
print('方式二--------a.sort(axis=1)')
a.sort(axis=1)
print(a)
结果
[[4 3 5]
 [1 2 1]]
方式一--------b = np.sort(a, axis=1)
[[3 4 5]
 [1 1 2]]
--------a
[[4 3 5]
 [1 2 1]]
方式二--------a.sort(axis=1)
[[3 4 5]
 [1 1 2]]
示例二,axis=0
import numpy as np

a = np.array([[4, 3, 5], [1, 2, 1]])
print(a)
# 方式一
print('方式一--------b = np.sort(a, axis=0)')
b = np.sort(a, axis=0)
print(b)
print('--------a')
print(a)
# 方式二
print('方式二--------a.sort(axis=0)')
a.sort(axis=0)
print(a)
结果
[[4 3 5]
 [1 2 1]]
方式一--------b = np.sort(a, axis=0)
[[1 2 1]
 [4 3 5]]
--------a
[[4 3 5]
 [1 2 1]]
方式二--------a.sort(axis=0)
[[1 2 1]
 [4 3 5]]
argsort()函数是将x中的元素从小到大排列,提取其对应的index(索引),然后输出到y
argsort,向量中元素从小到大排列
- 说明
argsort()函数是将x中的元素从小到大排列,提取其对应的index(索引),然后输出到y
import numpy as np

a = np.array([4, 3, 1, 2])
j = np.argsort(a)
print('--------')
print(j)
print('--------')
print(a[j])
结果
--------
[2 3 1 0]
--------
[1 2 3 4]