xml即可扩展标记语言,它可以用来标记数据、定义数据类型,是一种允许用户对自己的标记语言进行定义的源语言。
本文主要学习的ElementTree是python的XML处理模块,它提供了一个轻量级的对象模型。在使用ElementTree模块时,需要import xml.etree.ElementTree的操作。ElementTree表示整个XML节点树,而Element表示节点数中的一个单独的节点。
XML示例一:使用XML读取本地的first.xml文件,并解析数据
以下是first.xml文件的内容


 1 <data>
 2     <country name="Liechtenstein">
 3         <rank updated="yes">2</rank>
 4         <year>2023</year>
 5         <gdppc>14110</gdppc>
 6         <neighbor direction="E" name="Austria"/>
 7         <neighbor direction="W" name="switzeriand"/>
 8     </country>
 9     <country name="Singapore">
10         <rank updated="yes">5</rank>
11         <year>2026</year>
12         <gdppc>59900</gdppc>
13         <neighbor direction="N" name="Malaysia"/>
14     </country>
15     <country name="Faname">
16         <rank updated="yes">69</rank>
17         <year>2019</year>
18         <gdppc>13360</gdppc>
19         <neighbor direction="W" name="Costa Rica"/>
20         <neighbor direction="E" name="Colombia"/>
21     </country>
22 </data>
python代码实现:
1 #!/usr/bin/env python
2 # -*- coding:utf-8 -*-
3 """
4 使用XML读取本地的first.xml文件,并解析数据
5 """
6 from xml.etree import ElementTree as ET
7
8 root = ET.XML(open("first.xml", "r", encoding='utf-8').read()) #读取本地的first.xml文件,解析字符串
9
10 #通过循环读取子节点的内容
11 for node in root:
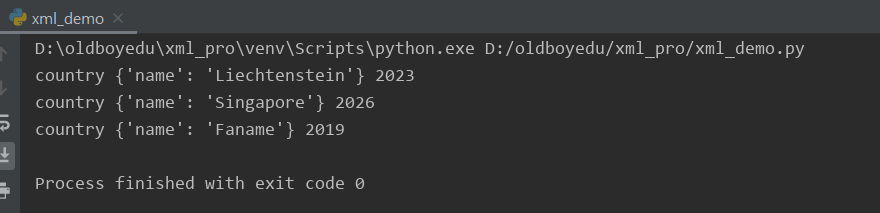
12 print(node.tag, node.attrib, node.find("year").text)
python实现读取first.xml文件并解析的结果:
XML示例二:通过.parse()方式打开文件,可以实现修改文件内容
 1 #!/usr/bin/env python
 2 # -*- coding:utf-8 -*-
 3
 4 #打开并解析文件内容
 5 from xml.etree import ElementTree as ET
 6
 7 tree = ET.parse("first.xml")
 8 root = tree.getroot()  #通过.getroot()获取根节点
 9 for node in root.iter('year'):  #通过.iter()迭代找到指定的子节点
10     new_year = int(node.text) + 1
11     node.text = str(new_year)
12     node.set('name', 'YY')  #通过.set()给year节点添加一个Name属性
13     #del node.attrib['name']  通过.attrib[]可删除指定的属性
14     head = root.find('gdppc')  # 获取节点
15     root.remove(head)                # 删除节点
16
17 #通过.write()将修改的内容从内存中写入文件
18 tree.write("first.xml")
示例三:创建xml文档
 1 #!/usr/bin/env python
 2 # -*- coding:utf-8 -*-
 3
 4 from xml.etree import ElementTree as ET
 5
 6 #创建根节点
 7 new_xml = ET.Element("namelist")
 8
 9 #在根节点下创建子节点1
10 name1 = ET.SubElement(new_xml, "name", attrib={"enrolled": "yes"})
11 #在name1子节点下再创建孙节点
12 age1 = ET.SubElement(name1, "age", attrib={"checked": "no"})
13 sex1 = ET.SubElement(name1, "sex")
14 sex1.text = '1'
15
16 #在根节点下创建子节点2
17 name2 = ET.SubElement(new_xml, "name", attrib={"enrolled": "no"})
18 age2 = ET.SubElement(name2, "age")
19 age2.text = '20'
20
21 #生成文档对象
22 et = ET.ElementTree(new_xml)
23 et.write("new_xml.xml", encoding='utf-8', xml_declaration=True)
创建xml文档实现的结果:
