说明:
在这个部分,会写个简单的入门案例。
然后,会重新写一个,更加严格的程序案例。
一:案例一
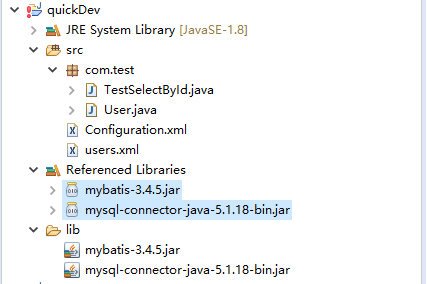
1.最终的目录结构
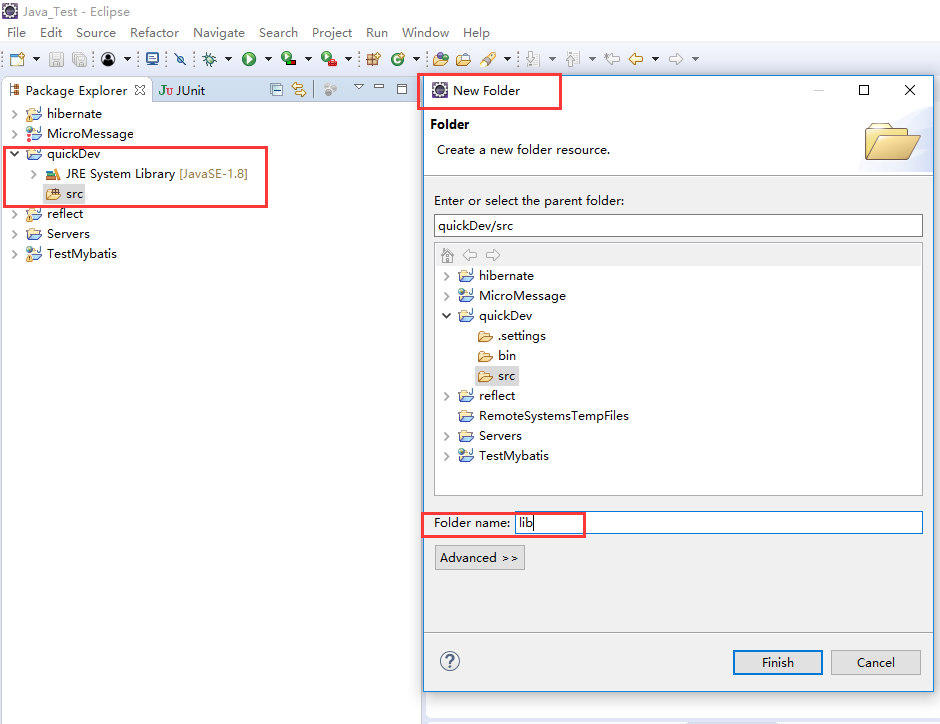
2.新建一个普通的Java项目,并新建lib
在项目名上右键,不是src。
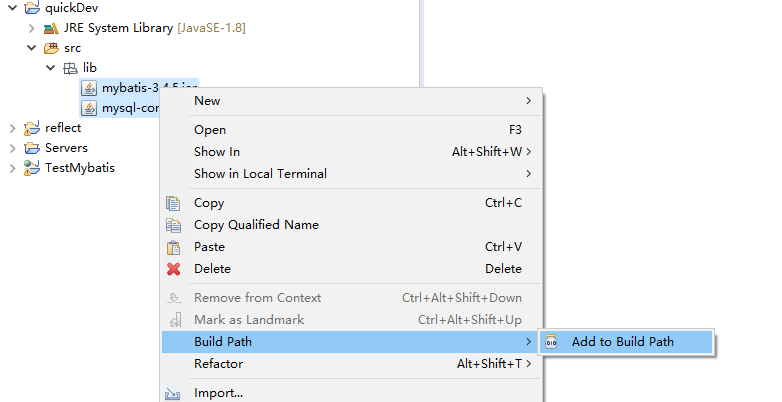
3.导入需要的jar包,并加入到classpath中
mybatis-3.4.5.jar
mysql-connector-java-5.1.18-bin.jar
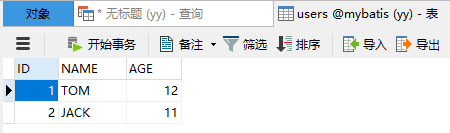
4.新建数据库与表
1 CREATE DATABASE mybatis;
2 USE mybatis;
3 CREATE TABLE users(
4     ID INT PRIMARY KEY AUTO_INCREMENT,
5     NAME VARCHAR(20),
6     AGE INT
7 );
8 INSERT INTO users(NAME,age) VALUES("TOM",12);
9 INSERT INTO users(NAME,AGE) VALUES("JACK",11);
5.新建bean--User.java
 1 package com.test;
 2
 3 public class User {
 4     private int id;
 5     private String name;
 6     private int age;
 7     public User() {}
 8     public int getId() {
 9         return id;
10     }
11     public void setId(int id) {
12         this.id = id;
13     }
14     public String getName() {
15         return name;
16     }
17     public void setName(String name) {
18         this.name = name;
19     }
20     public int getAge() {
21         return age;
22     }
23     public void setAge(int age) {
24         this.age = age;
25     }
26     @Override
27     public String toString() {
28         return "User [id=" + id + ", name=" + name + ", age=" + age + "]";
29     }
30
31 }
6.新建配置文件--Configuration.xml
resource="users.xml",注意的是,这个不需要加/。
 1 <?xml version="1.0" encoding="UTF-8" ?>
 2 <!DOCTYPE configuration PUBLIC "-//mybatis.org//DTD Config 3.0//EN" "http://mybatis.org/dtd/mybatis-3-config.dtd">
 3
 4 <configuration>
 5   <environments default="development">
 6     <environment id="development">
 7       <transactionManager type="JDBC">
 8         <property name="" value=""/>
 9       </transactionManager>
10       <dataSource type="UNPOOLED">
11         <property name="driver" value="com.mysql.jdbc.Driver"/>
12         <property name="url" value="jdbc:mysql://127.0.0.1:3308/mybatis"/>
13         <property name="username" value="root"/>
14         <property name="password" value="123456"/>
15       </dataSource>
16     </environment>
17   </environments>
18
19    <mappers>
20       <mapper resource="users.xml"/>
21    </mappers>
22
23 </configuration>
7.新建映射文件--users.xml
在这个映射文件中,需要注意的是,需要写result Map,不然找不到返回值。
 1 <?xml version="1.0" encoding="UTF-8"?>
 2 <!DOCTYPE mapper
 3     PUBLIC "-//mybatis.org//DTD Mapper 3.0//EN"
 4     "http://mybatis.org/dtd/mybatis-3-mapper.dtd">
 5
 6 <mapper namespace="quickFirst">
 7     <resultMap type="com.test.User" id="User">
 8         <id column="ID" jdbcType="INTEGER" property="id"/>
 9         <result column="NAME" jdbcType="VARCHAR" property="name"/>
10         <result column="AGE" jdbcType="INTEGER" property="age"/>
11     </resultMap>
12
13     <select id="selectUser" parameterType="int" resultMap="User">
14         SELECT * From users where id = #{id};
15     </select>
16 </mapper>
8.测试类--TestSelectById.java
这个类中使用的是反射的形式来获取配置文件。
需要注意的是:String resources="/Configuration.xml",这个需要增加/。
 1 package com.test;
 2
 3 import java.io.InputStream;
 4
 5 import org.apache.ibatis.session.SqlSession;
 6 import org.apache.ibatis.session.SqlSessionFactory;
 7 import org.apache.ibatis.session.SqlSessionFactoryBuilder;
 8
 9 public class TestSelectById {
10     public static void main(String[] regs) {
11         String resources="/Configuration.xml";
12         InputStream is=TestSelectById.class.getResourceAsStream(resources);
13         SqlSessionFactory sqlSessionFactory=new SqlSessionFactoryBuilder().build(is);
14         SqlSession sqlSession=sqlSessionFactory.openSession();
15         String statement="quickFirst.selectUser";
16         User user=sqlSession.selectOne(statement, 1);
17         System.out.println(user);
18     }
19 }
9.效果图

二:案例二
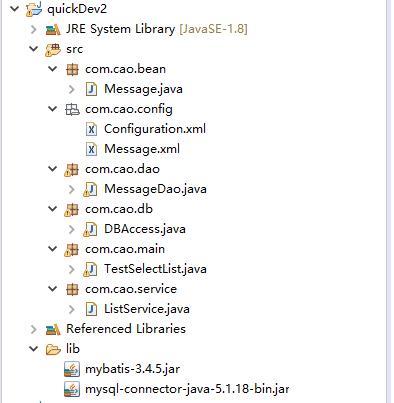
1.程序最终目录
2.新建表
 1 DROP TABLE IF EXISTS `message`;
 2 CREATE TABLE `message` (
 3   `ID` int(20) AUTO_INCREMENT COMMENT '主键',
 4   `COMMAND` varchar(16) DEFAULT NULL COMMENT '指令名称',
 5   `DESCRIPTION` varchar(32) DEFAULT NULL COMMENT '描述',
 6   `CONTENT` varchar(2048) DEFAULT NULL COMMENT '内容',
 7   PRIMARY KEY (`ID`)
 8 ) ENGINE=InnoDB AUTO_INCREMENT=10 DEFAULT CHARSET=utf8;
 9
10 INSERT INTO `message` VALUES ('1', '查看', '精彩内容', '精彩内容');
11 INSERT INTO `message` VALUES ('2', '段子', '精彩段子', '如果你的月薪是3000块钱');
12 INSERT INTO `message` VALUES ('3', '新闻', '今日头条', '7月17日,马来西亚一架载有298人');
13 INSERT INTO `message` VALUES ('4', '娱乐', '娱乐新闻', '昨日,邓超在微博分享了自己和孙俪的书法。');
14 INSERT INTO `message` VALUES ('5', '电影', '近日上映大片', '《忍者神龟》');

3.新建Message.java
 1 package com.cao.bean;
 2 /**
 3  * message��
 4  * @author dell
 5  *
 6  */
 7 public class Message {
 8     private int id;
 9     private String command;
10     private String description;
11     private String content;
12     public Message() {}
13     public Message(int id, String command, String description, String content) {
14         super();
15         this.id = id;
16         this.command = command;
17         this.description = description;
18         this.content = content;
19     }
20     public int getId() {
21         return id;
22     }
23     public void setId(int id) {
24         this.id = id;
25     }
26     public String getCommand() {
27         return command;
28     }
29     public void setCommand(String command) {
30         this.command = command;
31     }
32     public String getDescription() {
33         return description;
34     }
35     public void setDescription(String description) {
36         this.description = description;
37     }
38     public String getContent() {
39         return content;
40     }
41     public void setContent(String content) {
42         this.content = content;
43     }
44
45
46 }
4.新建配置文件
 1 <?xml version="1.0" encoding="UTF-8" ?>
 2 <!DOCTYPE configuration
 3     PUBLIC "-//mybatis.org//DTD Config 3.0//EN"
 4     "http://mybatis.org/dtd/mybatis-3-config.dtd">
 5 <configuration>
 6   <environments default="development">
 7     <environment id="development">
 8       <transactionManager type="JDBC">
 9         <property name="" value=""/>
10       </transactionManager>
11       <dataSource type="UNPOOLED">
12         <property name="driver" value="com.mysql.jdbc.Driver"/>
13         <property name="url" value="jdbc:mysql://127.0.0.1:3308/mybatis"/>
14         <property name="username" value="root"/>
15         <property name="password" value="123456"/>
16       </dataSource>
17     </environment>
18   </environments>
19
20    <mappers>
21       <mapper resource="com/cao/config/Message.xml"/>
22    </mappers>
23
24 </configuration>
5.新建映射文件
 1 <?xml version="1.0" encoding="UTF-8"?>
 2 <!DOCTYPE mapper
 3     PUBLIC "-//mybatis.org//DTD Mapper 3.0//EN"
 4     "http://mybatis.org/dtd/mybatis-3-mapper.dtd">
 5
 6 <mapper namespace="Message">
 7
 8   <resultMap type="com.cao.bean.Message" id="MessageResult">
 9     <id column="ID" jdbcType="INTEGER" property="id"/>
10     <result column="COMMAND" jdbcType="VARCHAR" property="command"/>
11     <result column="DESCRIPTION" jdbcType="VARCHAR" property="description"/>
12     <result column="CONTENT" jdbcType="VARCHAR" property="content"/>
13   </resultMap>
14
15   <select id="queryMessageList" parameterType="com.cao.bean.Message" resultMap="MessageResult">
16     SELECT ID,COMMAND,DESCRIPTION,CONTENT FROM message WHERE 1=1
17   </select>
18
19 </mapper>
6.新建DBAccess.java,链接数据库
 1 package com.cao.db;
 2
 3 import java.io.IOException;
 4 import java.io.Reader;
 5
 6 import org.apache.ibatis.io.Resources;
 7 import org.apache.ibatis.session.SqlSession;
 8 import org.apache.ibatis.session.SqlSessionFactory;
 9 import org.apache.ibatis.session.SqlSessionFactoryBuilder;
10
11 public class DBAccess {
12     public SqlSession getSqlSession() throws Exception {
13         //获取数据库的连接信息
14         Reader reader=Resources.getResourceAsReader("com/cao/config/Configuration.xml");
15
16         //
17         SqlSessionFactory sqlSessionFactory=new SqlSessionFactoryBuilder().build(reader);
18
19         //
20         SqlSession sqlSession=sqlSessionFactory.openSession();
21
22         System.out.println(sqlSession);
23         return sqlSession;
24     }
25 }
7.新建Dao,操作数据库
 1 package com.cao.dao;
 2
 3 import java.sql.Connection;
 4 import java.sql.DriverManager;
 5 import java.sql.PreparedStatement;
 6 import java.sql.ResultSet;
 7 import java.sql.SQLException;
 8 import java.util.ArrayList;
 9 import java.util.List;
10
11 import org.apache.ibatis.session.SqlSession;
12
13 import com.cao.bean.Message;
14 import com.cao.db.DBAccess;
15
16 /**
17  * 和message相关的dao
18  * @author dell
19  *
20  */
21 public class MessageDao {
22     /**
23      * 查询以及包括条件查询
24      * @param command
25      * @param description
26      * @return
27      */
28     public List<Message> queryMessageList()  {
29         List<Message> messageList=new ArrayList<>();
30         SqlSession sqlSession=null;
31         /**
32          * MyBatis
33          */
34         DBAccess dbAccess=new DBAccess();
35         try {
36             //封装,方便将参数传进到xml中
37             Message message=new Message();
38             sqlSession=dbAccess.getSqlSession();
39             messageList=sqlSession.selectList("Message.queryMessageList",message);
40
41         } catch (Exception e) {
42
43             e.printStackTrace();
44         }finally {
45             sqlSession.close();
46         }
47
48         return messageList;
49
50     }
51 }
8.新建service,数据处理层
 1 package com.cao.service;
 2
 3 import java.util.List;
 4
 5 import com.cao.bean.Message;
 6 import com.cao.dao.MessageDao;
 7
 8 /**
 9  * 列表相关的业务功能
10  * @author dell
11  *
12  */
13 public class ListService {
14     public List<Message> queryMessageList() {
15         MessageDao messageDao=new MessageDao();
16         return messageDao.queryMessageList();
17     }
18 }
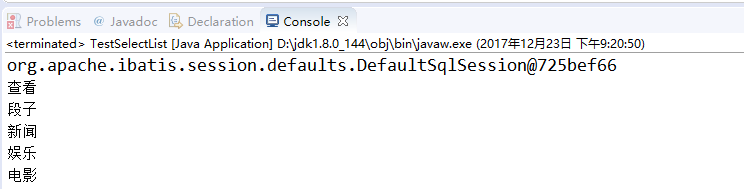
9.测试类
 1 package com.cao.main;
 2
 3 import java.util.Iterator;
 4 import java.util.List;
 5
 6 import com.cao.bean.Message;
 7 import com.cao.service.ListService;
 8
 9 public class TestSelectList {
10     public static void main(String[] args) {
11         ListService listService=new ListService();
12         List messageList=listService.queryMessageList();
13         Iterator it=messageList.iterator();
14         while(it.hasNext()) {
15             Message message=(Message)it.next();
16             String com=message.getCommand();
17             System.out.println(com);
18         }
19     }
20 }
10,结果