1、引用springboot框架
- 1、在maven项目底下的pom.xml的
中,引用springboot,如下
<?xml version="1.0" encoding="UTF-8"?>
<project xmlns="http://maven.apache.org/POM/4.0.0"
         xmlns:xsi="http://www.w3.org/2001/XMLSchema-instance"
         xsi:schemaLocation="http://maven.apache.org/POM/4.0.0 http://maven.apache.org/xsd/maven-4.0.0.xsd">
    <modelVersion>4.0.0</modelVersion>
	<!--项目父标签中引用springboot框架-->
    <parent>
        <groupId>org.springframework.boot</groupId>
        <artifactId>spring-boot-starter-parent</artifactId>
        <version>2.1.5.RELEASE</version>
        <relativePath/> <!-- lookup parent from repository -->
    </parent>

    <!--artifactId是项目的默认值,每个module名可在后续的module标签中定义-->
    <groupId>com.mycom.apitest</groupId>
    <artifactId>exercise</artifactId>
    <packaging>pom</packaging>
    <version>1.0-SNAPSHOT</version>

    <modules>
        <module>exercise10</module>
        <module>exercise11</module>
        <module>exercise12</module>
        <module>exercise13</module>
    </modules>

	<!--指定build的Java版本-->
    <build>
        <plugins>
            <plugin>
                <groupId>org.apache.maven.plugins</groupId>
                <artifactId>maven-compiler-plugin</artifactId>
                <configuration>
                    <source>1.8</source>
                    <target>1.8</target>
                </configuration>
            </plugin>
        </plugins>
    </build>

</project>
- 2、在module的pom.xml中引入springboot依赖,如下
<?xml version="1.0" encoding="UTF-8"?>
<project xmlns="http://maven.apache.org/POM/4.0.0"
         xmlns:xsi="http://www.w3.org/2001/XMLSchema-instance"
         xsi:schemaLocation="http://maven.apache.org/POM/4.0.0 http://maven.apache.org/xsd/maven-4.0.0.xsd">
    <parent>
        <artifactId>exercise</artifactId>
        <groupId>com.mycom.apitest</groupId>
        <version>1.0-SNAPSHOT</version>
    </parent>
    <modelVersion>4.0.0</modelVersion>

    <artifactId>exercise10</artifactId>

    <properties>
        <java.version>1.8</java.version>
    </properties>

    <dependencies>
        <dependency>
            <groupId>org.springframework.boot</groupId>
            <artifactId>spring-boot-starter-web</artifactId>
        </dependency>

        <dependency>
            <groupId>org.springframework.boot</groupId>
            <artifactId>spring-boot-starter-test</artifactId>
            <scope>test</scope>
        </dependency>
    </dependencies>

</project>
2、运行官网demo
* 新建包hello,并在包下新建测试类SampleController.java,其中内容为官网demo的代码,如下
package hello;

import org.springframework.boot.*;
import org.springframework.boot.autoconfigure.*;
import org.springframework.stereotype.*;
import org.springframework.web.bind.annotation.*;

@Controller
@EnableAutoConfiguration
public class SampleController {

//请求目录
    @RequestMapping("/")   //访问路径为根目录,即域名加端口即可访问
    @ResponseBody         //响应体,home为响应主页
    String home() {
        return "Hello World!";
    }
    //spring应用运行SampleController类
    public static void main(String[] args) throws Exception {
        SpringApplication.run(SampleController.class, args);
    }
}
-
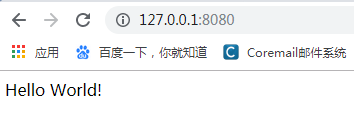
启用执行结果为:

springboot 内嵌的是tomcat 服务,默认的端口是8080,若端口被占用的话,会启动失败。 -
浏览器访问应用如下:
3、返回cookies信息的get接口开发
- 1、在main/java下新建一个入口类:Application.java
import org.springframework.boot.SpringApplication;
import org.springframework.boot.autoconfigure.SpringBootApplication;
import org.springframework.context.annotation.ComponentScan;

@SpringBootApplication       //加这个注解标签,表示将下面的入口类托管
@ComponentScan("com.course.server")              //表示托管给我后,你要我扫描哪个包下的类
public class Application {
    public static void main(String[] args) {
        SpringApplication.run(Application.class,args);     //固定写法,传入参数args与方法中的args相同
    }
}
-
2、在main/java下新建托管后需要扫描的包com.course.server,并建需要扫描的测试类MyGetMethod.java,如下
-
无cookie信息返回的写法,MyGetMethod.java
package com.course.server;

import org.springframework.web.bind.annotation.RequestMapping;
import org.springframework.web.bind.annotation.RequestMethod;
import org.springframework.web.bind.annotation.RestController;

@RestController     //表示以下类是需要被扫描的
public class MyGetMethod {

    @RequestMapping(value = "/getCookies",method = RequestMethod.GET)    //请求映射地址和请求方法,即请求路径,可与后面的方法名相同
    public String getCookies(){
        return "恭喜你获取cookies信息成功";       //响应信息
    }
}
- 有cookie信息返回的写法,MyGetMethod.java
package com.course.server;

import org.springframework.web.bind.annotation.RequestMapping;
import org.springframework.web.bind.annotation.RequestMethod;
import org.springframework.web.bind.annotation.RestController;

import javax.servlet.http.Cookie;
import javax.servlet.http.HttpServletResponse;

@RestController     //表示以下类是需要被扫描的
public class MyGetMethod {

    @RequestMapping(value = "/getCookies",method = RequestMethod.GET)    //请求映射地址和请求方法,即请求路径,可与后面的方法名相同
    public String getCookies(HttpServletResponse response){
        //HttpServletRequest   装载请求信息的类
        //HttpServletResponse  装载响应信息的类
        //定义响应的cookie信息
        Cookie cookie = new Cookie("login","true");
        response.addCookie(cookie);   //将cookie信息添加到响应中返回
        return "恭喜你获取cookies信息成功";       //响应信息
    }
}
- 3、在resources下,新建一个配置文件,名字必须为
application.properties,取这个名字,springboot框架才会将这个配置文件自动加载。且里面的字段内容为固定写法,后面具体的值可自定义,比如端口号,这里修改springboot启动的端口为8888,如下:
server.port=${port:8888}
- 4、执行后,访问结果为:

4、一个要求携带cookies信息访问的get接口开发
- 修改MyGetMethod.java部分代码如下
package com.course.server;

import org.springframework.web.bind.annotation.RequestMapping;
import org.springframework.web.bind.annotation.RequestMethod;
import org.springframework.web.bind.annotation.RestController;

import javax.servlet.http.Cookie;
import javax.servlet.http.HttpServletRequest;
import javax.servlet.http.HttpServletResponse;
import java.util.Objects;

@RestController     //表示以下类是需要被扫描的
public class MyGetMethod {

    @RequestMapping(value = "/getCookies",method = RequestMethod.GET)
    public String getCookies(HttpServletResponse response){
        Cookie cookie = new Cookie("login","true");
        response.addCookie(cookie);
        return "恭喜你获取cookies信息成功";
    }

    /*
    * 要求客户端携带cookies访问
    * 这是一个需要携带cookies信息才能访问的get请求
    * */
    @RequestMapping(value = "/get/with/cookies",method = RequestMethod.GET)
    public String getWithCookies(HttpServletRequest request){
        //获取请求中的cookie信息,并存在一维数组中,因可能有多个cookie信息
        Cookie[] cookies = request.getCookies();
        //定义cookie信息为空时的响应信息
        if (Objects.isNull(cookies)){
            return "你必须携带cookies信息来!";
        }
        //将获取到的cookie信息遍历出来比对,比对通过则返回成功相应信息
        for (Cookie cookie : cookies){
            if (cookie.getName().equals("login") &&
                    cookie.getValue().equals("true")){
                return "成功,这是一个需要携带cookies信息才能访问的get请求!";
            }
        }
        //如果获取到的cookie信息比对不正确,则返回以下信息(即除了上面两种情况,剩下的情况都返回以下信息)
        return "你必须携带正确的cookies信息来!!!";
    }
}
5、需携带参数的get请求的两种开发方式
第一种实现方式(参数在问号后面)
- 1、如下是对参数不做校验,传入什么参数都受理,包括空参数,也返回正确的响应(修改MyGetMethod.java部分代码)
package com.course.server;

import org.springframework.web.bind.annotation.RequestMapping;
import org.springframework.web.bind.annotation.RequestMethod;
import org.springframework.web.bind.annotation.RequestParam;
import org.springframework.web.bind.annotation.RestController;

import javax.servlet.http.Cookie;
import javax.servlet.http.HttpServletRequest;
import javax.servlet.http.HttpServletResponse;
import java.util.HashMap;
import java.util.Map;
import java.util.Objects;

@RestController
public class MyGetMethod {

    @RequestMapping(value = "/get/with/param",method = RequestMethod.GET)
    //将参数定义在方法传参位置处,用@RequestParam关键字,如下,需要传两个参数
    //泛数据类型(对象类型)
    public Map<String,Integer> getList(@RequestParam Integer start,
                                       @RequestParam Integer end){
        //泛数据类型的类,在实例化对象时,具体化元素的数据类型
        //响应体,如下返回的是json格式的信息
        Map<String,Integer> myList = new HashMap<>();

        myList.put("鞋",400);
        myList.put("干脆面",1);
        myList.put("衬衫",300);

        return myList;
    }
}
-
不管传入什么参数值,都会返回正确结果,这种方式可以用于获取传入的参数。结果为:


-
2、如下是对参数做校验,传入正确的参数,返回正确的信息,否则返回错误信息(修改MyGetMethod.java部分代码)
@RequestMapping(value = "/get/with/param",method = RequestMethod.GET)
//required=true:该参数不能为空;相反required=false:该参数能为空;若不写,则默认为true
public Map<String,Integer> getList(@RequestParam(value = "start", required = false) Integer start,
                                   @RequestParam(value = "end", required = false) Integer end){

    //响应体,如下返回的是json格式的信息
    Map<String, Integer> myList = new HashMap<>();

    if (start.equals(15) && end.equals(30)) {

        myList.put("鞋", 400);
        myList.put("干脆面", 1);
        myList.put("衬衫", 300);

        return myList;
    }
    //参数错误,则返回以下信息,空值则返回500
    myList.put("oh sorry start or end is wrong", 0);
    return myList;
}
第二种实现方式(参数在路径中)(修改MyGetMethod.java部分代码)
/**
 *第2种需要携带参数访问的get请求,用到的是@PathVariable 关键字,因为是参数化的路径,有校验
 * url:  ip:port/get/with/param/10/20
 * */
@RequestMapping(value = "/get/with/param/{start}/{end}")  //另一种请求url
public Map myGetList(@PathVariable Integer start,
                     @PathVariable Integer end){

    Map<String, Integer> myList = new HashMap<>();

    if (start.equals(15) && end.equals(30)) {

        myList.put("鞋", 400);
        myList.put("干脆面", 1);
        myList.put("衬衫", 300);

        return myList;
    }
    //参数错误,则返回以下信息,空值则返回500
    myList.put("oh sorry start or end is wrong", 0);
    return myList;
}

 //不做参数校验
@RequestMapping(value = "/get/with/param2/{start}/{end}")
public Map myGetList2(@PathVariable Integer start,
                     @PathVariable Integer end){

    Map<String,Integer> myList = new HashMap<>();
    myList.put("鞋",400);
    myList.put("衬衫",300);
    myList.put("干脆面",1);

    return myList;
}