spring的事务管理方式: 一、声名式 二、编程式
事务:查询不会影响数据的改变,对于增删改必须进行事务的管理.如果没有事务管理spring也提供了默认传播方式REQUIRED
一、声名式事务管理(基于AOP的事务管理把事务当做切面编织到代码中去): 又分为两类1.基于XML 2.注解式
1.XML的
<?xml version="1.0" encoding="UTF-8"?>
<beans xmlns="http://www.springframework.org/schema/beans"
       xmlns:xsi="http://www.w3.org/2001/XMLSchema-instance"
       xmlns:aop="http://www.springframework.org/schema/aop"
       xmlns:tx="http://www.springframework.org/schema/tx"
       xsi:schemaLocation="
        http://www.springframework.org/schema/beans
        http://www.springframework.org/schema/beans/spring-beans.xsd
        http://www.springframework.org/schema/tx
        http://www.springframework.org/schema/tx/spring-tx.xsd
        http://www.springframework.org/schema/aop
        http://www.springframework.org/schema/aop/spring-aop.xsd">
    <!--配置业务-->
    <bean id="accountService" class="com.service.impl.AccountServiceImpl">
        <property name="accountDao" ref="accountDao"></property>
    </bean>
    <!--配置账户持久层-->
    <bean id="accountDao" class="com.dao.impl.IAccountDaoImpl">
        <property name="dataSource" ref="datasource"></property>
    </bean>
    <bean id="datasource" class="org.springframework.jdbc.datasource.DriverManagerDataSource">
        <property name="driverClassName" value="com.mysql.jdbc.Driver"></property>
        <property name="url" value="jdbc:mysql://localhost:3306/db5"></property>
        <property name="username" value="root"></property>
        <property name="password" value="123"></property>
    </bean>
    <!-- spring中基于XML的声明式事务控制配置步骤
       1、配置事务管理器
       2、配置事务的通知
               此时我们需要导入事务的约束 tx名称空间和约束,同时也需要aop的
               使用tx:advice标签配置事务通知
                   属性:
                       id:给事务通知起一个唯一标识
                       transaction-manager:给事务通知提供一个事务管理器引用
       3、配置AOP中的通用切入点表达式
       4、建立事务通知和切入点表达式的对应关系
       5、配置事务的属性
              是在事务的通知tx:advice标签的内部

    -->
    <!--使用spring内置的事务管理========(由spring提供的)===========实现转账的业务-->
    <!--1.配置spring内置事务管理器-->
    <bean id="transactionManager" class="org.springframework.jdbc.datasource.DataSourceTransactionManager">
        <property name="dataSource" ref="datasource"></property>
    </bean>
    <!--2.配置事务通知-->
    <tx:advice id="txAdvice" transaction-manager="transactionManager">
        <!--5.配置事务的属性-->
        <tx:attributes>
            <!-- <tx:method xxx="xxx" ,xxx="xxx" ....配置事务的属性
               isolation:用于指定事务的隔离级别。默认值是DEFAULT,表示使用数据库的默认隔离级别。
               propagation:用于指定事务的传播行为。默认值是REQUIRED,表示一定会有事务,增删改的选择。查询方法可以选择SUPPORTS。
               read-only:用于指定事务是否只读。只有查询方法才能设置为true。默认值是false,表示读写。
               timeout:用于指定事务的超时时间,默认值是-1,表示永不超时。如果指定了数值,以秒为单位。
               rollback-for:用于指定一个异常,当产生该异常时,事务回滚,产生其他异常时,事务不回滚。没有默认值。表示任何异常都回滚。
               no-rollback-for:用于指定一个异常,当产生该异常时,事务不回滚,产生其他异常时事务回滚。没有默认值。表示任何异常都回滚。
       -->
            <tx:method name="transfer" propagation="REQUIRED" read-only="false"/>
        </tx:attributes>
    </tx:advice>
    <!--3.配置aop-->
    <aop:config>
        <!--配置切入点表达式-->
        <aop:pointcut id="pt1" expression="execution(* com.service.impl.*.*(..))"/>
        <!--4.建立切入点表达式和事务通知的对应关系-->
        <aop:advisor advice-ref="txAdvice" pointcut-ref="pt1"></aop:advisor>
    </aop:config>
</beans>
2.注解的(大大简化了代码)
<?xml version="1.0" encoding="UTF-8"?>
<beans xmlns="http://www.springframework.org/schema/beans"
xmlns:xsi="http://www.w3.org/2001/XMLSchema-instance"
xmlns:aop="http://www.springframework.org/schema/aop"
xmlns:tx="http://www.springframework.org/schema/tx"
xmlns:context="http://www.springframework.org/schema/context"
xsi:schemaLocation="
http://www.springframework.org/schema/beans
http://www.springframework.org/schema/beans/spring-beans.xsd
http://www.springframework.org/schema/tx
http://www.springframework.org/schema/tx/spring-tx.xsd
http://www.springframework.org/schema/aop
http://www.springframework.org/schema/aop/spring-aop.xsd
http://www.springframework.org/schema/context
http://www.springframework.org/schema/context/spring-context.xsd">
<!--配置容器扫描的包-->
<context:component-scan base-package="com"></context:component-scan>
<!--配置jdbcTemplate-->
<bean id="jdbcTemplate" class="org.springframework.jdbc.core.JdbcTemplate">
<property name="dataSource" ref="datasource"></property>
</bean>
<!--配置账户持久层-->
<bean id="accountDao" class="com.dao.impl.IAccountDaoImpl">
<property name="dataSource" ref="datasource"></property>
</bean>
<bean id="datasource" class="org.springframework.jdbc.datasource.DriverManagerDataSource">
<property name="driverClassName" value="com.mysql.jdbc.Driver"></property>
<property name="url" value="jdbc:mysql://localhost:3306/db5"></property>
<property name="username" value="root"></property>
<property name="password" value="123"></property>
</bean>
<!--使用spring内置的事务管理========(由spring提供的)===========实现转账的业务-->
<!-- spring中基于注解 的声明式事务控制配置步骤
1、配置事务管理器
2、开启spring对注解事务的支持
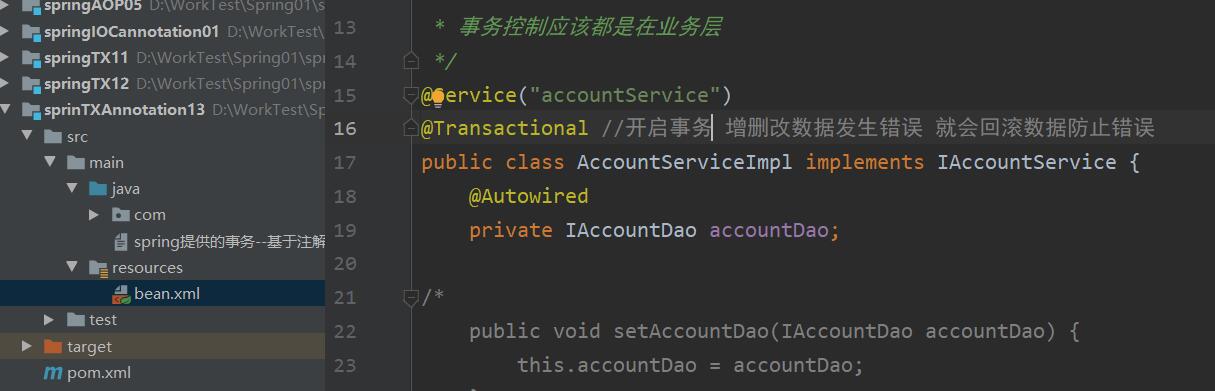
3、在需要事务支持的地方使用@Transactional注解-->
<!--1.配置spring内置事务管理器-->
<bean id="transactionManager" class="org.springframework.jdbc.datasource.DataSourceTransactionManager">
<property name="dataSource" ref="datasource"></property>
</bean>
<!--2.开启spring对注解事务的支持-->
<tx:annotation-driven transaction-manager="transactionManager"></tx:annotation-driven>
</beans>
dao层相应的类添加事务
二、编程式 顾名思义手敲编写事务
<?xml version="1.0" encoding="UTF-8"?>
<beans xmlns="http://www.springframework.org/schema/beans"
       xmlns:xsi="http://www.w3.org/2001/XMLSchema-instance"
       xsi:schemaLocation="http://www.springframework.org/schema/beans
        http://www.springframework.org/schema/beans/spring-beans.xsd">
    <!--配置业务-->
    <bean id="accountService" class="com.service.impl.AccountServiceImpl">
        <property name="accountDao" ref="accountDao"></property>
        <property name="template" ref="transactionTemplate"></property>
    </bean>
    <!--配置账户持久层-->
    <bean id="accountDao" class="com.dao.impl.IAccountDaoImpl">
        <property name="dataSource" ref="datasource"></property>
    </bean>
    <bean id="datasource" class="org.springframework.jdbc.datasource.DriverManagerDataSource">
        <property name="driverClassName" value="com.mysql.jdbc.Driver"></property>
        <property name="url" value="jdbc:mysql://localhost:3306/db5"></property>
        <property name="username" value="root"></property>
        <property name="password" value="123"></property>
    </bean>
    <!--配置事务管理器-->
    <bean id="transactionManager" class="org.springframework.jdbc.datasource.DataSourceTransactionManager">
        <property name="dataSource" ref="datasource"></property>
    </bean>
    <!--事务模板对象-->
    <bean id="transactionTemplate" class="org.springframework.transaction.support.TransactionTemplate">
        <property name="transactionManager" ref="transactionManager"></property>
    </bean>
</beans>
service层
package com.service.impl;

import com.dao.IAccountDao;
import com.domain.Account;
import com.service.IAccountService;
import org.springframework.transaction.TransactionStatus;
import org.springframework.transaction.support.TransactionCallback;
import org.springframework.transaction.support.TransactionTemplate;

/**
 * 账户的业务层实现类
 *
 * 事务控制应该都是在业务层
 */
public class AccountServiceImpl implements IAccountService {

    private IAccountDao accountDao;
    private TransactionTemplate  template;

    public void setTemplate(TransactionTemplate template) {
        this.template = template;
    }

    public void setAccountDao(IAccountDao accountDao) {
        this.accountDao = accountDao;
    }


    @Override
    public Account findAllById(Integer accountId) {

       return  template.execute(new TransactionCallback<Account>() {//编程式事务管理这样其实更加麻烦了
            @Override
            public Account doInTransaction(TransactionStatus status) {
                return accountDao.findAllById(accountId);
            }
        });


    }


    @Override
    public void transfer(String sourceName, String targetName, Float money) {
        template.execute(new TransactionCallback<Object>() {//编程式事务管理这样其实更加麻烦了
            @Override
            public Object doInTransaction(TransactionStatus status) {
                System.out.println("transfer....");
                //2.1根据名称查询转出账户
                Account source = accountDao.findAccountByName(sourceName);
                //2.2根据名称查询转入账户
                Account target = accountDao.findAccountByName(targetName);
                //2.3转出账户减钱
                source.setMoney(source.getMoney()-money);
                //2.4转入账户加钱
                target.setMoney(target.getMoney()+money);
                //2.5更新转出账户
                accountDao.updateAccount(source);

                //int i=1/0;

                //2.6更新转入账户
                accountDao.updateAccount(target);
                return null;
            }
        });

    }
}