一、画多个线段的Canvas封装
1、封装canvas
//MyCanvas.qml
import QtQuick 2.5
Canvas {
    id: canvasId
    property color triangleColor: "green"
    property int arrow_ 4;    //箭头宽度
    property int arrow_height: 8;   //箭头高度
    property var points: [];
    property bool drawArrow: false; //是否画箭头
    property int arrowWidth: 8;
    property int line_width: 1;
    property bool drawPot: true;   //是否画圆点
    property int potWidth: 4;//圆点的宽度

    function appendData (data) {
        points.push(data)
    }

    function draw()//画箭头
    {
        canvasId.requestPaint();
    }

    onPaint: {
        var ctx = getContext("2d");
        for(var p = 0;p<points.length;p++){
            var linePoints = points[p].points
            var lineColor = points[p].color?points[p].color:triangleColor
            //画直线
            ctx.lineWidth = line_width;
            ctx.beginPath();
            //画起点圆点
            if(drawPot){
                ctx.fillStyle = "white";
                ctx.arc(linePoints[0].x+potWidth/2-line_width,linePoints[0].y, potWidth/2, Math.PI * 2, false);
                ctx.fill();
            }
            ctx.strokeStyle = lineColor;
            ctx.moveTo(linePoints[0].x,linePoints[0].y);
            for(var i = 1;i<linePoints.length;i++){
                ctx.lineTo(linePoints[i].x,linePoints[i].y);
            }
            ctx.stroke();
            //画箭头
            if(drawArrow){
                var last_two = linePoints.length-2
                var last_one = linePoints.length-1
                var x = linePoints[last_one].x
                var y = linePoints[last_one].y
                //判断折线最后为水平还是垂直
                //x相等为垂直
                if (linePoints[last_two].x === linePoints[last_one].x){
                    //判断垂直方向的箭头走向
                    //last_two<last_one为从上至下
                    if(linePoints[last_two].y<linePoints[last_one].y){
                        ctx.lineWidth = 0;
                        ctx.fillStyle = lineColor;
                        ctx.beginPath();
                        y = y - arrowWidth/2;
                        ctx.moveTo(x,y)
                        ctx.lineTo(x-arrow_width/2,y-arrow_height);
                        ctx.lineTo(x+arrow_width/2,y-arrow_height);
                        ctx.closePath();
                        ctx.fill();
                        ctx.stroke();
                    }else{
                        ctx.lineWidth = 0;
                        ctx.fillStyle = lineColor;
                        ctx.beginPath();
                        y =y + arrowWidth/2;
                        ctx.moveTo(x,y)
                        ctx.lineTo(x-arrow_width/2,y+arrow_height);
                        ctx.lineTo(x+arrow_width/2,y+arrow_height);
                        ctx.closePath();
                        ctx.fill();
                        ctx.stroke();
                    }
                }else{
                    //last_two<last_one为从左至右
                    if(linePoints[last_two].x<linePoints[last_one].x){
                        ctx.lineWidth = 0;
                        ctx.fillStyle = lineColor;
                        ctx.beginPath();
                        x = x - arrowWidth/2;
                        ctx.moveTo(x,y)
                        ctx.lineTo(x-arrow_height,y-arrow_width/2);
                        ctx.lineTo(x-arrow_height,y+arrow_width/2);
                        ctx.closePath();
                        ctx.fill();
                        ctx.stroke();
                    }else{
                        ctx.lineWidth = 0;
                        ctx.fillStyle = lineColor;
                        ctx.beginPath();
                        x = x + arrowWidth/2;
                        ctx.moveTo(x,y)
                        ctx.lineTo(x+arrow_height,y-arrow_width/2);
                        ctx.lineTo(x+arrow_height,y+arrow_width/2);
                        ctx.closePath();
                        ctx.fill();
                        ctx.stroke();
                    }
                }
            }
        }
    }
}
2、定义
Mycanvas{
    id:mycanvas;
    antialiasing: true
    smooth: true
    anchors.fill: parent;
    drawArrow: false;
}
3、使用
//初始化画线
Timer{
    interval: 100;
    running: true;
    repeat: false;
    onTriggered: {
        var points;
        //xxx1
        points = {
            points: [
                {x: 269, y: 495},
                {x: getCenterX(rect_1), y: getCenterY(rect_1)}
            ],
            color: "gray"
        }
        mycanvas.appendData(points)
        //xxx2
        points = {
            points: [
                {x: 272, y: 445},
                {x: getCenterX(rect_2), y: getCenterY(rect_2)}
            ],
            color: "gray"
        }
        mycanvas.appendData(points)
        //xxx3
        points = {
            points: [
                {x: 274, y: 395},
                {x: getCenterX(rect_3), y: getCenterY(rect_3)}
            ],
            color: "gray"
        }
        mycanvas.appendData(points)


        //开始绘制
        mycanvas.draw()
    }
}
4、获取绝对坐标函数
//获取节点的中心坐标
function getCenterX(node){
  return node.x+node.width/2;
}
function getCenterY(node){
  return node.y+node.height/2;
}
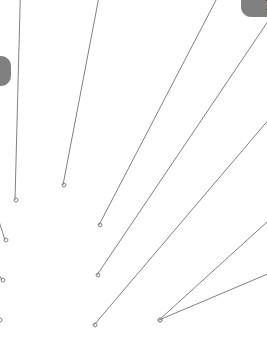
5、效果
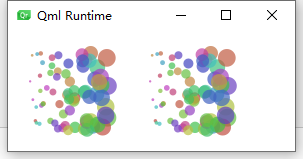
二、将Canvs绘制内容导出成url,并显示
1、代码:左侧随机生成一个圆,点击一次导出成url,并在后侧显示
也就是所谓的:像素缓冲;代码参考:qmlbook
import QtQuick 2.0
Rectangle{
    width:240;
    height:120
    Canvas{
        id:canvas
        x:10;
        y:10
        100;
        height:100
        property real hue:0.0
        onPaint:{
            var ctx=getContext("2d")
            var x=10+Math.random(80)*80
            var y=10+Math.random(80)*80
            hue+=Math.random()*0.1
            if(hue>1.0){hue-=1}
            ctx.globalAlpha=0.7
            ctx.fillStyle=Qt.hsla(hue,0.5,0.5,1.0)
            ctx.beginPath()
            ctx.moveTo(x+5,y)
            ctx.arc(x,y,x/10,0,360)
            ctx.closePath()
            ctx.fill()
        }
        MouseArea{
            anchors.fill:parent
            onClicked:{
                var url=canvas.toDataURL('image/png')
                //print('imageurl=',url)
                image.source=url
            }
        }
    }
    Image{
        id:image
        x:130;
        y:10
        100;
        height:100
    }
    Timer{
        interval:1000
        running:true
        triggeredOnStart:true
        repeat:true
        onTriggered:canvas.requestPaint()
    }
}
2、效果
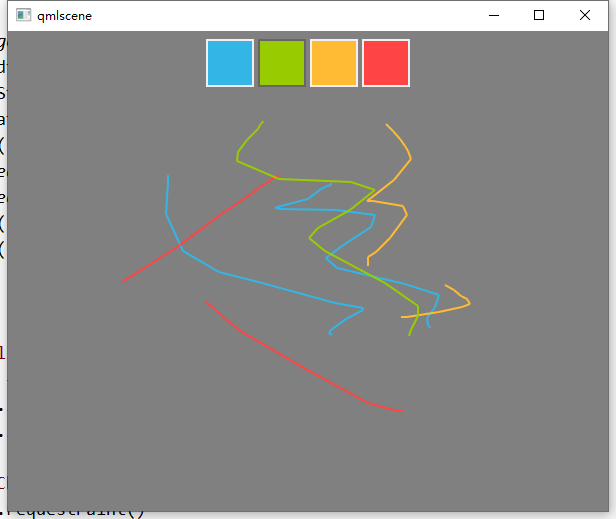
三、画图及封装
参考:qmlbook
1、ColorSquare.qml
import QtQuick 2.0

Rectangle {
    id: root
     48; height: 48
    color: "green"
    signal clicked
    property bool active: false
    border.color: active? "#666666" : "#f0f0f0"
    border. 2

    MouseArea {
        id: area
        anchors.fill :parent
        onClicked: {
            root.clicked()
        }
    }
}
2、main.qml
import QtQuick 2.0

Rectangle{
    width: 600
    height: 480
    color: "gray"
    Row{
        id:colorTools
        anchors{
            horizontalCenter:parent.horizontalCenter
            top:parent.top
            topMargin:8
        }

        property color paintColor:"#33B5E5"
        spacing:4
        Repeater{
            model:["#33B5E5","#99CC00","#FFBB33","#FF4444"]
            ColorSquare{
                id:red
                color:modelData
                active:parent.paintColor===color
                onClicked:{
                    parent.paintColor=color}
            }
        }
    }

    Canvas {
        id: canvas
        anchors {
            left: parent.left
            right: parent.right
            top: colorTools.bottom
            bottom: parent.bottom
            margins: 8
        }
        property real lastX
        property real lastY
        property color color: colorTools.paintColor

        onPaint: {
            var ctx = getContext('2d')
            ctx.lineWidth = 2.0
            ctx.strokeStyle = canvas.color
            ctx.beginPath()
            ctx.moveTo(lastX, lastY)
            lastX = area.mouseX
            lastY = area.mouseY
            ctx.lineTo(lastX, lastY)
            ctx.stroke()
        }
        MouseArea {
            id: area
            anchors.fill: parent
            onPressed: {
                canvas.lastX = mouseX
                canvas.lastY = mouseY
            }
            onPositionChanged: {
                canvas.requestPaint()
            }
        }
    }
}
3、效果