OpenVINO Model Server的服务化部署——step4(实现天空替换)

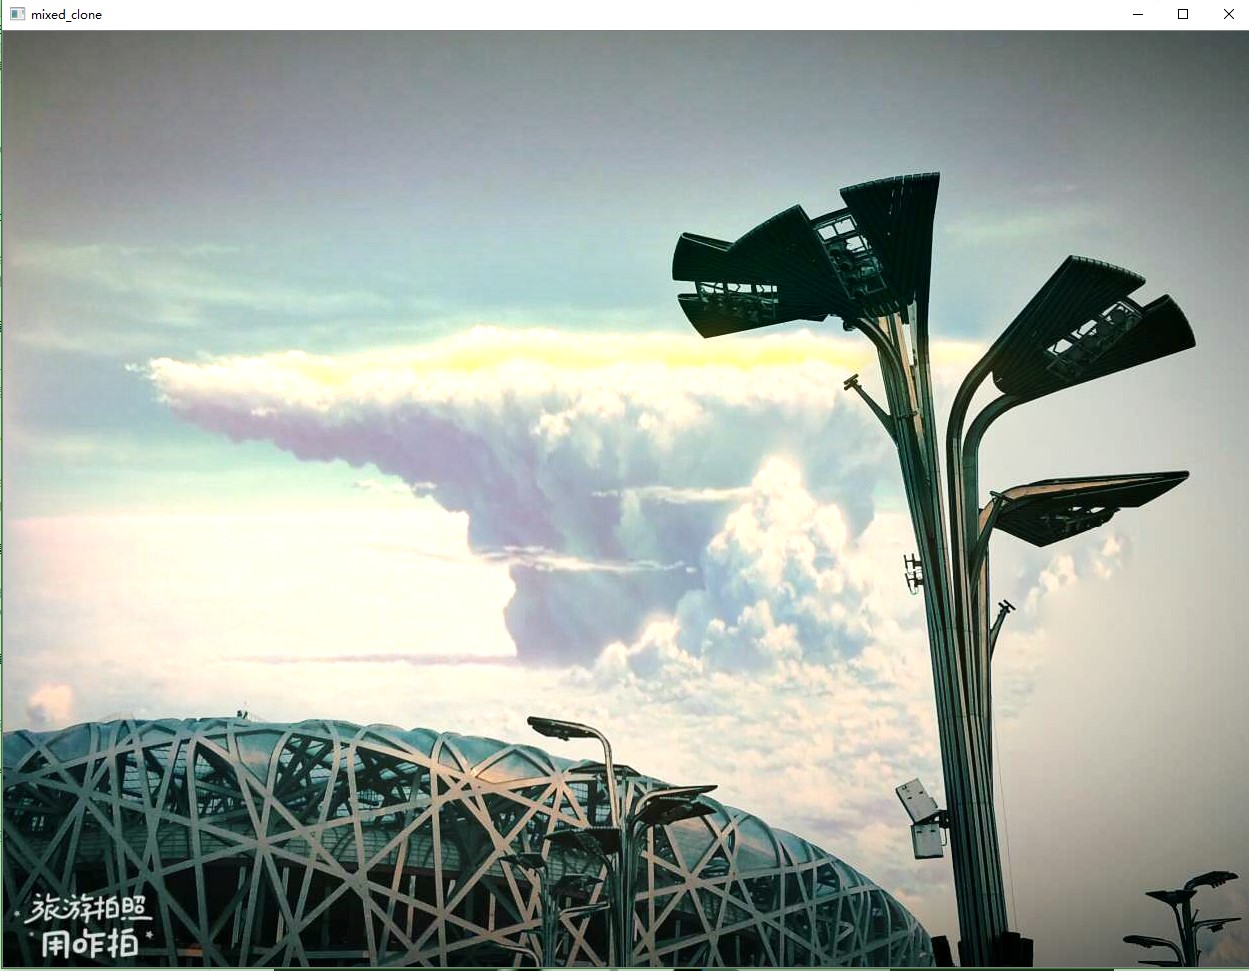
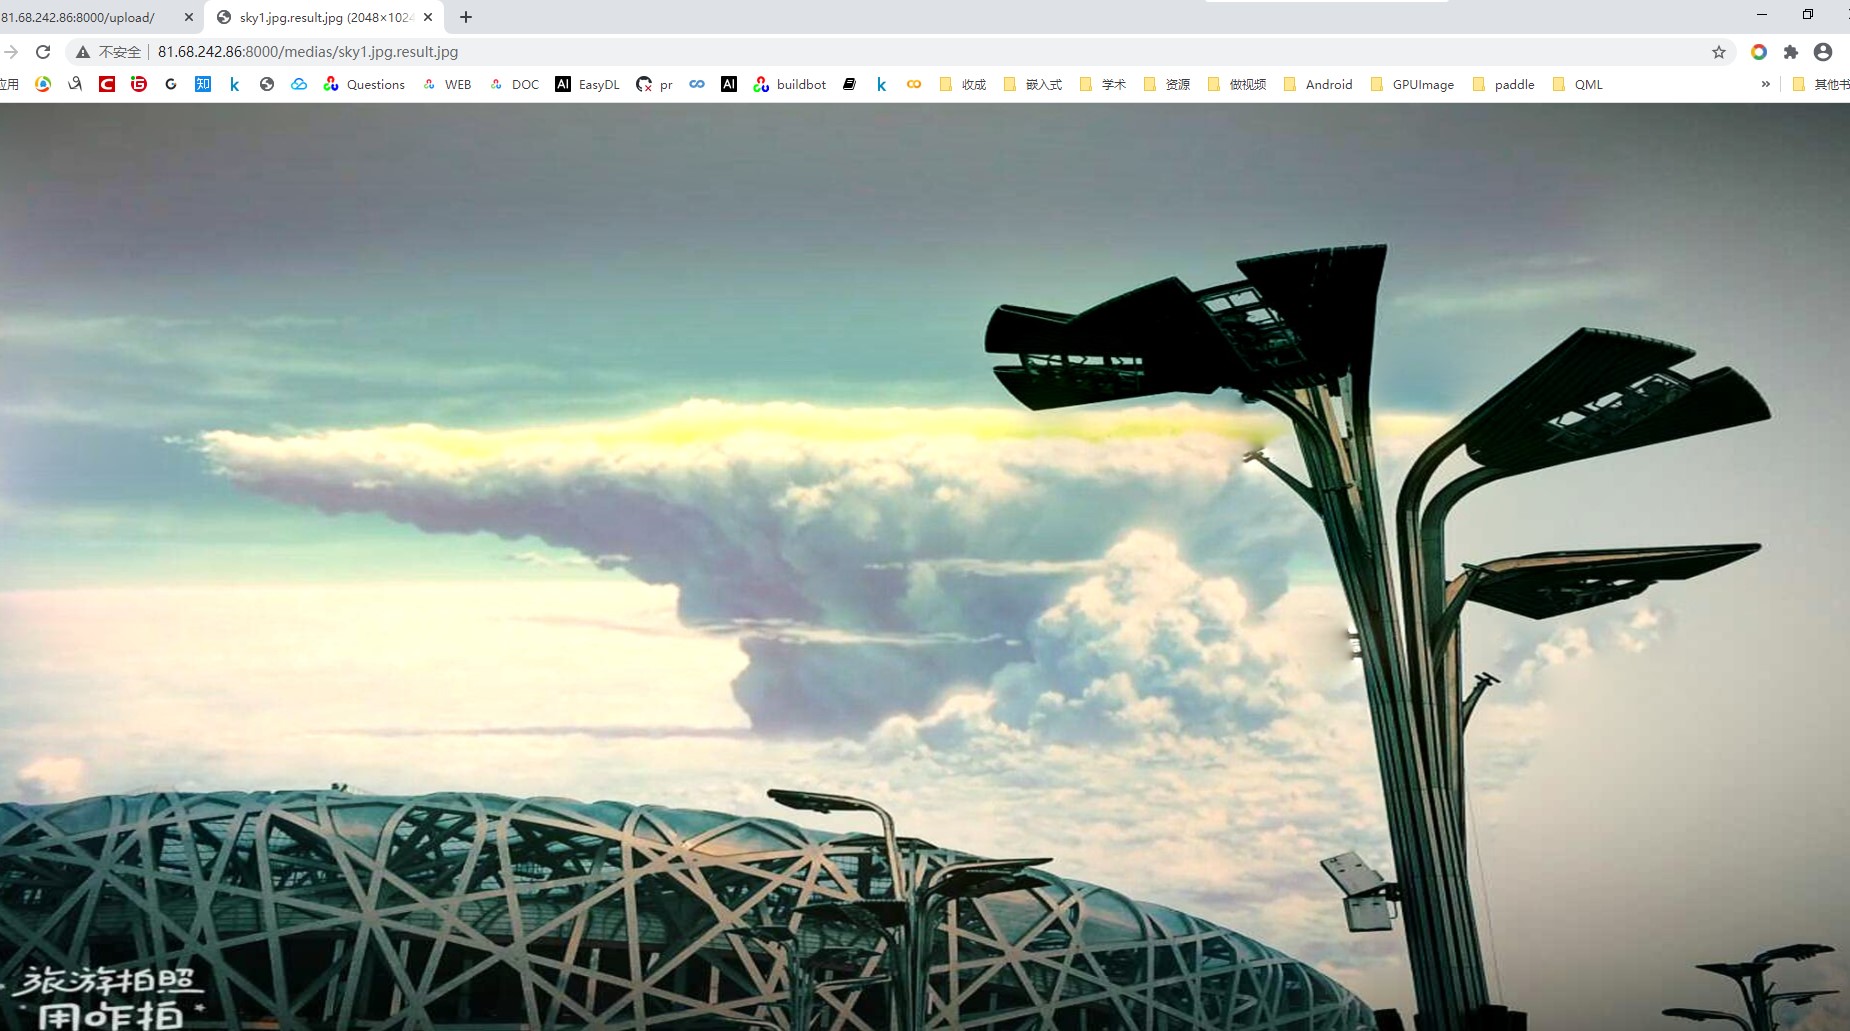
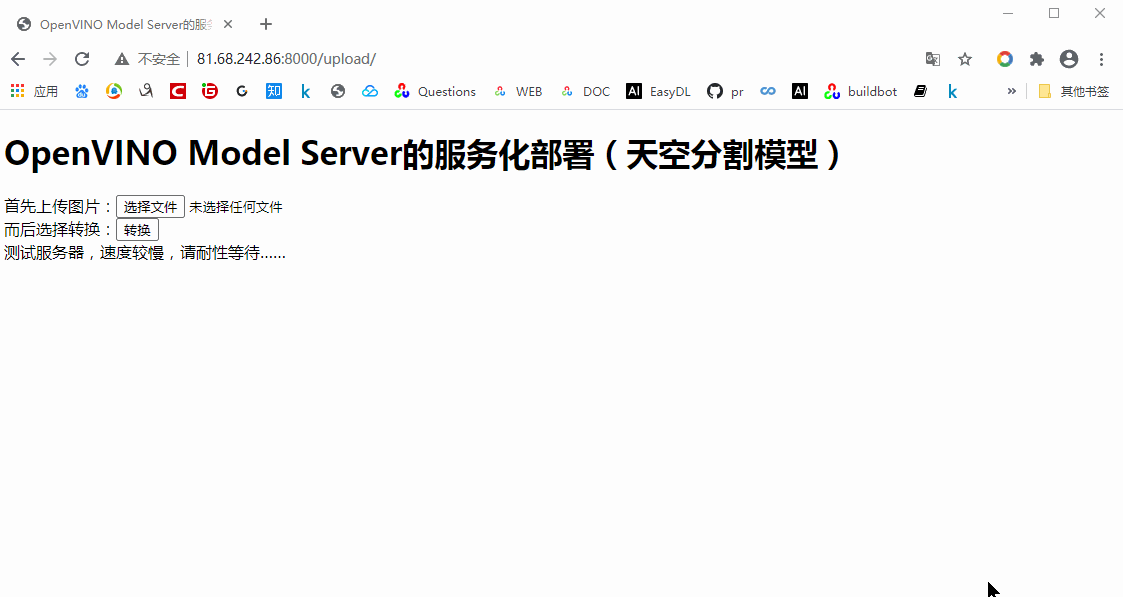
基于OpenVINO的“semantic-segmentation-adas”模型,能够较为精确的分割出天空;使用OpenCV的seamlessClone等函数,实现天空的无缝替换;基于Django实现网络化部署。三者结合,实现并部署“天空替换”模型。
目前服务已经上线:打开地址:http://81.68.242.86:8000/upload 就可以体验,手机端和PC端都可以。虽然界面比较简陋,速度也比较慢,但是基本可用。总的来说,openvino自带的这个模型本来是用于道路分割的,不是专用的,能够出一定效果,但是有些时候不精确;再加上后期处理,还有粗糙的地方。但本文最为重要的是证明工具链的可行,探索一条道路,这个是有价值的。
OpenVINO Model Server的服务化部署——step1(OpenVINO™ Model Server Quickstart)
https://www.cnblogs.com/jsxyhelu/p/13796161.html
OpenVINO Model Server的服务化部署——step2(天空分割模型)
https://www.cnblogs.com/jsxyhelu/p/13829051.html
OpenVINO Model Server的服务化部署——step3(django服务构建)
https://www.cnblogs.com/jsxyhelu/p/13878335.html
OpenVINO Model Server的服务化部署——step4(实现天空替换)
https://www.cnblogs.com/jsxyhelu/p/13894565.html
===========================================================================

前期已经基于OpenVINO搭建成功了天空识别模型,并且能够得到着色的结果图片,下一步就是继续来实现“天空替换”
一、天空替换重构
在OpenVINO着色结果基础上,重新编写c++和python版本的天空替换代码。
// 天空之子算法研究
// 2019年11月30日
#include "pch.h"
#include "cv_helper.h"
using namespace cv;
using namespace std;
int main()
{
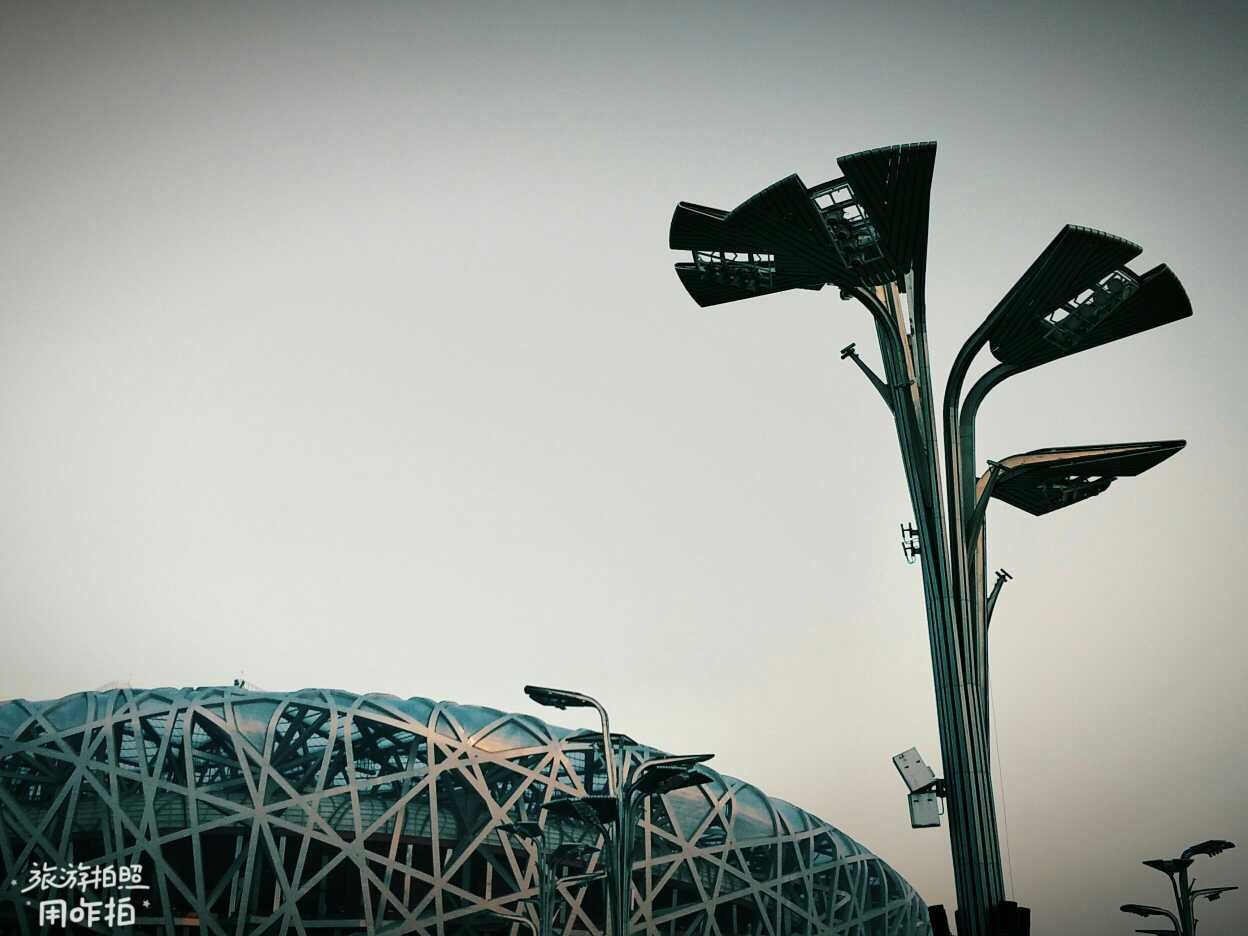
    Mat matSrc = imread("E:\未来项目\天空替换(天空分割)\测试图片\测试图片\sky14.jpg");
    Mat matCloud = imread("E:\未来项目\你的名字滤镜\算法实验\算法实验\sky1.png");
    Mat matMask = imread("E:\未来项目\天空替换(天空分割)\skyInBlue.png",0);
    matMask = (matMask == 124);
    //统一按照matSrc的大小进行缩放
    resize(matCloud, matCloud, matSrc.size());
    resize(matMask, matMask, matSrc.size());
    Point center = Point (matMask.cols / 2, matMask.rows / 2);
    //Mat normal_clone;
    //cartoonifyImage(matCloud, matCloud);
    Mat normal_clone;
    seamlessClone(matCloud, matSrc, matMask, center, normal_clone, MIXED_CLONE);
    cv::waitKey();
}
 
import cv2
import numpy as np
matSrc =cv2.imread('E:/template/sky14.jpg')
matCloud = cv2.imread('E:/template/cloud3.jpg')
matMask = cv2.imread('E:/template/skyInBlue.png',0)
rows,cols=matMask.shape
for i in range(rows):
    for j in range(cols):
        if (matMask[i,j]==124):
            matMask[i,j]=255
        else:
            matMask[i,j]=0


height,width=matSrc.shape[:2]
matCloud=cv2.resize(matCloud,(width,height),interpolation=cv2.INTER_CUBIC)
matMask=cv2.resize(matMask,(width,height),interpolation=cv2.INTER_CUBIC)

center = (width // 2, height // 2)
 
# Seamlessly clone src into dst and put the results in output
normal_clone = cv2.seamlessClone(matCloud, matSrc, matMask, center, cv2.NORMAL_CLONE)
mixed_clone = cv2.seamlessClone(matCloud, matSrc, matMask, center, cv2.MIXED_CLONE)


cv2.imshow('normal_clone',normal_clone)
cv2.imshow('mixed_clone',mixed_clone)
cv2.waitKey(0)
 
 
原图:
替换图:
这个已经实现了天空替换的结果,但是颜色还需要调亮一点。
二、相关的代码融合
修改现有view,主要是融入代码:
def process_detail(request,param1):
    options = [('grpc.max_receive_message_length'100 * 1024 * 1024),('grpc.max_send_message_length'100 * 1024 * 1024)]
    channel = grpc.insecure_channel("{}:{}".format('localhost',9000),options = options)
    stub = prediction_service_pb2_grpc.PredictionServiceStub(channel)
    batch_size = 1
    #TODO filepath
    output_str='filepath'
    imgfile = os.path.join('/root/mysites/goApp/images',param1)
    print(imgfile)
    img = load_image(imgfile)
    imgs = np.zeros((0,3,1024,2048), np.dtype('<f'))
    imgs = np.append(imgs, img, axis=0)

    request = predict_pb2.PredictRequest()
    request.model_spec.name = "semantic-segmentation-adas"
    print(" Request shape", img.shape)

    img = imgs[0:1]
    request.inputs["data"].CopyFrom(make_tensor_proto(img, shape=(img.shape)))  
    result = stub.Predict(request, 10.0)    # result includes a dictionary with all model outputs print(img.shape) 
    output = make_ndarray(result.outputs["4455.1"])

    for y in range(0,img.shape[0]):  # iterate over responses from all images in the batch
        img_out = output[y,:,:,:]
        print("image in batch item",y, ", output shape",img_out.shape)
        img_out = img_out.transpose(1,2,0)
        print("saving result to",os.path.join('/root/mysites/goApp/results',param1+'.result.jpg'))
        out_h, out_w,_ = img_out.shape
        print(out_h)
        print(out_w)
        for batch, data in enumerate(output):
            classes_map = np.zeros(shape=(out_h, out_w, 3), dtype=np.int)
            for i in range(out_h):
                for j in range(out_w):
                    if len(data[:, i, j]) == 1:
                        pixel_class = int(data[:, i, j])
                    else:
                        pixel_class = np.argmax(data[:, i, j])
                    classes_map[i, j, :] = classes_color_map[min(pixel_class, 20)]        
            classes_map = np.uint8(classes_map)
            matMask = cv2.cvtColor(classes_map,cv2.COLOR_BGR2GRAY)
            matMask = np.uint8(matMask)
            matCloud = cv2.imread('/root/mysites/goApp/images/cloud3.jpg')
            rows,cols=matMask.shape
            for i in range(rows):
                for j in range(cols):
                    if (matMask[i,j]==134):
                        matMask[i,j]=255
                    else:
                        matMask[i,j]=0
            matsrc = cv2.imread(imgfile)
            matsrc = cv2.resize(matsrc,(out_w,out_h),interpolation=cv2.INTER_CUBIC)
            matCloud=cv2.resize(matCloud,(out_w,out_h),interpolation=cv2.INTER_CUBIC)
            matMask=cv2.resize(matMask,(out_w,out_h),interpolation=cv2.INTER_CUBIC)

            center = (out_w // 2, out_h // 2)
 
            normal_clone = cv2.seamlessClone(matCloud,matsrc, matMask, center, cv2.NORMAL_CLONE)
            output_str = os.path.join('/root/mysites/goApp/results',param1+'.result.jpg')
            cv2.imwrite(output_str,normal_clone)
    return HttpResponse(output_str)
最后实现在浏览器中的调用时正常的。结果动图
三、目标导向
我最终想实现的是完全自可控的类似https://cloud.baidu.com/product/imageprocess/sky_seg的服务
 
包括网站服务,后端调用等。当然这个界面比较复杂,我自己的实现比较简单,如果能够找到 Django的模板的话,我也会来进行实现。


原文地址:https://www.cnblogs.com/jsxyhelu/p/13894565.html