1.环境搭建
1.1 引入依赖
<dependency>
    <groupId>io.springfox</groupId>
    <artifactId>springfox-swagger2</artifactId>
    <version>2.9.2</version>
</dependency>

<dependency>
    <groupId>io.springfox</groupId>
    <artifactId>springfox-swagger-ui</artifactId>
    <version>2.9.2</version>
</dependency>
1.2 创建Swagger2, 和SpringbootApplication同级
@Configurable
@EnableSwagger2
public class Swagger2 {
    //swagger2的配置文件,这里可以配置swagger2的一些基本的内容,比如扫描的包等等
    @Bean
    public Docket createRestApi() {
        return new Docket(DocumentationType.SWAGGER_2)
                .apiInfo(apiInfo())
                .select()
                //为当前包路径
                .apis(RequestHandlerSelectors.basePackage("com.test.springboot.controller"))
                .paths(PathSelectors.any())
                .build();
    }
    //构建 api文档的详细信息函数,注意这里的注解引用的是哪个
    private ApiInfo apiInfo() {
        return new ApiInfoBuilder()
                //页面标题
                .title("Spring Boot 测试使用 Swagger2 构建RESTful API")
                //创建人
                .contact(new Contact("SN", "#", ""))
                //版本号
                .version("1.0")
                //描述
                .description("API 描述")
                .build();
    }

}
访问: http://localhost/swagger-ui.html
2.@ApiModelProperty
@Data
public class User {
    @ApiModelProperty(value = "用户名")
    private String name;
    @ApiModelProperty(value = "密码", hidden = true)
    private String password;
    @ApiModelProperty(value = "年龄")
    private int age;
}
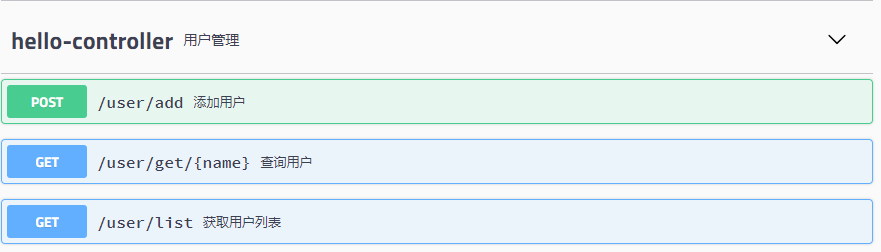
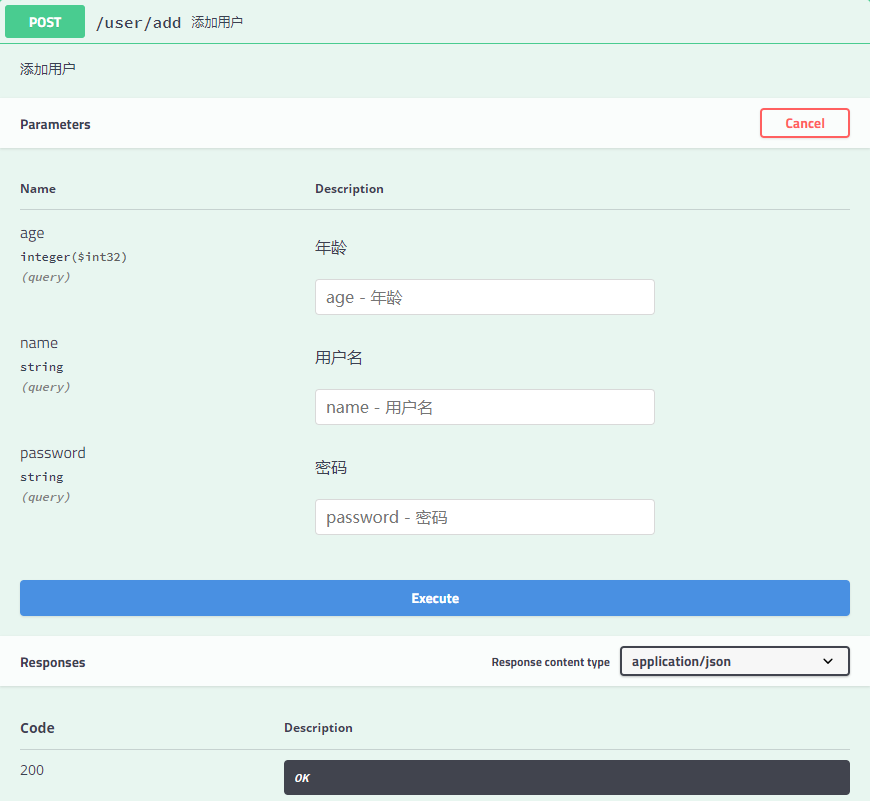
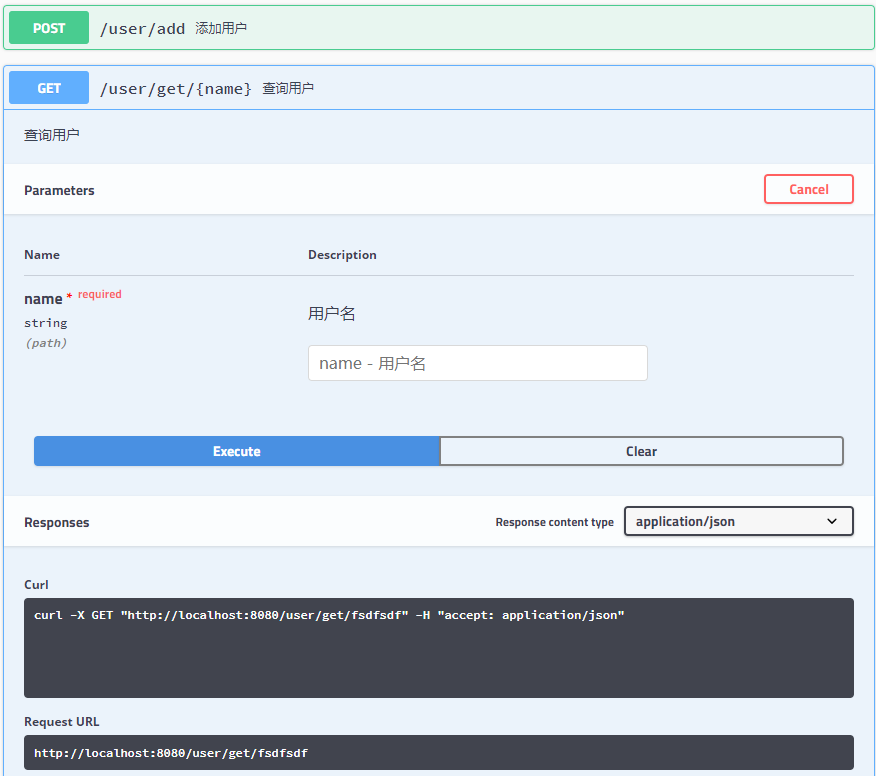
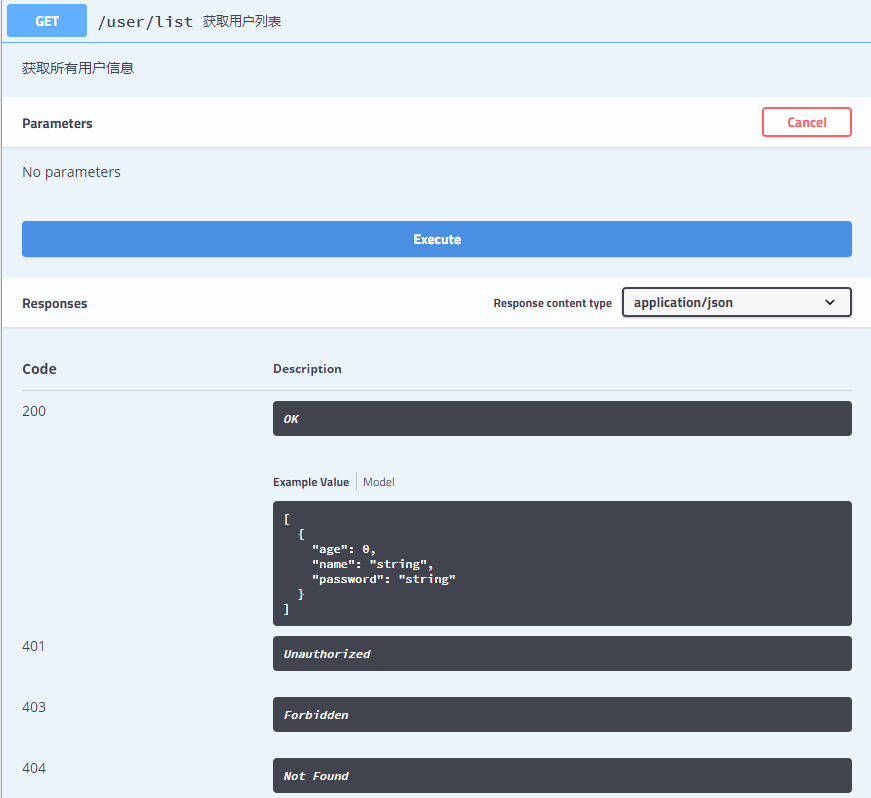
@RestController
@RequestMapping(value = "/user", produces = "application/json") //配置返回值 application/json
@Api(description = "用户管理")
public class HelloController {

    @ApiOperation(value = "获取用户列表", notes = "获取所有用户信息")
    @GetMapping("/list")
    public List<User> user(){
        List<User> list = new ArrayList<>();
        User user = new User();
        user.setName("sn");
        user.setAge(11);
        list.add(user);
        return list;
    }

    @ApiOperation(value = "添加用户", notes = "添加用户")
    @PostMapping("/add")
    public User create_user(User user){
        return  user;
    }

    @ApiOperation(value = "查询用户", notes = "查询用户")
    @GetMapping("/get/{name}")
    public User getUser(@ApiParam(value = "用户名", required = true)@PathVariable(value = "name") String name){
        User user = new User();
        user.setName(name);
        user.setAge(11);
        return user;
    }
}
效果如下:
3.Swagger2 基本使用
@Api: 描述类/接口的主要用途
@ApiOperation: 描述方法用途
@ApiImplicitParam: 描述方法的参数
@ApiImplicitParams: 描述方法的参数(Multi-Params)
@ApiParam:请求属性
@ApiIgnore: 忽略某类/方法/参数的文档
@ApiResponses:响应集配置
@ResponseHeader: 响应头设置
@ApiModelProperty:添加和操作模型属性的数据
错误
在使用SpringBoot中配置Swagger2的时候,出现
Unable to infer base url. This is common when using dynamic servlet registration or when the API is behind an API Gateway. The base url is the root of where all the swagger resources are served. For e.g. if the api is available at http://example.org/api/v2/api-docs then the base url is http://example.org/api/. Please enter the location manually:
是要在SpringBoot的启动Application前面加上 @EnableSwagger2注解