一、使用Maven的POM引入插件的形式:
这种方式只需在POM中引入Tomcat/Jetty的插件即可运行。参考:http://www.cnblogs.com/EasonJim/p/6687272.html
POM:

<project xmlns="http://maven.apache.org/POM/4.0.0" xmlns:xsi="http://www.w3.org/2001/XMLSchema-instance"
         xsi:schemaLocation="http://maven.apache.org/POM/4.0.0 http://maven.apache.org/maven-v4_0_0.xsd">
    <modelVersion>4.0.0</modelVersion>
    <groupId>com.jsoft.test</groupId>
    <artifactId>testweb</artifactId>
    <packaging>war</packaging>
    <version>1.0-SNAPSHOT</version>
    <name>testweb Maven Webapp</name>
    <url>http://maven.apache.org</url>
    <dependencies>
        <dependency>
            <groupId>junit</groupId>
            <artifactId>junit</artifactId>
            <version>3.8.1</version>
            <scope>test</scope>
        </dependency>
    </dependencies>
    <build>
        <finalName>testweb</finalName>
        <plugins>
            <!-- Config: Maven Tomcat Plugin -->
            <!-- http://mvnrepository.com/artifact/org.apache.tomcat.maven/tomcat7-maven-plugin -->
            <!-- http://tomcat.apache.org/maven-plugin-2.0/tomcat7-maven-plugin/plugin-info.html -->
            <plugin>
                <groupId>org.apache.tomcat.maven</groupId>
                <artifactId>tomcat7-maven-plugin</artifactId>
                <version>2.2</version>
                <!-- Config: contextPath and Port (Default:8080) -->
                <!--
                <configuration>
                    <path>/</path>
                    <port>8899</port>
                </configuration>
                 -->
            </plugin>
            <!-- Config: Maven Jetty Plugin -->
            <!-- http://mvnrepository.com/artifact/org.mortbay.jetty/jetty-maven-plugin -->
            <!-- http://www.eclipse.org/jetty/documentation/current/jetty-maven-plugin.html -->
            <plugin>
                <groupId>org.eclipse.jetty</groupId>
                <artifactId>jetty-maven-plugin</artifactId>
                <version>9.4.3.v20170317</version>
                <!-- Config: contextPath and Port (Default:8080) -->
                <!--
                <configuration>
                    <httpConnector>
                        <port>8899</port>
                    </httpConnector>
                    <webAppConfig>
                        <contextPath>/</contextPath>
                    </webAppConfig>
                </configuration>
                 -->
            </plugin>
        </plugins>
    </build>
</project>
运行:
【View】->【Tool Windows】->【Maven Projects】
然后选择列表的jetty:run,右键Run Maven Build。或者tomcat:run。
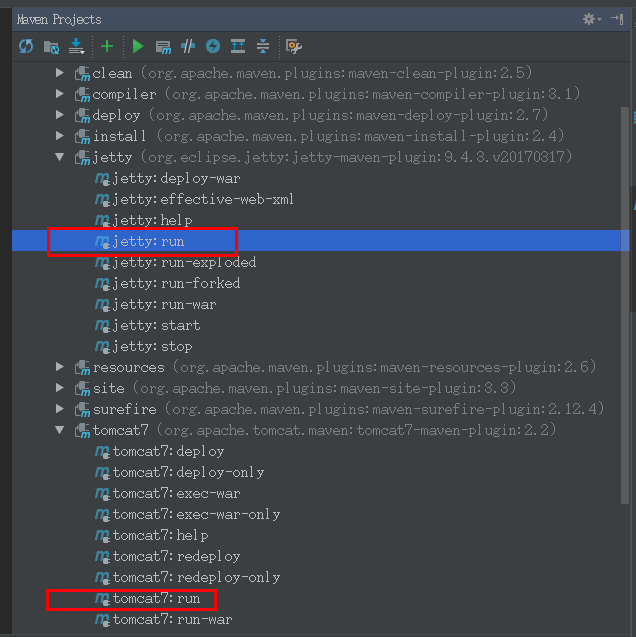
这些插件还有很多用法,要深入使用可以右键Edit...研究下去。
二、通过自带的的Tomcat插件运行:
前提:先安装好Tomcat,参考:(搜索本博客Tomcat安装)
配置:【Run】->【Edit Configurations】
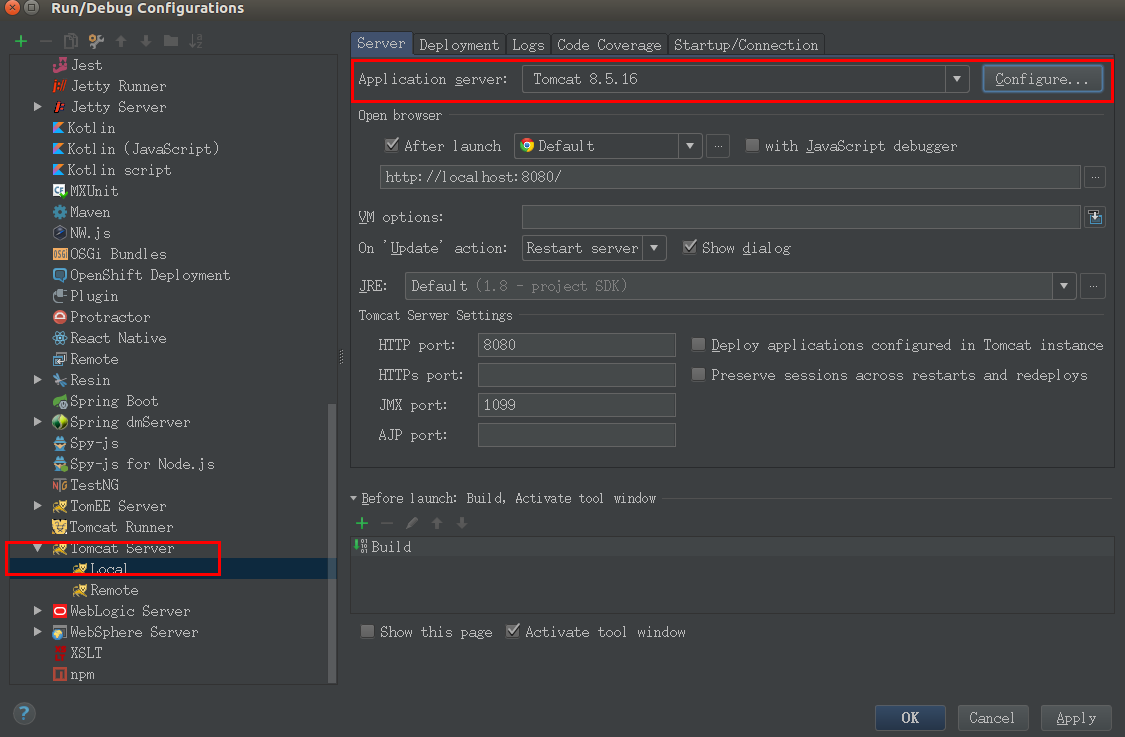
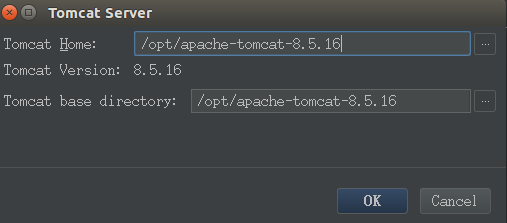
配置好本地的Tomcat,指向安装的路径:
接下来点击左上角的加号:【Tomcat Server】->【Local】
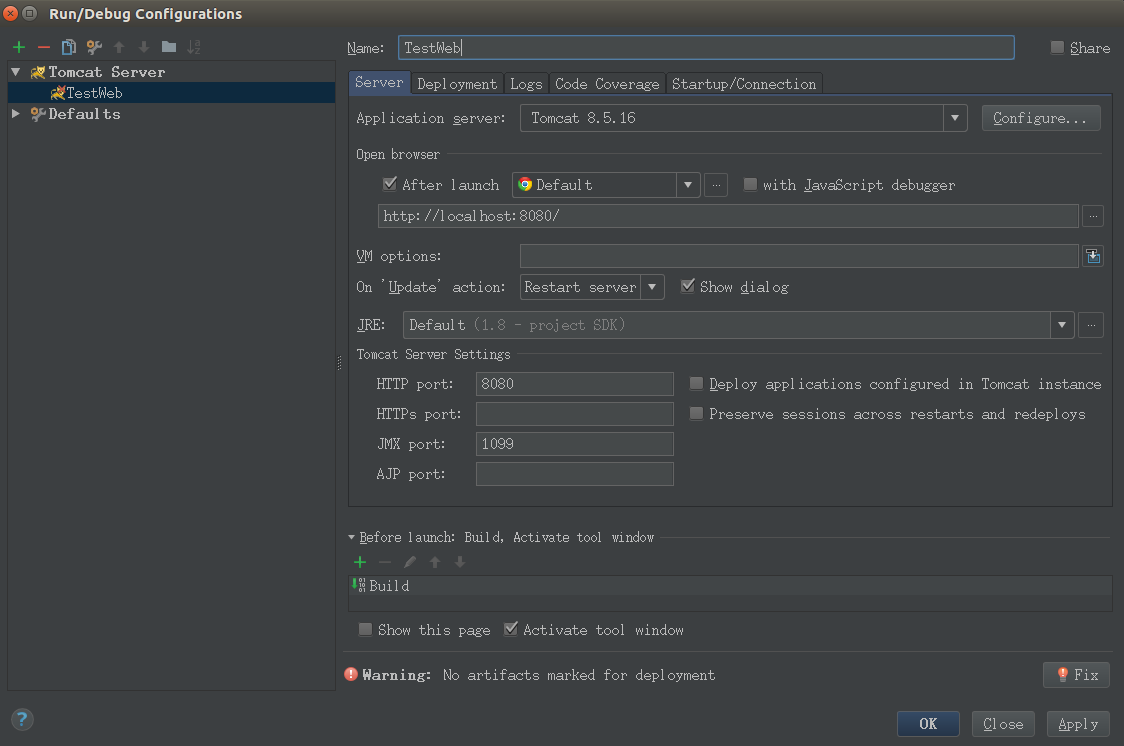
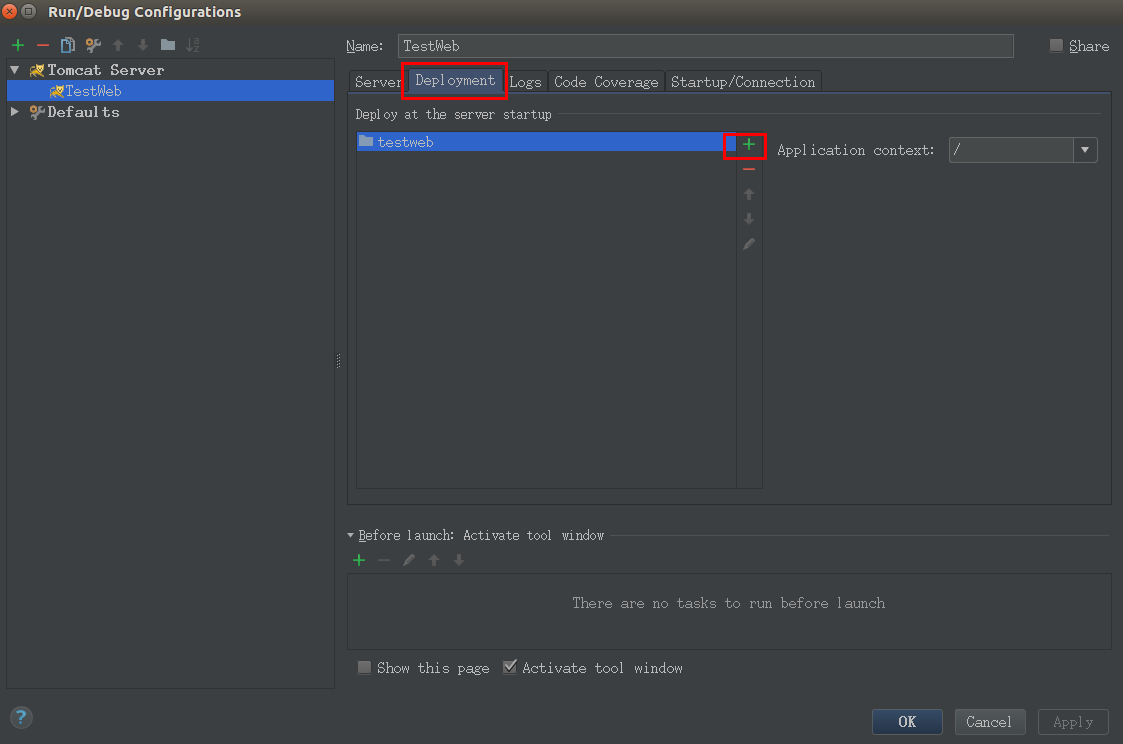
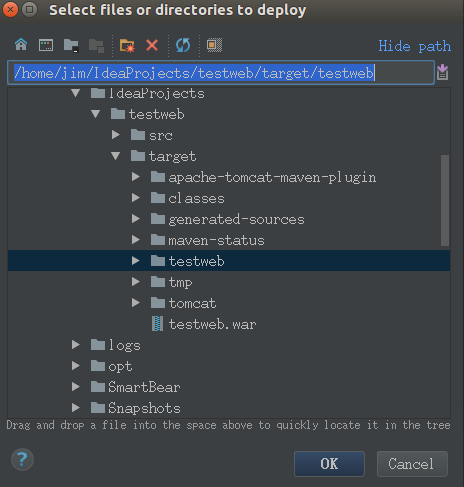
有两种选择,可以是war包或者指定编译后的target文件夹:
1、war包:

2、target文件夹
最后就是运行:【Run】->【Run ...】,然后选择上面创建的TestWeb即可。
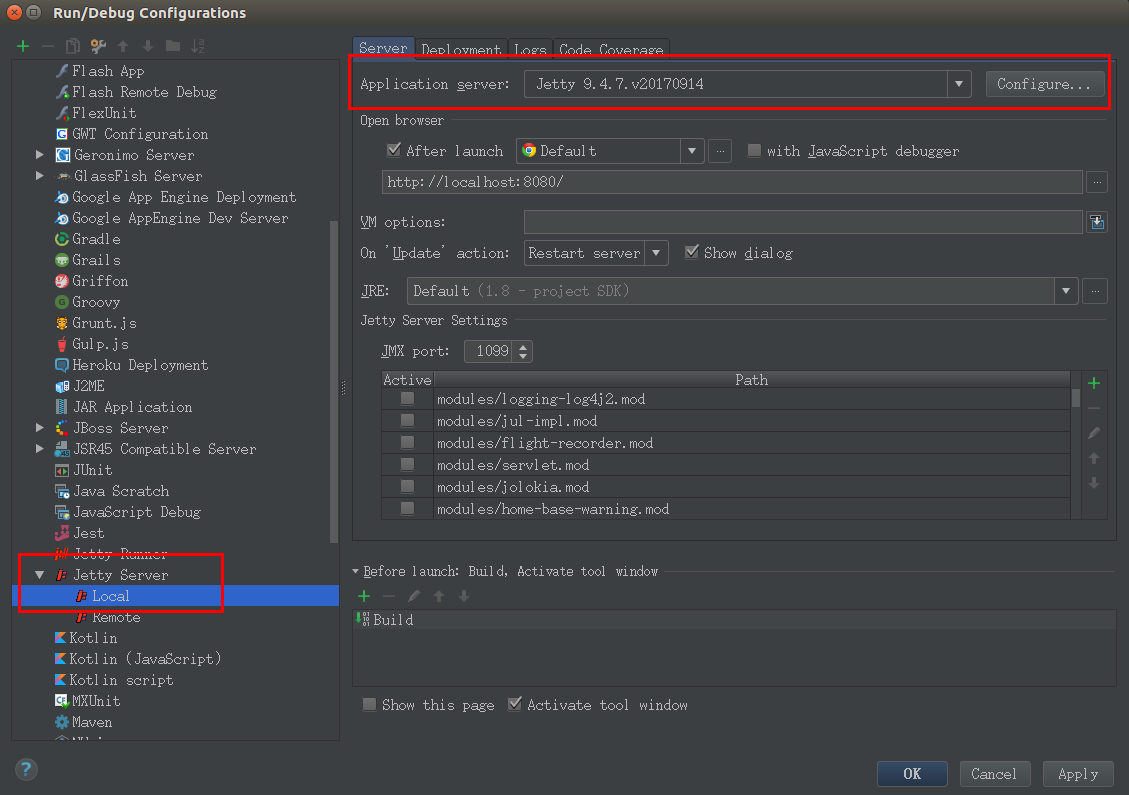
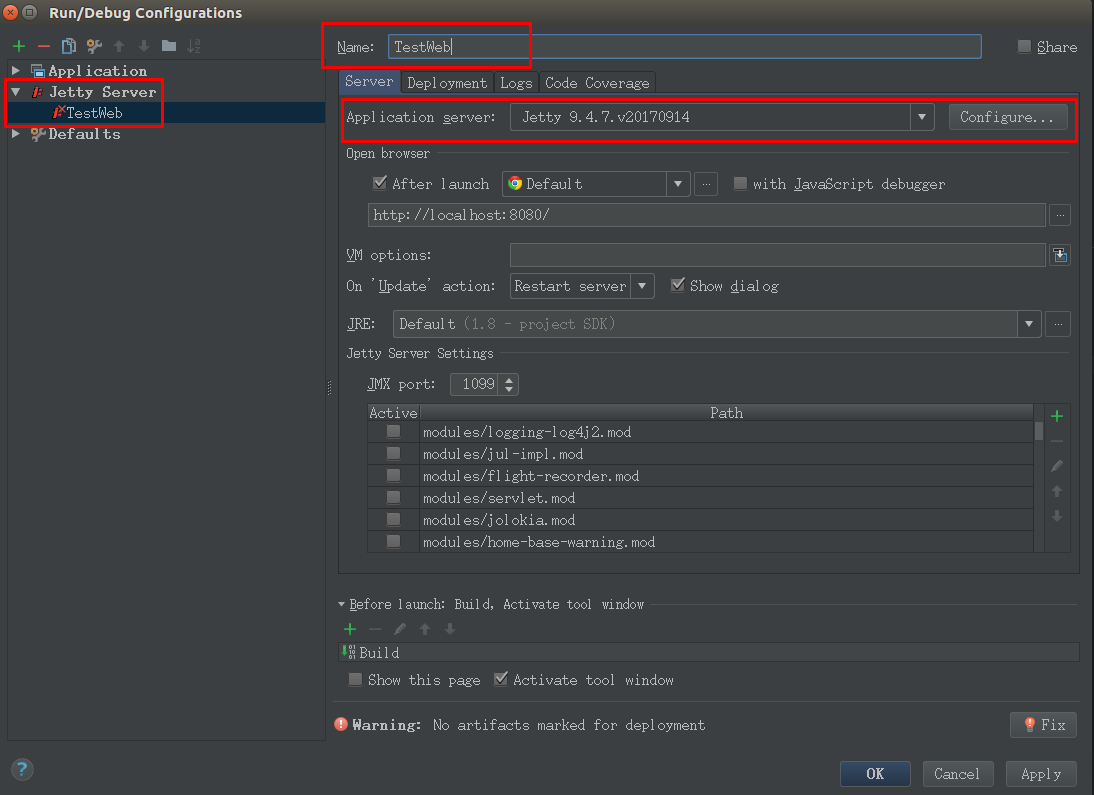
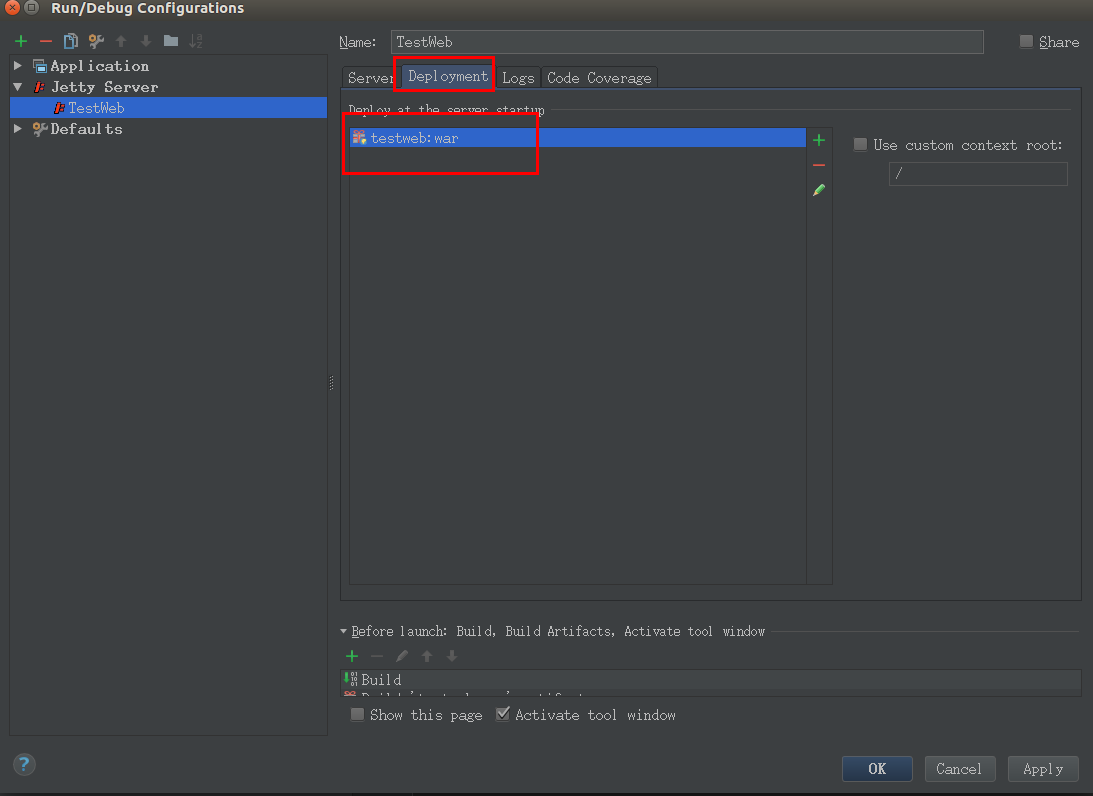
三、通过自带的Jetty插件:
原理和上面的基本一样:
1、配置Jetty本地Local
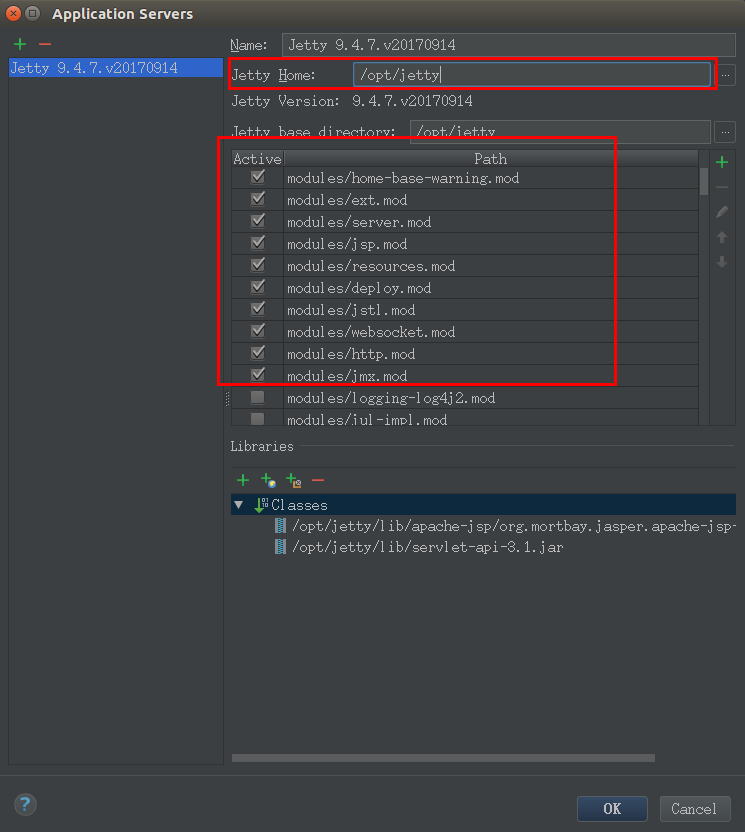
2、添加Jetty
3、Run
参考:
原文地址:https://www.cnblogs.com/EasonJim/p/7860700.html