在上一篇,项目基本实现了Spring Boot对Mybatis的整合。这篇文章使用Mockito对项目进行测试。
1、使用postmat测试;
2、编写单元测试类,使用mockito进行测试;
3、使用idea内置工具进行测试
运行AicodeBgmsApplication.java,启动项目后,可以采用如下方式对接口进行测试。
一、使用postman进行测试

如上图所示进行测试,其他接口请自行测试。

二、编写单元测试类进行测试
这里使用Idea辅助我们创建单元测试类
在要测试的类,如:UserInfoController.java类中点击右键,再点击Go To,再点击Test,如下图所示:

或者点击菜单上的Navigate,然后点击Test,选择Create New Test...
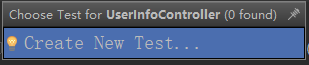
然后进入下面界面,如下:

确定要测试的类和包路径,把编写单元测试的方法都选中,然后点击OK。单元测试类即可生成。
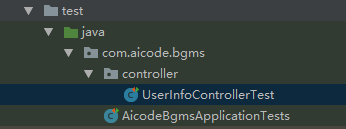
编写的测试代码如下:UserInfoControllerTest.java
- package com.aicode.bgms.controller;
-
- import org.junit.After;
- import org.junit.Before;
- import org.junit.Test;
- import org.junit.runner.RunWith;
- import org.springframework.beans.factory.annotation.Autowired;
- import org.springframework.boot.test.context.SpringBootTest;
- import org.springframework.test.context.junit4.SpringRunner;
- import org.springframework.test.web.servlet.MockMvc;
- import org.springframework.test.web.servlet.request.MockMvcRequestBuilders;
- import org.springframework.test.web.servlet.setup.MockMvcBuilders;
- import org.springframework.transaction.annotation.Transactional;
- import org.springframework.util.LinkedMultiValueMap;
- import org.springframework.util.MultiValueMap;
- import org.springframework.web.context.WebApplicationContext;
-
- import static org.junit.Assert.*;
-
- @RunWith(SpringRunner.class)
- @Transactional
- @SpringBootTest
- public class UserInfoControllerTest {
-
- private MockMvc mockMvc;
-
- @Autowired
- private WebApplicationContext wac;
-
- @Before
- public void setUp() throws Exception {
- this.mockMvc = MockMvcBuilders.webAppContextSetup(this.wac).build();
- }
-
- @After
- public void tearDown() throws Exception {
- }
-
- @Test
- public void list() throws Exception {
- String mvcResult= mockMvc.perform(MockMvcRequestBuilders.get("/list"))
- .andReturn().getResponse().getContentAsString();
- System.out.println("Result === "+mvcResult);
- }
-
- @Test
- public void add() throws Exception {
- final MultiValueMap<String, String> params = new LinkedMultiValueMap<>();
- params.add("userName", "test2");
- params.add("password", "pass1234");
- params.add("age", "12");
- params.add("email", "test@aicode.com");
- String mvcResult= mockMvc.perform(MockMvcRequestBuilders.post("/add")
- .params(params)).andReturn().getResponse().getContentAsString();
- System.out.println("Result === "+mvcResult);
- }
-
- @Test
- public void get() throws Exception {
- String mvcResult= mockMvc.perform(MockMvcRequestBuilders.get("/get/1"))
- .andReturn().getResponse().getContentAsString();
- System.out.println("Result === "+mvcResult);
- }
-
- @Test
- public void modify() throws Exception {
- final MultiValueMap<String, String> params = new LinkedMultiValueMap<>();
- params.add("id", "1");
- params.add("userName", "test1");
- params.add("password", "123qwe");
- params.add("age", "24");
- params.add("email", "test@aicode.com");
- String mvcResult= mockMvc.perform(MockMvcRequestBuilders.put("/edit")
- .params(params)).andReturn().getResponse().getContentAsString();
- System.out.println("Result === "+mvcResult);
- }
-
- @Test
- public void del() throws Exception {
- mockMvc.perform(MockMvcRequestBuilders.delete("/del/2"))
- .andReturn();
- String mvcResult= mockMvc.perform(MockMvcRequestBuilders.get("/list"))
- .andReturn().getResponse().getContentAsString();
- System.out.println("Result === "+mvcResult);
- }
-
- }
- @SpringBootTest —— SpringBoot 自 1.4.0 版本开始引入的一个用于测试的注解;
- @RunWith(SpringRunner.class) ——代表运行一个 Spring 容器;
- @Transactional——可以使单元测试进行事务回滚,以保证数据库表中没有因测试造成的垃圾数据,再就是保证单元测试可以反复执行;
- @Before—— 代表在测试启动时候需要提前加载的内容,这里是提前加载 MVC 环境。
执行UserInfoControllerTest.java,然后下面是执行单元测试的结果
关于MockMvc进行单元测试如果不太清楚,可以先百度一下做一下基本了解。

可以点击每个测试方法,查看具体的测试结果

这样,我们使用MockMvc就完成了对Controller层的测试。Service层和Dao层也可以使用MockMvc进行测试,这里就不再进行说明,请读者自行尝试。
三、使用Idea中的工具进行测试
运行AicodeBgmsApplication.java,启动项目。
点击菜单中的Tools——〉Test Restful Web Service,然后在窗口输入参数进行测试。
添加:
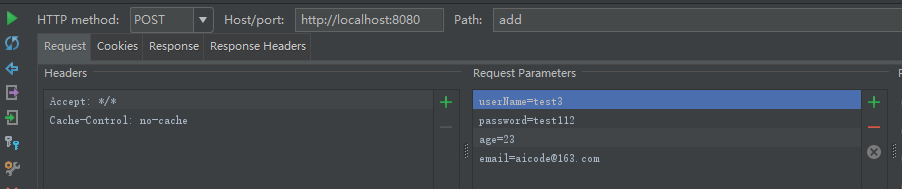
点击左侧的绿色右向三角标运行,然后可以看到返回结果。
查询:

点击左侧的绿色右向三角标运行,然后可以看到返回结果。
测试时,请求HTTP method的匹配。