境:
2台安装了centos7-minimal的主机
ip地址:
10.132.226.103/24 (controller)
10.132.226.104/24 (compute1)
1.配置主机名。
修改/etc/hostname文件,将里面的内容删除并分别增加controller和compute1保存并重启主机
2.配置名称解析:
修改两个主机中的/etc/hosts文件,并增加以下内容:
#controller
10.132.226.103        controller
#compute1
10.132.226.104        compute1
3.配置网络时间协议(NTP)
1)控制节点安装chrony:
1 [root@controller ~]# yum install -y chrony
2)控制节点配置chrony:修改/etc/chrony.conf文件
1 #~~~~~~~~~~添加allow~~~~~~~~~~#
2 # Allow NTP client access from local network.
3 #allow 192.168.0.0/16
4 allow 10.132.226.104
3)重启chrony服务:
1 [root@controller ~]# systemctl enable chronyd.service
2 [root@controller ~]# systemctl start chronyd.service
4)计算节点安装chrony:
1 [root@compute1 ~]# yum install -y install
5)配置计算节点:修改/etc/chrony.conf文件
[root@compute1 ~]# vim /etc/chrony.conf

#~~~~~~~~注释其他远程时间同步节点,增加controller节点~~~~~~~#
# Use public servers from the pool.ntp.org project.
# Please consider joining the pool (http://www.pool.ntp.org/join.html).
server controller iburst
#server 1.centos.pool.ntp.org iburst
#server 2.centos.pool.ntp.org iburst
#server 3.centos.pool.ntp.org iburst
4.安装OpenStack包(控制节点与计算节点都需要安装)
1).更改源,改为阿里云的源,(否则可能会出错,更换源之后其实也非常慢)
注意:更换阿里云的源在之后的安装中会出现问题,不建议更换。
2)启用OpenStack存储库
1 # yum install centos-release-openstack-queens
修改:启用OpenStack存储库后可以修改CentOS-OpenStack-queens.repo文件以起到更换源的作用
1 [centos-openstack-queens]
2 name=CentOS-7 - OpenStack queens
3 #baseurl=http://mirror.centos.org/centos/7/cloud/$basearch/openstack-queens/
4 baseurl=http://mirrors.163.com/centos/7.5.1804/cloud/x86_64/openstack-queens/   ===>网易的源
3)升级所有节点上的包
# yum upgrade
4)安装OpenStack客户端,以及OpenStack-selinux软件包(以自动管理OpenStack服务的安全策略)
1 # yum install python-openstackclient
2 # yum install openstack-selinux
5.SQL数据库安装(mariadb)(仅控制节点)
1)安装:
1 # yum install mariadb mariadb-server python2-PyMySQL
2)创建和编辑/etc/my.cnf.d/openstack.cnf文件
创建一个[mysqld]部分,并将bind-address 密钥设置为控制器节点的管理IP地址,以允许其他节点通过管理网络进行访问。设置其他键以启用有用选项和UTF-8字符集:
1 [mysqld]
2 bind-address = 10.132.226.103
3
4 default-storage-engine = innodb
5 innodb_file_per_table = on
6 max_connections = 4096
7 collation-server = utf8_general_ci
8 character-set-server = utf8
3)启动mariadb服务并设置开机自启动:
1 # systemctl enable mariadb.service
2 # systemctl start mariadb.service
4)运行mysql_secure_installation脚本来进行数据库初始化设置
1 # mysql_secure_installation
添加:不知道是否要进行其他节点对控制节点数据库的远程访问,这里先增加一个可以远程登录的root用户:
1 MariaDB [(none)]> grant all privileges on *.* to 'root'@'%' identified by '***';
如果不加identified by 会出现没有匹配的行的问题。
6.消息队列安装和配置(仅在控制节点安装)
1)安装并启动
1 [root@controller ~]# yum install -y rabbitmq-server
2 [root@controller ~]# systemctl enable rabbitmq-server.service
3 Created symlink from /etc/systemd/system/multi-user.target.wants/rabbitmq-server.service to /usr/lib/systemd/system/rabbitmq-server.service.
4 [root@controller ~]# systemctl start rabbitmq-server.service
2)添加OpenStack用户
1 [root@controller ~]# rabbitmqctl add_user openstack RABBIT_PASS
2 Creating user "openstack" ...
密码:RabbitMQ消息队列OpenStack用户的密码为RABBIT_PASS
3)允许用户进行配置,写入和读取访问OpenStack
1 [root@controller ~]# rabbitmqctl set_permissions openstack ".*" ".*" ".*"
2 Setting permissions for user "openstack" in vhost "/" ...
7.安装配置Memcached(控制节点)
1)安装
1 [root@controller ~]# yum install -y memcached python-memcached
2)编辑/etc/sysconfig/memcached文件并完成以下操作:配置服务以使用控制节点的管理ip地址(10.132.226.103),这是为了通过管理网络启用其他节点的访问:
1 OPTIONS="-l 127.0.0.1,::1,controller,compute1" ===>修改此行
注意:安装文档只添加了controller,我自作主张添加了compute1,如有问题排查此处!!!
3)设置开机自启并启动memcached
1 [root@controller ~]# systemctl enable memcached.service
2 Created symlink from /etc/systemd/system/multi-user.target.wants/memcached.service to /usr/lib/systemd/system/memcached.service.
3 [root@controller ~]# systemctl start memcached.service
8.Etcd的安装配置 (控制节点):
OpenStack服务可以使用Etcd,一种分布式可靠的键值存储,用于分布式密钥锁定,存储配置,跟踪服务生存和其他场景。
1)安装
1 [root@controller ~]# yum install etcd
2)编辑/etc/etcd/etcd.conf文件修改以下内容
 1 #[Member]
 2 ETCD_DATA_DIR="/var/lib/etcd/default.etcd"
 3 ETCD_LISTEN_PEER_URLS="http://10.132.226.103:2380"
 4 ETCD_LISTEN_CLIENT_URLS="http://10.132.226.103:2379"
 5 ETCD_NAME="controller"
 6 #[Clustering]
 7 ETCD_INITIAL_ADVERTISE_PEER_URLS="http://10.132.226.103:2380"
 8 ETCD_ADVERTISE_CLIENT_URLS="http://10.132.226.103:2379"
 9 ETCD_INITIAL_CLUSTER="controller=http://10.132.226.103:2380"
10 ETCD_INITIAL_CLUSTER_TOKEN="etcd-cluster-01"
11 ETCD_INITIAL_CLUSTER_STATE="new"
3)启动etcd服务并设置开机启动
1 [root@controller etcd]# systemctl enable etcd
2 Created symlink from /etc/systemd/system/multi-user.target.wants/etcd.service to /usr/lib/systemd/system/etcd.service.
3 [root@controller etcd]# systemctl start etcd
9.keystone安装配置(控制节点)
1)数据库设置,创建keystone数据库,并赋予适当权限
MariaDB [(none)]> create database keystone;
Query OK, 1 row affected (0.00 sec)

MariaDB [(none)]> GRANT ALL PRIVILEGES ON keystone.* TO 'keystone'@'localhost'  IDENTIFIED BY 'KEYSTONE_DBPASS';
Query OK, 0 rows affected (0.00 sec)

MariaDB [(none)]> GRANT ALL PRIVILEGES ON keystone.* TO 'keystone'@'controller'  IDENTIFIED BY 'KEYSTONE_DBPASS';
Query OK, 0 rows affected (0.00 sec)

MariaDB [(none)]> GRANT ALL PRIVILEGES ON keystone.* TO 'keystone'@'%' IDENTIFIED BY 'KEYSTONE_DBPASS';
Query OK, 0 rows affected (0.00 sec)
注意:keystone数据库的密码为:KEYSTONE_DBPASS
2)安装和配置组件
1 [root@controller etcd]# yum install openstack-keystone httpd mod_wsgi
3)编辑/etc/keystone/keystone.conf文件
(1)在[database]部分中配置数据库访问
1 connection = mysql+pymysql://keystone:KEYSTONE_DBPASS@controller/keystone
注意:注释掉或删除其他connection选项
(2)在[token]部分中,配置fernet令牌提供程序:
1 [token]
2 #~~~~~~省略若干~~~~~~#
3 provider = fernet
4)填充identity服务数据库:
1 [root@controller etcd]# su -s /bin/sh -c "keystone-manage db_sync" keystone
注意:等待完成可以查看一下keystone数据库中是否有表生产,若没有则有可能出现配置出错的问题。可以查看一下日志信息/var/log/keystone/keystone.conf
5)初始化Fernet秘钥存储库:
1 [root@controller etcd]# keystone-manage fernet_setup --keystone-user keystone --keystone-group keystone
2 [root@controller etcd]# keystone-manage credential_setup --keystone-user keystone --keystone-group keystone
6)引导身份服务:
[root@controller etcd]# keystone-manage bootstrap --bootstrap-password ADMIN_PASS
>   --bootstrap-admin-url http://controller:5000/v3/
>   --bootstrap-internal-url http://controller:5000/v3/
>   --bootstrap-public-url http://controller:5000/v3/
>   --bootstrap-region-id RegionOne
注意:此处admin用户的密码为ADMIN_PASS
7)配置Apache HTTP服务器
(1)编辑/etc/httpd/conf/httpd.conf文件并配置ServerName应用控制节点选项
1 ServerName controller
(2)创建/user/share/keystone/wsgi-keystone.conf文件的链接:
1 [root@controller ~]# ln -s /usr/share/keystone/wsgi-keystone.conf /etc/httpd/conf.d/
(3)启动Apache HTTP
1 [root@controller ~]# systemctl enable httpd.service
2 Created symlink from /etc/systemd/system/multi-user.target.wants/httpd.service to /usr/lib/systemd/system/httpd.service.
3 [root@controller ~]# systemctl start httpd.service
8)配置管理用户
1 [root@controller ~]# export OS_USERNAME=admin
2 [root@controller ~]# export OS_PASSWORD=ADMIN_PASS
3 [root@controller ~]# export OS_PROJECT_NAME=admin
4 [root@controller ~]# export OS_USER_DOMAIN_NAME=Default
5 [root@controller ~]# export OS_PROJECT_DOMAIN_NAME=Default
6 [root@controller ~]# export OS_AUTH_URL=http://controller:35357/v3
7 [root@controller ~]# export OS_IDENTITY_API_VERSION=3
注意:ADMIN_PASS为keystone服务admin用户密码
10.创建域,项目,用户和角色(控制节点)
Identity服务为每个OpenStack服务提供身份验证服务。身份验证服务使用域,项目,用户和角色的组合。
1)虽然本指南中的keystone-manage bootstrap步骤中已存在“默认”域,但创建新域的正式方法是:
[root@controller fernet-keys]# openstack domain create --description "An Example Domain" example
+-------------+----------------------------------+
| Field       | Value                            |
+-------------+----------------------------------+
| description | An Example Domain                |
| enabled     | True                             |
| id          | 59a70c50c06e478cb08916c7ef070f56 |
| name        | example                          |
| tags        | []                               |
+-------------+----------------------------------+
2)创建service项目:
[root@controller keystone]#  openstack project create --domain default --description "Service Project" service
+-------------+----------------------------------+
| Field       | Value                            |
+-------------+----------------------------------+
| description | Service Project                  |
| domain_id   | default                          |
| enabled     | True                             |
| id          | 873afbbb1c8d4282b92e987bc5d3027c |
| is_domain   | False                            |
| name        | service                          |
| parent_id   | default                          |
| tags        | []                               |
+-------------+----------------------------------+
3)创建demo项目和用户:常规(非管理员)任务应使用非特权项目和用户
(1)创建demo项目:
[root@controller keystone]# openstack project create --domain default --description "Demo Project" demo
+-------------+----------------------------------+
| Field       | Value                            |
+-------------+----------------------------------+
| description | Demo Project                     |
| domain_id   | default                          |
| enabled     | True                             |
| id          | b9d32240eedf44568aef4d6cfa5ee086 |
| is_domain   | False                            |
| name        | demo                             |
| parent_id   | default                          |
| tags        | []                               |
+-------------+----------------------------------+
注意:为此项目(demo)创建其他用户时不需要重复创建此(demo)项目
(2)创建demo用户:
[root@controller keystone]# openstack user create --domain default --password-prompt demo
User Password:   ===>密码为demo123
Repeat User Password:
+---------------------+----------------------------------+
| Field               | Value                            |
+---------------------+----------------------------------+
| domain_id           | default                          |
| enabled             | True                             |
| id                  | b59804bf67b74986ae3b56190be59d45 |
| name                | demo                             |
| options             | {}                               |
| password_expires_at | None                             |
+---------------------+----------------------------------+
(3)创建用户角色(role):
[root@controller keystone]# openstack role create user
+-----------+----------------------------------+
| Field     | Value                            |
+-----------+----------------------------------+
| domain_id | None                             |
| id        | 6c7aced4ae9143cbab48b122470b4e3a |
| name      | user                             |
+-----------+----------------------------------+
(4)将用户角色(role)添加到demo项目和用户:
[root@controller keystone]# openstack role add --project demo --user demo user
11.验证操作(控制节点):
在安装其他服务之前验证Identity服务操作
1)取消设置临时变量OS_AUTH_URL和OS_PASSWORD环境变量:
[root@controller keystone]# unset OS_AUTH_URL OS_PASSWORD
2)作为admin用户,请求身份验证令牌:
[root@controller keystone]# openstack --os-auth-url http://controller:35357/v3 --os-project-domain-name Default --os-user-domain-name Default --os-project-name admin --os-username admin token issue
Password:   ===>此处为密码为ADMIN_PASS

+------------+----------------------------------------------------------------+
| Field      | Value                                                          |
+------------+----------------------------------------------------------------+
| expires    | 2018-07-25T15:11:22+0000                                       |
| id         | gAAAAABbWIUKJK3_S_FDcnJ1OdedaHbbeRX-ty8Ey1l93-RFOxT0pD9dn_LCyY |
|            | RVPCB6MoHOXFfaPx6ud7HDowDTzSOQDI5CPaMj6Zh6Utu6uNjPEZk9yluFIbZH |
|            | gKDRVO5fTxEcV2hAtSCLtW8HNq9xQ0Qij0s-o5VSW-MwmzI_w35abMLiTX4    |
| project_id | a6fa6483ff3d4fa0b08c63a4c42ac82e                               |
| user_id    | 113a25c4fa5144d5870062af8a8b72b5                               |
+------------+----------------------------------------------------------------+
注意:keystone的admin用户的密码为ADMIN_PASS
3)作为demo用户,请求身份验证令牌:
[root@controller keystone]# openstack --os-auth-url http://controller:5000/v3 --os-project-domain-name Default --os-user-domain-name Default --os-project-name demo --os-username demo token issue
Password:

+------------+----------------------------------------------------------------+
| Field      | Value                                                          |
+------------+----------------------------------------------------------------+
| expires    | 2018-07-25T15:20:58+0000                                       |
| id         | gAAAAABbWIdKca9AKlNiolngK-0dBTliDXSYAiT0HtLFSNwvMBJ4UaphfqzP33 |
|            | nOw_nyO0JWInl40NYgipX_tcS72lP9wWvUnd9bF3Gz9lCFjjqfzMAwXOCfJNRn |
|            | GxvqJ_Wit_0Jxo77XpeZ2xIGTfcarJATGVDpnxOSwLzZTsP1J21p95pT_Ng    |
| project_id | b9d32240eedf44568aef4d6cfa5ee086                               |
| user_id    | b59804bf67b74986ae3b56190be59d45                               |
+------------+----------------------------------------------------------------+
12.创建脚本(控制节点)
前面的部分使用环境变量和命令选项的组合来通过openstack客户端与Identity服务进行交互 。为了提高客户端操作的效率,OpenStack支持简单的客户端环境脚本,也称为OpenRC文件。这些脚本通常包含所有客户端的常用选项,但也支持唯一选项。
1)创建并编辑admin-openrc文件并写入以下内容:
export OS_PROJECT_DOMAIN_NAME=Default
export OS_USER_DOMAIN_NAME=Default
export OS_PROJECT_NAME=admin
export OS_USERNAME=admin
export OS_PASSWORD=ADMIN_PASS
export OS_AUTH_URL=http://controller:5000/v3
export OS_IDENTITY_API_VERSION=3
export OS_IMAGE_API_VERSION=2
2)创建并编辑demo-openrc文件并写入以下内容:
export OS_PROJECT_DOMAIN_NAME=Default
export OS_USER_DOMAIN_NAME=Default
export OS_PROJECT_NAME=demo
export OS_USERNAME=demo
export OS_PASSWORD=DEMO_PASS
export OS_AUTH_URL=http://controller:5000/v3
export OS_IDENTITY_API_VERSION=3
export OS_IMAGE_API_VERSION=2
3)使用脚本:加载admin-openrc文件以使用Identity服务的位置以及admin项目和用户凭据填充环境变量,并请求身份验证令牌
[root@controller ~]# . admin-openrc
[root@controller ~]# openstack token issue

+------------+----------------------------------------------------------------+
| Field      | Value                                                          |
+------------+----------------------------------------------------------------+
| expires    | 2018-07-25T15:29:34+0000                                       |
| id         | gAAAAABbWIlO5vVfBz1qlVO2iMI3Eg1nt498wav_gj2Ks3RI47LmU-fRFmiJNh |
|            | BU8zN9FcvzW5scu2ngG7u81P2SqSYtH4kLfSSwiEiDC4NUtD2e8MCI3Sm6MyBq |
|            | XsJRMyIMTw1yL28oHPT_x9NKUwNVUe2Vko4vM49HK4X5rFm0mS0j2uXUp2c    |
| project_id | a6fa6483ff3d4fa0b08c63a4c42ac82e                               |
| user_id    | 113a25c4fa5144d5870062af8a8b72b5                               |
+------------+----------------------------------------------------------------+
13.Glance的安装配置(控制节点)
1)创建glance数据库与用户
MariaDB [(none)]> CREATE DATABASE glance;
Query OK, 1 row affected (0.00 sec)

MariaDB [(none)]> GRANT ALL PRIVILEGES ON glance.* TO 'glance'@'localhost'  IDENTIFIED BY 'GLANCE_DBPASS';
Query OK, 0 rows affected (0.00 sec)

MariaDB [(none)]> GRANT ALL PRIVILEGES ON glance.* TO 'glance'@'%' IDENTIFIED BY  'GLANCE_DBPASS';
Query OK, 0 rows affected (0.00 sec)

MariaDB [(none)]> GRANT ALL PRIVILEGES ON glance.* TO 'glance'@'controller' IDENTTIFIED BY 'GLANCE_DBPASS';
Query OK, 0 rows affected (0.00 sec)

MariaDB [(none)]> flush privileges;
Query OK, 0 rows affected (0.00 sec)
注意:数据库glance用户的密码为GLANCE_DBPASS
2)创建openstack的glance用户
[root@controller ~]# . admin-openrc
[root@controller ~]# openstack user create --domain default --password-prompt glance
User Password:       ===>glance123
Repeat User Password:
+---------------------+----------------------------------+
| Field               | Value                            |
+---------------------+----------------------------------+
| domain_id           | default                          |
| enabled             | True                             |
| id                  | 9a23f1aa715247eda3e2d6773966cec6 |
| name                | glance                           |
| options             | {}                               |
| password_expires_at | None                             |
+---------------------+----------------------------------+
注意:OpenStack的glance用户密码为glance123
3)将admin角色添加到glance用户和service项目:
[root@controller ~]# openstack role add --project service --user glance admin
4)创建glance服务实体
[root@controller ~]# openstack service create --name glance --description "OpenStack Image" image
+-------------+----------------------------------+
| Field       | Value                            |
+-------------+----------------------------------+
| description | OpenStack Image                  |
| enabled     | True                             |
| id          | 55aab5302a5940709a49a899d678b578 |
| name        | glance                           |
| type        | image                            |
+-------------+----------------------------------+
5)创建Image服务API端点:
[root@controller ~]# openstack endpoint create --region RegionOne  image public http://controller:9292
+--------------+----------------------------------+
| Field        | Value                            |
+--------------+----------------------------------+
| enabled      | True                             |
| id           | e6efcd617e5e497a8be2d28e902f16b7 |
| interface    | public                           |
| region       | RegionOne                        |
| region_id    | RegionOne                        |
| service_id   | 55aab5302a5940709a49a899d678b578 |
| service_name | glance                           |
| service_type | image                            |
| url          | http://controller:9292           |
+--------------+----------------------------------+
[root@controller ~]#  openstack endpoint create --region RegionOne image internal http://controller:9292
+--------------+----------------------------------+
| Field        | Value                            |
+--------------+----------------------------------+
| enabled      | True                             |
| id           | 3d8f89a5b3eb418c916512cd35cf54c7 |
| interface    | internal                         |
| region       | RegionOne                        |
| region_id    | RegionOne                        |
| service_id   | 55aab5302a5940709a49a899d678b578 |
| service_name | glance                           |
| service_type | image                            |
| url          | http://controller:9292           |
+--------------+----------------------------------+
[root@controller ~]# openstack endpoint create --region RegionOne  image admin http://controller:9292
+--------------+----------------------------------+
| Field        | Value                            |
+--------------+----------------------------------+
| enabled      | True                             |
| id           | 17c3f4400aa64188a190d13fb5e067f0 |
| interface    | admin                            |
| region       | RegionOne                        |
| region_id    | RegionOne                        |
| service_id   | 55aab5302a5940709a49a899d678b578 |
| service_name | glance                           |
| service_type | image                            |
| url          | http://controller:9292           |
+--------------+----------------------------------+
6)安装glance
[root@controller ~]# yum install -y openstack-glance
7)编辑修改/etc/glance/glance-api.conf文件
(1)在[database]部分中添加connection选项,如有其它connection选项存在则注释或删除
[database]
connection = mysql+pymysql://glance:GLANCE_DBPASS@controller/glance
(2)在[keystone_authtoken]和[paste_deploy]部分中,配置身份服务访问
#~~~~~~~~~省略若干~~~~~~~~#
[keystone_authtoken]

auth_uri = http://controller:5000
auth_url = http://controller:5000
memcached_servers = controller:11211
auth_type = password
project_domain_name = Default
user_domain_name = Default
project_name = service
username = glance
password = glance123     ===>为OpenStack的glance用户的密码

#~~~~~~~~~省略若干~~~~~~~~#

[paste_deploy]

flavor = keystone
#~~~~~~~~~省略若干~~~~~~~~#
注意:注释掉或删除该[keystone_authtoken]部分中的任何其他选项
(3)在[glance_store]部分中配置本地系统存储和映像文件的位置,添加一下内容:
[glance_store]


stores = file,http
default_store = file
filesystem_store_datadir = /var/lib/glance/images/
8)编辑/etc/glance/glance-registry.conf文件并完成以下操作
(1)在[database]部分中添加connection选项,如有其它connection选项存在则注释或删除
[database]
connection = mysql+pymysql://glance:GLANCE_DBPASS@controller/glance
(2)在[keystone_authtoken]和[paste_deploy]部分中,配置身份服务访问
[keystone_authtoken]

auth_uri = http://controller:5000
auth_url = http://controller:5000
memcached_servers = controller:11211
auth_type = password
project_domain_name = Default
user_domain_name = Default
project_name = service
username = glance
password = glance123    ===>此处为OpenStack的glance用户的密码

[paste_deploy]

flavor = keystone
注意:注释掉或删除该[keystone_authtoken]部分中的任何其他选项
9)填充Image服务数据库
[root@controller ~]# su -s /bin/sh -c "glance-manage db_sync" glance
/usr/lib/python2.7/site-packages/oslo_db/sqlalchemy/enginefacade.py:1336: OsloDBDeprecationWarning: EngineFacade is deprecated; please use oslo_db.sqlalchemy.enginefacade
  expire_on_commit=expire_on_commit, _conf=conf)
INFO  [alembic.runtime.migration] Context impl MySQLImpl.
INFO  [alembic.runtime.migration] Will assume non-transactional DDL.

..........
注:这里有INFO出现一般就是填充成功了,同时也可以在结束之后去glance的数据库查看一下是否有表生成。
10)启动Image服务并将其配置为开机自启
[root@controller ~]# systemctl enable openstack-glance-api.service openstack-glance-registry.service
Created symlink from /etc/systemd/system/multi-user.target.wants/openstack-glance-api.service to /usr/lib/systemd/system/openstack-glance-api.service.
Created symlink from /etc/systemd/system/multi-user.target.wants/openstack-glance-registry.service to /usr/lib/systemd/system/openstack-glance-registry.service.
[root@controller ~]# systemctl start openstack-glance-api.service openstack-glance-registry.service
11)验证操作
(1)source 环境脚本
[root@controller ~] . admin-openrc
(2)下载源映像
[root@controller ~]# wget http://download.cirros-cloud.net/0.4.0/cirros-0.4.0-x86_64-disk.img
(3)使用QCOW2磁盘格式,裸 容器格式和公共可见性将映像上载到映像服务 ,以便所有项目都可以访问它,并确认上传映像并验证属性:
[root@controller ~]#  openstack image create "cirros" --file cirros-0.4.0-x86_64-disk.img --disk-format qcow2 --container-format bare --public
+------------------+------------------------------------------------------+
| Field            | Value                                                |
+------------------+------------------------------------------------------+
| checksum         | 443b7623e27ecf03dc9e01ee93f67afe                     |
| container_format | bare                                                 |
| created_at       | 2018-07-26T07:30:24Z                                 |
| disk_format      | qcow2                                                |
| file             | /v2/images/7feafdcd-374a-4dde-9604-3f2123b62756/file |
| id               | 7feafdcd-374a-4dde-9604-3f2123b62756                 |
| min_disk         | 0                                                    |
| min_ram          | 0                                                    |
| name             | cirros                                               |
| owner            | a6fa6483ff3d4fa0b08c63a4c42ac82e                     |
| protected        | False                                                |
| schema           | /v2/schemas/image                                    |
| size             | 12716032                                             |
| status           | active                                               |
| tags             |                                                      |
| updated_at       | 2018-07-26T07:30:25Z                                 |
| virtual_size     | None                                                 |
| visibility       | public                                               |
+------------------+------------------------------------------------------+
[root@controller ~]# openstack image list
+--------------------------------------+--------+--------+
| ID                                   | Name   | Status |
+--------------------------------------+--------+--------+
| 7feafdcd-374a-4dde-9604-3f2123b62756 | cirros | active |
+--------------------------------------+--------+--------+
15.安装Nova前环境配置(控制节点)
在安装和配置Compute服务之前,必须创建数据库,服务凭据和API端点
1)创建数据库并赋予权限
MariaDB [(none)]> CREATE DATABASE nova_api;
Query OK, 1 row affected (0.00 sec)

MariaDB [(none)]> CREATE DATABASE nova;
Query OK, 1 row affected (0.00 sec)

MariaDB [(none)]> CREATE DATABASE nova_cell0;
Query OK, 1 row affected (0.00 sec)

MariaDB [(none)]> GRANT ALL PRIVILEGES ON nova_api.* TO 'nova'@'localhost' IDENTIIFIED BY 'NOVA_DBPASS';
Query OK, 0 rows affected (0.00 sec)

MariaDB [(none)]> GRANT ALL PRIVILEGES ON nova_api.* TO 'nova'@'%' IDENTIFIED BY  'NOVA_DBPASS';
Query OK, 0 rows affected (0.00 sec)

MariaDB [(none)]> GRANT ALL PRIVILEGES ON nova_api.* TO 'nova'@'controller' IDENTTIFIED BY 'NOVA_DBPASS';
Query OK, 0 rows affected (0.00 sec)

MariaDB [(none)]> GRANT ALL PRIVILEGES ON nova.* TO 'nova'@'localhost' IDENTIFIED BY 'NOVA_DBPASS';
Query OK, 0 rows affected (0.00 sec)

MariaDB [(none)]> GRANT ALL PRIVILEGES ON nova.* TO 'nova'@'%' IDENTIFIED BY 'NOVVA_DBPASS';
Query OK, 0 rows affected (0.00 sec)

MariaDB [(none)]> GRANT ALL PRIVILEGES ON nova.* TO 'nova'@'controller' IDENTIFIEED BY 'NOVA_DBPASS';
Query OK, 0 rows affected (0.00 sec)

MariaDB [(none)]> GRANT ALL PRIVILEGES ON nova_cell0.* TO 'nova'@'localhost' IDENTIFIED BY 'NOVA_DBPASS';
Query OK, 0 rows affected (0.00 sec)

MariaDB [(none)]> GRANT ALL PRIVILEGES ON nova_cell0.* TO 'nova'@'%' IDENTIFIED BY 'NOVA_DBPASS';
Query OK, 0 rows affected (0.00 sec)

MariaDB [(none)]> GRANT ALL PRIVILEGES ON nova_cell0.* TO 'nova'@'controller' IDEENTIFIED BY 'NOVA_DBPASS';
Query OK, 0 rows affected (0.00 sec)

MariaDB [(none)]> flush privileges;
Query OK, 0 rows affected (0.00 sec)
注意:数据库nova用户的密码为NOVA_DBPASS
2)创建compute服务凭据
(1)创建nova用户:
[root@controller ~]# . admin-openrc
[root@controller ~]# openstack user create --domain default --password-prompt nova
User Password:    ===>nova123
Repeat User Password:
+---------------------+----------------------------------+
| Field               | Value                            |
+---------------------+----------------------------------+
| domain_id           | default                          |
| enabled             | True                             |
| id                  | efccc87d880a4ec2b9f0daa72ed58aa6 |
| name                | nova                             |
| options             | {}                               |
| password_expires_at | None                             |
+---------------------+----------------------------------+
注意nova用户的密码为nova123
(2)将admin角色添加到nova用户
[root@controller ~]# openstack role add --project service --user nova admin
(3)创建nova服务实体
[root@controller ~]# openstack service create --name nova --description "OpenStack Compute" compute
+-------------+----------------------------------+
| Field       | Value                            |
+-------------+----------------------------------+
| description | OpenStack Compute                |
| enabled     | True                             |
| id          | fcb02966d25c415c974856ae9d306c51 |
| name        | nova                             |
| type        | compute                          |
+-------------+----------------------------------+
3)创建Compute API服务端点
[root@controller ~]# openstack endpoint create --region RegionOne compute public http://controller:8774/v2.1
+--------------+----------------------------------+
| Field        | Value                            |
+--------------+----------------------------------+
| enabled      | True                             |
| id           | 6a26d75718ae44038911e9ab73078f3f |
| interface    | public                           |
| region       | RegionOne                        |
| region_id    | RegionOne                        |
| service_id   | fcb02966d25c415c974856ae9d306c51 |
| service_name | nova                             |
| service_type | compute                          |
| url          | http://controller:8774/v2.1      |
+--------------+----------------------------------+
[root@controller ~]# openstack endpoint create --region RegionOne compute internal http://controller:8774/v2.1
+--------------+----------------------------------+
| Field        | Value                            |
+--------------+----------------------------------+
| enabled      | True                             |
| id           | 1b7d8a52ed404dd985eb569375fe449c |
| interface    | internal                         |
| region       | RegionOne                        |
| region_id    | RegionOne                        |
| service_id   | fcb02966d25c415c974856ae9d306c51 |
| service_name | nova                             |
| service_type | compute                          |
| url          | http://controller:8774/v2.1      |
+--------------+----------------------------------+
[root@controller ~]# openstack endpoint create --region RegionOne compute admin http://controller:8774/v2.1
+--------------+----------------------------------+
| Field        | Value                            |
+--------------+----------------------------------+
| enabled      | True                             |
| id           | 2e80238a040440fcb2fb5801f7cf5853 |
| interface    | admin                            |
| region       | RegionOne                        |
| region_id    | RegionOne                        |
| service_id   | fcb02966d25c415c974856ae9d306c51 |
| service_name | nova                             |
| service_type | compute                          |
| url          | http://controller:8774/v2.1      |
+--------------+----------------------------------+
4)创建Placement服务用户
[root@controller ~]#  openstack user create --domain default --password-prompt placement
User Password:        ===>密码为placement123
Repeat User Password:
+---------------------+----------------------------------+
| Field               | Value                            |
+---------------------+----------------------------------+
| domain_id           | default                          |
| enabled             | True                             |
| id                  | f5c22dc2fabe49ebbd733e97d4fb9a5f |
| name                | placement                        |
| options             | {}                               |
| password_expires_at | None                             |
+---------------------+----------------------------------+
注意:placement用户的密码为placement123
5)使用admin角色将placement用户添加到服务项目
[root@controller ~]# openstack role add --project service --user placement admin
6)在服务目录中创建Placement API条目:
[root@controller ~]# openstack service create --name placement --description "Placement API" placement
+-------------+----------------------------------+
| Field       | Value                            |
+-------------+----------------------------------+
| description | Placement API                    |
| enabled     | True                             |
| id          | a26c6f356a204d8eb071fc3c8085339b |
| name        | placement                        |
| type        | placement                        |
+-------------+----------------------------------+
7)创建Placement API服务端点
[root@controller ~]# openstack endpoint create --region RegionOne placement public http://controller:8778
+--------------+----------------------------------+
| Field        | Value                            |
+--------------+----------------------------------+
| enabled      | True                             |
| id           | 845d90d6bc19454d827058658a77de2d |
| interface    | public                           |
| region       | RegionOne                        |
| region_id    | RegionOne                        |
| service_id   | a26c6f356a204d8eb071fc3c8085339b |
| service_name | placement                        |
| service_type | placement                        |
| url          | http://controller:8778           |
+--------------+----------------------------------+
[root@controller ~]#  openstack endpoint create --region RegionOne placement internal http://controller:8778
+--------------+----------------------------------+
| Field        | Value                            |
+--------------+----------------------------------+
| enabled      | True                             |
| id           | 85db113b78324c25b3d3fe98969ec401 |
| interface    | internal                         |
| region       | RegionOne                        |
| region_id    | RegionOne                        |
| service_id   | a26c6f356a204d8eb071fc3c8085339b |
| service_name | placement                        |
| service_type | placement                        |
| url          | http://controller:8778           |
+--------------+----------------------------------+
[root@controller ~]# openstack endpoint create --region RegionOne placement admin http://controller:8778
+--------------+----------------------------------+
| Field        | Value                            |
+--------------+----------------------------------+
| enabled      | True                             |
| id           | cbe88b1e991f4782a23a3536e3d92556 |
| interface    | admin                            |
| region       | RegionOne                        |
| region_id    | RegionOne                        |
| service_id   | a26c6f356a204d8eb071fc3c8085339b |
| service_name | placement                        |
| service_type | placement                        |
| url          | http://controller:8778           |
+--------------+----------------------------------+
16.安装配置Nova(控制节点)
1)安装
[root@controller ~]# yum install -y openstack-nova-api openstack-nova-conductor openstack-nova-console openstack-nova-novncproxy openstack-nova-scheduler openstack-nova-placement-api
2)编辑/etc/nova/nova.conf文件
(1)再[DEFAULT]部分中仅启用计算和元数据API,以及配置RabbitMQ消息队列访问添加以下内容
[DEFAULT]
##仅启用计算和元数据API
enabled_apis=osapi_compute,metadata

##配置RabbitMQ消息队列访问
transport_url = rabbit://openstack:RABBIT_PASS@controller

##配置my_ip选项以使用控制节点的管理接口ip地址
my_ip=10.132.226.103

##启用对网络服务的支持
use_neutron=true

firewall_driver=nova.virt.firewall.NoopFirewallDriver   ===>启用此防火墙驱动
##默认情况下,Compute使用内部防火墙驱动程序。由于Networking服务包含防火墙驱动程序,因此必须使用nova.virt.firewall.NoopFirewallDriver防火墙驱动程序禁用Compute防火墙驱动 程序。
(2)在[api_database] 和 [database]部分中,配置数据库访问
[api_database]
#connection=mysql://nova:nova@localhost/nova
connection = mysql+pymysql://nova:NOVA_DBPASS@controller/nova_api

[database]

connection = mysql+pymysql://nova:NOVA_DBPASS@controller/nova
(3)在[api]和[keystone_authtoken]部分中,配置身份服务访问
[api]
auth_strategy=keystone

[keystone_authtoken]

auth_url = http://controller:5000/v3
memcached_servers = controller:11211
auth_type = password
project_domain_name = default
user_domain_name = default
project_name = service
username = nova
password = nova123
(4)在该[vnc]部分中,配置VNC代理以使用控制器节点的管理接口IP地址:
[vnc]
enabled=true
server_listen = $my_ip
server_proxyclient_address=$my_ip
(5)在[glance]部分中配置Image服务和API的位置
[glance]
api_servers=http://controller:9292
(6)在[oslo_concurrency]部分中,配置锁定路径
[oslo_concurrency]
lock_path=/var/lib/nova/tmp
(7)在[plancement]部分中配置Placement API
[placement]

os_region_name = RegionOne
project_domain_name = Default
project_name = service
auth_type = password
user_domain_name = Default
auth_url = http://controller:5000/v3
username = placement
password = placement123     ===>placement用户的密码
3)添加以下内容到/etc/httpd/conf.d/00-nova-placement-api.conf
<Directory /usr/bin>
   <IfVersion >= 2.4>
      Require all granted
   </IfVersion>
   <IfVersion < 2.4>
      Order allow,deny
      Allow from all
   </IfVersion>
</Directory>
4)重启httpd服务
[root@controller ~]# systemctl restart httpd
5)填充nova-api数据库
[root@controller ~]# su -s /bin/sh -c "nova-manage api_db sync" nova
/usr/lib/python2.7/site-packages/oslo_db/sqlalchemy/enginefacade.py:332: NotSupportedWarning: Configuration option(s) ['use_tpool'] not supported
注意:此时查看一下数据库中nova-api数据库有没有表生成
6)注册cell0数据库
[root@controller ~]# su -s /bin/sh -c "nova-manage cell_v2 map_cell0" nova
/usr/lib/python2.7/site-packages/oslo_db/sqlalchemy/enginefacade.py:332: NotSupportedWarning: Configuration option(s) ['use_tpool'] not supported
  exception.NotSupportedWarning
7)创建cell1单元格
[root@controller ~]# su -s /bin/sh -c "nova-manage cell_v2 create_cell --name=cell1 --verbose" nova
/usr/lib/python2.7/site-packages/oslo_db/sqlalchemy/enginefacade.py:332: NotSupportedWarning: Configuration option(s) ['use_tpool'] not supported
  exception.NotSupportedWarning
c2a802c6-4d8e-470f-953a-d4744ab507a7   ===>输出信息
8)填充nova数据库
[root@controller ~]# su -s /bin/sh -c "nova-manage db sync" nova
/usr/lib/python2.7/site-packages/oslo_db/sqlalchemy/enginefacade.py:332: NotSupportedWarning: Configuration option(s) ['use_tpool'] not supported
  exception.NotSupportedWarning
/usr/lib/python2.7/site-packages/pymysql/cursors.py:166: Warning: (1831, u'Duplicate index `block_device_mapping_instance_uuid_virtual_name_device_name_idx`. This is deprecated and will be disallowed in a future release.')
  result = self._query(query)
/usr/lib/python2.7/site-packages/pymysql/cursors.py:166: Warning: (1831, u'Duplicate index `uniq_instances0uuid`. This is deprecated and will be disallowed in a future release.')
  result = self._query(query)
注意:查看一下nova数据库中是否有表生成
9)验证nova cell0 和 cell1是否正确注册
[root@controller ~]# nova-manage cell_v2 list_cells
/usr/lib/python2.7/site-packages/oslo_db/sqlalchemy/enginefacade.py:332: NotSupportedWarning: Configuration option(s) ['use_tpool'] not supported
  exception.NotSupportedWarning
+-------+--------------------------------------+------------------------------------+-------------------------------------------------+
|  Name |                 UUID                 |           Transport URL            |               Database Connection               |
+-------+--------------------------------------+------------------------------------+-------------------------------------------------+
| cell0 | 00000000-0000-0000-0000-000000000000 |               none:/               | mysql+pymysql://nova:****@controller/nova_cell0 |
| cell1 | c2a802c6-4d8e-470f-953a-d4744ab507a7 | rabbit://openstack:****@controller |    mysql+pymysql://nova:****@controller/nova    |
+-------+--------------------------------------+------------------------------------+-------------------------------------------------+
10)启动nova等服务,并设置开机自启
[root@controller ~]# systemctl enable openstack-nova-api.service   openstack-nova-consoleauth.service openstack-nova-scheduler.service   openstack-nova-conductor.service openstack-nova-novncproxy.service
Created symlink from /etc/systemd/system/multi-user.target.wants/openstack-nova-api.service to /usr/lib/systemd/system/openstack-nova-api.service.
Created symlink from /etc/systemd/system/multi-user.target.wants/openstack-nova-consoleauth.service to /usr/lib/systemd/system/openstack-nova-consoleauth.service.
Created symlink from /etc/systemd/system/multi-user.target.wants/openstack-nova-scheduler.service to /usr/lib/systemd/system/openstack-nova-scheduler.service.
Created symlink from /etc/systemd/system/multi-user.target.wants/openstack-nova-conductor.service to /usr/lib/systemd/system/openstack-nova-conductor.service.
Created symlink from /etc/systemd/system/multi-user.target.wants/openstack-nova-novncproxy.service to /usr/lib/systemd/system/openstack-nova-novncproxy.service.

[root@controller ~]# systemctl start openstack-nova-api.service   openstack-nova-consoleauth.service openstack-nova-scheduler.service   openstack-nova-conductor.service openstack-nova-novncproxy.service
17.计算节点安装nova
1)安装
[root@compute1 ~]# yum install -y openstack-nova-compute
注意:此处安装出现问题,解决方法见下一篇随笔
2)编辑/etc/nova/nova.conf文件完成以下操作
(1)修改[DEFAULT]部分中的相关内容
[DEFAULT]

## 仅启用计算和元数据API
enabled_apis=osapi_compute,metadata

## 配置RabbitMQ消息队列访问
transport_url = rabbit://openstack:RABBIT_PASS@controller

## 配置my_ip选项
my_ip = 10.132.226.104   ## 计算节点的ip

## 启用对网络服务的支持
use_neutron=true

firewall_driver=nova.virt.firewall.NoopFirewallDriver
(2)在[api]和[keystone_authtoken]部分中,配置身份服务访问:
[api]

auth_strategy=keystone

[keystone_authtoken]

auth_url = http://controller:5000/v3
memcached_servers = controller:11211
auth_type = password
project_domain_name = default
user_domain_name = default
project_name = service
username = nova
password = nova123
(3)在[vnc]中配置Image服务API的位置
[vnc]
api_servers = http://controller:9292
(4)在[oslo_concurrency]部分中,配置锁定路径
[oslo_concurrency]

lock_path=/var/lib/nova/tmp
(5)在[placement]部分中配置Placement API
[placement]

os_region_name = RegionOne
project_domain_name = Default
project_name = service
auth_type = password
user_domain_name = Default
auth_url = http://controller:5000/v3
username = placement
password = placement123
3)确定计算节点是否支持虚拟机的硬件加速
# egrep -c '(vmx|svm)' /proc/cpuinfo
8
如果此命令返回值,则计算节点支持硬件加速,通常不需要其他配置。one or greater

如果此命令返回值zero,则您的计算节点不支持硬件加速,您必须配置libvirt为使用QEMU而不是KVM。

编辑文件中的[libvirt]部分,/etc/nova/nova.conf如下所示:

[libvirt]
#...
virt_type  =  qemu
4)启动compute等服务并设置开机自启
[root@compute1 ~]# systemctl enable libvirtd.service openstack-nova-compute.service
Created symlink from /etc/systemd/system/multi-user.target.wants/openstack-nova-compute.service to /usr/lib/systemd/system/openstack-nova-compute.service.
[root@compute1 ~]# systemctl start libvirtd.service openstack-nova-compute.service
注意:如果nova-compute服务无法启动,请检查 /var/log/nova/nova-compute.log。该错误消息可能表示控制器节点上的防火墙阻止访问端口5672.将防火墙配置为打开控制器节点上的端口5672并重新启动 计算节点上的服务。AMQP server on controller:5672 isunreachablenova-comput
5)(控制节点操作)将计算节点添加到单元数据库
(1)获取管理员凭据,确认数据库中有计算主机
[root@controller ~]# . admin-openrc
[root@controller ~]# openstack compute service list --service nova-compute
+----+--------------+----------+------+---------+-------+----------------------------+
| ID | Binary       | Host     | Zone | Status  | State | Updated At                 |
+----+--------------+----------+------+---------+-------+----------------------------+
|  9 | nova-compute | compute1 | nova | enabled | up    | 2018-07-27T09:51:19.000000 |
+----+--------------+----------+------+---------+-------+----------------------------+
(2)发现主机
[root@controller ~]# su -s /bin/sh -c "nova-manage cell_v2 discover_hosts --verbose" nova
/usr/lib/python2.7/site-packages/oslo_db/sqlalchemy/enginefacade.py:332: NotSupportedWarning: Configuration option(s) ['use_tpool'] not supported
  exception.NotSupportedWarning
Found 2 cell mappings.
Skipping cell0 since it does not contain hosts.
Getting computes from cell 'cell1': c2a802c6-4d8e-470f-953a-d4744ab507a7
Checking host mapping for compute host 'compute1': 8554856e-43e2-4234-892d-e461b385afec
Creating host mapping for compute host 'compute1': 8554856e-43e2-4234-892d-e461b385afec
Found 1 unmapped computes in cell: c2a802c6-4d8e-470f-953a-d4744ab507a7
[root@controller ~]# vim /etc/nova/nova.conf
[root@controller ~]# su -s /bin/sh -c "nova-manage cell_v2 discover_hosts --verbose" nova
/usr/lib/python2.7/site-packages/oslo_db/sqlalchemy/enginefacade.py:332: NotSupportedWarning: Configuration option(s) ['use_tpool'] not supported
  exception.NotSupportedWarning
Found 2 cell mappings.
Skipping cell0 since it does not contain hosts.
Getting computes from cell 'cell1': c2a802c6-4d8e-470f-953a-d4744ab507a7
Found 0 unmapped computes in cell: c2a802c6-4d8e-470f-953a-d4744ab507a7
注意:添加新计算节点时,必须在控制器节点上运行 nova-manage cell_v2 discover_hosts 以注册这些新计算节点。或者,您可以在/etc/nova/nova.conf文件以下位置设置适当的间隔 :
[scheduler]
discover_hosts_in_cells_interval  =  300
6)验证操作
(1)获取管理员凭据,并列出服务组件已验证每个进程的成功启动个注册:
[root@controller ~]# . admin-openrc
[root@controller ~]# openstack compute service list
+----+------------------+------------+----------+---------+-------+----------------------------+
| ID | Binary           | Host       | Zone     | Status  | State | Updated At                 |
+----+------------------+------------+----------+---------+-------+----------------------------+
|  1 | nova-consoleauth | controller | internal | enabled | up    | 2018-07-27T11:37:44.000000 |
|  2 | nova-scheduler   | controller | internal | enabled | up    | 2018-07-27T11:37:44.000000 |
|  3 | nova-conductor   | controller | internal | enabled | up    | 2018-07-27T11:37:40.000000 |
|  9 | nova-compute     | compute1   | nova     | enabled | up    | 2018-07-27T11:37:42.000000 |
+----+------------------+------------+----------+---------+-------+----------------------------+
(2)列出identity服务中的AP端点以验证与Identity服务的连接:
[root@controller ~]# openstack catalog list
+-----------+-----------+-----------------------------------------+
| Name      | Type      | Endpoints                               |
+-----------+-----------+-----------------------------------------+
| glance    | image     | RegionOne                               |
|           |           |   admin: http://controller:9292         |
|           |           | RegionOne                               |
|           |           |   internal: http://controller:9292      |
|           |           | RegionOne                               |
|           |           |   public: http://controller:9292        |
|           |           |                                         |
| keystone  | identity  | RegionOne                               |
|           |           |   public: http://controller:5000/v3/    |
|           |           | RegionOne                               |
|           |           |   admin: http://controller:5000/v3/     |
|           |           | RegionOne                               |
|           |           |   internal: http://controller:5000/v3/  |
|           |           |                                         |
| placement | placement | RegionOne                               |
|           |           |   public: http://controller:8778        |
|           |           | RegionOne                               |
|           |           |   internal: http://controller:8778      |
|           |           | RegionOne                               |
|           |           |   admin: http://controller:8778         |
|           |           |                                         |
| nova      | compute   | RegionOne                               |
|           |           |   internal: http://controller:8774/v2.1 |
|           |           | RegionOne                               |
|           |           |   admin: http://controller:8774/v2.1    |
|           |           | RegionOne                               |
|           |           |   public: http://controller:8774/v2.1   |
|           |           |                                         |
+-----------+-----------+-----------------------------------------+
(3)列出Image服务中的图像以验证与Image服务的连接:
[root@controller ~]# openstack image list
+--------------------------------------+--------+--------+
| ID                                   | Name   | Status |
+--------------------------------------+--------+--------+
| 7feafdcd-374a-4dde-9604-3f2123b62756 | cirros | active |
+--------------------------------------+--------+--------+
(4)检查单元格和placement API是否成功
[root@controller ~]# nova-status upgrade check
/usr/lib/python2.7/site-packages/oslo_db/sqlalchemy/enginefacade.py:332: NotSupportedWarning: Configuration option(s) ['use_tpool'] not supported
  exception.NotSupportedWarning
Option "os_region_name" from group "placement" is deprecated. Use option "region-name" from group "placement".
+--------------------------------+
| Upgrade Check Results          |
+--------------------------------+
| Check: Cells v2                |
| Result: Success                |
| Details: None                  |
+--------------------------------+
| Check: Placement API           |
| Result: Success                |
| Details: None                  |
+--------------------------------+
| Check: Resource Providers      |
| Result: Success                |
| Details: None                  |
+--------------------------------+
| Check: Ironic Flavor Migration |
| Result: Success                |
| Details: None                  |
+--------------------------------+
| Check: API Service Version     |
| Result: Success                |
| Details: None                  |
+--------------------------------+
18.安装Neutron前的环境设置(控制节点)
1)创建数据库以及数据库用户(neutron)
MariaDB [(none)]> CREATE DATABASE neutron;
Query OK, 1 row affected (0.00 sec)

MariaDB [(none)]> GRANT ALL PRIVILEGES ON neutron.* TO 'neutron'@'localhost' IDENTIFIED BY 'NEUTRON_DBPASS';
Query OK, 0 rows affected (0.00 sec)

MariaDB [(none)]> GRANT ALL PRIVILEGES ON neutron.* TO 'neutron'@'controller' IDEENTIFIED BY 'NEUTRON_DBPASS';
Query OK, 0 rows affected (0.00 sec)

MariaDB [(none)]> GRANT ALL PRIVILEGES ON neutron.* TO 'neutron'@'%' IDENTIFIED BY 'NEUTRON_DBPASS';
Query OK, 0 rows affected (0.00 sec)

MariaDB [(none)]> flush privileges;
Query OK, 0 rows affected (0.00 sec)
注意:数据库neutron用户的密码为NEUTRON_DBPASS
2)创建OpenStack的neutron用户
[root@controller ~]# . admin-openrc
[root@controller ~]# openstack user create --domain default --password-prompt neutron
User Password:    ===>neutron123
Repeat User Password:
+---------------------+----------------------------------+
| Field               | Value                            |
+---------------------+----------------------------------+
| domain_id           | default                          |
| enabled             | True                             |
| id                  | e66f255ee370425e81b031d6a9a9e558 |
| name                | neutron                          |
| options             | {}                               |
| password_expires_at | None                             |
+---------------------+----------------------------------+
注意:OpenStack的neutron用户密码为neutron123
3)将admin角色添加到neutron用户
[root@controller ~]# openstack role add --project service --user neutron admin
4)创建neutron服务实体
[root@controller ~]# openstack service create --name neutron --description "OpenStack Networking" network
+-------------+----------------------------------+
| Field       | Value                            |
+-------------+----------------------------------+
| description | OpenStack Networking             |
| enabled     | True                             |
| id          | fac621943283457d9ae8b84361d9841a |
| name        | neutron                          |
| type        | network                          |
+-------------+----------------------------------+
5)创建网络服务API端点
[root@controller ~]# openstack endpoint create --region RegionOne network public http://controller:9696
+--------------+----------------------------------+
| Field        | Value                            |
+--------------+----------------------------------+
| enabled      | True                             |
| id           | fb25b8b704e346ef97ed3bb862c6e3ab |
| interface    | public                           |
| region       | RegionOne                        |
| region_id    | RegionOne                        |
| service_id   | fac621943283457d9ae8b84361d9841a |
| service_name | neutron                          |
| service_type | network                          |
| url          | http://controller:9696           |
+--------------+----------------------------------+
[root@controller ~]# openstack endpoint create --region RegionOne network internal http://controller:9696
+--------------+----------------------------------+
| Field        | Value                            |
+--------------+----------------------------------+
| enabled      | True                             |
| id           | 1d37082dd81b4796bad283e3d5184301 |
| interface    | internal                         |
| region       | RegionOne                        |
| region_id    | RegionOne                        |
| service_id   | fac621943283457d9ae8b84361d9841a |
| service_name | neutron                          |
| service_type | network                          |
| url          | http://controller:9696           |
+--------------+----------------------------------+
[root@controller ~]# openstack endpoint create --region RegionOne network admin http://controller:9696
+--------------+----------------------------------+
| Field        | Value                            |
+--------------+----------------------------------+
| enabled      | True                             |
| id           | 4550b213679f40668a2661d63bfdb843 |
| interface    | admin                            |
| region       | RegionOne                        |
| region_id    | RegionOne                        |
| service_id   | fac621943283457d9ae8b84361d9841a |
| service_name | neutron                          |
| service_type | network                          |
| url          | http://controller:9696           |
+--------------+----------------------------------+
19.安装Neutron之配置自助服务网络(控制节点)
1)组件安装
[root@controller ~]# yum install openstack-neutron openstack-neutron-ml2 openstack-neutron-linuxbridge ebtables
2)编辑/etc/neutron/neutron.conf文件
(1)在[database]部分中,配置数据库访问
[database]
connection = mysql+pymysql://neutron:NEUTRON_DBPASS@controller/neutron
(2)在[DEFAULT]部分中启用模块化第二层(ML2)插件,路由器服务和重叠的ip地址:
[DEFAULT]
core_plugin = ml2
service_plugins = router
allow_overlapping_ips = True
(3)在[DEFAULT]部分中,配置RabbitMQ消息队列访问
[DEFAULT]
transport_url = rabbit://openstack:RABBIT_PASS@controller
(4)在[DEFAULT]和[keystone_authtoken]部分中,配置身份服务访问
[DEFAULT]
auth_strategy = keystone

[keystone_authtoken]

auth_uri = http://controller:5000
auth_url = http://controller:35357
memcached_servers = controller:11211
auth_type = password
project_domain_name = default
user_domain_name = default
project_name = service
username = neutron
password = neutron123   ===>OpenStack的neutron用户密码
(5)在[DEFAULT]和[nova]部分中,配置网络以通知Compute网络拓扑更改
[DEFAULT]
notify_nova_on_port_status_changes = true
notify_nova_on_port_data_changes = true

[nova]
auth_url = http://controller:35357
auth_type = password
project_domain_name = default
user_domain_name = default
region_name = RegionOne
project_name = service
username = nova
password = nova123
(6)在[oslo_concurrency]部分中,配置锁定路径
[oslo_concurrency]
lock_path = /var/lib/neutron/tmp
3)编辑/etc/neutron/plugins/ml2/ml2_conf.ini文件
(1)修改[ml2]部分中
[ml2]

## 在该[ml2]部分中,启用flat,VLAN和VXLAN网络:
type_drivers = flat,vlan,vxlan

## 在该[ml2]部分中,启用VXLAN自助服务网络:
tenant_network_types = vxlan

## 在该[ml2]部分中,启用Linux桥和第2层填充机制:
mechanism_drivers = linuxbridge,l2population
## 配置ML2插件后,删除type_drivers选项中的值 可能会导致数据库不一致。

## 在该[ml2]部分中,启用端口安全性扩展驱动程序:
extension_drivers = port_security
(2)在[ml2_type_flat]部分中,将提供虚拟网络配置为扁平网络
[ml2_type_flat]
flat_networks = provider
(3)在[ml2_type_vxlan]部分中,为自助服务网配置VXLAN网络标识符范围
[ml2_type_vxlan]
vni_ranges = 1:1000
(4)在[securityproup]部分中,启用ipset以提高安全组规则的效率
[securitygroup]
enable_ipset = true
4)配置Linux桥代理——编辑/etc/neutron/plugins/ml2/linuxbridge_agent.ini文件
(1)在[linux_bridge]部分中,将提供虚拟网络映射到提供者物理网络接口:
[linux_bridge]

physical_interface_mappings = provider:enp0s31f6

## enp0s31f6是网络接口名可以通过ipconfig命令查看
(2)在[vxlan]部分中,启用VXLAN重叠网络,配置处理覆盖网络的物理网络接口的IP地址,并启用第2层填充
[vxlan]

enable_vxlan = true
local_ip = 10.132.226.103  #===>控制节点ip
l2_population = true
(3)在[securitygroup]部分中,启用安全组并配置Linux桥接iptables防火墙驱动程序
[securitygroup]

firewall_driver = neutron.agent.linux.iptables_firewall.IptablesFirewallDriver

enable_security_group = true
(4)使用sysctl命令将以下选项的值设为1
[root@controller ~]# sysctl net.bridge.bridge-nf-call-iptables=1
net.bridge.bridge-nf-call-iptables = 1
[root@controller ~]# sysctl net.bridge.bridge-nf-call-ip6tables=1
net.bridge.bridge-nf-call-ip6tables = 1
5)配置第三次代理,编辑/etc/neutron/l3_agent.ini文件并添加以下内容
[DEFAULT]

interface_driver = linuxbridge
6)配置DHCP代理,编辑/etc/neutron/dhcp_agent.ini文件并添加以下内容
[DEFAULT]

interface_driver = linuxbridge
dhcp_driver = neutron.agent.linux.dhcp.Dnsmasq
enable_isolated_metadata = true
20.安装配置Neutron(控制节点)
1)配置元数据代理,编辑/etc/neutron/metadata_agent.ini文件添加以下内容
[DEFAULT]
nova_metadata_host = controller
metadata_proxy_shared_secret = METADATA_SECRET
2)配置Compute服务以使用Networking服务
(1)编辑/etc/nova/nova.conf文件 在[neutron]部分的添加以下内容
[neutron]

url = http://controller:9696
auth_url = http://controller:35357
auth_type = password
project_domain_name = default
user_domain_name = default
region_name = RegionOne
project_name = service
username = neutron
password = neutron123 #  ===>neutron用户密码
service_metadata_proxy = true
metadata_proxy_shared_secret = METADATA_SECRET
3)创建符号链接
[root@controller ~]# ln -s /etc/neutron/plugins/ml2/ml2_conf.ini /etc/neutron/plugin.ini
4)填充数据库
[root@controller ~]# su -s /bin/sh -c "neutron-db-manage --config-file /etc/neutron/neutron.conf --config-file /etc/neutron/plugins/ml2/ml2_conf.ini upgrade head" neutron
INFO  [alembic.runtime.migration] Context impl MySQLImpl.
INFO  [alembic.runtime.migration] Will assume non-transactional DDL.
  Running upgrade for neutron ...
INFO  [alembic.runtime.migration] Context impl MySQLImpl.
INFO  [alembic.runtime.migration] Will assume non-transactional DDL.
INFO  [alembic.runtime.migration] Running upgrade  -> kilo, kilo_initial
INFO  [alembic.runtime.migration] Running upgrade kilo -> 354db87e3225, nsxv_vdr_metadata.py
INFO  [alembic.runtime.migration] Running upgrade 354db87e3225 -> 599c6a226151, neutrodb_ipam
......
5)重启Compute API服务
[root@controller ~]# systemctl restart openstack-nova-api.service
6)启动网络服务,并设置开机自启
[root@controller ~]# systemctl enable neutron-server.service neutron-linuxbridge-agent.service neutron-dhcp-agent.service neutron-metadata-agent.service
Created symlink from /etc/systemd/system/multi-user.target.wants/neutron-server.service to /usr/lib/systemd/system/neutron-server.service.
Created symlink from /etc/systemd/system/multi-user.target.wants/neutron-linuxbridge-agent.service to /usr/lib/systemd/system/neutron-linuxbridge-agent.service.
Created symlink from /etc/systemd/system/multi-user.target.wants/neutron-dhcp-agent.service to /usr/lib/systemd/system/neutron-dhcp-agent.service.
Created symlink from /etc/systemd/system/multi-user.target.wants/neutron-metadata-agent.service to /usr/lib/systemd/system/neutron-metadata-agent.service.
[root@controller ~]# systemctl start neutron-server.service neutron-linuxbridge-agent.service neutron-dhcp-agent.service neutron-metadata-agent.service
7)启用第三次服务,并设置开机自启
[root@controller ~]# systemctl enable neutron-l3-agent.service
Created symlink from /etc/systemd/system/multi-user.target.wants/neutron-l3-agent.service to /usr/lib/systemd/system/neutron-l3-agent.service.
[root@controller ~]# systemctl start neutron-l3-agent.service
21.安装Neutron(计算节点)
1)安装组件
[root@controller ~]# yum install openstack-neutron-linuxbridge ebtables ipset
2)编辑/etc/neutron/neutronn.conf,添加以下内容
[DEFAULT]
## 配置RabbitMQ 消息队列访问:
transport_url = rabbit://openstack:RABBIT_PASS@controller
##配置身份服务访问:
auth_strategy = keystone

##配置身份服务访问:
[keystone_authtoken]
auth_uri = http://controller:5000
auth_url = http://controller:35357
memcached_servers = controller:11211
auth_type = password
project_domain_name = default
user_domain_name = default
project_name = service
username = neutron
password = neutron123    ===>neutron用户的密码

##配置锁定路径
[oslo_concurrency]

lock_path = /var/lib/neutron/tmp
3)配置自助网络服务
(1)编辑/etc/neutron/plugins/ml2/linuxbridge_agent.ini文件,并添加以下内容
[linux_bridge]
###将提供者虚拟网络映射到提供者物理网络接口:
physical_interface_mappings = provider:enp0s31f6

## enp0s31f6是网卡信息通过ipconfig可以查看

[securitygroup]
###启用安全组并配置Linux桥接iptables防火墙驱动程序:
enable_security_group = true
firewall_driver = neutron.agent.linux.iptables_firewall.IptablesFirewallDriver

[vxlan]
###启用VXLAN重叠网络,配置处理覆盖网络的物理网络接口的IP地址,并启用第2层填充:
enable_vxlan = true
local_ip = 10.132.226.104  ===>本机的ip地址
l2_population = true
(2)通过验证以下所有sysctl值设置为1:确保您的Linux操作系统内核支持网桥过滤器:
[root@compute1 ~]# modprobe bridge
[root@compute1 ~]# modprobe br_netfilter
[root@compute1 ~]# sysctl net.bridge.bridge-nf-call-iptables=1
net.bridge.bridge-nf-call-iptables = 1
[root@compute1 ~]# sysctl net.bridge.bridge-nf-call-ip6tables=1
net.bridge.bridge-nf-call-ip6tables = 1
4)编辑/etc/nova/nova.conf文件,添加以下内容
[neutron]

url = http://controller:9696
auth_url = http://controller:35357
auth_type = password
project_domain_name = default
user_domain_name = default
region_name = RegionOne
project_name = service
username = neutron
password = neutron123
5)重启Compute服务
[root@compute1 ~]# systemctl restart openstack-nova-compute.service
6)启动Linux网桥代理并将其配置为系统引导时启动:
[root@compute1 ~]# systemctl enable neutron-linuxbridge-agent.service
Created symlink from /etc/systemd/system/multi-user.target.wants/neutron-linuxbridge-agent.service to /usr/lib/systemd/system/neutron-linuxbridge-agent.service.
[root@compute1 ~]# systemctl start neutron-linuxbridge-agent.service
7)控制节点验证
[root@controller ~]# openstack extension list --network +----------------------------------------------------------------------------------------------+---------------------------+----------------------------------------------------------------------------------------------------------------------------------------------------------+ | Name | Alias | Description | +----------------------------------------------------------------------------------------------+---------------------------+----------------------------------------------------------------------------------------------------------------------------------------------------------+ | Default Subnetpools | default-subnetpools | Provides ability to mark and use a subnetpool as the default. | | Availability Zone | availability_zone | The availability zone extension. | | Network Availability Zone | network_availability_zone | Availability zone support for network. | | Auto Allocated Topology Services | auto-allocated-topology | Auto Allocated Topology Services. | | Neutron L3 Configurable external gateway mode | ext-gw-mode | Extension of the router abstraction for specifying whether SNAT should occur on the external gateway | | Port Binding | binding | Expose port bindings of a virtual port to external application | | agent | agent | The agent management extension. | | Subnet Allocation | subnet_allocation | Enables allocation of subnets from a subnet pool | | L3 Agent Scheduler | l3_agent_scheduler | Schedule routers among l3 agents | | Tag support | tag | Enables to set tag on resources. | | Neutron external network | external-net | Adds external network attribute to network resource. | | Tag support for resources with standard attribute: trunk, policy, security_group, floatingip | standard-attr-tag | Enables to set tag on resources with standard attribute. | | Neutron Service Flavors | flavors | Flavor specification for Neutron advanced services. | | Network MTU | net-mtu | Provides MTU attribute for a network resource. | | Network IP Availability | network-ip-availability | Provides IP availability data for each network and subnet. | | Quota management support | quotas | Expose functions for quotas management per tenant | | If-Match constraints based on revision_number | revision-if-match | Extension indicating that If-Match based on revision_number is supported. | | HA Router extension | l3-ha | Adds HA capability to routers. | | Provider Network | provider | Expose mapping of virtual networks to physical networks | | Multi Provider Network | multi-provider | Expose mapping of virtual networks to multiple physical networks | | Quota details management support | quota_details | Expose functions for quotas usage statistics per project | | Address scope | address-scope | Address scopes extension. | | Neutron Extra Route | extraroute | Extra routes configuration for L3 router | | Network MTU (writable) | net-mtu-writable | Provides a writable MTU attribute for a network resource. | | Subnet service types | subnet-service-types | Provides ability to set the subnet service_types field | | Resource timestamps | standard-attr-timestamp | Adds created_at and updated_at fields to all Neutron resources that have Neutron standard attributes. | | Neutron Service Type Management | service-type | API for retrieving service providers for Neutron advanced services | | Router Flavor Extension | l3-flavors | Flavor support for routers. | | Port Security | port-security | Provides port security | | Neutron Extra DHCP options | extra_dhcp_opt | Extra options configuration for DHCP. For example PXE boot options to DHCP clients can be specified (e.g. tftp-server, server-ip-address, bootfile-name) | | Resource revision numbers | standard-attr-revisions | This extension will display the revision number of neutron resources. | | Pagination support | pagination | Extension that indicates that pagination is enabled. | | Sorting support | sorting | Extension that indicates that sorting is enabled. | | security-group | security-group | The security groups extension. | | DHCP Agent Scheduler | dhcp_agent_scheduler | Schedule networks among dhcp agents | | Router Availability Zone | router_availability_zone | Availability zone support for router. | | RBAC Policies | rbac-policies | Allows creation and modification of policies that control tenant access to resources. | | Tag support for resources: subnet, subnetpool, port, router | tag-ext | Extends tag support to more L2 and L3 resources. | | standard-attr-description | standard-attr-description | Extension to add descriptions to standard attributes | | IP address substring filtering | ip-substring-filtering | Provides IP address substring filtering when listing ports | | Neutron L3 Router | router | Router abstraction for basic L3 forwarding between L2 Neutron networks and access to external networks via a NAT gateway. | | Allowed Address Pairs | allowed-address-pairs | Provides allowed address pairs | | project_id field enabled | project-id | Extension that indicates that project_id field is enabled. | | Distributed Virtual Router | dvr | Enables configuration of Distributed Virtual Routers. | +----------------------------------------------------------------------------------------------+---------------------------+----------------------------------------------------------------------------------------------------------------------------------------------------------+
[root@controller ~]# openstack network agent list
+--------------------------------------+--------------------+------------+-------------------+-------+-------+---------------------------+
| ID                                   | Agent Type         | Host       | Availability Zone | Alive | State | Binary                    |
+--------------------------------------+--------------------+------------+-------------------+-------+-------+---------------------------+
| 0244254a-c782-4505-ad9a-7a7751216526 | Linux bridge agent | compute1   | None              | :-)   | UP    | neutron-linuxbridge-agent |
| 1cb1bf35-bcea-4ed1-8eff-a69f439ed4a0 | DHCP agent         | controller | nova              | :-)   | UP    | neutron-dhcp-agent        |
| 3e2a99a4-07c6-4ba5-b627-a321408ed40c | L3 agent           | controller | nova              | :-)   | UP    | neutron-l3-agent          |
| 5d5359c2-79f6-47a0-846d-c672eac7537f | Metadata agent     | controller | None              | :-)   | UP    | neutron-metadata-agent    |
| c2fded1e-d70f-4a85-9c3c-1955e7853f79 | Linux bridge agent | controller | None              | :-)   | UP    | neutron-linuxbridge-agent |
+--------------------------------------+--------------------+------------+-------------------+-------+-------+---------------------------+
22.安装dashboard(Horizon)
1)安装
[root@controller ~]# yum install openstack-dashboard
2)编辑/etc/openstack-dashboard/local_setting文件
(1)配置dashboard以在controller节点上使用OpenStack服务:
OPENSTACK_HOST = "controller"
(2)允许其他主机访问Dashboard
ALLOWED_HOSTS = ['*']
# 使用'*'表示接受所有主机的访问
(3)配置memcached回话存储服务
SESSION_ENGINE = 'django.contrib.sessions.backends.cache'

CACHES = {
    'default': {
         'BACKEND': 'django.core.cache.backends.memcached.MemcachedCache',
         'LOCATION': 'controller:11211',
    }
}
注意:此处要注释掉其他的回话存储配置
(4)启用Identity API版本3:
OPENSTACK_KEYSTONE_URL = "http://%s:5000/v3" % OPENSTACK_HOST
(5)启用对域的支持:
OPENSTACK_KEYSTONE_MULTIDOMAIN_SUPPORT = True
(6)配置API版本:
OPENSTACK_API_VERSIONS = {
    "identity": 3,
    "image": 2,
    "volume": 2,
}
(7)配置Default为通过仪表盘创建的用户的默认域:
OPENSTACK_KEYSTONE_DEFAULT_DOMAIN = 'Default'
(8)配置user为您通过仪表盘创建的用户的默认角色
OPENSTACK_KEYSTONE_DEFAULT_ROLE = "user"
(9)配置可选时区
TIME_ZONE = "UTC"
3)重新启动web服务器和会话存储服务
[root@controller ~]# systemctl restart httpd.service memcached.service
4)验证,通过浏览器访问http://10.132.226.103/dashboard进入Horizon的登录界面
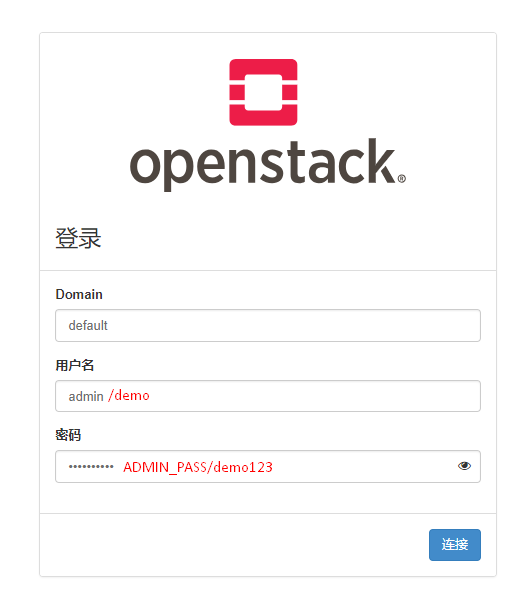
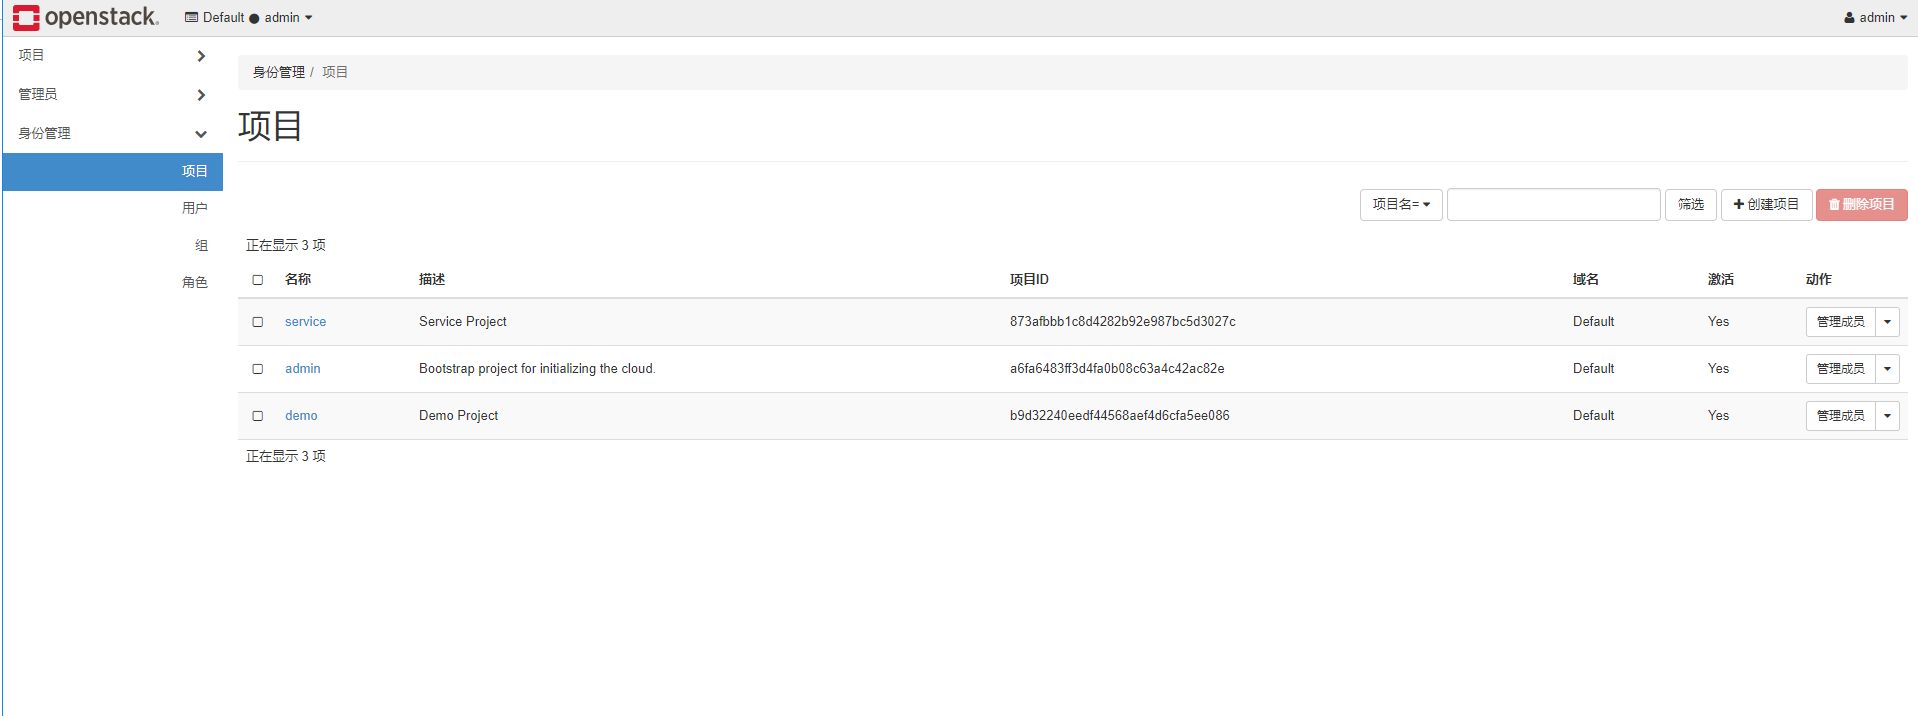
部署成功!!!