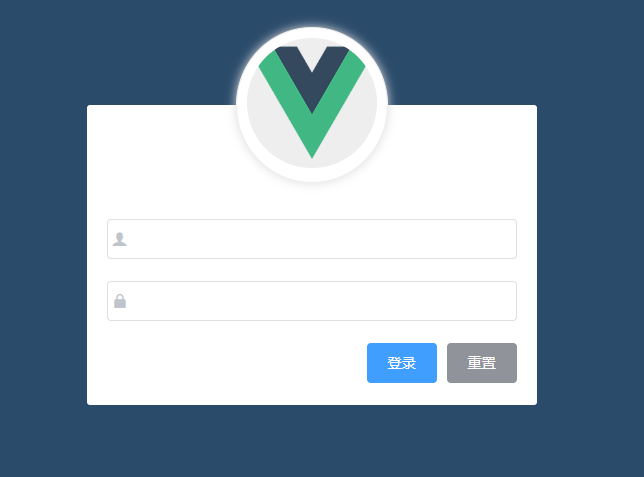
效果图:
1、首先来根据Element网站实现布局:
<template>
  <div class="login_container">
    <div class="login_box">
      <!--头像区域-->
      <div class="avatar_box">
        <img src="../assets/logo.png" alt />
      </div>
      <!--表单区域-->
      <el-form  label-width="0px" class="login_form">
        <el-form-item>
          <el-input prefix-icon="iconfont icon-user" v-model="loginForm.username"></el-input>
        </el-form-item>
        <el-form-item>
          <el-input prefix-icon="iconfont icon-3702mima" v-model="loginForm.password" show-password></el-input>
        </el-form-item>
        <el-form-item class="btns">
          <el-button type="primary">登录</el-button>
          <el-button type="info">重置</el-button>
        </el-form-item>
      </el-form>
    </div>
  </div>
</template>

<script>
export default {
  data () {
    return {
      // 登录表单的数据绑定对象
      loginForm: {
        username: '',
        password: ''
      },
   }
}
</script>

<style lang="less" scoped>
.login_container {
  height: 100%;
  background: #2b4b6b;
}
.login_box {
  width: 450px;
  height: 300px;
  background: #fff;
  border-radius: 3px;
  position: absolute;
  left: 50%;
  top: 50%;
  transform: translate(-50%, -50%);

  .avatar_box {
    padding: 10px;
    width: 130px;
    height: 130;
    border: 1px solid #eee;
    border-radius: 50%;
    box-shadow: 0 0 10px #ddd;
    position: absolute;
    left: 50%;
    transform: translate(-50%, -50%);
    background: #fff;
    img {
      width: 100%;
      height: 100%;
      border-radius: 50%;
      background: #eee;
    }
  }
}
.login_form {
  position: absolute;
  bottom: 0;
  width: 100%;
  padding: 0 20px;
  box-sizing: border-box;
}
.btns {
  display: flex;
  justify-content: flex-end;
}
</style>
2、加入表单验证规则
loginForm:是数据绑定对象,loginFormRef:是引用名称,loginFormRules:是验证规则,label-width:是表单域标签的宽度
加入 :rules="loginFormRules"
<el-form ref="loginFormRef" :model="loginForm" :rules="loginFormRules" label-width="0px" class="login_form">
        <el-form-item prop="username">
          <el-input prefix-icon="iconfont icon-user" v-model="loginForm.username"></el-input>
        </el-form-item>
        <el-form-item prop="password">
          <el-input prefix-icon="iconfont icon-3702mima" v-model="loginForm.password" show-password></el-input>
        </el-form-item>
        <el-form-item class="btns">
          <el-button type="primary">登录</el-button>
          <el-button type="info">重置</el-button>
        </el-form-item>
</el-form>

<script>
export default {
  data () {
    return {
      // 登录表单的数据绑定对象
      loginForm: {
        username: '',
        password: ''
      },
      // 表单的验证规则对象
      loginFormRules: {
        username: [
          { required: true, message: '请输入登录名称', trigger: 'blur' },
          { min: 3, max: 10, message: '长度在 3 到 10 个字符', trigger: 'blur' }
        ],
        password: [
          { required: true, message: '请输入登录密码', trigger: 'blur' },
          { min: 6, max: 15, message: '长度在 6 到 15 个字符', trigger: 'blur' }
        ]
      }
    }
  }
}
</script>
验证规则的required:表示是否必填,message:表示提示信息,trigger:表示触发时机(blur失去焦点)
3、重置按钮
resetFields 对整个表单进行重置,将所有字段值重置为初始值并移除校验结果
加入ref="loginFormRef"和@click="resetLoginForm"
<el-form ref="loginFormRef" :model="loginForm" :rules="loginFormRules" label-width="0px" class="login_form">
        <el-form-item prop="username">
          <el-input prefix-icon="iconfont icon-user" v-model="loginForm.username"></el-input>
        </el-form-item>
        <el-form-item prop="password">
          <el-input prefix-icon="iconfont icon-3702mima" v-model="loginForm.password" show-password></el-input>
        </el-form-item>
        <el-form-item class="btns">
          <el-button type="primary">登录</el-button>
          <el-button type="info" @click="resetLoginForm">重置</el-button>
        </el-form-item>
</el-form>

<script>
export default {
  data () {
    return {
      // 登录表单的数据绑定对象
      loginForm: {
        username: '',
        password: ''
      },
      // 表单的验证规则对象
      loginFormRules: {
        username: [
          { required: true, message: '请输入登录名称', trigger: 'blur' },
          { min: 3, max: 10, message: '长度在 3 到 10 个字符', trigger: 'blur' }
        ],
        password: [
          { required: true, message: '请输入登录密码', trigger: 'blur' },
          { min: 6, max: 15, message: '长度在 6 到 15 个字符', trigger: 'blur' }
        ]
      }
    }
  },
  methods: {
    // 点击重置按钮 重置表单
    resetLoginForm () {
      // console.log(this)
      this.$refs.loginFormRef.resetFields()
    }
  }
}
</script>
4、登录前的预校验:
validate
说明:对整个表单进行校验的方法,参数为一个回调函数。该回调函数会在校验结束后被调用,并传入两个参数:是否校验成功和未通过校验的字段。若不传入回调函数,则会返回一个promise
参数:Function(callback: Function(boolean, object))
<el-button type="primary" @click="submitLogin">登录</el-button>

<script>
export default {
   methods: {
    // 点击登录按钮
    submitLogin () {
      this.$refs.loginFormRef.validate(valid => {
        console.log(valid)
      })
    },
    // 点击重置按钮 重置表单
    resetLoginForm () {
      // console.log(this)
      this.$refs.loginFormRef.resetFields()
    }
  }
}
</script>
5、通过axios发起请求:
可以先进行配置 main.js
import axios from 'axios'
// 配置请求的根路径
axios.defaults.baseURL = 'http://127.0.0.1:8888/api/private/v1/'
Vue.prototype.$http = axios
页面调用:
// 点击登录按钮
submitLogin () {
    this.$refs.loginFormRef.validate(async valid => {
        // console.log(valid)
        if (!valid) return
        const { data: res } = await this.$http.post('login', this.loginForm)
        // console.log(res)
        if (res.meta.status !== 200) return console.log('登录失败')
        console.log('登录成功')
    })
},
6、配置弹框提示
打开plugins/element.js
import Vue from 'vue'
import { Button, Form, FormItem, Input, Message } from 'element-ui'
Vue.use(Button)
Vue.use(Form)
Vue.use(FormItem)
Vue.use(Input)
// 挂载到Vue全局
Vue.prototype.$message = Message
修改Login.vue代码
// 点击登录按钮
    submitLogin () {
      this.$refs.loginFormRef.validate(async valid => {
        // console.log(valid)
        if (!valid) return
        const { data: res } = await this.$http.post('login', this.loginForm) // data重定向为res
        // console.log(res)
        if (res.meta.status !== 200) return this.$message.error('登录失败')
        this.$message.success('登录成功')
      })
    },

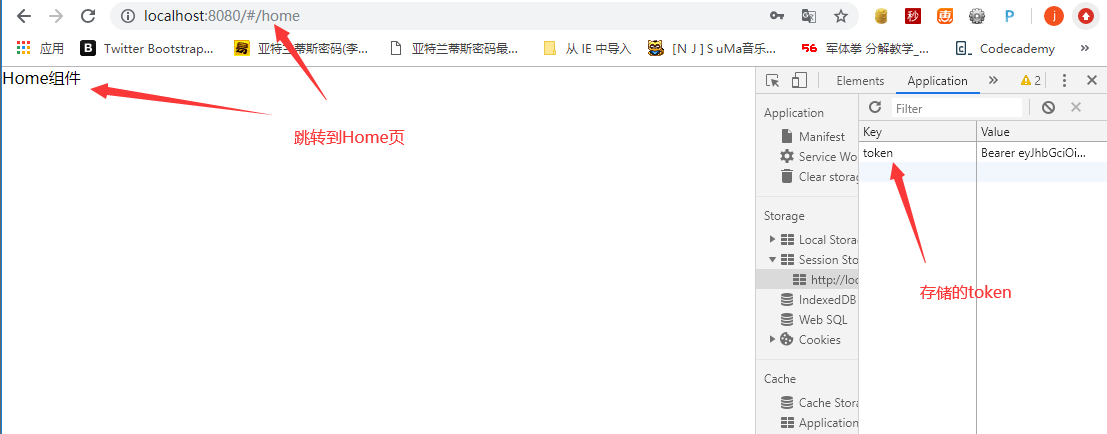
7、登录之后的token保存到客户端的sessionStorage中
项目中除了登录之外的其他api接口,必须在登录之后才能访问
token只在当前网站打开期间生效,所以将token保存在sessionStorage中
// 点击登录按钮
   submitLogin () {
      this.$refs.loginFormRef.validate(async valid => {
        // console.log(valid)
        if (!valid) return
        const { data: res } = await this.$http.post('login', this.loginForm) // data重定向为res
        // console.log(res)
        if (res.meta.status !== 200) return this.$message.error('登录失败')
        this.$message.success('登录成功')
        // 将登录成功之后的token保存到客户端的sessionStorage中
        window.sessionStorage.setItem('token', res.data.token)
   })
8、通过编程式导航跳转到后台主页,路由地址是 /home
修改Login.vue:
// 点击登录按钮
   submitLogin () {
      this.$refs.loginFormRef.validate(async valid => {
        // console.log(valid)
        if (!valid) return
        const { data: res } = await this.$http.post('login', this.loginForm) // data重定向为res
        // console.log(res)
        if (res.meta.status !== 200) return this.$message.error('登录失败')
        this.$message.success('登录成功')
        // 将登录成功之后的token保存到客户端的sessionStorage中
        window.sessionStorage.setItem('token', res.data.token)
        // 通过编程式导航跳转到后台主页,路由地址是 /home
        this.$router.push('/home')
      })
   }
新建home路由:
import Home from '../components/Home.vue'

const routes = [
  { path: '/', redirect: '/login' }, // 重定向
  { path: '/login', component: Login },
  { path: '/home', component: Home }
]
新建Home.vue文件:
<template>
<div class="">
  Home组件
</div>
</template>

<script>
export default {
}
</script>

<style lang="less" scoped>

</style>
9、Home页增加访问权限
现在把Session Storage清空,刷新Home页还是能访问的,而我们的需求是:如果用户没有登录,但是直接通过URL访问特定权限的页面,需要重新导航到登录页面。
beforEach路由导航守卫:
- to:router即将进入的路由对象。
- from:当前导航正要离开的路由。
- next:一个function,一定要调用该方法来 resolve 这个钩子。执行效果依赖 next 方法的调用参数。
- next() : 进行管道中的下一个钩子。如果全部钩子执行完了,则导航的状态就是 confirmed (确认的)。
- next(false) : 中断当前的导航。如果浏览器的 URL 改变了(可能是用户手动或者浏览器后退按钮),那么 URL 地址会重置到 from 路由对应的地址。
- next('/') 或者 next({ path: '/' }): 跳转到一个不同的地址。当前的导航被中断,然后进行一个新的导航。 你可以向 next 传递任意位置对象,且允许设置诸如 replace: true、name: ‘home' 之类的选项以及任何用在 router-link 的 to prop 或 router.push 中的选项,注意,next可以通过query传递参数。
- next(error) : (2.4.0+) 如果传入 next 的参数是一个 Error 实例,则导航会被终止且该错误会被传递给 router.onError() 注册过的回调。
在router里添加路由守卫:
// 挂载路由导航守卫
router.beforeEach((to, from, next) => {
  // to:将要访问的路径
  // from:代表从那个路径跳转而来
  // next是一个函数,表示放行;  next() 放行    next('/login') 强制跳转

  // 如果用户访问的登录页,直接放行
  if (to.path === '/login') return next()
  // 从sessionStorage中获取到保存的token值
  const tokenStr = window.sessionStorage.getItem('token')
  // 没有token 强制跳转到登录页
  if (!tokenStr) return next('/login')
  next()
})
现在在浏览器里输入 http://localhost:8080/#/home 会 强制跳转为 http://localhost:8080/#/login
10、退出功能
基于token的方式实现退出比较简单,只需要销毁本地的token即可。这样,后续的请求就不会携带token,必须重新登录生成一个新的token之后才可以访问页面
Home页面里添加退出按钮:
<el-button type="info" @click="logout">退出</el-button>

<script>
export default {
  methods: {
    logout () {
      // 清空token
      window.sessionStorage.clear('token')
      // 跳转到登录页
      this.$router.push('/login')
    }
  }
}
</script>
OK,功能实现。