1.创建nginx运行账户www并加入到www组,不允许www用户直接登录系统,查看创建。
groupadd www
useradd -g www www -s /bin/false
tail /etc/passwd
2.进入nginx的配置文件目录
cd /usr/local/nginx/conf
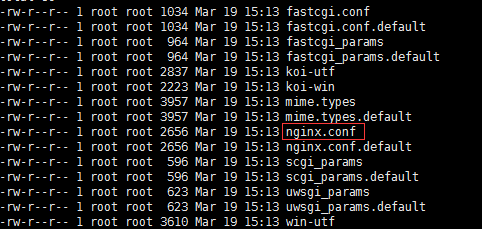
3.看一下目录下文件
ll
4.编辑配置文件nginx.conf,可以一项一项配置使用【/usr/local/nginx/sbin/nginx -t】查看是否配置出错。
vi nginx.conf
4.1、上边创建了用户,#user nobody 打开注释,修改为user www www
4.2、worker_processes 2; #设置值和CPU核心数一致
4.3、error_log定义错误日志文件的位置及输出级别【debug / info / notice / warn / error / crit】
error_log /usr/local/nginx/logs/error.log error;
user  www www;#用来指定nginx worker进程运行用户以及用户组,默认nobody账号运行
worker_processes  1;#指定nginx要开启的子进程数量,运行过程中监控每个进程消耗内存(一般几M~几十M不等)根据实际情况进行调整,通常数量是CPU内核数量的整数倍

#定义错误日志文件的位置及输出级别【debug / info / notice / warn / error / crit】
error_log  /usr/local/nginx/logs/error.log error;
#error_log  logs/error.log  notice;
#error_log  logs/error.log  info;

#用来指定进程id的存储文件的位置
#pid        logs/nginx.pid;

#用于指定一个进程可以打开最多文件数量的描述
worker_rlimit_nofile 1024;

#针对nginx服务器的工作模式的一些操作配置
events {
    worker_connections  1024;#指定最大可以同时接收的连接数量,这里一定要注意,最大连接数量是和worker processes共同决定的
    multi_accept on;#配置指定nginx在收到一个新连接通知后尽可能多的接受更多的连接
    use epoll;#配置指定了线程轮询的方法,如果是linux2.6+,使用epoll,如果是BSD如Mac请使用Kqueue
}


http {
    include       mime.types;#指定在当前文件中包含另一个文件的指令
    default_type  application/octet-stream;#指定默认处理的文件类型可以是二进制

    log_format  main  '$remote_addr - $remote_user [$time_local] "$request" '
                      '$status $body_bytes_sent "$http_referer" '
                      '"$http_user_agent" "$http_x_forwarded_for"';

    access_log  /usr/local/nginx/logs/access.log  main;##用于指定该虚拟主机服务器中的访问记录日志存放路径,main是上边log_format定义的格式

    sendfile        on;#配置on让sendfile发挥作用,将文件的回写过程交给数据缓冲去去完成,而不是放在应用中完成,这样的话在性能提升有有好处
    tcp_nopush     on;#让nginx在一个数据包中发送所有的头文件,而不是一个一个单独发
    tcp_nodelay on;#让nginx不要缓存数据,而是一段一段发送,如果数据的传输有实时性的要求的话可以配置它,发送完一小段数据就立刻能得到返回值,但是不要滥用哦


    #keepalive_timeout  0;
    keepalive_timeout  65;#给客户端分配连接超时时间,服务器会在这个时间过后关闭连接。一般设置时间较短,可以让nginx工作持续性更好
    client_header_timeout 10;#设置请求头的超时时间
    client_body_timeout 10;#设置请求体的超时时间
    send_timeout 10;#指定客户端响应超时时间,如果客户端两次操作间隔超过这个时间,服务器就会关闭这个链接

    limit_conn_zone $binary_remote_addr zone=addr:5m;#设置用于保存各种key的共享内存的参数,
    limit_conn addr 100; #给定的key设置最大连接数

    gzip  on;#是告诉nginx采用gzip压缩的形式发送数据。这将会减少我们发送的数据量
    gzip_disable "msie6";#为指定的客户端禁用gzip功能。我们设置成IE6或者更低版本以使我们的方案能够广泛兼容
    gzip_types text/plain text/css application/json application/javascript text/xml application/xml application/xml+rss text/javascript;


    #主要负责负载均衡的配置,通过默认的轮询调度方式来分发请求到后端服务器
    #-- max_fails:表示失败最大次数,超过失败最大次数暂停服务
    #-- fail_timeout:表示如果请求受理失败,暂停指定的时间之后重新发起请求
    upstream nginxServer {
        ip_hash;#指定请求调度算法,默认是weight权重轮询调度,可以指定
        server localhost:8000 max_fails=3 fail_timeout=3s;#可以用localhost,调用同一台服务器上server,也可以用ip或域名,代理其他服务器
        server 60.110.110.60:8001 down;#表示该主机暂停服务
        server 60.110.110.60:8002 max_fails=3 fail_timeout=3s;
        server 60.110.110.60:8003 max_fails=3 fail_timeout=3s;
        server 60.110.110.60:8004 max_fails=3 fail_timeout=3s;
        server 60.110.110.60:8005 max_fails=3 fail_timeout=3s;
    }


    server {
        listen       80;
        server_name www.xxx.cn;#指定ip地址或者域名,多个配置之间用空格分隔

        charset utf-8;

        #access_log  logs/host.access.log  main;

        #location / {
        #    root   html;
        #    index  index.html index.htm;
        #    proxy_pass http://nginxServer/;
        #    proxy_set_header Host $host;
        #    proxy_set_header X-Real-IP $remote_addr;
        #    proxy_set_header X-Forwarded-For $proxy_add_x_forwarded_for;
        #}

        #error_page  404              /404.html;#用于指定该虚拟主机服务器中访问错误日志的存放路径

        rewrite ^(.*)$ https://$host$1 permanent;#强制http访问https端口。如果不用https协议注掉

        # redirect server error pages to the static page /50x.html
        #
        error_page   500 502 503 504  /50x.html;
        location = /50x.html {
            root   html;
        }

        # proxy the PHP scripts to Apache listening on 127.0.0.1:80
        #
        #location ~ .php$ {
        #    proxy_pass   http://127.0.0.1;
        #}

        # pass the PHP scripts to FastCGI server listening on 127.0.0.1:9000
        #
        #location ~ .php$ {
        #    root           html;
        #    fastcgi_pass   127.0.0.1:9000;
        #    fastcgi_index  index.php;
        #    fastcgi_param  SCRIPT_FILENAME  /scripts$fastcgi_script_name;
        #    include        fastcgi_params;
        #}

        # deny access to .htaccess files, if Apache's document root
        # concurs with nginx's one
        #
        #location ~ /.ht {
        #    deny  all;
        #}
    }

    # another virtual host using mix of IP-, name-, and port-based configuration
    #
    #server {
    #    listen       8000;
    #    listen       somename:8080;
    #    server_name  somename  alias  another.alias;

    #    location / {
    #        root   html;
    #        index  index.html index.htm;
    #    }
    #}


    # HTTPS server

    server {
        listen       443 ssl;
        server_name  www.xxx.cn;

        ssl_certificate      cert/www.xxx.cn.pem;
        ssl_certificate_key  cert/www.xxx.cn.key;

        ssl_session_cache    shared:SSL:1m;
        ssl_session_timeout  5m;

        ssl_ciphers ECDHE-RSA-AES128-GCM-SHA256:ECDHE:ECDH:AES:HIGH:!NULL:!aNULL:!MD5:!ADH:!RC4;
        ssl_protocols TLSv1 TLSv1.1 TLSv1.2;
        ssl_prefer_server_ciphers  on;

        location / {
            root   html;
            index  index.html index.htm;
            proxy_pass http://nginxServer/;
            proxy_set_header Host $host;
            proxy_set_header X-Real-IP $remote_addr;
            proxy_set_header X-Forwarded-For $proxy_add_x_forwarded_for;
        }
    }

}
5.启动
/usr/local/nginx/sbin/nginx
6.重新加载
/usr/local/nginx/sbin/nginx -s reload
7.重启
/usr/local/nginx/sbin/nginx -s reopen
8.停止
/usr/local/nginx/sbin/nginx -s stop
9.设置开机启动
vi /etc/init.d/nginx
#! /bin/bash
# chkconfig: - 85 15
PATH=/usr/local/nginx
DESC="nginx daemon"
NAME=nginx
DAEMON=$PATH/sbin/$NAME
CONFIGFILE=$PATH/conf/$NAME.conf
PIDFILE=$PATH/logs/$NAME.pid
SCRIPTNAME=/etc/init.d/$NAME
set -e
[ -x "$DAEMON" ] || exit 0
do_start() {
$DAEMON -c $CONFIGFILE || echo -n "nginx already running"
}
do_stop() {
$DAEMON -s stop || echo -n "nginx not running"
}
do_reload() {
$DAEMON -s reload || echo -n "nginx can't reload"
}
case "$1" in
start)
echo -n "Starting $DESC: $NAME"
do_start
echo "."
;;
stop)
echo -n "Stopping $DESC: $NAME"
do_stop
echo "."
;;
reload|graceful)
echo -n "Reloading $DESC configuration..."
do_reload
echo "."
;;
restart)
echo -n "Restarting $DESC: $NAME"
do_stop
do_start
echo "."
;;
*)
echo "Usage: $SCRIPTNAME {start|stop|reload|restart}" >&2
exit 3
;;
esac
exit 0
将上方脚本代码cp到vi的nginx文件中,修改其中的PATH路径改为自己的安装路径。
然后授权
chmod a+x /etc/init.d/nginx
/etc/init.d/nginx start
/etc/init.d/nginx stop

chkconfig --add /etc/init.d/nginx

service nginx start
service nginx stop

chkconfig nginx on
chkconfig nginx off