1. 下载安装nodejs
截至2018-06-05 最新稳定版本为 8.11.2,直接 next ,不改目录。
PS C:UsersAdministrator> node -v
v8.11.2
PS C:UsersAdministrator> npm -v
5.6.0
2. 安装node后,设置 npm 淘宝代理镜像
npm config set registry https://registry.npm.taobao.org
npm info underscore (如果上面配置正确这个命令会有字符串response)
或者直接编辑 ~/.npmrc(比如 C:UsersAdministrator.npmrc )加入下面内容。
registry = https://registry.npm.taobao.org
3. 安装 vue-cli
截至2018-06-05 最新版本为 2.9.6。带上版本号,大家用同一个版本。
npm i vue-cli@2.9.6 -g
安装完成后,校验是否安装成功
PS C:UsersAdministrator> vue -V
2.9.6
3. 初始化项目
使用 vue init 命令初始化项目
vue init webpack
? Generate project in current directory? (Y/n)
// 是否在当前文件夹下创建项目: 输入y, 回车
? Project name (vue-learn-demo)
// 项目名称:不输入,直接回车
? Project description (A Vue.js project)
// 项目描述:不输入,直接回车
? Author (fefuns <1321120469@qq.com>)
// 作者: 不输入,直接回车
? Vue build (Use arrow keys)
> Runtime + Compiler: recommended for most users
  Runtime-only: about 6KB lighter min+gzip, but templates (or any Vue-specific HTML) are ONLY allowed in .vue files - render functions are required elsewhere

// 第一个是vue官方推荐大部分用户用这个,这个表示可以不基于 .vue 文件做开发,可以在运行时做编译,因为它有一个 compiler。
// 如果选第二个,min + gzip后,vuejs文件会减小6KB,因为它省略了templates模板的编译过程, 因为这个编译过程是webpack 用 vue-loader 去编译.vue 做的, 但是必须依赖 .vue文件做开发。
// 上下箭头选第二个,回车。

? Install vue-router? (Y/n)
// 是否安装路由:输入 y, 回车
? Use ESLint to lint your code? (Y/n)
// 是否使用 ESlint 规范代码:输入 y, 回车
? Pick an ESLint preset (Use arrow keys)
> Standard (https://github.com/standard/standard)
  Airbnb (https://github.com/airbnb/javascript)
  none (configure it yourself)
// 选择哪种 ESlint 规范预设。选择 standard 规范
? Set up unit tests (Y/n)
// 是否设置单元测试:输入 n, 回车
? Setup e2e tests with Nightwatch? (Y/n)
// 是否用 Nightwatch 设置 E2E 测试:输入 n,回车
? Should we run `npm install` for you after the project has been created? (recommended) (Use arrow keys)
> Yes, use NPM
  Yes, use Yarn
  No, I will handle that myself

// 是否在创建完项目后自动安装依赖,并选择一种依赖管理工具。
// 选择 npm, 回车
进行完以上步骤,执行 npm run dev 即可打开 http://localhost:8080 开发环境

可能会遇到的问题:
了解更多:
4. 如何在项目中使用 scss
vue-cli@2.9.6 生成的项目,默认加入了处理sass的loader, 但是并没有将依赖写在package.json中。
所以想在 .vue文件里使用scss
<style scoped lang="scss">

<style>
得自己安装依赖:其中安装sass-loader前需要提前安装node-sass。如果你以后做的项目样式是用less的话,安装less-loader前需要安装less。以下为安装node-sass 与 sass-loader
npm install sass-loader node-sass --save-dev
可能会出现的问题:
- node-sass 安装不成功。解决方案,用如下方式安装
npm install --save-dev node-sass --registry=https://registry.npm.taobao.org --disturl=https://npm.taobao.org/dist --sass-binary-site=http://npm.taobao.org/mirrors/node-sass
5. 安装 HTTP 库 axios
可以理解为jquery项目中的ajax
npm i axios -S
// 相当于 npm install axios --save
在项目中全局引入,修改 src/main.js
import axios from 'axios'
...
Vue.prototype.$http = axios
6. 安装状态管理库 vuex
npm i vuex -S
// 相当于 npm install vuex --save
在项目中全局引入,修改 src/main.js
import Vuex from 'vuex'
...
vue.use(Vuex)
7. 安装 ElementUI
npm i element-ui -S
在项目中全局引入,修改 src/main.js
import ElementUI from 'element-ui'
import 'element-ui/lib/theme-chalk/index.css'
...
Vue.use(ElementUI)
8. 关于 ES6 编译相关的一些优化
babel-polyfill:
Babel 默认只转换新的 JavaScript 语法,而不转换新的 API。例如,Iterator、Generator、Set、Maps、Proxy、Reflect、Symbol、Promise 等全局对象,以及一些定义在全局对象上的方法(比如 Object.assign)都不会转译。如果想使用这些新的对象和方法,必须使用 babel-polyfill,为当前环境提供一个垫片。
babel-runtime:
babel-runtime 是为了减少重复代码而生的。babel-runtime插件能够将这些工具函数的代码转换成require语句,指向为对babel-runtime的引用。
babel-plugin-transform-runtime:
以插件的形式在打包时引入到文件里
vue-cli生成的项目自带了有babel-plugin-transform-runtime
安装方式:
npm i babel-runtime -S
// 相当于 npm install babel-runtime --save
npm i babel-polyfill -D
// 相当于 npm install babel-polyfill --save-dev
在项目中全局引入,修改 src/main.js, 在第一行加入
import 'babel-polyfill'
注意 bable-polyfill 必须写在最上面,而babel-runtime是不需要引入的
了解更多:
- babel的polyfill和runtime的区别
- 为什么有的是 --save 有的是 save-dev, 他们之间的区别就在于。其实这个感觉影响也不是太大。
--save-dev 是你开发时候依赖的东西,--save 是你发布到线上之后还依赖的东西。
比如,你写 ES6 代码,如果你想编译成 ES5 发布那么 babel 就是devDependencies。 如果你用了 axios,由于发布之后还是依赖 axios 处理数据请求,所以是dependencies。
最终的 src/main.js 如下:
import 'babel-polyfill'
import Vue from 'vue'
import router from './router'
import Vuex from 'vuex'
import axios from 'axios'
import ElementUI from 'element-ui'
import 'element-ui/lib/theme-chalk/index.css'
import App from './App'

Vue.config.productionTip = false
Vue.use(Vuex)
Vue.use(ElementUI)
Vue.prototype.$http = axios

/* eslint-disable no-new */
new Vue({
  el: '#app',
  router,
  render: h => h(App)
})
最终的 package.json 如下:
{
  "name": "vue-learn-demo",
  "version": "1.0.0",
  "description": "A Vue.js project",
  "author": "fefuns <1321120469@qq.com>",
  "private": true,
  "scripts": {
    "dev": "webpack-dev-server --inline --progress --config build/webpack.dev.conf.js",
    "start": "npm run dev",
    "lint": "eslint --ext .js,.vue src",
    "build": "node build/build.js"
  },
  "dependencies": {
    "axios": "^0.18.0",
    "babel-runtime": "^6.26.0",
    "element-ui": "^2.4.0",
    "vue": "^2.5.2",
    "vue-router": "^3.0.1",
    "vuex": "^3.0.1"
  },
  "devDependencies": {
    "autoprefixer": "^7.1.2",
    "babel-core": "^6.22.1",
    "babel-eslint": "^8.2.1",
    "babel-helper-vue-jsx-merge-props": "^2.0.3",
    "babel-loader": "^7.1.1",
    "babel-plugin-syntax-jsx": "^6.18.0",
    "babel-plugin-transform-runtime": "^6.22.0",
    "babel-plugin-transform-vue-jsx": "^3.5.0",
    "babel-polyfill": "^6.26.0",
    "babel-preset-env": "^1.3.2",
    "babel-preset-stage-2": "^6.22.0",
    "chalk": "^2.0.1",
    "copy-webpack-plugin": "^4.0.1",
    "css-loader": "^0.28.0",
    "eslint": "^4.15.0",
    "eslint-config-standard": "^10.2.1",
    "eslint-friendly-formatter": "^3.0.0",
    "eslint-loader": "^1.7.1",
    "eslint-plugin-import": "^2.7.0",
    "eslint-plugin-node": "^5.2.0",
    "eslint-plugin-promise": "^3.4.0",
    "eslint-plugin-standard": "^3.0.1",
    "eslint-plugin-vue": "^4.0.0",
    "extract-text-webpack-plugin": "^3.0.0",
    "file-loader": "^1.1.4",
    "friendly-errors-webpack-plugin": "^1.6.1",
    "html-webpack-plugin": "^2.30.1",
    "node-notifier": "^5.1.2",
    "optimize-css-assets-webpack-plugin": "^3.2.0",
    "ora": "^1.2.0",
    "portfinder": "^1.0.13",
    "postcss-import": "^11.0.0",
    "postcss-loader": "^2.0.8",
    "postcss-url": "^7.2.1",
    "rimraf": "^2.6.0",
    "semver": "^5.3.0",
    "shelljs": "^0.7.6",
    "uglifyjs-webpack-plugin": "^1.1.1",
    "url-loader": "^0.5.8",
    "vue-loader": "^13.3.0",
    "vue-style-loader": "^3.0.1",
    "vue-template-compiler": "^2.5.2",
    "webpack": "^3.6.0",
    "webpack-bundle-analyzer": "^2.9.0",
    "webpack-dev-server": "^2.9.1",
    "webpack-merge": "^4.1.0"
  },
  "engines": {
    "node": ">= 6.0.0",
    "npm": ">= 3.0.0"
  },
  "browserslist": [
    "> 1%",
    "last 2 versions",
    "not ie <= 8"
  ]
}
9. 做 vue 项目编辑器的选择与设置
涉及到工程化的项目,不再建议使用轻量级编辑器sublime,推荐使用vscode或webstorm。
以vscode为例,为了更高效的编写vue项目,至少需要做以下配置:
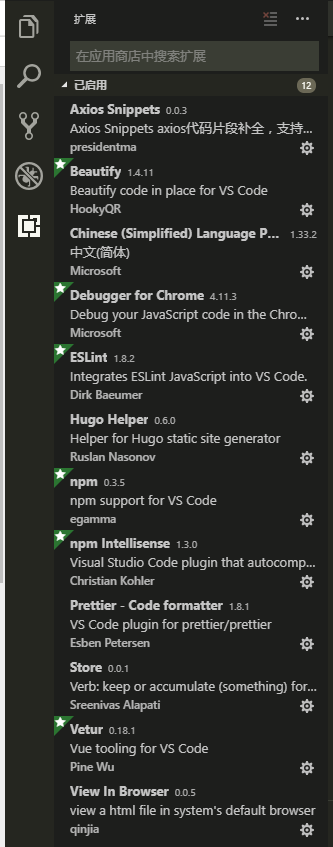
1. 安装 Vetur 扩展
主要是用于让vscode能识别vue文件,对vue代码进行高亮处理
2. vscode保存代码,自动按照eslint规范格式化代码设置
我自己的设置:
文件 > 首选项 > 设置

{
    "editor.tabSize": 2,
    "files.associations": {
        "*.vue": "vue"
    },
    "eslint.autoFixOnSave": true,
    "eslint.options": {
        "extensions": [
            ".js",
            ".vue"
        ]
    },
    "eslint.validate": [{
        "language": "javascript",
        "autoFix": true
      },{
        "language": "vue",
        "autoFix": true
      },{
        "language": "html",
        "autoFix": true
      }, {
        "language": "javascriptreact",
        "autoFix": true,
      }, {
        "language": "vue-html",
        "autoFix": true
      }
    ],
    "search.exclude": {
        "**/node_modules": true,
        "**/bower_components": true,
        "**/dist": true
    },
    "emmet.syntaxProfiles": {
        "javascript": "jsx",
        "vue": "html",
        "vue-html": "html"
    },
    "git.confirmSync": false,
    "window.zoomLevel": 0,
    "editor.renderWhitespace": "boundary",
    "editor.cursorBlinking": "smooth",
    "workbench.iconTheme": null,
    "editor.minimap.enabled": true,
    "editor.minimap.renderCharacters": false,
    // "tslint.autoFixOnSave": true,
    "editor.fontFamily": "'Droid Sans Mono', 'Courier New', monospace, 'Droid Sans Fallback'",
    // "beautify.tabSize": 2,
    "window.title": "${dirty}${activeEditorMedium}${separator}${rootName}",
    // "typescript.extension.sortImports.maxNamedImportsInSingleLine": 5,
    // "typescript.extension.sortImports.omitSemicolon": true,
    "editor.codeLens": true,
    "editor.snippetSuggestions": "top",
    // "react-native-storybooks.port": 6006,
"editor.wordWrap": "on",
"http.proxyStrictSSL": false,
"workbench.colorTheme": "Monokai",
"editor.detectIndentation": false,
"emmet.triggerExpansionOnTab": true
}
- VSCode拓展插件推荐(HTML、Node、Vue、React开发均适用)
- 利用vscode配置一段符合官方风格指南的vue代码片段
- Ctrl+Shift+P打开命令输入 snippet (打开用户代码片段)
- 再输入vue(选择代码片段的语言) 如果搜索不到,安装一个插件 vueHelper
- 如果搜索到复制粘贴以下代码
{
  "Print to console": {
    "prefix": "vue",
    "body": [
        "<template>",
        "  <div>
",
        "  </div>",
        "</template>
",
        "<script>",
        "import OtherComponent from '@/components/OtherComponent'
",
        "export default {",
        "  name: 'MyName',",
        "  components: {",
        "    OtherComponent",
        "  },",
        "  directives: {},",
        "  filters: {},",
        "  extends: {},",
        "  mixins: {},",
        "  props: {},",
        "  data () {",
        "    return {
",
        "    }",
        "  },",
        "  computed: {},",
        "  watch: {},",
        "  beforeCreate () {",
        "    // 生命周期钩子:组件实例刚被创建,组件属性计算之前,如 data 属性等",
        "  },",
        "  created () {",
        "    // 生命周期钩子:组件实例创建完成,属性已绑定,但 DOM 还未生成,$el 属性还不存在",
        "    // 初始化渲染页面",
        "  },",
        "  beforeMount () {",
        "    // 生命周期钩子:模板编译/挂载之前",
        "  },",
        "  mounted () {",
        "    // 生命周期钩子:模板编译、挂载之后(此时不保证已在 document 中)",
        "  },",
        "  beforeUpate () {",
        "    // 生命周期钩子:组件更新之前",
        "  },",
        "  updated () {",
        "    // 生命周期钩子:组件更新之后",
        "  },",
        "  activated () {",
        "    // 生命周期钩子:keep-alive 组件激活时调用",
        "  },",
        "  deactivated () {",
        "    // 生命周期钩子:keep-alive 组件停用时调用",
        "  },",
        "  beforeDestroy () {",
        "    // 生命周期钩子:实例销毁前调用",
        "  },",
        "  destroyed () {",
        "    // 生命周期钩子:实例销毁后调用",
        "  },",
        "  errorCaptured (err, vm, info) {",
        "    // 生命周期钩子:当捕获一个来自子孙组件的错误时被调用。此钩子会收到三个参数:错误对象、发生错误的组件实例以及一个包含错误来源信息的字符串。",
        "    console.log(err, vm, info)",
        "  },",
        "  methods: {}",
        "}",
        "</script>
",
        "<style lang="scss" scoped></style>",
        "$2"
    ],
    "description": "Log output to console"
  }
}