步骤:
    UIImageView *imageView = [[UIImageView alloc]initWithFrame:CGRectMake(100, 100, 100, 100)];
    imageView.backgroundColor  = [UIColor redColor];
    [self.view addSubview:imageView];

    NSMutableArray *array = [NSMutableArray array];
    for (int i = 0; i < 2; i++){

        //  生成图片名
        NSString *string = [NSString stringWithFormat:@"sheep2%d" , i+1];

        //  解决内存问题
        NSBundle *mainBundle = [NSBundle mainBundle];
        NSString *path = [mainBundle pathForResource:string ofType:@"png"];
        UIImage *currentImage = [UIImage imageWithContentsOfFile:path];

        //  将图片加入数组
        [array addObject:currentImage];

    }

    imageView.animationImages = array;

    //默认为0,才会无限播放. 设置成MAXFLOAT 真机运行一会,帧动画会无故消失
    imageView.animationRepeatCount = MAXFLOAT;
    imageView.animationDuration = 1;
    [imageView startAnimating];
坑:
animationRepeatCount默认为0,才会无限播放. 设置成MAXFLOAT 真机运行一会,帧动画会无故消失
imageView.animationRepeatCount = MAXFLOAT;
iOS开发中三种简单的动画设置:http://www.cnblogs.com/wendingding/p/3801330.html
iOS开发中的动画效果http://it.100xuexi.com/view/otdetail/20131012/8ce0fea2-e4f3-4111-93e8-015ac03a781f.html
iOS 计算点间距离、点间角度、线间角度http://blog.csdn.net/gf771115/article/details/7860423
//转换旋转角度的宏
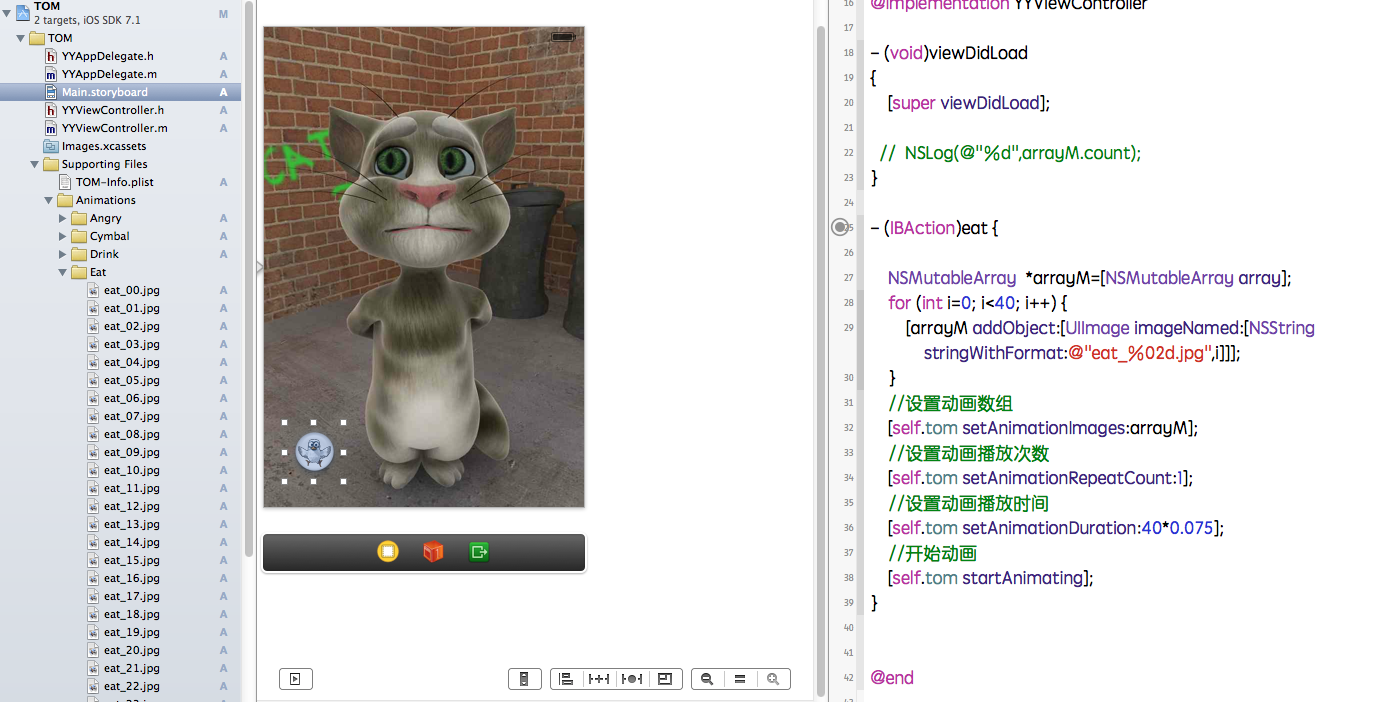
导入提前准备好的素材,对UIImageview和button按钮进行连线。
代码示例:
    NSMutableArray  *arrayM=[NSMutableArray array];
    for (int i=0; i<40; i++) {
        [arrayM addObject:[UIImage imageNamed:[NSString stringWithFormat:@"eat_%02d.jpg",i]]];
    }
    //设置动画数组
    [self.tom setAnimationImages:arrayM];
    //设置动画播放次数
    [self.tom setAnimationRepeatCount:1];
    //设置动画播放时间
    [self.tom setAnimationDuration:40*0.075];
    //开始动画
    [self.tom startAnimating];
}
点击按钮,即可执行动画,实现效果截图如下:

四、补充知识
1. Images.xcassets中的素材
(1)只支持png格式的图片
(2) 图片只支持[UIImage imageNamed]的方式实例化,但是不能从Bundle中加载
(3) 在编译时,Images.xcassets中的所有文件会被打包为Assets.car的文件
- (void)playAnimateWithName:(NSString *)name framesNumber:(int)frames
{
// 动画可能被打断
if (self.animationImageView.isAnimating){
return;
}
// 1.取出所有的这个动画相关的序列图片,生成一个数组用来存放这些图片
// 1.1生成数组
NSMutableArray *array = [NSMutableArray array];
// 1.2循环生成图片名,根据图片名把图片存入数组
for (int i = 0; i < frames; i++)
{
// 生成图片名
NSString *string = [NSString stringWithFormat:@"%@_%02d",name , i];
// 生成图片
// UIImage *image = [UIImage imageNamed:string];
// 解决内存问题
NSBundle *mainBundle = [NSBundle mainBundle];
NSString *path = [mainBundle pathForResource:string ofType:@"jpg"];
UIImage *image = [UIImage imageWithContentsOfFile:path];
// 将图片加入数组
[array addObject:image];
}
// 1.3把数组存入UIImageView中
self.animationImageView.animationImages = array;
// 1.4 重复次数
self.animationImageView.animationRepeatCount = 1;
// fps 12
self.animationImageView.animationDuration = frames / 12;
// 1.5播放动画
[self.animationImageView startAnimating];
//动画执行完0.01秒之后,使用 setAnimationImages: 方法清空里面的参数 withObject:nil. 将数组array清空.
[self.animationImageView performSelector:@selector(setAnimationImages:) withObject:nil afterDelay:self.animationImageView.animationDuration + 0.01];
// self.animationImageView performSelector:<#(SEL)#> withObject:<#(id)#> afterDelay:<#(NSTimeInterval)#>
}
3. UIImage imageNamed
(1)在图片使用完成后,不会直接被释放掉,具体释放时间由系统决定,适用于图片小,常用的图像处理
(2)如果要释放快速释放图片,可以使用[UIImage imageWithContentsOfFile:path]实例化图像
4. 方法重构的策略
(1) 将具有共性的代码复制到一个新的方法
(2)根据不同的调用情况,增加方法的参数
提示:在写程序时不要着急重构,有时候把代码先写出来,更容易看清楚如何重构才会更好
5. Bundle(包)中的图片素材
往项目中拖拽素材时,通常选择
(1) Destination: 勾选
(2) Folders:
1)选择第一项:黄色文件夹
注意点:Xcode中分文件夹,Bundle中所有所在都在同一个文件夹下,因此,不能出现文件重名的情况
特点:
a.可以直接使用[NSBundle mainBundle]作为资源路径,效率高!
b.可以使用[UIImage imageNamed:]加载图像
2)选择第二项:蓝色文件夹
注意点:Xcode中分文件夹,Bundle中同样分文件夹,因此,可以出现文件重名的情况
特点:
a.需要在[NSBundle mainBundle]的基础上拼接实际的路径,效率较差
b.不能使用[UIImage imageNamed:]加载图