用于指定对于 DI 使用注解,将不再需要在 Spring 中生命 Bean 实例,需要在原有的 Spring 运行环境基础上再做一些改变,完成以下三步
(1)导入 AOP 的 JAR 包。因为注解的后台实现用到了 AOP 编程。(spring-aop-4.2.1.RELEASE.jar)
(2)在配置文件中加入 context 约束(the context schema)
<?xml version="1.0" encoding="UTF-8"?>
<beans xmlns="http://www.springframework.org/schema/beans"
    xmlns:xsi="http://www.w3.org/2001/XMLSchema-instance"
    xmlns:context="http://www.springframework.org/schema/context" xsi:schemaLocation="
        http://www.springframework.org/schema/beans http://www.springframework.org/schema/beans/spring-beans.xsd
        http://www.springframework.org/schema/context http://www.springframework.org/schema/context/spring-context.xsd"> <!-- bean definitions here -->

</beans>
(3)在 Spring 配置文件中配置组件扫描器,用于在指定的基本包中扫描注解
<!-- 会扫描com.neu这个包及其子包 -->
<!-- <context:component-scan base-package="com.neu" /> -->
<!-- 会扫描com.neu的所有子包 -->
<!-- <context:component-scan base-package="com.neu.*" /> -->

<context:component-scan base-package="com.neu.di01" />
定义 Bean@Component
需要在类上使用注解 @Component,该注解的 value 属性用于指定该 bean 的 id 值
@Component("myStudent")
public class Student {
    // 类的定义
}
// 与@Component具有相同功能,不同意义的注解还有三个:
// @Repository:注解在Dao实现类上
// @Service:注解在Service实现类上
// @Controller:注解在处理器上(SpringMVC)
@Component("mySchool")
public class School {
    // 类的定义
}
另外,Spring 还提供了三个功能基本和 @Component 等效的注解:
@Respository 用于对 DAO 实现类进行注解
@Service 用于对 Service 实现类进行注解
@Controller 用于对 Controller 实现类进行注解
Spring 之所以创建三个与@Component等效的注解,是为了以后对其进行功能上的扩展,使他们不再等效
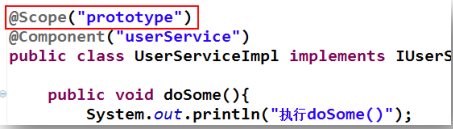
Bean 的作用域@Scope
其 value 值用于指定作用域。默认为 singleton
基本类型属性注入@Value
需要在属性上使用注解的 value 属性用于指定要注入的值
使用该注解实现注入时,类中无需 setter。当然,若属性中有 setter,也可以将注解加到 setter 上
@Value("张三")
private String name;
@Value("23")
private int age;
按类型注入域属性@Autowired
需要在域属性上使用注解@Autowired,该注解默认使用按类型自动装配 Bean 的方式。
同样这个注解也不需要 setter 方法,但是也可以加在 setter 方法上
@Autowired // byType自动注入
private School school;
按名称注入域属性@Autowired与@Qualifier
需要联合使用@Autowired和@Qualifier注解。@Qualifier 的 value 属性用于指定要匹配的 Bean 的 id 值。同样类中无需 setter,也可加到 setter 上。
@Component("mySchool")
public class School {
    private String sname;
@Autowired
@Qualifier("mySchool") // byName自动注入,需要这两个注解联用
private School school;
@Autowired还有一个属性 required,默认为 true。表示当匹配失败时会终止程序执行,若设置为 false,则匹配失败时将被忽略,未匹配的属性值设置为 null
域属性注解@Resource
Spring 提供了对Jsr-250规范中定义的@Resource标准注解的支持。@Resource注解既可以按名称匹配 Bean,也可以按类型匹配 Bean。使用该注解,要求 JDK 必须是 6 及以上的版本。
(1)按类型注入域属性
@Resource注解若不带有任何参数,则会按照类型进行 Bean 的匹配注入
@Resource // byType自动注入
private School school;
(2)按名称注入域属性
@Resource注解指定其 name 属性,则 name 的值即为按照名称进行匹配的 Bean 的 id
@Component("mySchool")
public class School {
    private String sname;
@Resource(name = "mySchool") // byName自动注入
private School school;
Bean 的生命始末与@PostConstruct与@PreDestroy
在方法上使用@PostConstruct,与原来的 init-method 等效。
在方法上使用@PreDestroy,与原来的 destroy-method 等效
@PostConstruct
public void afterInit() {
    System.out.println("初始化完毕后");
}

@PreDestroy
public void preDestory() {
    System.out.println("销毁之前");
}
使用 JavaConfig 进行配置(了解)
JavaConfig,是在 Spring 3.0 开始从一个独立的项目并入到 Spring 中的。JavaConfig 可以看做一个可以用来完成 Bean 的装配的 Spring 的配置文件,即 Spring 容器,只不过该容器不是 XML 文件,而是由程序员使用 Java 自己编写的 Java 类
对于一个POJO类,在类上使用@Configuration注解,将会使得当前类作为一个 Spring 的容器来使用,用于完成 Bean 的创建。在该 JavaConfig 的方法上使用 @Bean,将会使一个普通的方法所返回的结果变为指定名称的 Bean 实例。在 JavaConfig 中,也可以完成域属性的自动注入。
@Configuration // 表示当前类将作为Spring容器来使用
public class MyJavaConfig {
    @Bean(name = "mySchool")
    public School mySchoolCreator() {
        return new School("北京大学");
    }

    @Bean(name = "myStudent", autowire = Autowire.BY_TYPE)
    public Student myStudentCreator() {
        return new Student("张三", 22);
    }
}
使用 Spring 自带的 JUnit4 测试
使用 Spring 的 JUnit4 对 Spring 代码进行测试,将不再需要在程序的代码中直接写出创建 Spring 容器,及从 Spring 容器中通过 getBean() 获取对象。这些工作将由 JUnit4 注解,配合域属性的自动注入注解共同完成。(除了 JUnit-4.9.jar之外,还需要导入spring-test-4.2.1.RELEASE.jar)
测试类例子
package com.neu.di08;

import javax.annotation.Resource;

import org.junit.Test;
import org.junit.runner.RunWith;
import org.springframework.test.context.ContextConfiguration;
import org.springframework.test.context.junit4.SpringJUnit4ClassRunner;

@RunWith(SpringJUnit4ClassRunner.class)
@ContextConfiguration("classpath:com/neu/di08/applicationContext.xml")
public class MyTest {
    @Resource(name="myStudent")
    private Student student;

    @Test
    public void test01() {
        System.out.println(student);
    }

    @Test
    public void test02() {
        System.out.println(student);
    }
}