将一个SpringBoot项目,打成war包
<!-- 1. 修改POM依赖 -->
<dependency>
    <groupId>org.springframework.boot</groupId>
    <artifactId>spring-boot-starter-web</artifactId>
    <exclusions>
        <exclusion>
            <groupId>org.springframework.boot</groupId>
            <artifactId>spring-boot-starter-tomcat</artifactId>
        </exclusion>
    </exclusions>
</dependency>

<dependency>
    <groupId>org.springframework.boot</groupId>
    <artifactId>spring-boot-starter-tomcat</artifactId>
    <scope>provided</scope>
</dependency>

<!-- 2. 修改启动类,继承SpringBootServletInitializer类,重写configure方法 -->
import org.springframework.boot.SpringApplication;
import org.springframework.boot.autoconfigure.SpringBootApplication;
import org.springframework.boot.builder.SpringApplicationBuilder;
import org.springframework.boot.web.servlet.support.SpringBootServletInitializer;

@SpringBootApplication
public class WarApplication extends SpringBootServletInitializer {

    public static void main(String[] args) {
        SpringApplication.run(WarApplication.class, args);
    }

    @Override
    protected SpringApplicationBuilder configure(SpringApplicationBuilder builder) {
        return builder.sources(WarApplication.class);
    }
}
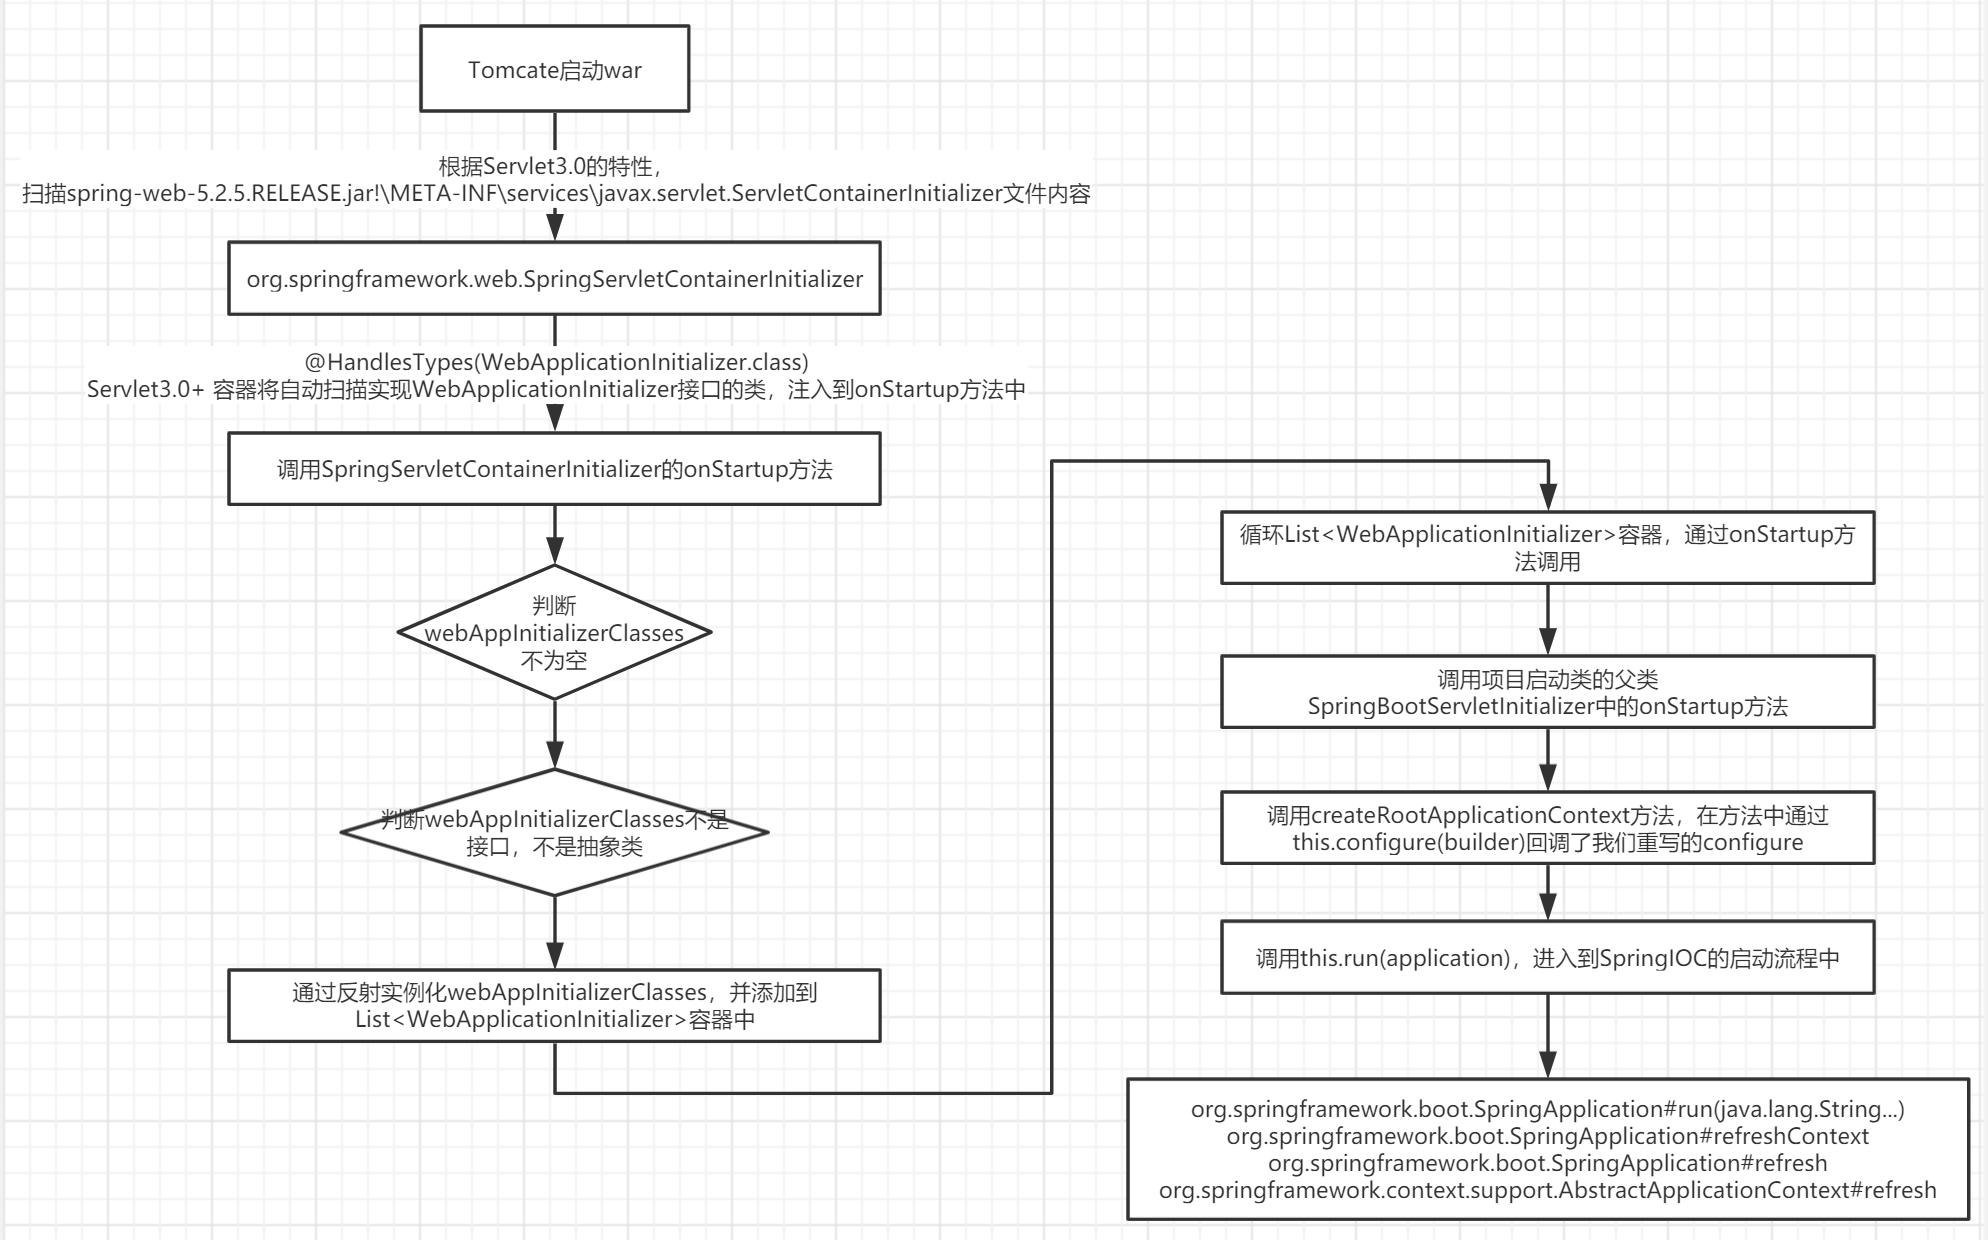
Springboot项目打war包为何要继承SpringBootServletInitializer,重写的configure在什么时候被调用的?
这里涉及到一个Servlet3.0的新特性按需加载(详情可参考https://www.oracle.com/technetwork/cn/community/4-servlet-3-324302-zhs.pdf),按需加载主要做了:
1、Web应用启动时,创建当前Web应用导入jar包中的ServletContainerInitializer类的实例
2、ServletContainerInitializer 类必须放在jar包的 META-INF/services目录下,文件名称为javax.servlet.ServletContainerInitializer
3、文件的内容指向ServletContainerInitializer实现类的全路径
4、使用@HandlesTypes 在我们应用启动的时候,将标注的类信息(@HandlesTypes注解的value值)传递给ServletContainerInitializer的应用类
下面是Tomcat启动的整个调用过程: