Flume 文档:https://flume.apache.org/FlumeUserGuide.html
Flume 下载:https://archive.apache.org/dist/flume/ & https://flume.apache.org/download.html
JDK 下载:https://mirrors.huaweicloud.com/java/jdk/
Flume 不是一个分布式程序,也不需要启动什么进程。在有任务时,运行程序,指定任务即可。
一、安装
# 下载
curl -o /opt/apache-flume-1.9.0-bin.tar.gz http://mirrors.tuna.tsinghua.edu.cn/apache/flume/1.9.0/apache-flume-1.9.0-bin.tar.gz

# 解压
tar -zxf /opt/apache-flume-1.9.0-bin.tar.gz -C /opt/

# 配置
cd /opt/apache-flume-1.9.0-bin/conf/
cp flume-env.sh.template flume-env.sh
vim flume-env.sh
flume-env.sh 改一个 JDK 路径即可
# Licensed to the Apache Software Foundation (ASF) under one
# or more contributor license agreements.  See the NOTICE file
# distributed with this work for additional information
# regarding copyright ownership.  The ASF licenses this file
# to you under the Apache License, Version 2.0 (the
# "License"); you may not use this file except in compliance
# with the License.  You may obtain a copy of the License at
#
#     http://www.apache.org/licenses/LICENSE-2.0
#
# Unless required by applicable law or agreed to in writing, software
# distributed under the License is distributed on an "AS IS" BASIS,
# WITHOUT WARRANTIES OR CONDITIONS OF ANY KIND, either express or implied.
# See the License for the specific language governing permissions and
# limitations under the License.

# If this file is placed at FLUME_CONF_DIR/flume-env.sh, it will be sourced
# during Flume startup.

# Enviroment variables can be set here.

export JAVA_HOME=/opt/jdk1.8.0_202

# Give Flume more memory and pre-allocate, enable remote monitoring via JMX
# export JAVA_OPTS="-Xms100m -Xmx2000m -Dcom.sun.management.jmxremote"

# Let Flume write raw event data and configuration information to its log files for debugging
# purposes. Enabling these flags is not recommended in production,
# as it may result in logging sensitive user information or encryption secrets.
# export JAVA_OPTS="$JAVA_OPTS -Dorg.apache.flume.log.rawdata=true -Dorg.apache.flume.log.printconfig=true "

# Note that the Flume conf directory is always included in the classpath.
#FLUME_CLASSPATH=""
二、HelloWorld
https://flume.apache.org/FlumeUserGuide.html#a-simple-example
监控端口数据官方案例:使用 Flume 监听一个端口,收集该端口数据,并打印到控制台。
1.使用 nc 做为网络通信
yum install -y nc

# 服务端,接受消息
nc -lk 4444

# 客户端,发送消息
nc 127.0.0.1 4444
2.编写 Flume Agent 配置文件
https://flume.apache.org/FlumeUserGuide.html#netcat-tcp-source
https://flume.apache.org/FlumeUserGuide.html#netcat-udp-source
flume-netcat-logger.conf
# Name the components on this agent
# a1:表示 agent 的名称
# r1:表示 a1 的 Source 的名称
a1.sources = r1
# k1:表示 a1 的 Sink 的名称
a1.sinks = k1
# c1:表示 a1 的 Channel 的名称
a1.channels = c1

# Describe/configure the source
# 表示 a1 的输入源类型为 netcat 端口类型
a1.sources.r1.type = netcat
# 表示 a1 的监听的主机
a1.sources.r1.bind = 127.0.0.1
# 表示 a1 的监听的端口号
a1.sources.r1.port = 4444

# Describe the sink
# 表示 a1 的输出目的地是控制台 logger 类型
a1.sinks.k1.type = logger

# Use a channel which buffers events in memory
# 表示 a1 的 channel 类型是 memory 内存型
a1.channels.c1.type = memory
# 表示 a1 的 channel 总容量 1000 个 event
a1.channels.c1.capacity = 1000
# 表示 a1 的 channel 传输时收集到了 100 条 event 以后再去提交事务
a1.channels.c1.transactionCapacity = 100

# Bind the source and sink to the channel
# 表示将 r1 和 c1 连接起来
a1.sources.r1.channels = c1
# 表示将 k1 和 c1 连接起来
a1.sinks.k1.channel = c1
3.开启 Flume 监听端口
cd /opt/apache-flume-1.9.0-bin/

# 第一种写法
bin/flume-ng agent --conf conf/ --name a1 --conf-file /tmp/flume-netcat-logger.conf -Dflume.root.logger=INFO,console

# 第二种写法
bin/flume-ng agent -c conf/ -n a1 -f /tmp/flume-netcat-logger.conf -Dflume.root.logger=INFO,console

# --conf/-c:表示配置文件存储在 conf/目录
# --name/-n:表示给 agent 起名为 a1
# --conf-file/-f:flume 本次启动读取的配置文件是在 /tmp 文件夹下的 flume-telnet.conf 文件。
# -Dflume.root.logger=INFO,console :-D 表示 flume 运行时动态修改 flume.root.logger 参数属性值,并将控制台日志打印级别设置为 INFO 级别。日志级别包括:log、info、warn、error。

4.向监听的网络端口发送数据
nc 127.0.0.1 4444
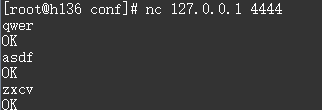
再看 Flume 监控日志
