1.简介
当我们希望每个接收端接收各自希望的消息时,我们可以使用路由键,此时交换机的类型为direct。
2.工作原理
每个接收端的消息队列在绑定交换机的时候,可以设定相应的路由键。
发送端通过交换机发送信息时,可以指明路由键 ,交换机会根据路由键把消息发送到相应的消息队列。
接收端可以根据路由键获取不同的消息队列。
3.代码
send3.py
 1 #!/usr/bin/env python
 2 # -*- coding: utf-8 -*-
 3 import pika
 4
 5 hostname = '192.168.1.133'
 6 parameters = pika.ConnectionParameters(hostname)
 7 connection = pika.BlockingConnection(parameters)
 8
 9 # 创建通道
10 channel = connection.channel()
11 # 定义交换机,设置类型为direct
12 channel.exchange_declare(exchange='change_dir', type='direct')
13
14 # 定义三个路由键
15 routings = ['info', 'warning', 'error']
16
17 # 将消息依次发送到交换机,并设置路由键
18 for routing in routings:
19     message = '%s message.' % routing
20     channel.basic_publish(exchange='change_dir', routing_key=routing, body=message)
21     print message
22
23 connection.close()
receive3.py
 1 #!/usr/bin/env python
 2 # -*- coding: utf-8 -*-
 3 import pika
 4 import sys
 5
 6 hostname = '192.168.1.133'
 7 parameters = pika.ConnectionParameters(hostname)
 8 connection = pika.BlockingConnection(parameters)
 9
10 # 创建通道
11 channel = connection.channel()
12 # 定义交换机,设置类型为direct
13 channel.exchange_declare(exchange='change_dir', type='direct')
14
15 # 从命令行获取路由键参数,如果没有,则设置为info
16 routings = sys.argv[1:]
17 if not routings:
18     routings = ['info']
19
20 # 生成临时队列,并绑定到交换机上,设置路由键
21 result = channel.queue_declare(exclusive=True)
22 queue_name = result.method.queue
23 for routing in routings:
24     channel.queue_bind(exchange='change_dir', queue=queue_name, routing_key=routing)
25
26
27 def callback(ch, method, properties, body):
28     print " [x] Received %r" % (body,)
29
30 channel.basic_consume(callback, queue=queue_name, no_ack=True)
31
32 print ' [*] Waiting for messages. To exit press CTRL+C'
33 channel.start_consuming()
4.示例演示
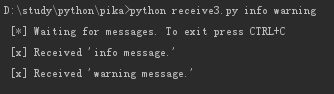
打开三个终端,在前两个运行receive3.py:
python receive3.py info warning

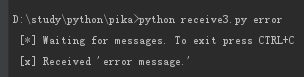
python receive3.py error

第三个终端运行send3.py:

查看接收端的消息:
我们可以发现,接收端只能获取指定路由键的消息队列。