1.关闭特定的自动配置。
SprintBoot最大的特点之一就是自动配置,但是如果我们某个功能不想让其自动给我们配置,我们可以通过@SpringBootApplication注解里面的属性来设置。代码示例如下:
@SpringBootApplication(exclude = {DataSourceAutoConfiguration.class})

该属性会将指定的配置失效掉,即不用自动配置。我们可以看一下源码的实现。标红的代码就是检查出exclude的Class,然后将其从自动配置的的List里面移除。

2.导入xml配置
现在很多应用都是用java配置来代替最初的xml配置的方式,但是在项目中,有特殊需求必须用到xml的配置,我们可以用@ImportResource注解来实现xml文件的导入。
示例代码如下:
@ImportResource({ "classpath:aa.xml"}).这是导入了类路径下的一个aa.xml的配置文件。
3.属性配置
我们知道,基于springEL我们可以很方便的为应用中的某些字段注入值。SpringBoot也为我们提供了一种方式,这可以让我们可以将properties和一个bean关联,避免了属性值过多造成的代码冗余。
代码示例如下:
首先在resource路径下新建一个player.properties文件:
player.name=KOBE
player.number=24
player.team=LAKERS
接着创建一个javabean与其相关联。这里Component注解是让spring管理该bean,因为后面要用到;ConfiurationProperties属性的prefix就是设置关联对象的前缀;如果是在
application.properties里面配置的话,不需要PropertySource注解指定位置。如果是单独写的一个配置文件的话则要通过该注解来关联具体的配置文件。
package com.example.demo.property;

import org.springframework.boot.context.properties.ConfigurationProperties;
import org.springframework.context.annotation.PropertySource;
import org.springframework.stereotype.Component;

/**
 * Created by Joker on 2017/9/8.
 */
@Component
@ConfigurationProperties(prefix = "player")
@PropertySource("classpath:player.properties")
public class PlayerProp {
    private String name;
    private String team;
    private Long number;

    public String getName() {
        return name;
    }

    public void setName(String name) {
        this.name = name;
    }

    public String getTeam() {
        return team;
    }

    public void setTeam(String team) {
        this.team = team;
    }

    public Long getNumber() {
        return number;
    }

    public void setNumber(Long number) {
        this.number = number;
    }
}
现在我们就可以在之前的controller里面使用这个配置bean了。
@Autowired
PlayerProp playerProp;
@RequestMapping("/player")
public String playerInfo() {
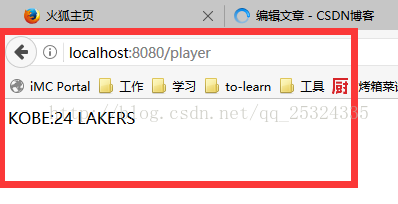
return playerProp.getName() + ":" + playerProp.getNumber() + " " + playerProp.getTeam();
}
访问网址:http://localhost:8080/player 可以看到输出如下。
4.日志配置:
在application.properties里面输入logging.可以看到IDEA的自动提示信息,可以看到一系列的日志配置的信息。可以根据实际的情况进行配置。

5.查看项目自动配置的类
可以在application.properties里面添加 :debug=true 查看项目开启了哪些自动配置

6.Profile配置
profile是spring针对不同的环境提供不同配置的一种支持。通过配置 spring.profiles.active=dev 来切换环境信息。全局的profile信息使用application-{profile}.properties来配置。
代码示例:(不同环境下设置不同的服务器端口)
首先在resource下新建三个不同的profile配置文件
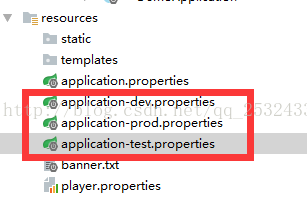
分别在dev,prod,test 中配置 server.port=8881 , server.port=8882, server.port=8883 .
最后在application.properties中设置环境: spring.profiles.active=dev 。运行项目,可以发现现在访问的端口号只有是8881才会正常访问:

如果错误,欢迎指正,不胜感激!