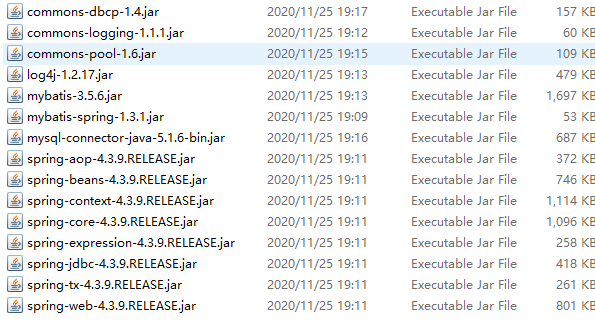
一、导入基础jar包:

二、类----表
创建实体类和数据表。
注意数据表的属性名跟实体类属性名必须一致。
三、Mybatis配置文件。conf.xml(数据源、mapper.xml),但是可省,将该文件中的配置全部交给spring管理。
四、建立类和表的映射:
StudentMapper.xml:
<?xml version="1.0" encoding="UTF-8" ?>
<!DOCTYPE mapper
 PUBLIC "-//mybatis.org//DTD Mapper 3.0//EN"
 "http://mybatis.org/dtd/mybatis-3-mapper.dtd">
<mapper namespace="org.ruangong.mapper.StudentMapper">
	 <select id="queryPersonById" resultType="org.ruangong.entity.Student" parameterType="int">
	 	select * from student where stuNo = #{stuNo}
	 </select>
	 <insert id="addStudent" parameterType="org.ruangong.entity.Student">
	 	insert into student(id,name,age) values(#{stuNo},#{stuName},#{stuAge})
	 </insert>
</mapper>
五、在web项目中引入spring:
在web.xml中加入:
 <!-- web引入spring -->
  <!-- needed for ContextLoaderListener -->
	<context-param>
		<param-name>contextConfigLocation</param-name>
		<param-value>classpath:applicationContext.xml</param-value>
	</context-param>

	<!-- Bootstraps the root web application context before servlet initialization -->
	<listener>
		<listener-class>org.springframework.web.context.ContextLoaderListener</listener-class>
	</listener>
六:配置applicationContext.xml文件:
:
<?xml version="1.0" encoding="UTF-8"?>
<beans xmlns="http://www.springframework.org/schema/beans"
	xmlns:xsi="http://www.w3.org/2001/XMLSchema-instance"
	xsi:schemaLocation="http://www.springframework.org/schema/beans http://www.springframework.org/schema/beans/spring-beans.xsd">
	<!-- 数据源、mapper.xml -->

	<bean id="config" class="org.springframework.beans.factory.config.PreferencesPlaceholderConfigurer">
		<property name="locations">
			<array>
				<value>classpath:db.properties</value>
			</array>
		</property>
	</bean>
	<!-- 配置数据库信息(替代mybatis的配置文件conf.xml) -->
	<bean id="dataSource" class="org.apache.commons.dbcp.BasicDataSource">
		<property name="driverClassName" value="${driver}"></property>
		<property name="url" value="${url}"></property>
		<property name="username" value="${username}"></property>
		<property name="password" value="${password}"></property>
		<!-- <property name="maxActive" value="${maxActive}"></property>
		<property name="maxIdle" value="${maxIdle}"></property> -->
	</bean>
	<!-- 加载mapper文件 -->
	<!-- 在SpringIoc容器中 创建Mybatis的核心类sqlsessionfactory -->
	<bean id="sqlSessionFactory" class="org.mybatis.spring.SqlSessionFactoryBean">
		<property name="dataSource" ref="dataSource"></property>
		 <!-- 加载Mybatis配置文件 -->
		<!-- <property name="configLocation" value="classpath:conf.xml"></property> -->
		<!-- 加载mapper.xml路径 -->
		<property name="mapperLocations" value="org/ruangong/mapper/*.xml"></property>
	</bean>
</beans>
然后创建db.properties:
driver=com.mysql.jdbc.Driver
url=jdbc:mysql://localhost:3306/jcc?characterEncoding=UTF-8
username=root
password=
maxIdle=1000
maxActive=500
七:创建studentMapper.java接口:
package org.ruangong.mapper;

import org.ruangong.entity.Student;

public interface studentMapper {
	void addStudent(Student student);
	Student queryPersonById(int id);
}
八、配置SpringMVC:
将springMVC引入到web里:
web.xml添加:
<!-- 项目整合springMVC -->
	<!-- The front controller of this Spring Web application, responsible for handling all application requests -->
	<servlet>
		<servlet-name>springDispatcherServlet</servlet-name>
		<servlet-class>org.springframework.web.servlet.DispatcherServlet</servlet-class>
		<init-param>
			<param-name>contextConfigLocation</param-name>
			<param-value>classpath:applicationContext-controller.xml</param-value>
		</init-param>
		<load-on-startup>1</load-on-startup>
	</servlet>

	<!-- Map all requests to the DispatcherServlet for handling -->
	<servlet-mapping>
		<servlet-name>springDispatcherServlet</servlet-name>
		<url-pattern>/</url-pattern>
	</servlet-mapping>
配置SpringMVC:
在applicationContext-controller.xml中:加入视图解析器和springMVC基础配置:
<?xml version="1.0" encoding="UTF-8"?>
<beans xmlns="http://www.springframework.org/schema/beans"
	xmlns:xsi="http://www.w3.org/2001/XMLSchema-instance"
	xmlns:mvc="http://www.springframework.org/schema/mvc"
     xmlns:context="http://www.springframework.org/schema/context"
	xsi:schemaLocation="http://www.springframework.org/schema/mvc http://www.springframework.org/schema/mvc/spring-mvc-4.3.xsd
		http://www.springframework.org/schema/beans http://www.springframework.org/schema/beans/spring-beans.xsd">
	<!-- 配置视图解析器 -->
	<bean class="org.springframework.web.servlet.view.InternalResourceViewResolver">
			<property name="prefix" value="/views/"></property>
			<property name="suffix" value=".jsp"></property>
	</bean>

	<!-- SpringMVC基础配置 -->
	<mvc:annotation-driven></mvc:annotation-driven>
</beans>
配置结束。
九:开始实现三层:创建seivice层和serviceImpl实现层。
十:创建控制器(controller)相当于原始的servlet。
package org.ruangong.controller;

import org.springframework.stereotype.Controller;

@Controller
public class StudentController {

}
注意将普通类变成控制器必须在类名前加注解。
并在applicationContext-controller.xml中加入扫描器:
<!-- 配置扫描器,扫描包中的注解 -->
	<context:component-scan base-package="org.ruangong.controller"></context:component-scan>
十一、在serviceimpl实现层:
package org.ruangong.service.impl;
import org.ruangong.entity.Student;
import org.ruangong.mapper.studentMapper;
import org.ruangong.service.StudentService;
public class StudentServiceImpl implements StudentService{
//service依赖于dao(mapper)
private studentMapper studentmapper;//=new studentMapper();
public void setStudentmapper(studentMapper studentmapper) {
this.studentmapper = studentmapper;
}
@Override
public Student queryStudentById(int id) {
// TODO Auto-generated method stub
Student student = studentmapper.queryPersonById(id);
// return (student.getStuNo()+","+student.getStuName()+","+student.getStuAge()).toString();
return student;
}
}
在applicationContext.xml中加入依赖注入:
<!-- 依赖注入,给service注入dao -->
	<bean id="StudentService" class="org.ruangong.service.impl.StudentServiceImpl">
		<property name="studentmapper" value="studentMapper"></property>
	</bean>
十二、在controller层:
package org.ruangong.controller;
import java.util.Map;
import org.ruangong.entity.Student;
import org.ruangong.service.StudentService;
import org.springframework.beans.factory.annotation.Autowired;
import org.springframework.beans.factory.annotation.Qualifier;
import org.springframework.stereotype.Controller;
import org.springframework.web.bind.annotation.PathVariable;
import org.springframework.web.bind.annotation.RequestMapping;
@RequestMapping("studentcontroller")
@Controller
public class StudentController {
//控制器依赖于service
@Autowired
@Qualifier("studentService")
private StudentService studentService;
public void setStudentservice(StudentService studentService) {
this.studentService = studentService;
}
@RequestMapping("queryStudentById/{id}")
public String queryStudentById(@PathVariable("id") Integer id,Map<String,Object> map){
System.out.println(id);
Student student = studentService.queryStudentById(id);
map.put("student", student);
// return (student.getStuNo()+","+student.getStuName()+","+student.getStuAge()).toString();
return "result";
}
}
在applicationContext.xml中加入依赖注入:
<!-- 依赖注入,给controller注入service -->
	<bean id="StudentController" class="org.ruangong.controller.StudentController">
		<property name="studentservice" ref="StudentService"></property>
	</bean>
十三:创建jsp发起请求:
<%@ page language="java" contentType="text/html; charset=UTF-8"
    pageEncoding="UTF-8"%>
<!DOCTYPE html PUBLIC "-//W3C//DTD HTML 4.01 Transitional//EN" "http://www.w3.org/TR/html4/loose.dtd">
<html>
<head>
<meta http-equiv="Content-Type" content="text/html; charset=UTF-8">
<title>Insert title here</title>
</head>
<body>
	<a href="studentcontroller/queryStudentById/20173681">查询20173681号学生</a>
</body>
</html>
十四、创建接受结果界面,在views文件中创建result.jsp:
<%@ page language="java" contentType="text/html; charset=UTF-8"
    pageEncoding="UTF-8"%>
<!DOCTYPE html PUBLIC "-//W3C//DTD HTML 4.01 Transitional//EN" "http://www.w3.org/TR/html4/loose.dtd">
<html>
<head>
<meta http-equiv="Content-Type" content="text/html; charset=UTF-8">
<title>Insert title here</title>
</head>
<body>
	${requestScope.student.stuNo}-${requestScope.student.stuName}-${requestScope.student.stuAge}
</body>
</html>
用request.Scope接受request域中的信息。
运行即可:
整理:以上的配置问题有小瑕疵,运行会出问题,以下面的为准。
applicationContext.xml:
<?xml version="1.0" encoding="UTF-8"?>
<beans xmlns="http://www.springframework.org/schema/beans"
	xmlns:xsi="http://www.w3.org/2001/XMLSchema-instance"
	xsi:schemaLocation="http://www.springframework.org/schema/beans http://www.springframework.org/schema/beans/spring-beans.xsd">

	<!-- 数据源、mapper.xml -->

	<bean id="config" class="org.springframework.beans.factory.config.PreferencesPlaceholderConfigurer">
		<property name="locations">
			<array>
				<value>classpath:db.properties</value>
			</array>
		</property>
	</bean>
	<!-- 配置数据库信息(替代mybatis的配置文件conf.xml) -->
	<bean id="dataSource" class="org.apache.commons.dbcp.BasicDataSource">
		<property name="driverClassName" value="${driver}"></property>
		<property name="url" value="${url}"></property>
		<property name="username" value="${username}"></property>
		<property name="password" value="${password}"></property>
		<!-- <property name="maxActive" value="${maxActive}"></property>
		<property name="maxIdle" value="${maxIdle}"></property> -->
	</bean>

	<!-- 加载mapper文件 -->
	<!-- 在SpringIoc容器中 创建Mybatis的核心类sqlsessionfactory -->
	<bean id="sqlSessionFactory" class="org.mybatis.spring.SqlSessionFactoryBean">
		<property name="dataSource" ref="dataSource"></property>
		<!-- 加载mapper.xml路径 -->
		<property name="mapperLocations" value="classpath:org/ruangong/mapper/*.xml"></property>
	</bean>

	<!-- 第三种方式生成Mapper对象  	约定:批量产生Mapper对在SpringIOC中的id值默认就是接口名(首字母小写) -->
	<bean class="org.mybatis.spring.mapper.MapperScannerConfigurer">
		<property name="sqlSessionFactoryBeanName" value="sqlSessionFactory"></property>
		<!-- 指定批量产生哪个包中的mapper对象 -->
		<property name="basePackage" value="org.ruangong.mapper"></property>
	</bean>


	<!-- <bean id="sqlSession" class="org.mybatis.spring.SqlSessionFactoryBean">
		<property name="typeAliasesPackage" value="org.ruangong.mapper" />
		<property name="dataSource" ref="dataSource"/>
		<property name="mapperLocations" value="classpath:org/ruangong/mapper/*.xml"/>
	</bean>

	<bean class="org.mybatis.spring.mapper.MapperScannerConfigurer">
		<property name="basePackage" value="com.ruangong.mapper"/>
	</bean> -->

	<!-- 依赖注入,给service注入dao -->
	<bean id="studentService" class="org.ruangong.service.impl.StudentServiceImpl">
		<property name="studentmapper" ref="studentMapper"></property>
	</bean>

	<!-- 依赖注入,给controller注入service -->
	<!-- <bean id="StudentController" class="org.ruangong.controller.StudentController">
		<property name="studentservice" ref="StudentService"></property>
	</bean> -->
</beans>
applicationContext-controller.xml:
<?xml version="1.0" encoding="UTF-8"?>
<beans xmlns="http://www.springframework.org/schema/beans"
	xmlns:xsi="http://www.w3.org/2001/XMLSchema-instance"
	xmlns:mvc="http://www.springframework.org/schema/mvc"
	xmlns:context="http://www.springframework.org/schema/context"
	xsi:schemaLocation="http://www.springframework.org/schema/mvc http://www.springframework.org/schema/mvc/spring-mvc-4.3.xsd
		http://www.springframework.org/schema/beans http://www.springframework.org/schema/beans/spring-beans.xsd
		http://www.springframework.org/schema/context http://www.springframework.org/schema/context/spring-context-4.3.xsd">

	<!-- 配置扫描器,扫描包中的注解 -->
	<context:component-scan base-package="org.ruangong.controller"></context:component-scan>

	<!-- 配置视图解析器 -->
	<bean class="org.springframework.web.servlet.view.InternalResourceViewResolver">
			<property name="prefix" value="/views/"></property>
			<property name="suffix" value=".jsp"></property>
	</bean>

	<!-- SpringMVC基础配置 -->
	<mvc:annotation-driven></mvc:annotation-driven>
</beans>
web.xml:
<?xml version="1.0" encoding="UTF-8"?>
<web-app xmlns:xsi="http://www.w3.org/2001/XMLSchema-instance" xmlns="http://java.sun.com/xml/ns/javaee" xsi:schemaLocation="http://java.sun.com/xml/ns/javaee http://java.sun.com/xml/ns/javaee/web-app_2_5.xsd" id="WebApp_ID" version="2.5">
  <display-name>SSMProject</display-name>
  <welcome-file-list>
    <welcome-file>index.html</welcome-file>
    <welcome-file>index.htm</welcome-file>
    <welcome-file>index.jsp</welcome-file>
    <welcome-file>default.html</welcome-file>
    <welcome-file>default.htm</welcome-file>
    <welcome-file>default.jsp</welcome-file>
  </welcome-file-list>

  <!-- web引入spring -->
  <!-- needed for ContextLoaderListener -->
	<context-param>
		<param-name>contextConfigLocation</param-name>
		<param-value>classpath:applicationContext.xml</param-value>
	</context-param>

	<!-- Bootstraps the root web application context before servlet initialization -->
	<listener>
		<listener-class>org.springframework.web.context.ContextLoaderListener</listener-class>
	</listener>


	<!-- 项目整合springMVC -->
	<!-- The front controller of this Spring Web application, responsible for handling all application requests -->
	<servlet>
		<servlet-name>springDispatcherServlet</servlet-name>
		<servlet-class>org.springframework.web.servlet.DispatcherServlet</servlet-class>
		<init-param>
			<param-name>contextConfigLocation</param-name>
			<param-value>classpath:applicationContext-controller.xml</param-value>
		</init-param>
		<load-on-startup>1</load-on-startup>
	</servlet>

	<!-- Map all requests to the DispatcherServlet for handling -->
	<servlet-mapping>
		<servlet-name>springDispatcherServlet</servlet-name>
		<url-pattern>/</url-pattern>
	</servlet-mapping>
</web-app>