smarty模板的作用可以让前端和后端分离(也就是前端的显示页面和后端的php代码)。
smarty模板的核心是一个类,下载好的模板中有这么几个重要的文件夹
(1)libs核心文件夹
(2)int.inc.php这是入口文件
(3)plugins:自己写的插件文件夹
(4)templates_c:存放编译好的文件
(5)int.inc.php这是入口文件
(6)定义好常量:不能修改
一、如何实现前后分离的原理:
核心是一个类
1.左分隔符{
2.右分隔符}
3.数组(默认空数组):存储变量
4.提供一个方法:向模板中注册变量的方法(assign(名字,值))
方法存在数组中的(找到数组存入变量)
5.还有一个方法:显示模板的(display(模板的名称或是路径))
两个功能:拿模板,解析变量
通过名称就可以找到模板的路径
$url = "模板路径".$name ;
读取模板文件,返回字符串
$str = file_get_contents($url);
将字符串的某些内容作了替换
1.将模板中的"名字"替换成 一段php代码 echo $arr=[名字]
2.将替换好的字符串保存到临时文件或者是编译好的文件
file_put_contents(存放的位置,上面替换好的字符串);
3.将编译好的文件拿到当前页面显示
include(临时文件的目录);
二、怎么用模板?
模板页面
1.引入模板的入口文件
include("入口文件路径位置");
2.直接用对象
提供一个方法:向模板中注册变量的方法(assign(名字,值)
$smarty->assign("ceshi","你好");
提供一个方法:显示模板的(display(模板的名称或是路径))
$smarty->display("ceshi.html");
正常页面
{assign(名字)}
注意:
1.访问的是php的页面,显示的是html页面
2.html用到了外部的样式表,位置是相对于访问的php页面来找外部样式
三、入口文件的内容
|
1
2
3
4
5
6
7
8
9
10
11
12
13
14
15
16
17
18
19
20
21
22
23
24
25
26
27
28
|
<?phpdefine("ROOT",str_replace("\","/",dirname(__FILE__)).'/'); //常量ROOT中指定项目根目录//echo str_replace("\","/",dirname(__FILE__)).'/'; //获取当前文件所在的位置require ROOT.'libs/Smarty.class.php'; //加载Smarty类文件$smarty = new Smarty(); //实例化Smarty对象define("CSS_PATH","/project/css/");define("JS_PATH","/project/js/");//$smarty -> auto_literal = false; //就可以让定界符号使用空格$smarty->setTemplateDir(ROOT.'templates/'); //设置所有模板文件存放位置//$smarty->addTemplateDir(ROOT.'templates2/'); //添加一个模板文件夹$smarty->setCompileDir(ROOT.'templates_c/'); //设置编译过的模板存放的目录$smarty->addPluginsDir(ROOT.'plugins/'); //设置为模板扩充插件存放目录$smarty->setCacheDir(ROOT.'cache/'); //设置缓存文件存放目录$smarty->setConfigDir(ROOT.'configs/'); //设置模板配置文件存放目录$smarty->caching = false; //设置Smarty缓存开关功能$smarty->cache_lifetime = 60*60*24; //设置缓存模板有效时间一天<br>//下面的内容是修改左和右的分隔符形式$smarty->left_delimiter = '<{'; //设置模板语言中的左结束符$smarty->right_delimiter = '}>'; //设置模板语言中的右结束符?> |
四、一些注意的点
(1)smarty注释
模板注释被*星号包围,而两边的星号又被定界符包围:
例如:
|
1
|
{* this is a comment *} |
注意:smarty注释不会在模板文件的最后输出中出现,这与<!-- HTML 注释-->不同(译注:html注释在页面源码中可见,而smarty注释则不能)也就是:注释只存在于模板里面,而在输出的页面中谁也看不见。
(2)从配置文件读取的变量
配置文件的内容:
|
1
2
3
4
5
6
7
|
config file - foo.conf:pageTitle = "This is mine"bodyBgColor = '#eeeeee'tableBorderSize = 3tableBgColor = "#bbbbbb"rowBgColor = "#cccccc" |
主页中写的内容:
|
1
2
3
4
5
6
7
8
9
10
11
12
13
14
|
//下面为配置文件变量“井号方法”的示例{config_load file='foo.conf'}<html><title>{#pageTitle#}</title><body bgcolor="{#bodyBgColor#}"><table border="{#tableBorderSize#}" bgcolor="{#tableBgColor#}"><tr bgcolor="{#rowBgColor#}"><td>First</td><td>Last</td><td>Address</td></tr></table></body></html> |
|
1
2
3
4
5
6
7
8
9
10
11
12
13
14
15
|
//下面为$smarty.config方法的示例:{config_load file='foo.conf'}<html><title>{$smarty.config.pageTitle}</title><body bgcolor="{$smarty.config.bodyBgColor}"><table border="{$smarty.config.tableBorderSize}" bgcolor="{$smarty.config.tableBgColor"}><tr bgcolor="{$smarty.config.rowBgColor}"><td>First</td><td>Last</td><td>Address</td></tr></table></body></html> |
(3)加载配置文件后,配置文件中的变量需要用两个井号"#"包围或者是smarty的保留变量$smarty.config.来调用
{$smarty.now}取得当前时间戳,可以直接通过变量调节器date_format[格式化日期]输出显示
date_format转换标记:
- %a - 当前区域星期几的简写
- %A - 当前区域星期几的全称
- %b - 当前区域月份的简写
- %B - 当前区域月份的全称
- %c - 当前区域首选的日期时间表达
- %C - 世纪值(年份除以 100 后取整,范围从 00 到 99)
- %d - 月份中的第几天,十进制数字(范围从 01 到 31)
- %D - 和 %m/%d/%y 一样
- %e - 月份中的第几天,十进制数字,一位的数字前会加上一个空格(范围从 ' 1' 到 '31')
- %g - 和 %G 一样,但是没有世纪
- %G - 4 位数的年份,符合 ISO 星期数(参见 %V)。和 %V 的格式和值一样,只除了如果 ISO 星期数属于前一年或者后一年,则使用那一年。
- %h - 和 %b 一样
- %H - 24 小时制的十进制小时数(范围从 00 到 23)
- %I - 12 小时制的十进制小时数(范围从 00 到 12)
- %j - 年份中的第几天,十进制数(范围从 001 到 366)
- %m - 十进制月份(范围从 01 到 12)
- %M - 十进制分钟数
- %n - 换行符
- %p - 根据给定的时间值为 `am' 或 `pm',或者当前区域设置中的相应字符串
- %r - 用 a.m. 和 p.m. 符号的时间
- %R - 24 小时符号的时间
- %S - 十进制秒数
- %t - 制表符
- %T - 当前时间,和 %H:%M:%S 一样
- %u - 星期几的十进制数表达 [1,7],1 表示星期一
- %U - 本年的第几周,从第一周的第一个星期天作为第一天开始
- %V - 本年第几周的 ISO 8601:1988 格式,范围从 01 到 53,第 1 周是本年第一个至少还有 4 天的星期,星期一作为每周的第一天。(用 %G 或者 %g 作为指定时间戳相应周数的年份组成。)
- %W - 本年的第几周数,从第一周的第一个星期一作为第一天开始
- %w - 星期中的第几天,星期天为 0
- %x - 当前区域首选的时间表示法,不包括时间
- %X - 当前区域首选的时间表示法,不包括日期
- %y - 没有世纪数的十进制年份(范围从 00 到 99)
- %Y - 包括世纪数的十进制年份
- %Z 或 %z - 时区名或缩写
- %% - 文字上的 `%' 字符
例如:
|
1
2
3
4
|
<?php$config['date'] = '%I:%M %p';$smarty->assign('config', $config);?> |
正常页面中的
|
1
2
3
|
{$smarty.now|date_format}{$smarty.now|date_format:"%D"}{$smarty.now|date_format:$config.date} |
根据上面的字母提示可以算出输出信息。
Smarty自带了一些内置函数,这些内置函数是Smarty模板引擎的组成部分。他们被编译成相应的内嵌PHP代码,以获得最大性能。
您创建的自定义函数不能与内置函数同名,也不必修改这些内置函数。
其中一些具有assign属性,用来收集函数结果,并将结果分配给一个命名的模板变量,而不是将内容输出,类似于{assign}函数。
一、{if}{elseif}{else} 条件
随着一些特性加入到模版引擎,Smarty的{if}语句与php的if语句一样富有弹性。每一个{if}必须与一个{/if}成对出现,允许使用{else}和{elseif},所有php条件和函数在这里同样适用,诸如||、or、&&、and、is_array()等等。
如果开启安全,只支持符合$php_functions的安全策略属性的php函数。
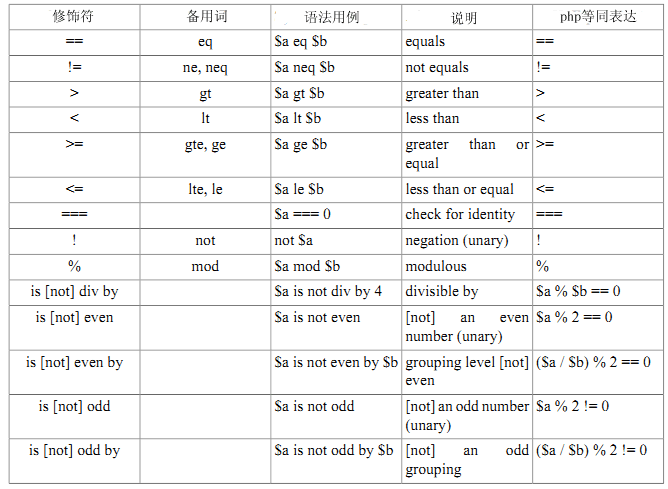
下面是一串有效的限定符,它们的左右必须用空格分隔开,注意列出的清单中方括号是可选的,在适用情况下使用相应的等号(全等或不全等)。
(1){if}语句(开头结尾不要忘记)
先要在php页面引入“入口文件”,写入“变量注册方法”和“模板显示方法”
|
1
2
3
4
5
6
7
|
<?phpinclude("../init.inc.php"); //引入的入口文件$smarty->assign("name",10); //变量注册方法assign()$smarty->display("test.html"); //模板显示方法display() |
然后是html页面的条件了
|
1
2
3
4
5
6
7
|
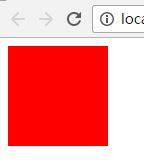
<!--开头if--><{if $name == 10}> <!--如果$name等于10--><div style="100px; height:100px; "></div> <!--这个div的颜色是红色--><!--结尾if--><{/if}> |
看下结果
修改一下php文件中的注册值
|
1
|
$smarty->assign("name",11); |
那么这个div就不会显示了,因为条件是$name等于10的时候才会显示红色
(2){if}...{else}语句
php页面还是上面的例子,不同的是html页面加了一个“否则”的语句
|
1
2
3
4
5
6
7
8
|
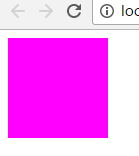
<!--开头if--><{if $name == 10}> <!--如果$name等于10,这个div就是红色--><div style="100px; height:100px; "></div><!--否则--><{else}> <!--否则这个div是粉色--><div style="100px; height:100px; "></div><!--结尾if--><{/if}> |
刚开始在php中name的值是“10”,所以也看到了颜色是红色;现在我们把name的值成随便一个数,那么html中的如果就不会成立,那么就会出现“否则”的颜色
注意:上面的那个表中相对的“备用词”也是可以用的。
二、{foreach},{foreachelse}遍历
(1)同样,要先写php文件,既然是遍历,那么我们可以用数组
|
1
2
3
4
5
6
7
8
9
10
11
12
13
|
<?phpinclude("../init.inc.php");$arr = array( array("001","中国"), array("002","淄博"), array("003","济南"), array("004","济宁"),);$smarty->assign("shuzu",$arr);$smarty->display("test.html"); |
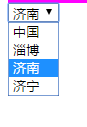
(2)然后就是写html页面了,{foreach}也是双标签啊,这里使用下拉列表显示出来的
|
1
2
3
4
5
6
7
|
<select> <{foreach $shuzu as $v}> <option value="<{$v[0]}>"><{$v[1]}></option> <{/foreach}> </select> |
看下显示结果
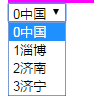
(3)嵌套了key的{foreach}
php页面没有任何变换,变换的是html页面
不同的是as后面的代码
|
1
2
3
4
5
|
<select> <{foreach $shuzu as $k=>$v}> <!--不同之处就是$k=>$v--> <option value="<{$v[0]}>"><{$k}><{$v[1]}></option> <{/foreach}> </select> |
这样就是显示出代号了
(4)@index
包含当前数组的下标,开始时为0。
同样的将html页面中的key进行修改
|
1
2
3
4
5
|
<select> <{foreach $shuzu as $v}> <option value="<{$v[0]}>"><{$v@index }><{$v[1]}></option> <{/foreach}></select> |
效果是同样的

同样的还有一些差不多的
@iteration :iteration包含当前循环的迭代,总是以1开始,这点与index不同。每迭代一次值自动加1。
@first :当{foreach}循环第一个时first为真。这里我们演示当第一次迭代表格头所在行。
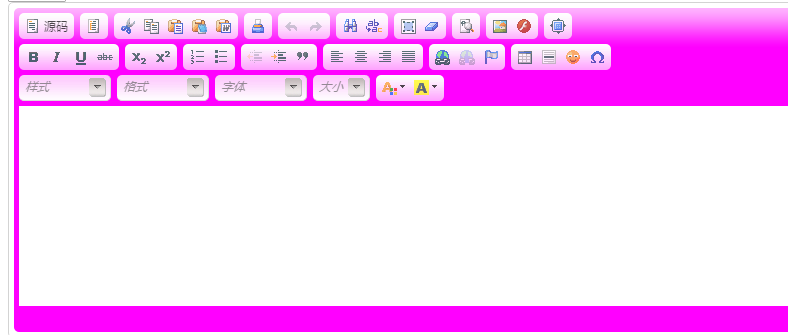
三、编辑器插件
这个就是关于编辑器的文件:
根据提示可以修改任何的参数对编辑器进行修改
|
1
2
3
4
5
6
7
8
9
10
11
12
13
14
15
16
17
18
19
20
21
22
23
24
25
26
27
28
29
30
31
32
33
34
35
36
37
38
39
40
41
42
43
44
45
46
47
48
49
50
51
52
53
54
55
56
57
58
59
60
61
62
63
64
65
66
67
68
69
70
71
72
73
74
75
76
77
78
|
<?php /** * 编辑器 * @param int $textareaid * @param int $toolbar 有basic full 和desc三种 * @param int $color 编辑器颜色 * @param string $alowuploadexts 允许上传类型 * @param string $height 编辑器高度 * @param string $disabled_page 是否禁用分页和子标题 */ function smarty_block_textarea($args, $content, $smarty, &$repeat) { //public static function editor($textareaid = 'content', $toolbar = 'basic', $height = 200, $color = '', $up=true) { if(!$repeat) { $textareaid = !empty($args['name']) ? $args['name'] : 'content'; $toolbar = !empty($args['toolbar']) ? $args['toolbar'] : 'basic'; $height = !empty($args['height']) ? $args['height'] : '200'; $color = !empty($args['color']) ? $args['color'] : ''; $up = !empty($args['up']) ? $args['up'] : true; $str ='<textarea name="'.$textareaid.'">'.$content.'</textarea>'; if(!defined('EDITOR_INIT')) { $str .= '<script type="text/javascript" src="../js/ckeditor/ckeditor.js"></script>'; define('EDITOR_INIT', 1); } if($toolbar == 'basic') { $toolbar = "['Bold', 'Italic','Underline','Strike','NumberedList', 'BulletedList', 'TextColor','BGColor', 'Link', 'Unlink', '-', 'Image','Flash','Table','Smiley','SpecialChar'],['RemoveFormat'],
"; } elseif($toolbar == 'full') { $toolbar = "['Source','-','Templates'], ['Cut','Copy','Paste','PasteText','PasteFromWord','-','Print'], ['Undo','Redo','-','Find','Replace','-','SelectAll','RemoveFormat'],['ShowBlocks'],['Image','Capture','Flash'],['Maximize'], '/', ['Bold','Italic','Underline','Strike','-'], ['Subscript','Superscript','-'], ['NumberedList','BulletedList','-','Outdent','Indent','Blockquote'], ['JustifyLeft','JustifyCenter','JustifyRight','JustifyBlock'], ['Link','Unlink','Anchor'], ['Table','HorizontalRule','Smiley','SpecialChar'], '/', ['Styles','Format','Font','FontSize'], ['TextColor','BGColor'], ['attachment'],
"; } elseif($toolbar == 'desc') { $toolbar = "['Bold', 'Italic', '-', 'NumberedList', 'BulletedList', '-', 'Link', 'Unlink', '-', 'Image', '-','Source'],
"; } else { $toolbar = ''; } $str .= "<script type="text/javascript">
"; $str .= "CKEDITOR.replace( '$textareaid',{"; $str .= "height:{$height},"; if($color) { $str .= "extraPlugins : 'uicolor',uiColor: '$color',"; } /* if($up) { $str .="filebrowserImageUploadUrl:'".B_URL."/upimage',"; $str .="filebrowserFlashUploadUrl:'".B_URL."/upflash',"; } */ $str .= "toolbar :
"; $str .= "[
"; $str .= $toolbar; $str .= "]
"; //$str .= "fullPage : true"; $str .= "});
"; $str .= '</script>'; return $str; } } |
可以显示出编辑器来看下,同样的在html文件中写
|
1
2
3
|
<{textarea}> <{/textarea}> |
这样就可以加载出编辑框了
(1)在上面的插件中有这么一句注释
|
1
|
* @param int $toolbar 有basic full 和desc三种 |
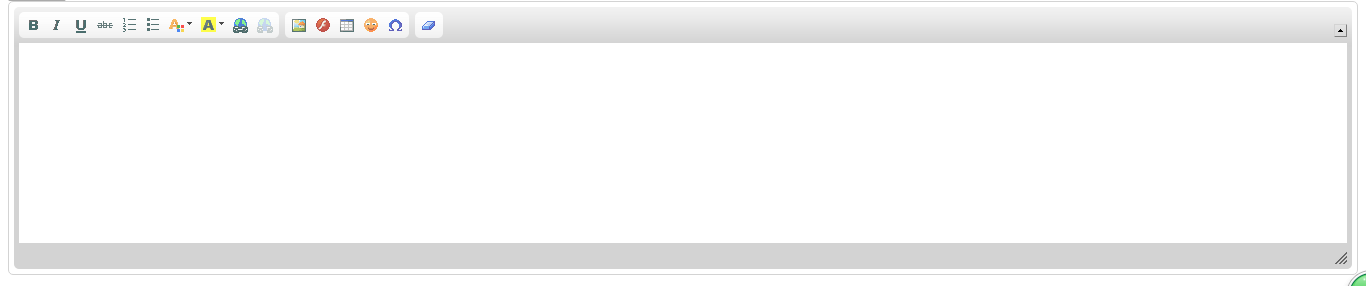
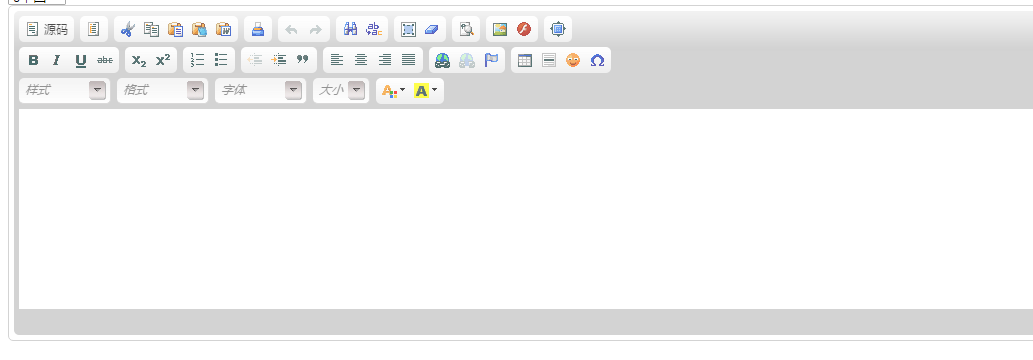
这样是可以直接在html中进行修改编辑框显示的功能,将toolbar的值改成“full”
|
1
2
3
|
<{textarea name='uid' toolbar='full'}> <{/textarea}> |
看下结果:比没有改值的时候的功能多了点
通过一些参数还可以修改其他的样式:比如颜色,那么就在后面加上
|
1
|
color='#F0F' |
就可以变成想要的颜色