目录
从零搭建一个SpringCloud项目之Eureka搭建
一、父项目创建
-
在idea上点击new->project创建一个新项目,并删除他的src目录(父项目不需要写代码)。
-
在pom文件里引入
<?xml version="1.0" encoding="UTF-8"?>
<project xmlns="http://maven.apache.org/POM/4.0.0"
         xmlns:xsi="http://www.w3.org/2001/XMLSchema-instance"
         xsi:schemaLocation="http://maven.apache.org/POM/4.0.0 http://maven.apache.org/xsd/maven-4.0.0.xsd">
    <modelVersion>4.0.0</modelVersion>
    <modules>
        <module>study-eureka-server</module>
    </modules>

    <parent>
        <groupId>org.springframework.boot</groupId>
        <artifactId>spring-boot-starter-parent</artifactId>
        <version>2.0.6.RELEASE</version>
    </parent>

    <groupId>com.mmc</groupId>
    <artifactId>spring-cloud-study</artifactId>
    <version>1.0-SNAPSHOT</version>
    <packaging>pom</packaging>
    <description>springcloud 父工程</description>


    <properties>
        <java.version>1.8</java.version>
    </properties>


    <!-- 引入spring-cloud的版本 -->
    <dependencyManagement>

        <dependencies>
                <dependency>
                    <groupId>org.springframework.cloud</groupId>
                    <artifactId>spring-cloud-dependencies</artifactId>
                    <version>Finchley.SR2</version>
                    <type>pom</type>
                    <scope>import</scope>
                </dependency>
        </dependencies>
    </dependencyManagement>


    <build>
        <plugins>
            <plugin>
                <groupId>org.springframework.boot</groupId>
                <artifactId>spring-boot-maven-plugin</artifactId>
            </plugin>
        </plugins>
    </build>
</project>
- 父项目主要进行版本控制和项目聚合
二、 搭建一个Eureka Server
- 引入pom文件
 <dependencies>

        <!-- Eureka的服务端  -->
        <dependency>
            <groupId>org.springframework.cloud</groupId>
            <artifactId>spring-cloud-starter-netflix-eureka-server</artifactId>
        </dependency>
    </dependencies>
- 加启用注解
@SpringBootApplication
@EnableEurekaServer
public class EurekaStudyApplication {

    public static void main(String[] args) {
        SpringApplication.run(EurekaStudyApplication.class,args);
    }
}
- 编写配置文件
server.port=9000
#表示是否注册到Eureka Server,默认是true,由于当前应用就是Eureka Server,所以填false
eureka.client.register-with-eureka=false
#表示是否注册到Eureka Server获取注册信息
eureka.client.fetch-registry=false
eureka.client.service-url.defaultZone=http://localhost:9000/eureka/
- 启动项目
输入地址http://localhost:9000/ ,出现界面,完成。
三、 搭建一个Eureka Client
- 新建一个工程,引入如下pom文件
 <dependencies>

        <dependency>
            <groupId>org.springframework.boot</groupId>
            <artifactId>spring-boot-starter-web</artifactId>
         </dependency>

        <dependency>
            <groupId>org.springframework.cloud</groupId>
            <artifactId>spring-cloud-starter-netflix-eureka-client</artifactId>
        </dependency>
    </dependencies>
- 在启动类上加注解
@SpringBootApplication
@EnableDiscoveryClient
public class EurekaClientApplication {

    public static void main(String[] args) {
        SpringApplication.run(EurekaClientApplication.class,args);
    }
}
- 编写配置文件application.properties
server.port=8001
#注册到eureka服务端的微服务名称
spring.application.name=study-eureka-client
#注册到eureka服务端的地址
eureka.client.service-url.defaultZone=http://localhost:9000/eureka/
#点击具体的微服务,是否显示ip
eureka.instance.prefer-ip-address=true
eureka.instance.instance-id=study-eureka-client-8001
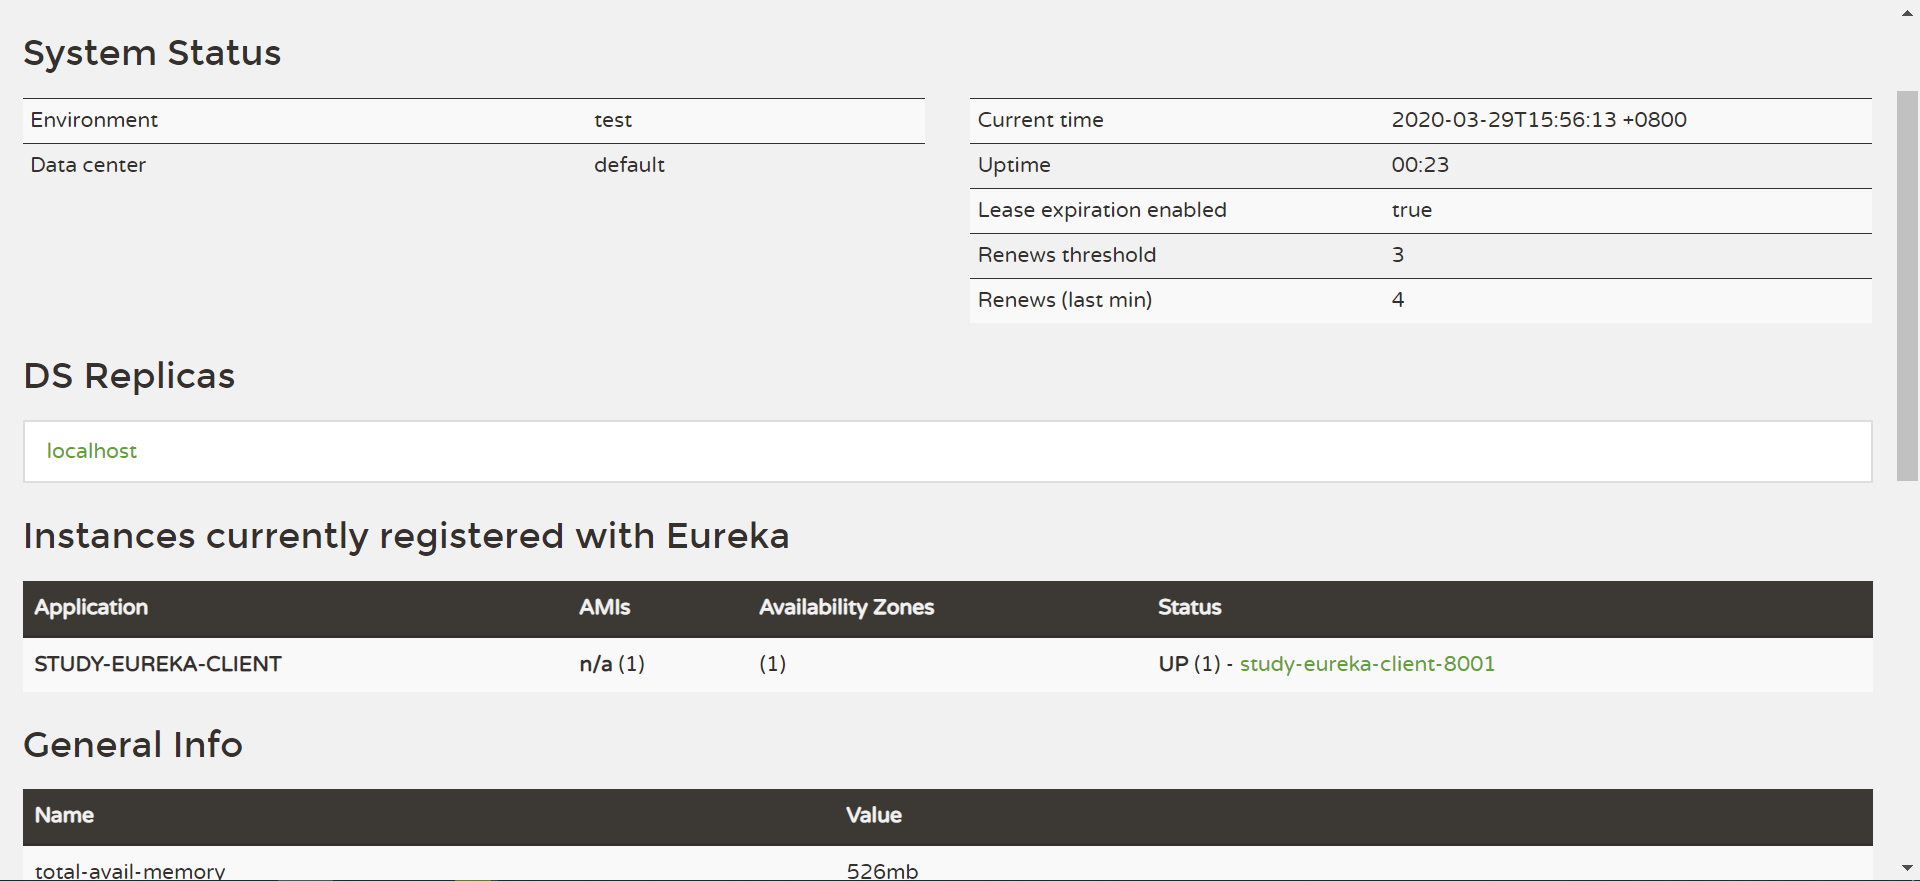
- 启动项目,打开http://localhost:9000/,发现客户端已经注册上去了。
四、修改为高可用的Eureka Server
修改配置文件为
server.port=9000
#表示是否注册到Eureka Server,默认是true,由于当前应用就是Eureka Server,所以填false
eureka.client.register-with-eureka=true
#表示是否注册到Eureka Server获取注册信息
eureka.client.fetch-registry=true
eureka.client.service-url.defaultZone=http://localhost:9001/eureka/
再复制一个Eureka Server项目,配置为:
server.port=9001
#表示是否注册到Eureka Server,默认是true,由于当前应用就是Eureka Server,所以填false
eureka.client.register-with-eureka=true
#表示是否注册到Eureka Server获取注册信息
eureka.client.fetch-registry=true
eureka.client.service-url.defaultZone=http://localhost:9000/eureka/
启动两个Server项目即可
client端改写一行配置:
eureka.client.service-url.defaultZone=http://localhost:9000/eureka/,http://localhost:9001/eureka/
五、安全配置,让你的Eureka不再裸奔
服务端:
- 在Eureka Server的pom文件中加入
<dependency>
            <groupId>org.springframework.boot</groupId>
            <artifactId>spring-boot-starter-security</artifactId>
        </dependency>
- 修改application配置文件,增加如下内容
spring.security.basic.enable=true
spring.security.user.name=root
spring.security.user.password=123456789

eureka.client.service-url.defaultZone=http://${spring.security.user.name}:${spring.security.user.password}@localhost:9000/eureka/
- 增加配置文件
/**
 * @description:
 * @author: mmc
 * @create: 2020-03-29 16:58
 **/
@Configuration
public class SecurityConfig extends WebSecurityConfigurerAdapter {


    @Override
    protected void configure(HttpSecurity http) throws Exception {
        super.configure(http);
        http.csrf().disable();
    }
}
客户端:
- 客户端需要修改配置
security.login.username=root
security.login.pass=123456789
eureka.client.service-url.defaultZone=http://${security.login.username}:${security.login.pass}@localhost:9000/eureka/
六、配置信息总结
Eureka配置的重要信息总结:
- eureka.client.register-with-eureka=false
表示是否向注册中心注册自己,非集群环境下设置为false
- eureka.client.fetch-registry=false
表示是否从Eureka Server获取注册信息,默认为true。 如果这是一个单点的 Eureka Server,不需要同步其他节点的数据,可以设为false
- eureka.instance.lease-renewal-interval-in-seconds=30(默认)
心跳秒数设置,30秒就告诉eureka server一声我还活着
- eureka.instance.lease-expiration-duration-in-seconds=90(默认)
过期时间,90秒还没收到你的心跳,就把你剔除掉
- eureka.client.registry-fetch-interval-seconds=30
客户端缓存的注册信息的刷新时间(此配置生效的前提是eureka.client.fetch-registry=true)
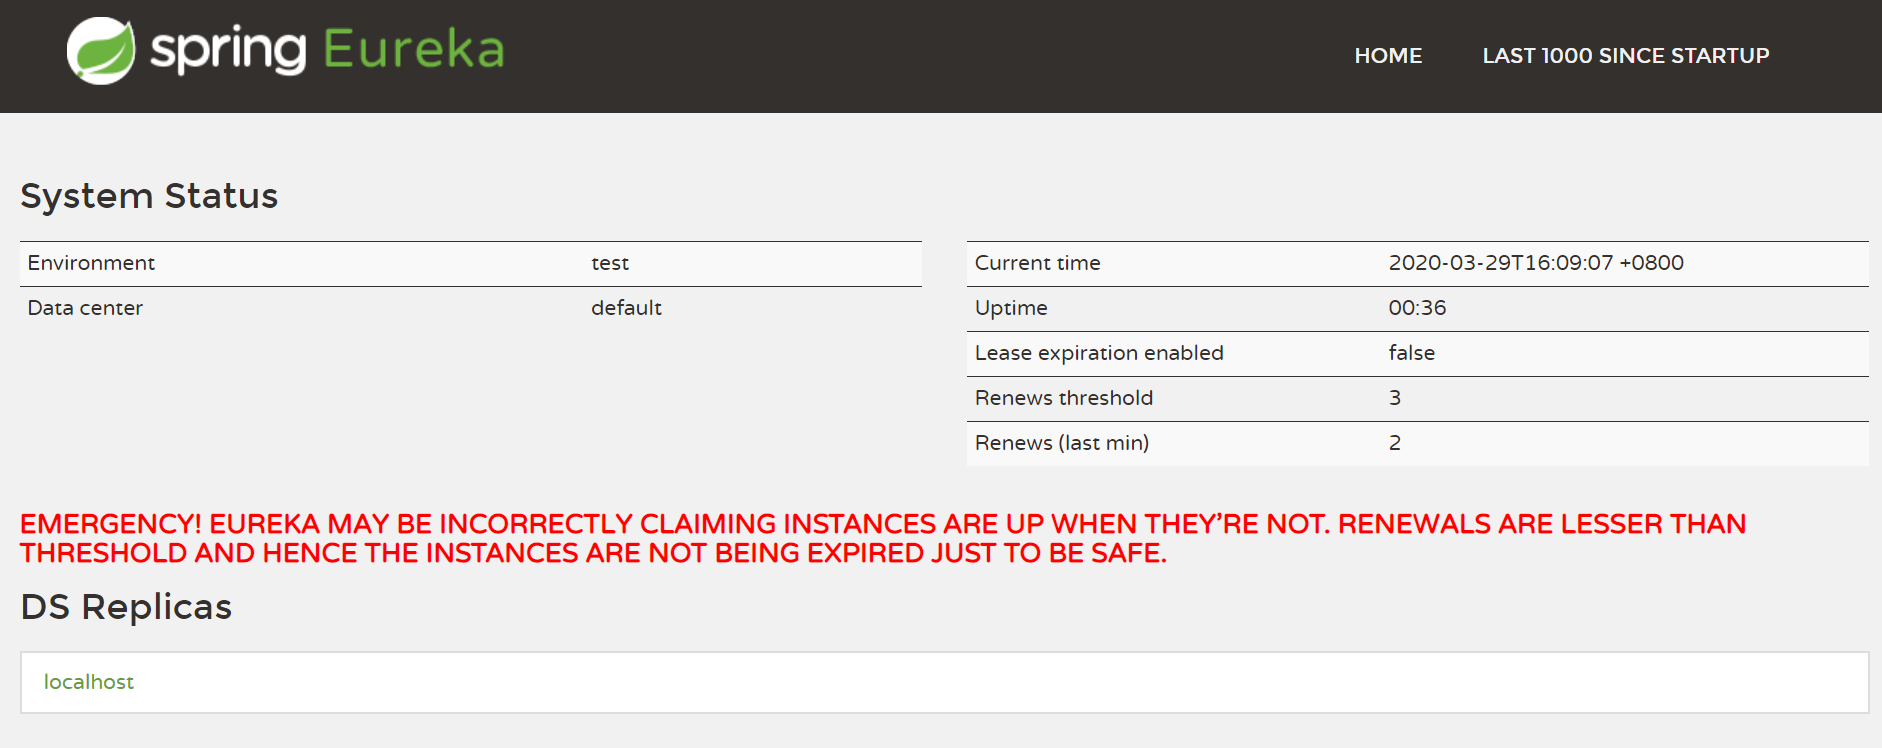
- Eureka自我保护功能
默认情况下,如果Eureka Server在90秒内未接收到某个微服务实例的心跳请求,那么它就会被剔除掉。但是试想如果Eureka Server和微服务实例处于两个网络环境中,当他们俩网络突然之间不能连接时,那么岂不是所有的微服务实例都被剔除了。所以设计了一个自我保护功能。即当短时间内丢失过多客户端时,Eureka Server会自动保护注册表中的微服务实例,不会剔除掉他们。
项目git地址:
https://github.com/mmcLine/spring-cloud-study/tree/master