操作系统:Windows 10
Python版本:3.7及以上版本均可
PyCharm:PyCharm 2019.3
1、安装 PyQt5 及其拓展工具。
pip installpyqt5
pipinstall pyqt5-tools
2、在 PyCharm 内配置安装好的 PyQt5 环境。
通过菜单栏进入设置界面。
File -> Settings -> Tools -> External Tools
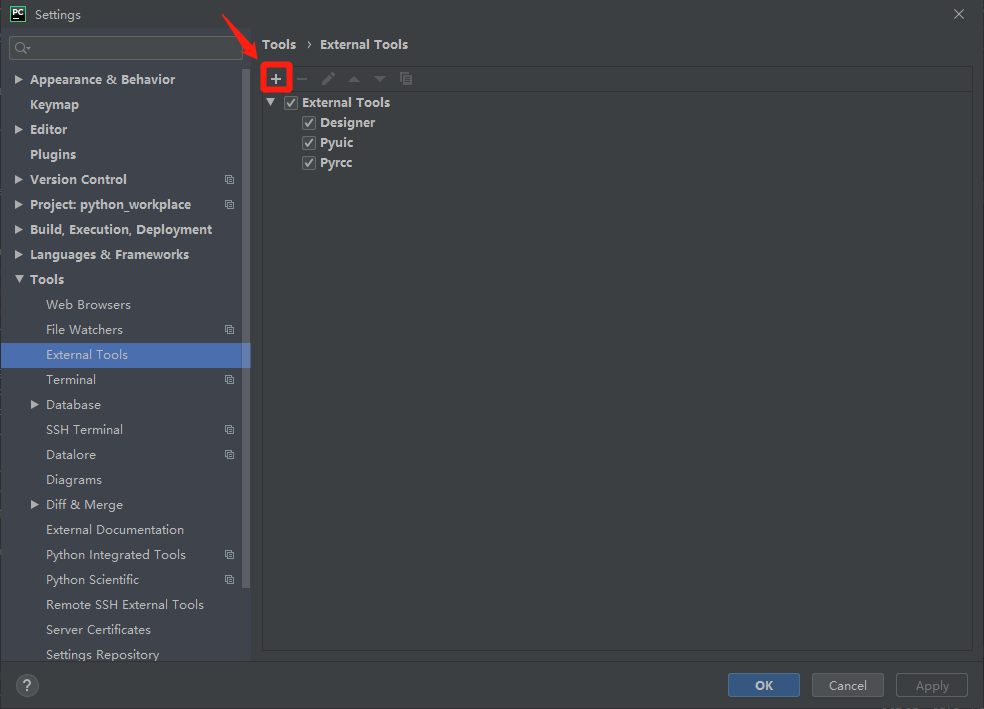
点击 “+” 号进行拓展工具的添加。
3、创建以下三个拓展工具。
(1)Designer
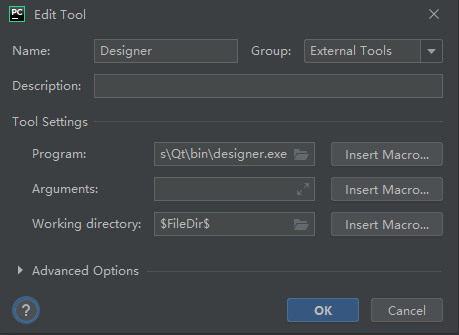
其中,Tool Settings 内的各个参数为:
Program: D:\Programs\Python\Python38\Lib\site-packages\pyqt5_tools\Qt\bin\designer.exe
(这个路径,就是 pip 安装 pyqt5-tools 的路径)
Working directory: $FileDir$
(2)Pyuic
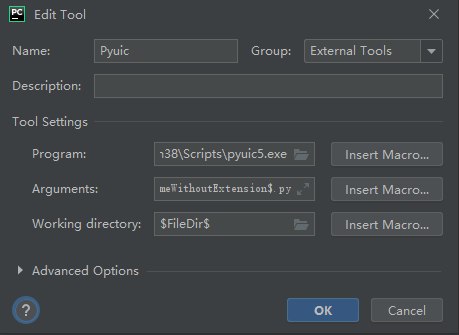
其中,Tool Settings 内的各个参数为:
Program: D:\Programs\Python\Python38\Scripts\pyuic5.exe
(这个路径,就是 Python 安装路径。)
Arguments: $FileName$ -o $FileNameWithoutExtension$.py
Working directory: $FileDir$
(3)Pyrcc
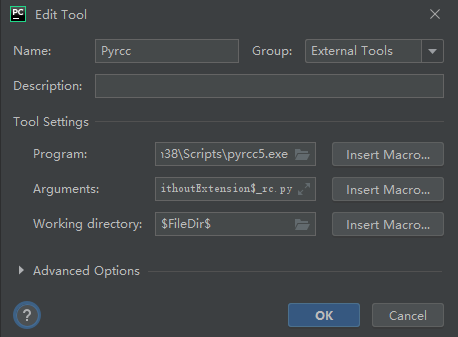
其中,Tool Settings 内的各个参数为:
Program: D:\Programs\Python\Python38\Scripts\pyrcc5.exe
(这个路径,就是 Python 安装路径。)
Arguments: $FileName$ -o $FileNameWithoutExtension$_rc.py
Working directory: $FileDir$
总结:完成以上设置,即配置好 PyCharm + PyQt5 的环境搭建。
备注:
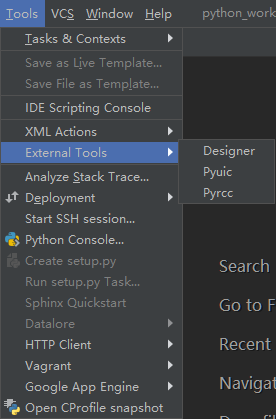
(1)可以通过菜单栏上的 Tools 上,找到 External Tools。
可以看到里面有新添加的拓展工具:Designer、Pyuic、Pyrcc。
(2)Designer:用来创建程序的 UI 界面,保存后,生成的文件后缀名为 .ui
(3)Pyuic:用来将 .ui 文件 转换为 .py 文件。
(4)Pyrcc:将资源文件(.qrc)转换为py文件,并在主程序中引入
————————————————
版权声明:本文为CSDN博主「猫屎丸」的原创文章,遵循CC 4.0 BY-SA版权协议,转载请附上原文出处链接及本声明。
原文链接:https://blog.csdn.net/weixin_35878962/article/details/113478698