Android 自定义组件
Android 提供了非常精致的和非常强大的组件化模型,能够更加方便的构建UI,这些UI组件都是基于基本的layout类:View 和 ViewGroup。
部分能够用的widgets包括:Button,TextView,EditText,ListView,CheckBox,RadioButton,Gallery,Spinner,和一些比较特殊用途的widgets(AutoCompleteTextView, ImageSwitcher,
and TextSwitcher.)
布局组件有LinearLayout, FrameLayout, RelativeLayout,absoluteLayout,TabelLayout
如果预定义的widgets和布局组件都不符合您的需求,那就需要创建属于自己的view,如果只是需要对已有的widget和layout进行小部分的调整,那就可以通过重写部分一些方法来完成开发。
下面就举个例子讲解如何创建自定义的xml属性,以及如果使用。
1. 首先创建一个新的android application.
2. 创建属性
在res/values/ 下创建一个attr.xml 文件,定义好需要的attributes
<?xml version="1.0" encoding="utf-8"?>
<resources>
	<declare-styleable name="custom">
	    <attr name="text" format="string" />
	    <attr name="size" format="integer"/>
	    <attr name="color" format="reference|color"/>
	</declare-styleable>
</resources>
3. 创建自定义的View
创建一个View, CustomView 继承自View(根据具体的情况,如果需求和已经存在的widget或者layout相差不大,就继承,重写一些方法)
package com.hualu.androidview;

import android.content.Context;
import android.content.res.TypedArray;
import android.graphics.Canvas;
import android.graphics.Paint;
import android.util.AttributeSet;
import android.view.View;

public class CustomView extends View {

	private  Paint p = null;
	private String text =  null;

	public CustomView(Context context) {
		super(context);
		initCustomView() ;
	}

	public CustomView(Context context, AttributeSet attrs){
		super(context, attrs ) ;
		initCustomView() ;
		TypedArray a = context.obtainStyledAttributes(attrs,R.styleable.custom) ;
		int indexCount = a.getIndexCount() ;
		for(int i = 0 ; i < indexCount ; i ++){
			int index = a.getIndex(i) ;
			switch (index) {
			case R.styleable.custom_text:
				text = a.getString(index) ;
				break;
			case R.styleable.custom_size:
				p.setTextSize(a.getInt(index, 0));
				break;
			case R.styleable.custom_color:
				p.setColor(a.getColor(index, 0xFF000000)) ;
				break;
			}
		}
		a.recycle() ;
	}

	void initCustomView(){
		 p = new Paint();
	     p.setAntiAlias(true);
	} ;

	@Override
	protected void onDraw(Canvas canvas) {
		super.onDraw(canvas);
		canvas.drawText(text, 10, 10, p) ;
	}

}
4. 在layout的文件使用自定义的view
<RelativeLayout xmlns:android="http://schemas.android.com/apk/res/android"
    xmlns:custom="http://schemas.android.com/apk/res/com.hualu.androidview"
    xmlns:tools="http://schemas.android.com/tools"
    android:layout_width="match_parent"
    android:layout_height="match_parent"
    tools:context=".MainActivity" >

    <TextView
        android:layout_width="wrap_content"
        android:layout_height="wrap_content"
        android:layout_centerHorizontal="true"
        android:layout_centerVertical="true"
        android:text="@string/hello_world" />
    <com.hualu.androidview.CustomView
        android:layout_width="wrap_content"
        android:layout_height="wrap_content"
        custom:text="custom view"
        custom:color="#00FF00"
        custom:size="18"
        />

</RelativeLayout>
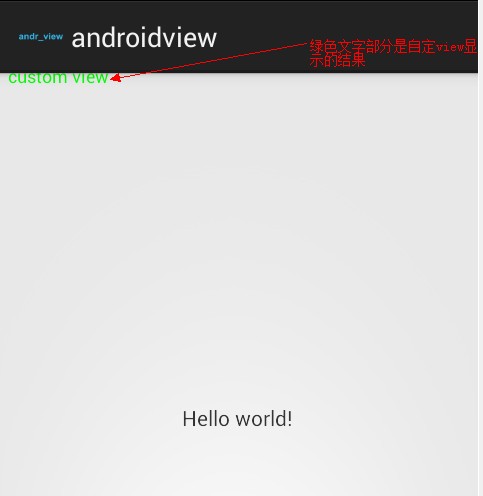
5. 运行应用
结果: