案例子任务一、安装配置keepalived
步骤1:使用nginx镜像生成nginx-keep镜像
1) 启动nginx容器并进入
docker run -d --privileged nginx /usr/sbin/init
2)在nginx容器中使用yum方式安装keepalived
yum -y install keepalived
安装完成后,检查!

3)保存容器为镜像
docker commit 容器ID nginx-keep
步骤2:使用nginx-keep镜像启动nginx1和nginx2两个容器
1)#docker network create --subnet=172.18.0.0/16 cluster //创建docker网络
此网络在之前的案例中已有说明,请自行查阅!
2)#docker network ls //查看宿主机上的docker网络类型种类
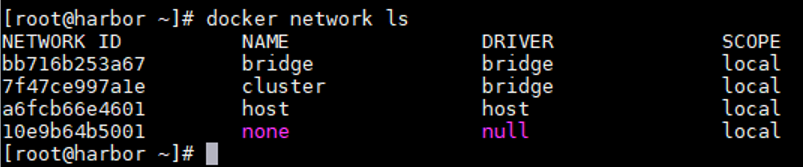
3)启动容器nginx1,设定地址为172.18.0.11
docker run -d --privileged --net cluster --ip 172.18.0.11 --name nginx1 nginx-keep /usr/sbin/init
4)启动容器nginx2,设定地址为172.18.0.12
docker run -d --privileged --net cluster --ip 172.18.0.12 --name nginx2 nginx-keep /usr/sbin/init
5)配置容器nginx1的web服务,编辑首页内容为“nginx1”,在宿主机访问,nginx2亦是如此。
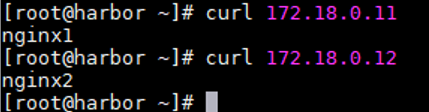
此时,两个容器的nginx配置基本完成!
步骤3:在nginx1和nginx2两个容器配置keepalived
注意:docker容器下配置高可用,需要在宿主机安装keepalived服务并启动,否则容器keepalived不能启动
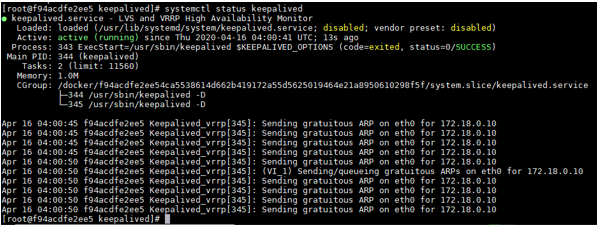
1) 在nginx1编辑 /etc/keepalived/keepalived.conf ,启动keepalived服务
global_defs {
   notification_email {
     acassen@firewall.loc
     failover@firewall.loc
     sysadmin@firewall.loc
   }
   notification_email_from Alexandre.Cassen@firewall.loc
   smtp_server 172.18.0.1
   smtp_connect_timeout 30
   router_id nginx1    #ID唯一标识,名称不可重复
   vrrp_skip_check_adv_addr
   #vrrp_strict  #此行需要注释掉,否则会导致宿主机无法访问VIP,严格执行vrrp协议
   vrrp_garp_interval 0
   vrrp_gna_interval 0
}
vrrp_instance VI_1 {
    state MASTER  #主为master
    interface eth0  #所属网络
    virtual_router_id 51  #虚拟ID,默认即可
    priority 100  #权重
    advert_int 1
    authentication {
        auth_type PASS
        auth_pass 1111
    }
     virtual_ipaddress {
        172.18.0.10  #vip地址
    }
}
完事后启动。
2)在nginx2编辑 /etc/keepalived/keepalived.conf ,启动keepalived服务
global_defs {
   notification_email {
     acassen@firewall.loc
     failover@firewall.loc
     sysadmin@firewall.loc
   }
   notification_email_from Alexandre.Cassen@firewall.loc
   smtp_server 172.18.0.1
   smtp_connect_timeout 30
   router_id nginx1    #ID唯一标识,名称不可重复
   vrrp_skip_check_adv_addr
   #vrrp_strict  #此行需要注释掉,否则会导致宿主机无法访问VIP,严格执行vrrp协议
   vrrp_garp_interval 0
   vrrp_gna_interval 0
}
vrrp_instance VI_1 {
    state BACKUP  #从为backup
    interface eth0  #所属网络
    virtual_router_id 51  #虚拟ID,默认即可
    priority 90  #权重
    advert_int 1
    authentication {
        auth_type PASS
        auth_pass 1111
    }
     virtual_ipaddress {
        172.18.0.10  #vip地址
    }
}
完事后重启

3)在宿主机ping 172.18.0.10,使用arp -a 查看缓存
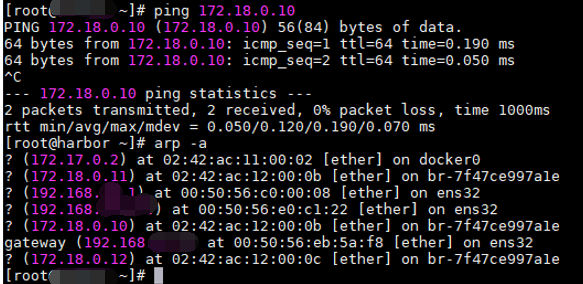
4)#curl http:// 172.18.0.10在宿主机访问虚拟地址

5)#ifconfig eth0 down在nginx1上当掉网卡,在宿主机使用arp -a 查看缓存

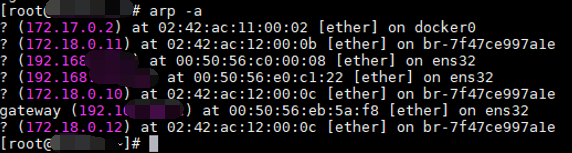
可以观察到MAC发生了变化!
6)#curl http:// 172.18.0.10在宿主机使用浏览器访问虚拟地址

案例子任务二、配置keepalived 支持nginx高可用
步骤1:编写 Nginx 状态检测脚本
1) 在nginx1上编写 Nginx 状态检测脚本 /etc/keepalived/nginx_check.sh
#!/bin/bash
if [ `ps -C nginx --no-header |wc -l` -eq 0 ]  #用于查看当前nginx运行状况
  then
     systemctl start nginx
     sleep 2
  if [ `ps -C nginx --no-header |wc -l` -eq 0 ]
     then
        kill keepalived
  fi
fi
2)赋予/etc/keepalived/nginx_check.sh执行权限,并测试脚本

步骤2:配置keepalived 支持nginx高可用
1)在nginx1上编辑/etc/keepalived/keepalived.conf
global_defs {
   notification_email {
     acassen@firewall.loc
     failover@firewall.loc
     sysadmin@firewall.loc
   }
   notification_email_from Alexandre.Cassen@firewall.loc
   smtp_server 172.18.0.1
   smtp_connect_timeout 30
   router_id nginx1
   vrrp_skip_check_adv_addr
   vrrp_strict
   vrrp_garp_interval 0
   vrrp_gna_interval 0
}
vrrp_script chk_nginx {
   script "/etc/keepalived/nginx_check.sh"  #执行脚本
   interval 2
   weight -20  #降低nginx1的权重
}

vrrp_instance VI_1 {
    state MASTER
    interface eth0
    virtual_router_id 51
    priority 100
    advert_int 1
    authentication {
        auth_type PASS
        auth_pass 1111
    }
    track_script {
        chk_nginx  #执行
    }
     virtual_ipaddress {
        172.18.0.10
    }
}
2)重新启动keepalived,在主机使用浏览器访问虚拟地址

3)在nginx1停止nginx服务,在主机使用浏览器访问虚拟地址
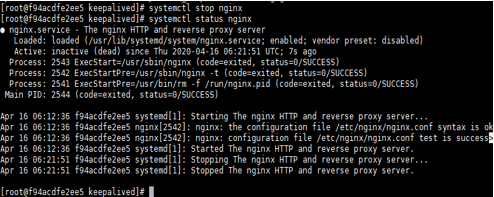

由此,我们就实现了简单的高可用配置!