转载自:https://www.cnblogs.com/hellxz/p/use-kubeadm-init-kubernetes-cluster.html,并由个人完全实践,感谢@hellxz。
说明
本文系搭建 kubernetes v1.18.5 集群笔记,使用三台虚拟机作为 CentOS 测试机,安装 kubeadm、kubelet、kubectl 均使用 yum 安装,网络组件选用的是 flannel。
环境准备
部署集群没有特殊说明均使用 root 用户执行命令。
硬件信息
| IP | hostname | mem | disk | explain |
|---|---|---|---|---|
| 10.1.1.204 | k8s-master | 4GB | 36GB | k8s 控制平台节点 |
| 10.1.1.151 | k8s-node1 | 4GB | 36GB | k8s执行节点1 |
| 10.1.1.186 | k8s-node2 | 4GB | 36GB | k8s执行节点2 |
软件信息
| software | version |
|---|---|
| CentOS | CentOS Linux release 7.6.1810 (Core) |
| Kubernetes | 1.18.5 |
| Docker | 19.03.12 |
保证环境正确性
| purpose | commands |
|---|---|
| 保证集群各节点互通 | ping -c 3 <ip> |
| 保证MAC地址唯一 | ip link 或 ifconfig -a |
| 保证集群内主机名唯一 | 查询 hostnamectl status,修改 hostnamectl set-hostname <hostname> |
| 保证系统产品uuid唯一 | dmidecode -s system-uuid 或 sudo cat /sys/class/dmi/id/product_uuid |
修改MAC地址参考命令:
ifconfig eth0 down
ifconfig eth0 hw ether 00:0c:29:84:fd:a4
ifconfig eth0 up
如product_uuid不唯一,请考虑重新安装CentOS。
确保端口开放正常
k8s-master 节点端口检查:
| Protocol | Direction | Port Range | Purpose |
|---|---|---|---|
| TCP | Inbound | 6443* | Kube-apiserver |
| TCP | Inbound | 2379-2380 | Etcd API |
| TCP | Inbound | 10250 | Kubelet API |
| TCP | Inbound | 10251 | Kube-scheduler |
| TCP | Inbound | 10252 | Kube-controller-manager |
k8s-node* 节点端口检查:
| Protocol | Direction | Port Range | Purpose |
|---|---|---|---|
| TCP | Inbound | 10250 | Kubelet api |
| TCP | Inbound | 30000-32767 | NodePort Service |
配置主机互信
配置hosts解析:
cat >> /etc/hosts <<EOF
10.1.1.204 k8s-master
10.1.1.151 k8s-node1
10.1.1.186 k8s-node2
EOF
在 k8s-master 生成ssh密钥,并分发到各个节点:
# 生成ssh密钥,直接一路回车
ssh-keygen -t rsa
# 复制刚刚生成的密钥到各节点可信列表中,需分别输入各主机密码
ssh-copy-id root@k8s-master
ssh-copy-id root@k8s-node1
ssh-copy-id root@k8s-node2
禁用swap
swap仅当内存不够时会使用硬盘块充当额外内存,硬盘的io较内存差距极大,禁用swap以提高性能各节点均需执行:
swapoff -a
sed -i 's/.*swap.*/#&/' /etc/fstab
关闭SELinux
关闭 SELinux,否则 kubelet 挂载目录时可能报错 Permission denied,可以设置为 permissive 或 disabled,permissive 会提示warn信息各节点均需执行:
setenforce 0
sed -i 's/^SELINUX=.*/SELINUX=disabled/' /etc/selinux/config
设置时区、同步时间
timedatectl set-timezone Asia/Shanghai
systemctl enable --now chronyd
查看同步状态:
timedatectl status
# 将当前的 UTC 时间写入硬件时钟
timedatectl set-local-rtc 0
# 重启依赖于系统时间的服务
systemctl restart rsyslog && systemctl restart crond
关闭防火墙
systemctl stop firewalld
systemctl disable firewalld
修改内核参数
cp /etc/sysctl.conf{,.bak}

echo "net.ipv4.ip_forward = 1" >> /etc/sysctl.conf
echo "net.bridge.bridge-nf-call-ip6tables = 1" >> /etc/sysctl.conf
echo "net.bridge.bridge-nf-call-iptables = 1" >> /etc/sysctl.conf
echo "net.ipv6.conf.all.disable_ipv6 = 1" >> /etc/sysctl.conf
echo "net.ipv6.conf.default.disable_ipv6 = 1" >> /etc/sysctl.conf
echo "net.ipv6.conf.lo.disable_ipv6 = 1" >> /etc/sysctl.conf
echo "net.ipv6.conf.all.forwarding = 1"  >> /etc/sysctl.conf
部署Docker
所有节点均需要安装Docker。
添加 Docker yum 源
# 安装必要依赖
yum install -y yum-utils device-mapper-persistent-data lvm2
# 添加 aliyun docker-ce yum 源
yum-config-manager --add-repo http://mirrors.aliyun.com/docker-ce/linux/centos/docker-ce.repo
# 重建 yum 缓存
yum makecache fast
安装 Docker
# 查看可用 docker 版本
yum list docker-ce.x86_64 --showduplicates | sort -r
 * updates: mirrors.tuna.tsinghua.edu.cn
Loading mirror speeds from cached hostfile
Loaded plugins: fastestmirror
 * extras: mirrors.tuna.tsinghua.edu.cn
docker-ce.x86_64            3:19.03.9-3.el7                     docker-ce-stable
docker-ce.x86_64            3:19.03.8-3.el7                     docker-ce-stable
docker-ce.x86_64            3:19.03.7-3.el7                     docker-ce-stable
docker-ce.x86_64            3:19.03.6-3.el7                     docker-ce-stable
docker-ce.x86_64            3:19.03.5-3.el7                     docker-ce-stable
docker-ce.x86_64            3:19.03.4-3.el7                     docker-ce-stable
docker-ce.x86_64            3:19.03.3-3.el7                     docker-ce-stable
docker-ce.x86_64            3:19.03.2-3.el7                     docker-ce-stable
docker-ce.x86_64            3:19.03.1-3.el7                     docker-ce-stable
docker-ce.x86_64            3:19.03.12-3.el7                    docker-ce-stable
docker-ce.x86_64            3:19.03.11-3.el7                    docker-ce-stable
docker-ce.x86_64            3:19.03.10-3.el7                    docker-ce-stable
docker-ce.x86_64            3:19.03.0-3.el7                     docker-ce-stable
docker-ce.x86_64            3:18.09.9-3.el7                     docker-ce-stable
docker-ce.x86_64            3:18.09.8-3.el7                     docker-ce-stable
docker-ce.x86_64            3:18.09.7-3.el7                     docker-ce-stable
docker-ce.x86_64            3:18.09.6-3.el7                     docker-ce-stable
docker-ce.x86_64            3:18.09.5-3.el7                     docker-ce-stable
docker-ce.x86_64            3:18.09.4-3.el7                     docker-ce-stable
docker-ce.x86_64            3:18.09.3-3.el7                     docker-ce-stable
docker-ce.x86_64            3:18.09.2-3.el7                     docker-ce-stable
docker-ce.x86_64            3:18.09.1-3.el7                     docker-ce-stable
docker-ce.x86_64            3:18.09.0-3.el7                     docker-ce-stable
docker-ce.x86_64            18.06.3.ce-3.el7                    docker-ce-stable
docker-ce.x86_64            18.06.2.ce-3.el7                    docker-ce-stable
docker-ce.x86_64            18.06.1.ce-3.el7                    docker-ce-stable
docker-ce.x86_64            18.06.0.ce-3.el7                    docker-ce-stable
docker-ce.x86_64            18.03.1.ce-1.el7.centos             docker-ce-stable
docker-ce.x86_64            18.03.0.ce-1.el7.centos             docker-ce-stable
docker-ce.x86_64            17.12.1.ce-1.el7.centos             docker-ce-stable
docker-ce.x86_64            17.12.0.ce-1.el7.centos             docker-ce-stable
docker-ce.x86_64            17.09.1.ce-1.el7.centos             docker-ce-stable
docker-ce.x86_64            17.09.0.ce-1.el7.centos             docker-ce-stable
docker-ce.x86_64            17.06.2.ce-1.el7.centos             docker-ce-stable
docker-ce.x86_64            17.06.1.ce-1.el7.centos             docker-ce-stable
docker-ce.x86_64            17.06.0.ce-1.el7.centos             docker-ce-stable
docker-ce.x86_64            17.03.3.ce-1.el7                    docker-ce-stable
docker-ce.x86_64            17.03.2.ce-1.el7.centos             docker-ce-stable
docker-ce.x86_64            17.03.1.ce-1.el7.centos             docker-ce-stable
docker-ce.x86_64            17.03.0.ce-1.el7.centos             docker-ce-stable
 * base: mirrors.tuna.tsinghua.edu.cn
Available Packages
# 安装指定版本 Docker
yum install -y docker-ce-19.03.12-3.el7
这里以安装
19.03.12版本举例,注意版本号不包含:与之前的数字。
确保网络模块开机自动加载
lsmod | grep overlay
lsmod | grep br_netfilter
若上面命令无返回值输出或提示文件不存在,需执行以下命令:
cat > /etc/modules-load.d/docker.conf <<EOF
overlay
br_netfilter
EOF

modprobe overlay
modprobe br_netfilter
使桥接流量对iptables可见
各个节点均需执行:
cat > /etc/sysctl.d/k8s.conf <<EOF
net.bridge.bridge-nf-call-ip6tables = 1
net.bridge.bridge-nf-call-iptables = 1
EOF

sysctl --system
验证是否生效,均返回 1 即正确。
sysctl -n net.bridge.bridge-nf-call-iptables
sysctl -n net.bridge.bridge-nf-call-ip6tables
配置 Docker
mkdir /etc/docker

# 修改 cgroup 驱动为 systemd [k8s官方推荐]、限制容器日志量、修改存储类型,最后的 docker 家目录可修改
cat > /etc/docker/daemon.json <<EOF
{
  "exec-opts": ["native.cgroupdriver=systemd"],
  "log-driver": "json-file",
  "log-opts": {
    "max-size": "100m"
  },
  "storage-driver": "overlay2",
  "storage-opts": [
    "overlay2.override_kernel_check=true"
  ],
  "registry-mirrors": ["https://7uuu3esz.mirror.aliyuncs.com"],
  "data-root": "/data/docker"
}
EOF

# 添加开机自启,立即启动
systemctl enable --now docker
验证 Docker 是否正常
# 查看docker信息,判断是否与配置一致
docker info
Client:
 Debug Mode: false

Server:
 Containers: 0
  Running: 0
  Paused: 0
  Stopped: 0
 Images: 0
 Server Version: 19.03.12
 Storage Driver: overlay2
  Backing Filesystem: xfs
  Supports d_type: true
  Native Overlay Diff: true
 Logging Driver: json-file
 Cgroup Driver: systemd
 Plugins:
  Volume: local
  Network: bridge host ipvlan macvlan null overlay
  Log: awslogs fluentd gcplogs gelf journald json-file local logentries splunk syslog
 Swarm: inactive
 Runtimes: runc
 Default Runtime: runc
 Init Binary: docker-init
 containerd version: 7ad184331fa3e55e52b890ea95e65ba581ae3429
 runc version: dc9208a3303feef5b3839f4323d9beb36df0a9dd
 init version: fec3683
 Security Options:
  seccomp
   Profile: default
 Kernel Version: 3.10.0-957.el7.x86_64
 Operating System: CentOS Linux 7 (Core)
 OSType: linux
 Architecture: x86_64
 CPUs: 2
 Total Memory: 3.683GiB
 Name: k8s-master
 ID: ELO6:HASF:6EIU:NJP3:SEMF:KJIH:G7IB:ZEYI:DTJU:V6E4:VU4D:3DHF
 Docker Root Dir: /data/docker
 Debug Mode: false
 Registry: https://index.docker.io/v1/
 Labels:
 Experimental: false
 Insecure Registries:
  127.0.0.0/8
 Registry Mirrors:
  https://7uuu3esz.mirror.aliyuncs.com/
 Live Restore Enabled: false
# hello-docker 测试
docker run --rm hello-world
# 删除测试 image
docker rmi hello-world
添加用户到 Docker 组
对于非root用户,无需sudo即可使用docker命令。
# 添加用户到 docker 组
usermod -aG docker <USERNAME>
# 当前会话立即更新 docker 组
newgrp docker
部署 Kubernetes 集群
如未说明,各节点均需执行如下步骤:
添加 kubernetes 源
cat > /etc/yum.repos.d/kubernetes.repo <<EOF
[kubernetes]
name=Kubernetes
baseurl=https://mirrors.aliyun.com/kubernetes/yum/repos/kubernetes-el7-x86_64/
enabled=1
gpgcheck=1
repo_gpgcheck=1
gpgkey=https://mirrors.aliyun.com/kubernetes/yum/doc/yum-key.gpg https://mirrors.aliyun.com/kubernetes/yum/doc/rpm-package-key.gpg
EOF

# 重建yum缓存,输入y添加证书认证
yum makecache fast
安装 kubeadm、kubelet、kubectl
- 各节点均需安装
kubeadm、kubelet; kubectl仅k8s-master节点需安装(作为worker节点,kubectl无法使用,可以不装)。
yum install -y kubelet kubeadm kubectl --disableexcludes=kubernetes
systemctl enable --now kubelet
配置自动补全命令
# 安装 bash 自动补全插件
yum install bash-completion -y
# 设置 kubectl 与 kubeadm 命令补全,下次 login 生效
kubectl completion bash >/etc/bash_completion.d/kubectl
kubeadm completion bash > /etc/bash_completion.d/kubeadm
预拉取 kubernetes 镜像
由于国内网络因素,kubernetes镜像需要从mirrors站点或通过dockerhub用户推送的镜像拉取。
# 查看指定 k8s 版本需要哪些镜像
kubeadm config images list --kubernetes-version v1.18.5
W0815 22:18:40.474596   19979 configset.go:202] WARNING: kubeadm cannot validate component configs for API groups [k
ubelet.config.k8s.io kubeproxy.config.k8s.io]k8s.gcr.io/kube-apiserver:v1.18.5
k8s.gcr.io/kube-controller-manager:v1.18.5
k8s.gcr.io/kube-scheduler:v1.18.5
k8s.gcr.io/kube-proxy:v1.18.5
k8s.gcr.io/pause:3.2
k8s.gcr.io/etcd:3.4.3-0
k8s.gcr.io/coredns:1.6.7
因为阿里云的镜像暂时还没更新到
v1.18.5版本,所以通过在dockerhub上拉取。
在 /root/k8s 目录下,新建脚本 get-k8s-images.sh 内容如下:
#!/bin/bash
# Script For Quick Pull K8S Docker Images
# by iuskye <iuskye@126.com>

KUBE_VERSION=v1.18.5
PAUSE_VERSION=3.2
CORE_DNS_VERSION=1.6.7
ETCD_VERSION=3.4.3-0

# pull kubernetes images from hub.docker.com
docker pull kubeimage/kube-proxy-amd64:$KUBE_VERSION
docker pull kubeimage/kube-controller-manager-amd64:$KUBE_VERSION
docker pull kubeimage/kube-apiserver-amd64:$KUBE_VERSION
docker pull kubeimage/kube-scheduler-amd64:$KUBE_VERSION
# pull aliyuncs mirror docker images
docker pull registry.cn-hangzhou.aliyuncs.com/google_containers/pause:$PAUSE_VERSION
docker pull registry.cn-hangzhou.aliyuncs.com/google_containers/coredns:$CORE_DNS_VERSION
docker pull registry.cn-hangzhou.aliyuncs.com/google_containers/etcd:$ETCD_VERSION

# retag to k8s.gcr.io prefix
docker tag kubeimage/kube-proxy-amd64:$KUBE_VERSION  k8s.gcr.io/kube-proxy:$KUBE_VERSION
docker tag kubeimage/kube-controller-manager-amd64:$KUBE_VERSION k8s.gcr.io/kube-controller-manager:$KUBE_VERSION
docker tag kubeimage/kube-apiserver-amd64:$KUBE_VERSION k8s.gcr.io/kube-apiserver:$KUBE_VERSION
docker tag kubeimage/kube-scheduler-amd64:$KUBE_VERSION k8s.gcr.io/kube-scheduler:$KUBE_VERSION
docker tag registry.cn-hangzhou.aliyuncs.com/google_containers/pause:$PAUSE_VERSION k8s.gcr.io/pause:$PAUSE_VERSION
docker tag registry.cn-hangzhou.aliyuncs.com/google_containers/coredns:$CORE_DNS_VERSION k8s.gcr.io/coredns:$CORE_DNS_VERSION
docker tag registry.cn-hangzhou.aliyuncs.com/google_containers/etcd:$ETCD_VERSION k8s.gcr.io/etcd:$ETCD_VERSION

# untag origin tag, the images won't be delete.
docker rmi kubeimage/kube-proxy-amd64:$KUBE_VERSION
docker rmi kubeimage/kube-controller-manager-amd64:$KUBE_VERSION
docker rmi kubeimage/kube-apiserver-amd64:$KUBE_VERSION
docker rmi kubeimage/kube-scheduler-amd64:$KUBE_VERSION
docker rmi registry.cn-hangzhou.aliyuncs.com/google_containers/pause:$PAUSE_VERSION
docker rmi registry.cn-hangzhou.aliyuncs.com/google_containers/coredns:$CORE_DNS_VERSION
docker rmi registry.cn-hangzhou.aliyuncs.com/google_containers/etcd:$ETCD_VERSION
脚本添加可执行权限,执行脚本拉取镜像:
chmod +x get-k8s-images.sh
./get-k8s-images.sh
拉取完成,执行 docker images 查看镜像:
docker images

REPOSITORY                           TAG                 IMAGE ID            CREATED             SIZE
k8s.gcr.io/kube-proxy                v1.18.5             a1daed4e2b60        7 weeks ago         117MB
k8s.gcr.io/kube-controller-manager   v1.18.5             8d69eaf196dc        7 weeks ago         162MB
k8s.gcr.io/kube-apiserver            v1.18.5             08ca24f16874        7 weeks ago         173MB
k8s.gcr.io/kube-scheduler            v1.18.5             39d887c6621d        7 weeks ago         95.3MB
k8s.gcr.io/pause                     3.2                 80d28bedfe5d        6 months ago        683kB
k8s.gcr.io/coredns                   1.6.7               67da37a9a360        6 months ago        43.8MB
k8s.gcr.io/etcd
初始化 k8s-master
仅 kube-master 节点需要执行此步骤。
修改kubelet配置默认 cgroup driver
mkdir /var/lib/kubelet

cat > /var/lib/kubelet/config.yaml <<EOF
apiVersion: kubelet.config.k8s.io/v1beta1
kind: KubeletConfiguration
cgroupDriver: systemd
EOF

systemctl restart kubelet
生成 kubeadm初始化配置文件
[可选] 仅当需自定义初始化配置时用。
kubeadm config print init-defaults > init.default.yaml
测试环境是否正常
kubeadm init phase preflight
W0815 22:32:18.647679   21047 configset.go:202] WARNING: kubeadm cannot validate component configs for API groups [k
ubelet.config.k8s.io kubeproxy.config.k8s.io][preflight] Running pre-flight checks
[preflight] Pulling images required for setting up a Kubernetes cluster
[preflight] This might take a minute or two, depending on the speed of your internet connection
[preflight] You can also perform this action in beforehand using 'kubeadm config images pull'
上图提示Warning是正常的,校验不了k8s信息是因为连不上被ban的网站。
初始化 mster
10.244.0.0/16是flannel固定使用的IP段,设置取决于网络组件要求。、
kubeadm init --pod-network-cidr=10.244.0.0/16 --kubernetes-version=v1.18.5 [--config kubeadm-init.yaml]
输出如下:
kubeadm init --pod-network-cidr=10.244.0.0/16 --kubernetes-version=v1.18.5

W0815 22:34:22.306284   21385 configset.go:202] WARNING: kubeadm cannot validate component configs for API groups [k
ubelet.config.k8s.io kubeproxy.config.k8s.io][init] Using Kubernetes version: v1.18.5
[preflight] Running pre-flight checks
[preflight] Pulling images required for setting up a Kubernetes cluster
[preflight] This might take a minute or two, depending on the speed of your internet connection
[preflight] You can also perform this action in beforehand using 'kubeadm config images pull'
[kubelet-start] Writing kubelet environment file with flags to file "/var/lib/kubelet/kubeadm-flags.env"
[kubelet-start] Writing kubelet configuration to file "/var/lib/kubelet/config.yaml"
[kubelet-start] Starting the kubelet
[certs] Using certificateDir folder "/etc/kubernetes/pki"
[certs] Generating "ca" certificate and key
[certs] Generating "apiserver" certificate and key
[certs] apiserver serving cert is signed for DNS names [k8s-master kubernetes kubernetes.default kubernetes.default.
svc kubernetes.default.svc.cluster.local] and IPs [10.96.0.1 10.1.1.204][certs] Generating "apiserver-kubelet-client" certificate and key
[certs] Generating "front-proxy-ca" certificate and key
[certs] Generating "front-proxy-client" certificate and key
[certs] Generating "etcd/ca" certificate and key
[certs] Generating "etcd/server" certificate and key
[certs] etcd/server serving cert is signed for DNS names [k8s-master localhost] and IPs [10.1.1.204 127.0.0.1 ::1]
[certs] Generating "etcd/peer" certificate and key
[certs] etcd/peer serving cert is signed for DNS names [k8s-master localhost] and IPs [10.1.1.204 127.0.0.1 ::1]
[certs] Generating "etcd/healthcheck-client" certificate and key
[certs] Generating "apiserver-etcd-client" certificate and key
[certs] Generating "sa" key and public key
[kubeconfig] Using kubeconfig folder "/etc/kubernetes"
[kubeconfig] Writing "admin.conf" kubeconfig file
[kubeconfig] Writing "kubelet.conf" kubeconfig file
[kubeconfig] Writing "controller-manager.conf" kubeconfig file
[kubeconfig] Writing "scheduler.conf" kubeconfig file
[control-plane] Using manifest folder "/etc/kubernetes/manifests"
[control-plane] Creating static Pod manifest for "kube-apiserver"
[control-plane] Creating static Pod manifest for "kube-controller-manager"
W0815 22:34:25.496900   21385 manifests.go:225] the default kube-apiserver authorization-mode is "Node,RBAC"; using
"Node,RBAC"[control-plane] Creating static Pod manifest for "kube-scheduler"
W0815 22:34:25.498008   21385 manifests.go:225] the default kube-apiserver authorization-mode is "Node,RBAC"; using
"Node,RBAC"[etcd] Creating static Pod manifest for local etcd in "/etc/kubernetes/manifests"
[wait-control-plane] Waiting for the kubelet to boot up the control plane as static Pods from directory "/etc/kubern
etes/manifests". This can take up to 4m0s[apiclient] All control plane components are healthy after 22.501958 seconds
[upload-config] Storing the configuration used in ConfigMap "kubeadm-config" in the "kube-system" Namespace
[kubelet] Creating a ConfigMap "kubelet-config-1.18" in namespace kube-system with the configuration for the kubelet
s in the cluster[upload-certs] Skipping phase. Please see --upload-certs
[mark-control-plane] Marking the node k8s-master as control-plane by adding the label "node-role.kubernetes.io/maste
r=''"[mark-control-plane] Marking the node k8s-master as control-plane by adding the taints [node-role.kubernetes.io/mast
er:NoSchedule][bootstrap-token] Using token: o3imhx.7evputkjj3fspv7t
[bootstrap-token] Configuring bootstrap tokens, cluster-info ConfigMap, RBAC Roles
[bootstrap-token] configured RBAC rules to allow Node Bootstrap tokens to get nodes
[bootstrap-token] configured RBAC rules to allow Node Bootstrap tokens to post CSRs in order for nodes to get long t
erm certificate credentials[bootstrap-token] configured RBAC rules to allow the csrapprover controller automatically approve CSRs from a Node B
ootstrap Token[bootstrap-token] configured RBAC rules to allow certificate rotation for all node client certificates in the cluste
r[bootstrap-token] Creating the "cluster-info" ConfigMap in the "kube-public" namespace
[kubelet-finalize] Updating "/etc/kubernetes/kubelet.conf" to point to a rotatable kubelet client certificate and ke
y[addons] Applied essential addon: CoreDNS
[addons] Applied essential addon: kube-proxy

Your Kubernetes control-plane has initialized successfully!

To start using your cluster, you need to run the following as a regular user:

  mkdir -p $HOME/.kube
  sudo cp -i /etc/kubernetes/admin.conf $HOME/.kube/config
  sudo chown $(id -u):$(id -g) $HOME/.kube/config

You should now deploy a pod network to the cluster.
Run "kubectl apply -f [podnetwork].yaml" with one of the options listed at:
  https://kubernetes.io/docs/concepts/cluster-administration/addons/

Then you can join any number of worker nodes by running the following on each as root:

kubeadm join 10.1.1.204:6443 --token o3imhx.7evputkjj3fspv7t
    --discovery-token-ca-cert-hash sha256:7e8aac39cbd6374646ff2bdd020215e5bc06ef0a91f5b90e0a3482a0b58e622d
为日常使用集群的用户添加 kubectl 使用权限
su iuskye
mkdir -p $HOME/.kube
sudo cp -i /etc/kubernetes/admin.conf $HOME/.kube/admin.conf
sudo chown $(id -u):$(id -g) $HOME/.kube/admin.conf
echo "export KUBECONFIG=$HOME/.kube/admin.conf" >> ~/.bashrc
exit
配置 master 认证
echo 'export KUBECONFIG=/etc/kubernetes/admin.conf' >> /etc/profile
. /etc/profile
如果不配置这个,会提示如下输出:
The connection to the server localhost:8080 was refused - did you specify the right host or port?
此时master节点已经初始化成功,但是还未完装网络组件,还无法与其他节点通讯。
安装网络组件,以 flannel 为例
cd ~/k8s
yum install -y wget
# 下载flannel最新配置文件
wget http://download.iuskye.com/Linux/Kubernetes/v1.18.5/kube-flannel.yml
kubectl apply -f kube-flannel.yml
podsecuritypolicy.policy/psp.flannel.unprivileged created
clusterrole.rbac.authorization.k8s.io/flannel created
clusterrolebinding.rbac.authorization.k8s.io/flannel created
serviceaccount/flannel created
configmap/kube-flannel-cfg created
daemonset.apps/kube-flannel-ds-amd64 created
daemonset.apps/kube-flannel-ds-arm64 created
daemonset.apps/kube-flannel-ds-arm created
daemonset.apps/kube-flannel-ds-ppc64le created
daemonset.apps/kube-flannel-ds-s390x created
查看 k8s-master 节点状态
kubectl get nodes
NAME         STATUS     ROLES    AGE   VERSION
k8s-master   NotReady   master   12m   v1.18.8
NAME         STATUS   ROLES    AGE   VERSION
k8s-master   Ready    master   20m   v1.18.8
如果
STATUS提示NotReady,可以通过kubectl describe node kube-master查看具体的描述信息,性能差的服务器到达Ready状态时间会长些。
备份镜像供其他节点使用
在 k8s-master 节点将镜像备份出来,便于后续传输给其他node节点,当然有镜像仓库更好。
docker save k8s.gcr.io/kube-proxy:v1.18.5
            k8s.gcr.io/kube-apiserver:v1.18.5
            k8s.gcr.io/kube-controller-manager:v1.18.5
            k8s.gcr.io/kube-scheduler:v1.18.5
            k8s.gcr.io/pause:3.2
            k8s.gcr.io/coredns:1.6.7
            k8s.gcr.io/etcd:3.4.3-0 > k8s-imagesV1.18.5.tar
初始化 k8s-node* 节点并加入集群
拷贝镜像到 node 节点
以 k8s-node1 举例,node2不再赘述。
# 此时命令在 kube-node* 节点上执行
mkdir ~/k8s
scp root@k8s-master:/root/k8s/k8s-imagesV1.18.5.tar ~/k8s
cd ~/k8s
docker load < k8s-imagesV1.18.5.tar
获取加入 kubernetes 的命令
访问 k8s-master 输入创建新token命令,同时输出加入集群的命令:
kubeadm token create --print-join-command
W0815 22:52:33.703674   27535 configset.go:202] WARNING: kubeadm cannot validate component configs for API groups [k
ubelet.config.k8s.io kubeproxy.config.k8s.io]kubeadm join 10.1.1.204:6443 --token xv18dj.4j1929tfam4y6pap     --discovery-token-ca-cert-hash sha256:7e8aac39cbd6374646ff2bdd020215e5bc06ef0a91f5b90e0a3482a0b58e622d
在 k8s-node* 节点上执行加入集群的命令
kubeadm join 10.1.1.204:6443 --token xv18dj.4j1929tfam4y6pap --discovery-token-ca-cert-hash sha256:7e8aac39cbd6374646ff2bdd020215e5bc06ef0a91f5b90e0a3482a0b58e622d
W0815 22:57:07.493498   21725 join.go:346] [preflight] WARNING: JoinControlPane.controlPlane settings will be ignored when control-plane flag is not set.[preflight] Running pre-flight checks
[preflight] Reading configuration from the cluster...
[preflight] FYI: You can look at this config file with 'kubectl -n kube-system get cm kubeadm-config -oyaml'
[kubelet-start] Downloading configuration for the kubelet from the "kubelet-config-1.18" ConfigMap in the kube-syste
m namespace[kubelet-start] Writing kubelet configuration to file "/var/lib/kubelet/config.yaml"
[kubelet-start] Writing kubelet environment file with flags to file "/var/lib/kubelet/kubeadm-flags.env"
[kubelet-start] Starting the kubelet
[kubelet-start] Waiting for the kubelet to perform the TLS Bootstrap...

This node has joined the cluster:
* Certificate signing request was sent to apiserver and a response was received.
* The Kubelet was informed of the new secure connection details.

Run 'kubectl get nodes' on the control-plane to see this node join the cluster.
查看集群节点状态
kubectl get nodes
NAME         STATUS     ROLES    AGE     VERSION
k8s-master   Ready      master   25m     v1.18.8
k8s-node1    NotReady   <none>   3m22s   v1.18.8
k8s-node2    NotReady   <none>   2m58s   v1.18.8
发现 node 节点状态为NotReady,别着急,等几分钟就好了:
NAME         STATUS   ROLES    AGE     VERSION
k8s-master   Ready    master   26m     v1.18.8
k8s-node1    Ready    <none>   4m51s   v1.18.8
k8s-node2    Ready    <none>   4m27s   v1.18.8
6.1 部署Dashboard
wget http://download.iuskye.com/Linux/Kubernetes/v1.18.0/bin_install/dashboard/recommended.yaml
默认Dashboard只能集群内部访问,修改Service为NodePort类型,暴露到外部:
vi recommended.yaml
kind: Service
apiVersion: v1
metadata:
  labels:
    k8s-app: kubernetes-dashboard
  name: kubernetes-dashboard
  namespace: kubernetes-dashboard
spec:
  ports:
    - port: 443
      targetPort: 8443
      nodePort: 30001
  type: NodePort
  selector:
    k8s-app: kubernetes-dashboard
# 需要等待一段时间下方 STATUS 为 Running 才行
kubectl apply -f recommended.yaml
kubectl get pods,svc -n kubernetes-dashboard

NAME                                             READY   STATUS    RESTARTS   AGE
pod/dashboard-metrics-scraper-694557449d-6mwvp   1/1     Running   0          41s
pod/kubernetes-dashboard-9774cc786-rqqfq         1/1     Running   0          41s

NAME                                TYPE        CLUSTER-IP      EXTERNAL-IP   PORT(S)         AGE
service/dashboard-metrics-scraper   ClusterIP   10.103.62.172   <none>        8000/TCP        41s
service/kubernetes-dashboard        NodePort    10.105.217.95   <none>        443:30001/TCP   41s
访问地址:https://NodeIP:30001;使用Firefox浏览器,Chrome浏览器打不开不信任SSL证书的网站。
创建service account并绑定默认cluster-admin管理员集群角色:
kubectl create serviceaccount dashboard-admin -n kube-system
kubectl create clusterrolebinding dashboard-admin --clusterrole=cluster-admin --serviceaccount=kube-system:dashboard-admin
kubectl describe secrets -n kube-system $(kubectl -n kube-system get secret | awk '/dashboard-admin/{print $1}')
获得token:
eyJhbGciOiJSUzI1NiIsImtpZCI6Im5MWmNZMTczZlI2V2l2R2NTa2Viank5OVo3Z0d1RF84c0lnLUZXbWJNNVkifQ.eyJpc3MiOiJrdWJlcm5ldGVzL3NlcnZpY2VhY2NvdW50Iiwia3ViZXJuZXRlcy5pby9zZXJ2aWNlYWNjb3VudC9uYW1lc3BhY2UiOiJrdWJlLXN5c3RlbSIsImt1YmVybmV0ZXMuaW8vc2VydmljZWFjY291bnQvc2VjcmV0Lm5hbWUiOiJkYXNoYm9hcmQtYWRtaW4tdG9rZW4tdzJjdnQiLCJrdWJlcm5ldGVzLmlvL3NlcnZpY2VhY2NvdW50L3NlcnZpY2UtYWNjb3VudC5uYW1lIjoiZGFzaGJvYXJkLWFkbWluIiwia3ViZXJuZXRlcy5pby9zZXJ2aWNlYWNjb3VudC9zZXJ2aWNlLWFjY291bnQudWlkIjoiNDE0OTIwOWQtZDNmNy00NmZkLTg2YWQtYjFmMGYxODM5Mjk0Iiwic3ViIjoic3lzdGVtOnNlcnZpY2VhY2NvdW50Omt1YmUtc3lzdGVtOmRhc2hib2FyZC1hZG1pbiJ9.UGbo4brzxWfyYI10r0esCUXdCqvcE7dMmjhxhf9qCsfG-8sNr4_6CghG4Cg5qUOmKjtXnG_RFGjDtgQna8D1zxaK8iO9N28kaBxv5dFoubaMV1O1ueLFvnXtSDM9ekf4G88feXRoUHLrCv2HM0XkNZ-_665E8CB1_rVQnGSeVJ7EmJxcEJNYruHmVvsoJ0HfvqUa9X7_K6r7ftkT5hmJSx6EYxUf0zx6siMKo0Dlcn5jLbmNbDwFGbs8_lCDrRxQvV_Z8na3Zk7cN3eTqvuQFNCflmXDsIVtnr8xoKPrySjw_sOX4jxLNWc2dbUUcX3rHrSd9cEtoRLvaO7ab_Q-Jw
这里需要注意粘贴的时候有可能被换行,如果被换行,可在记事本中设置为一行。
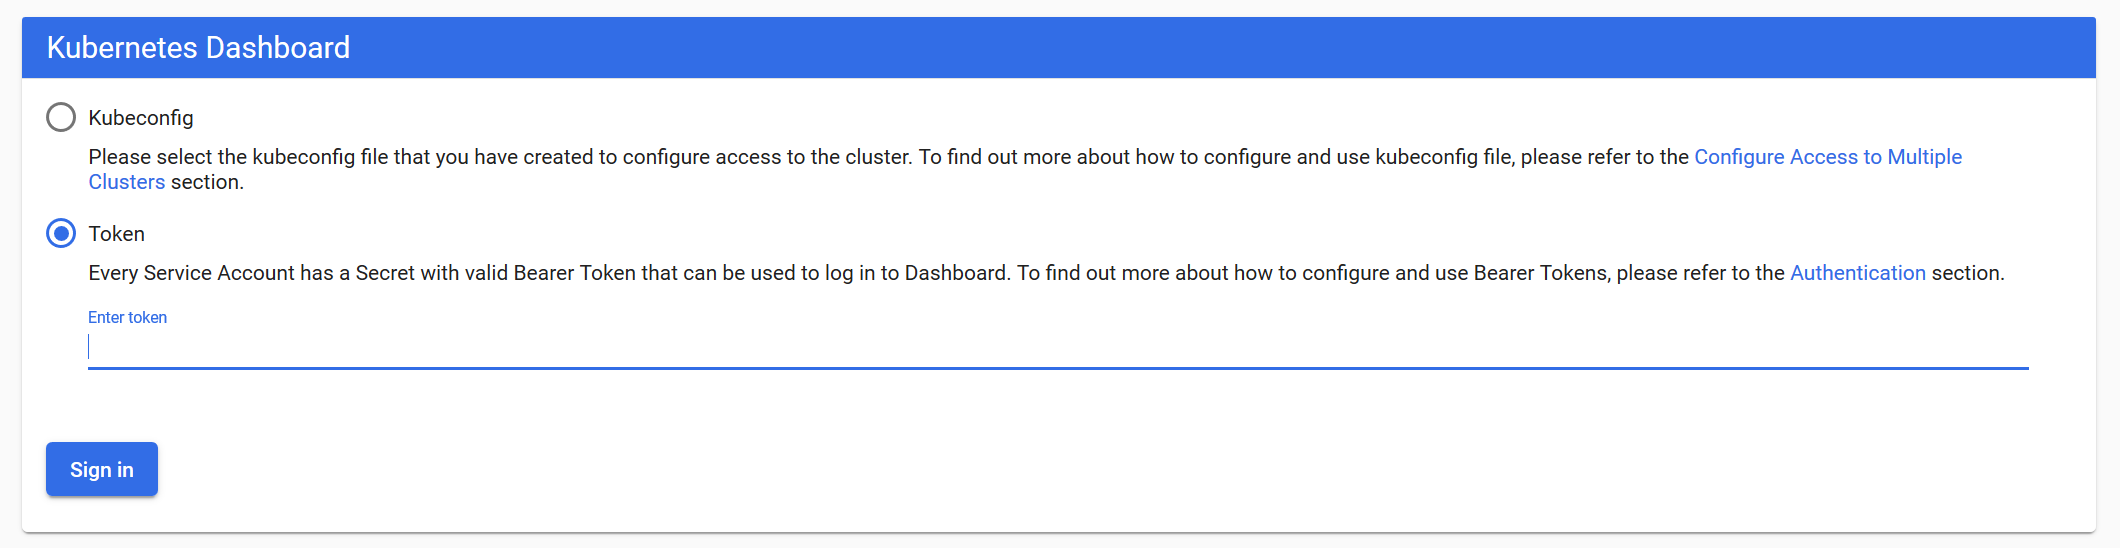
使用输出的token登录Dashboard。
登录界面:
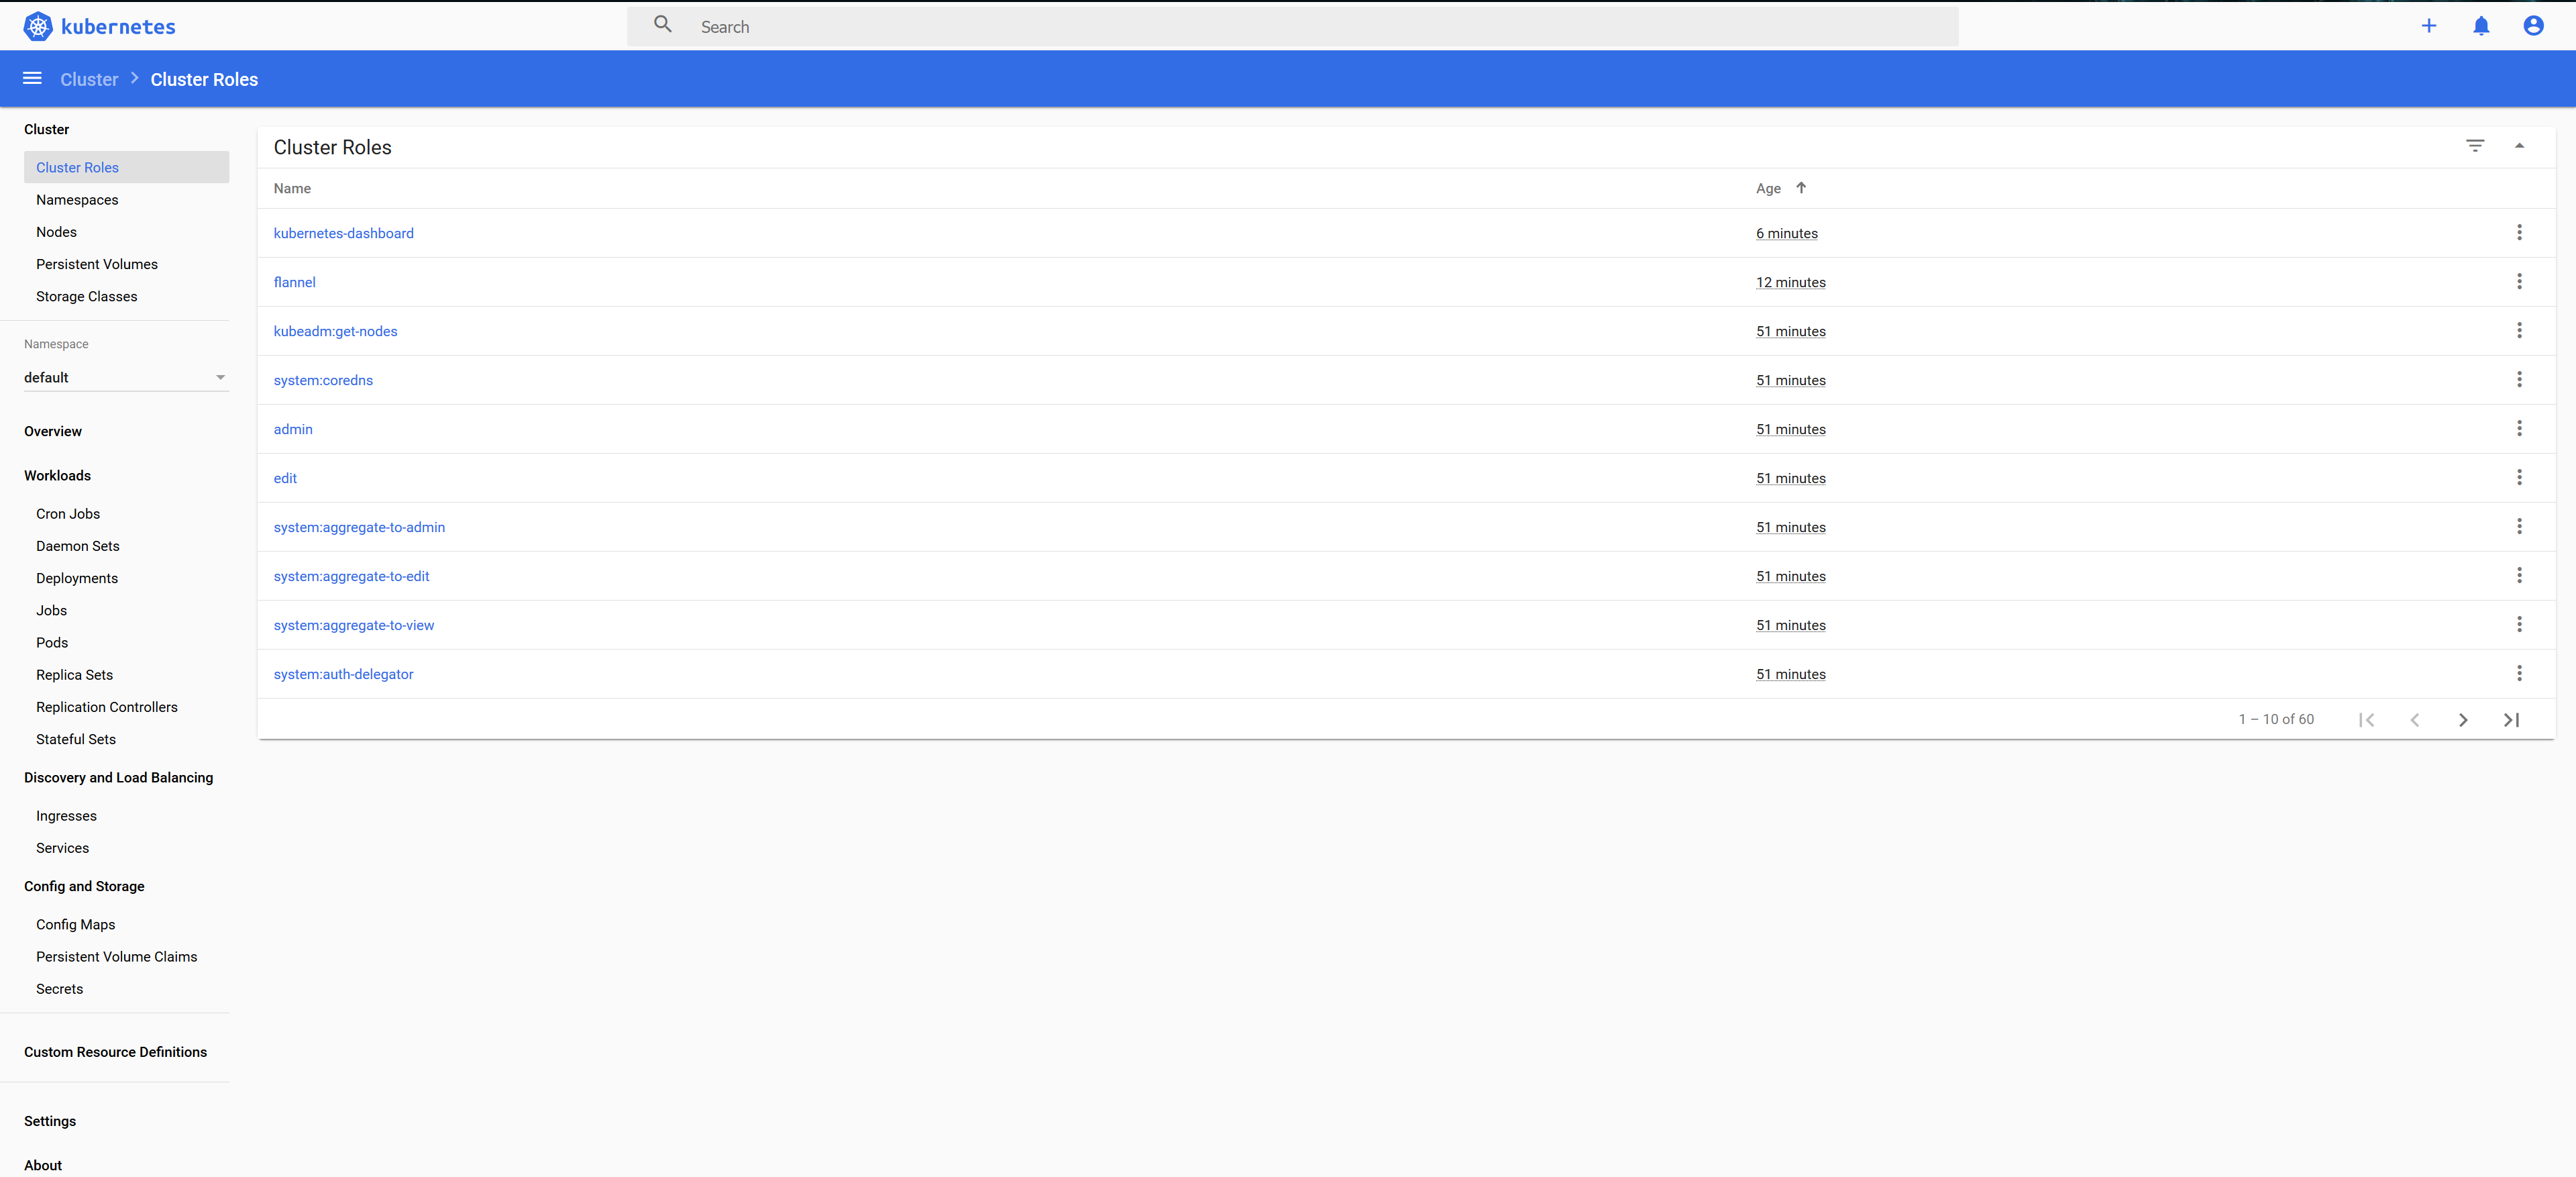
Cluster Roles:
命名空间:

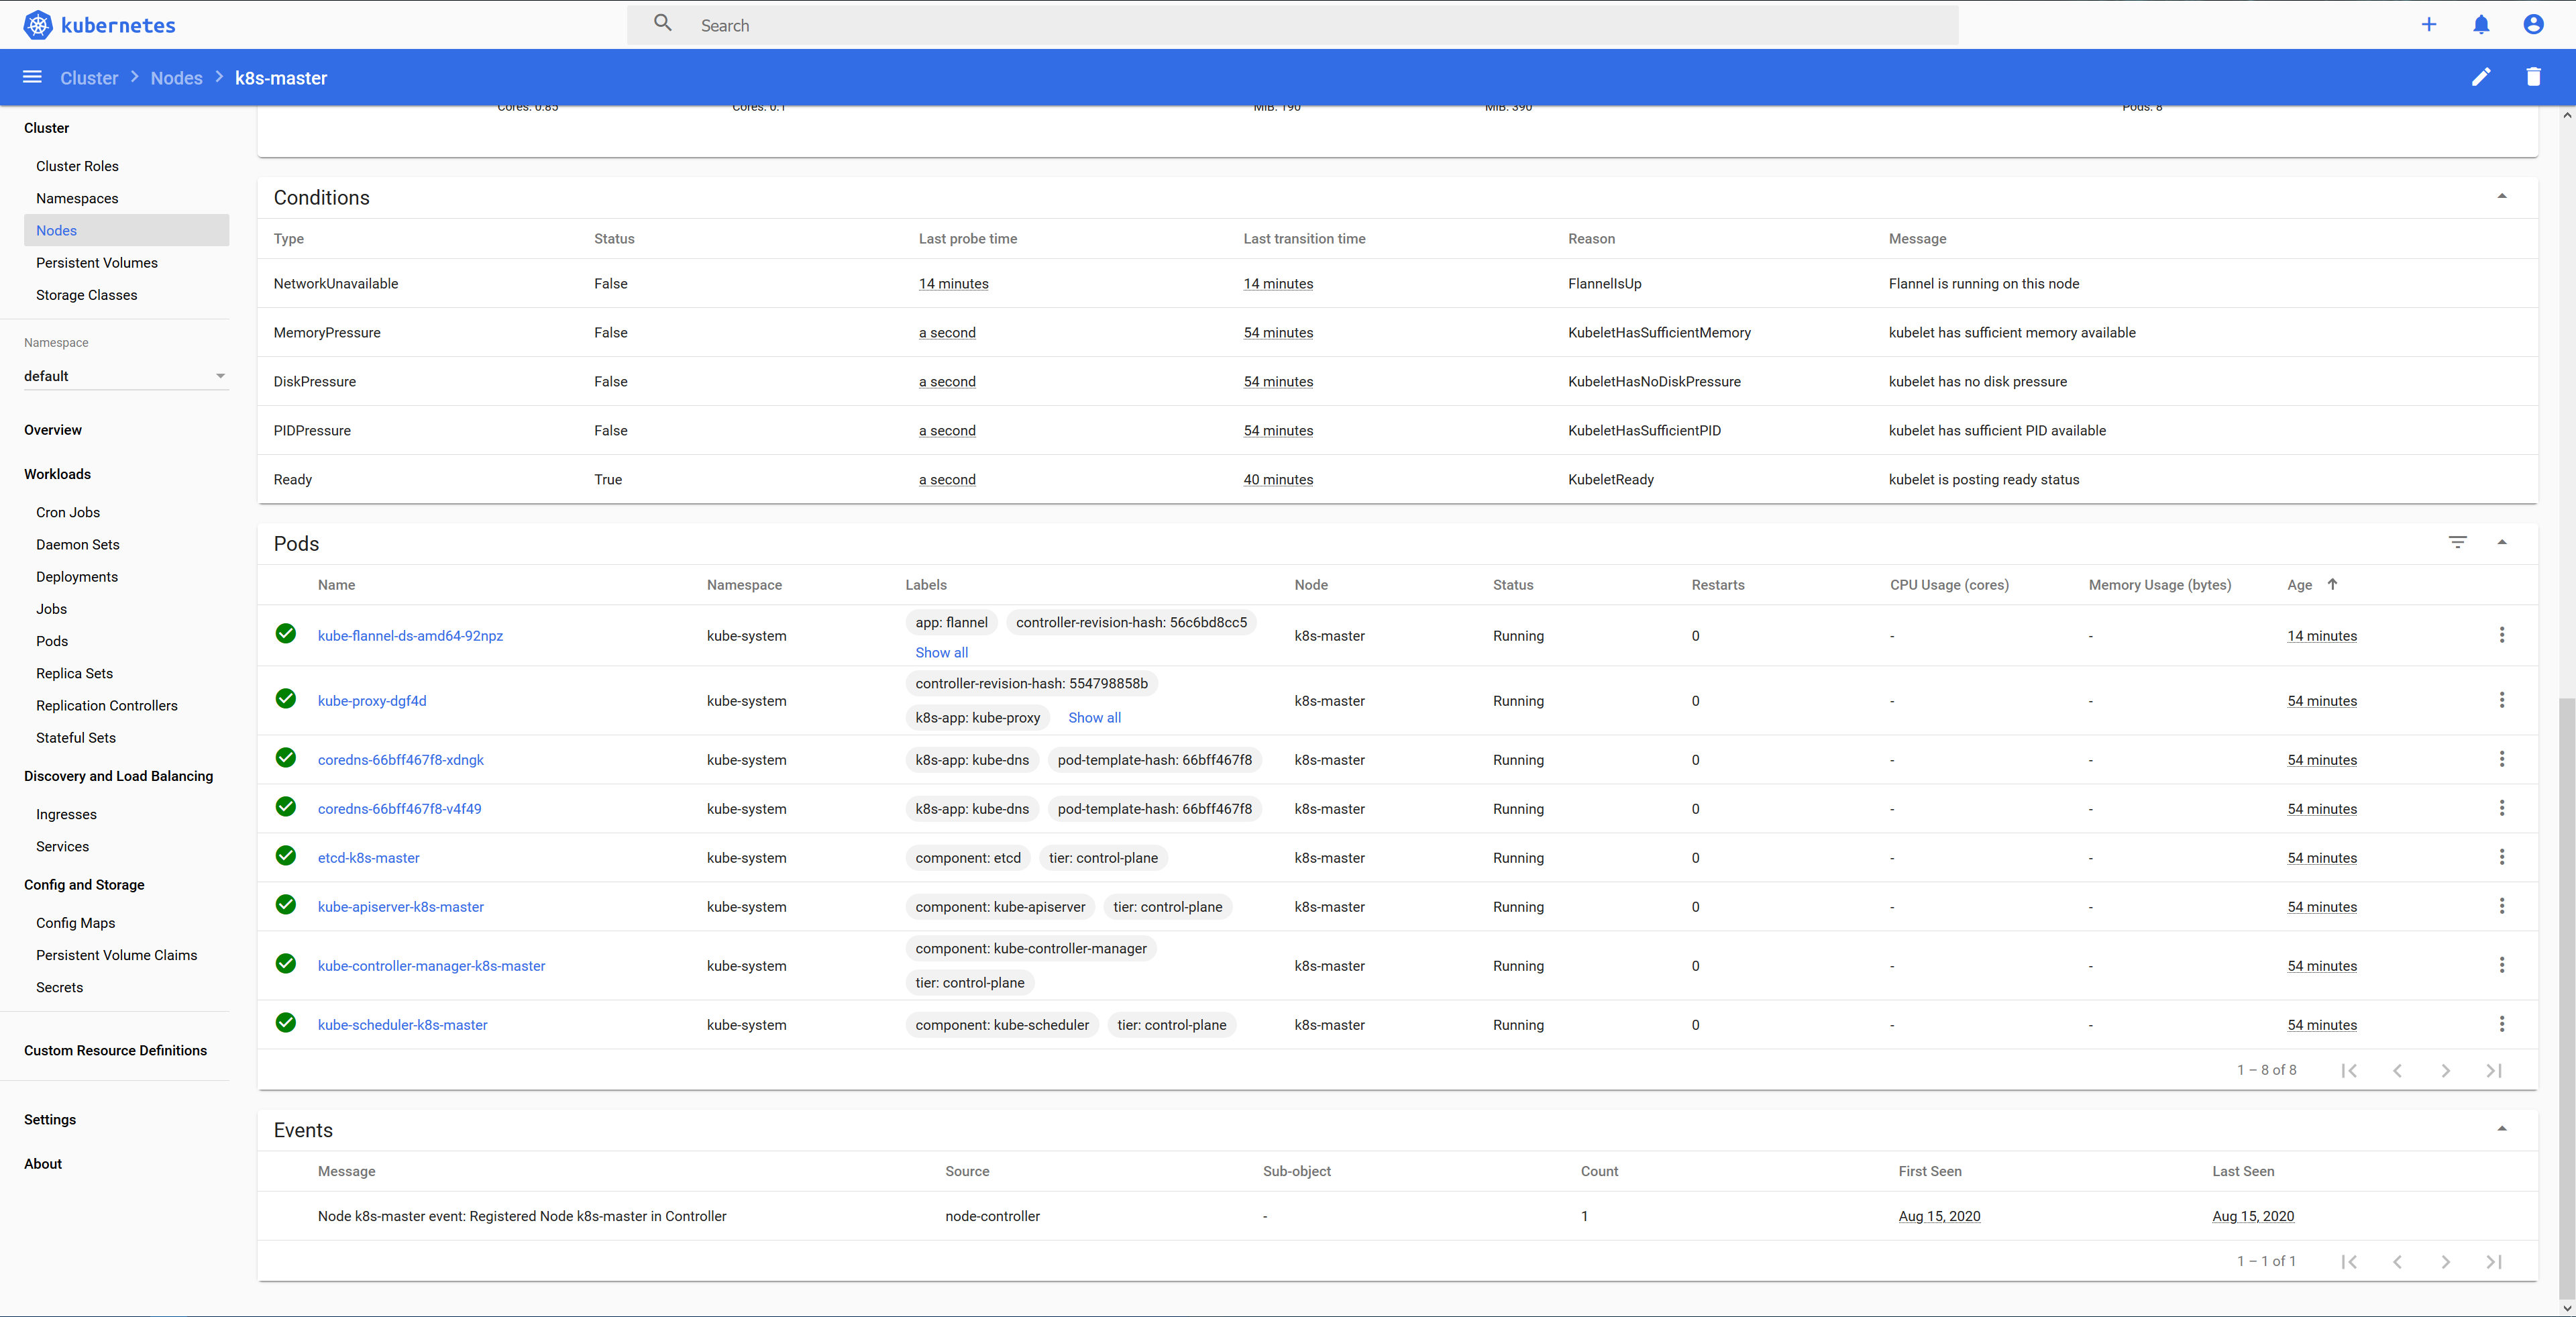
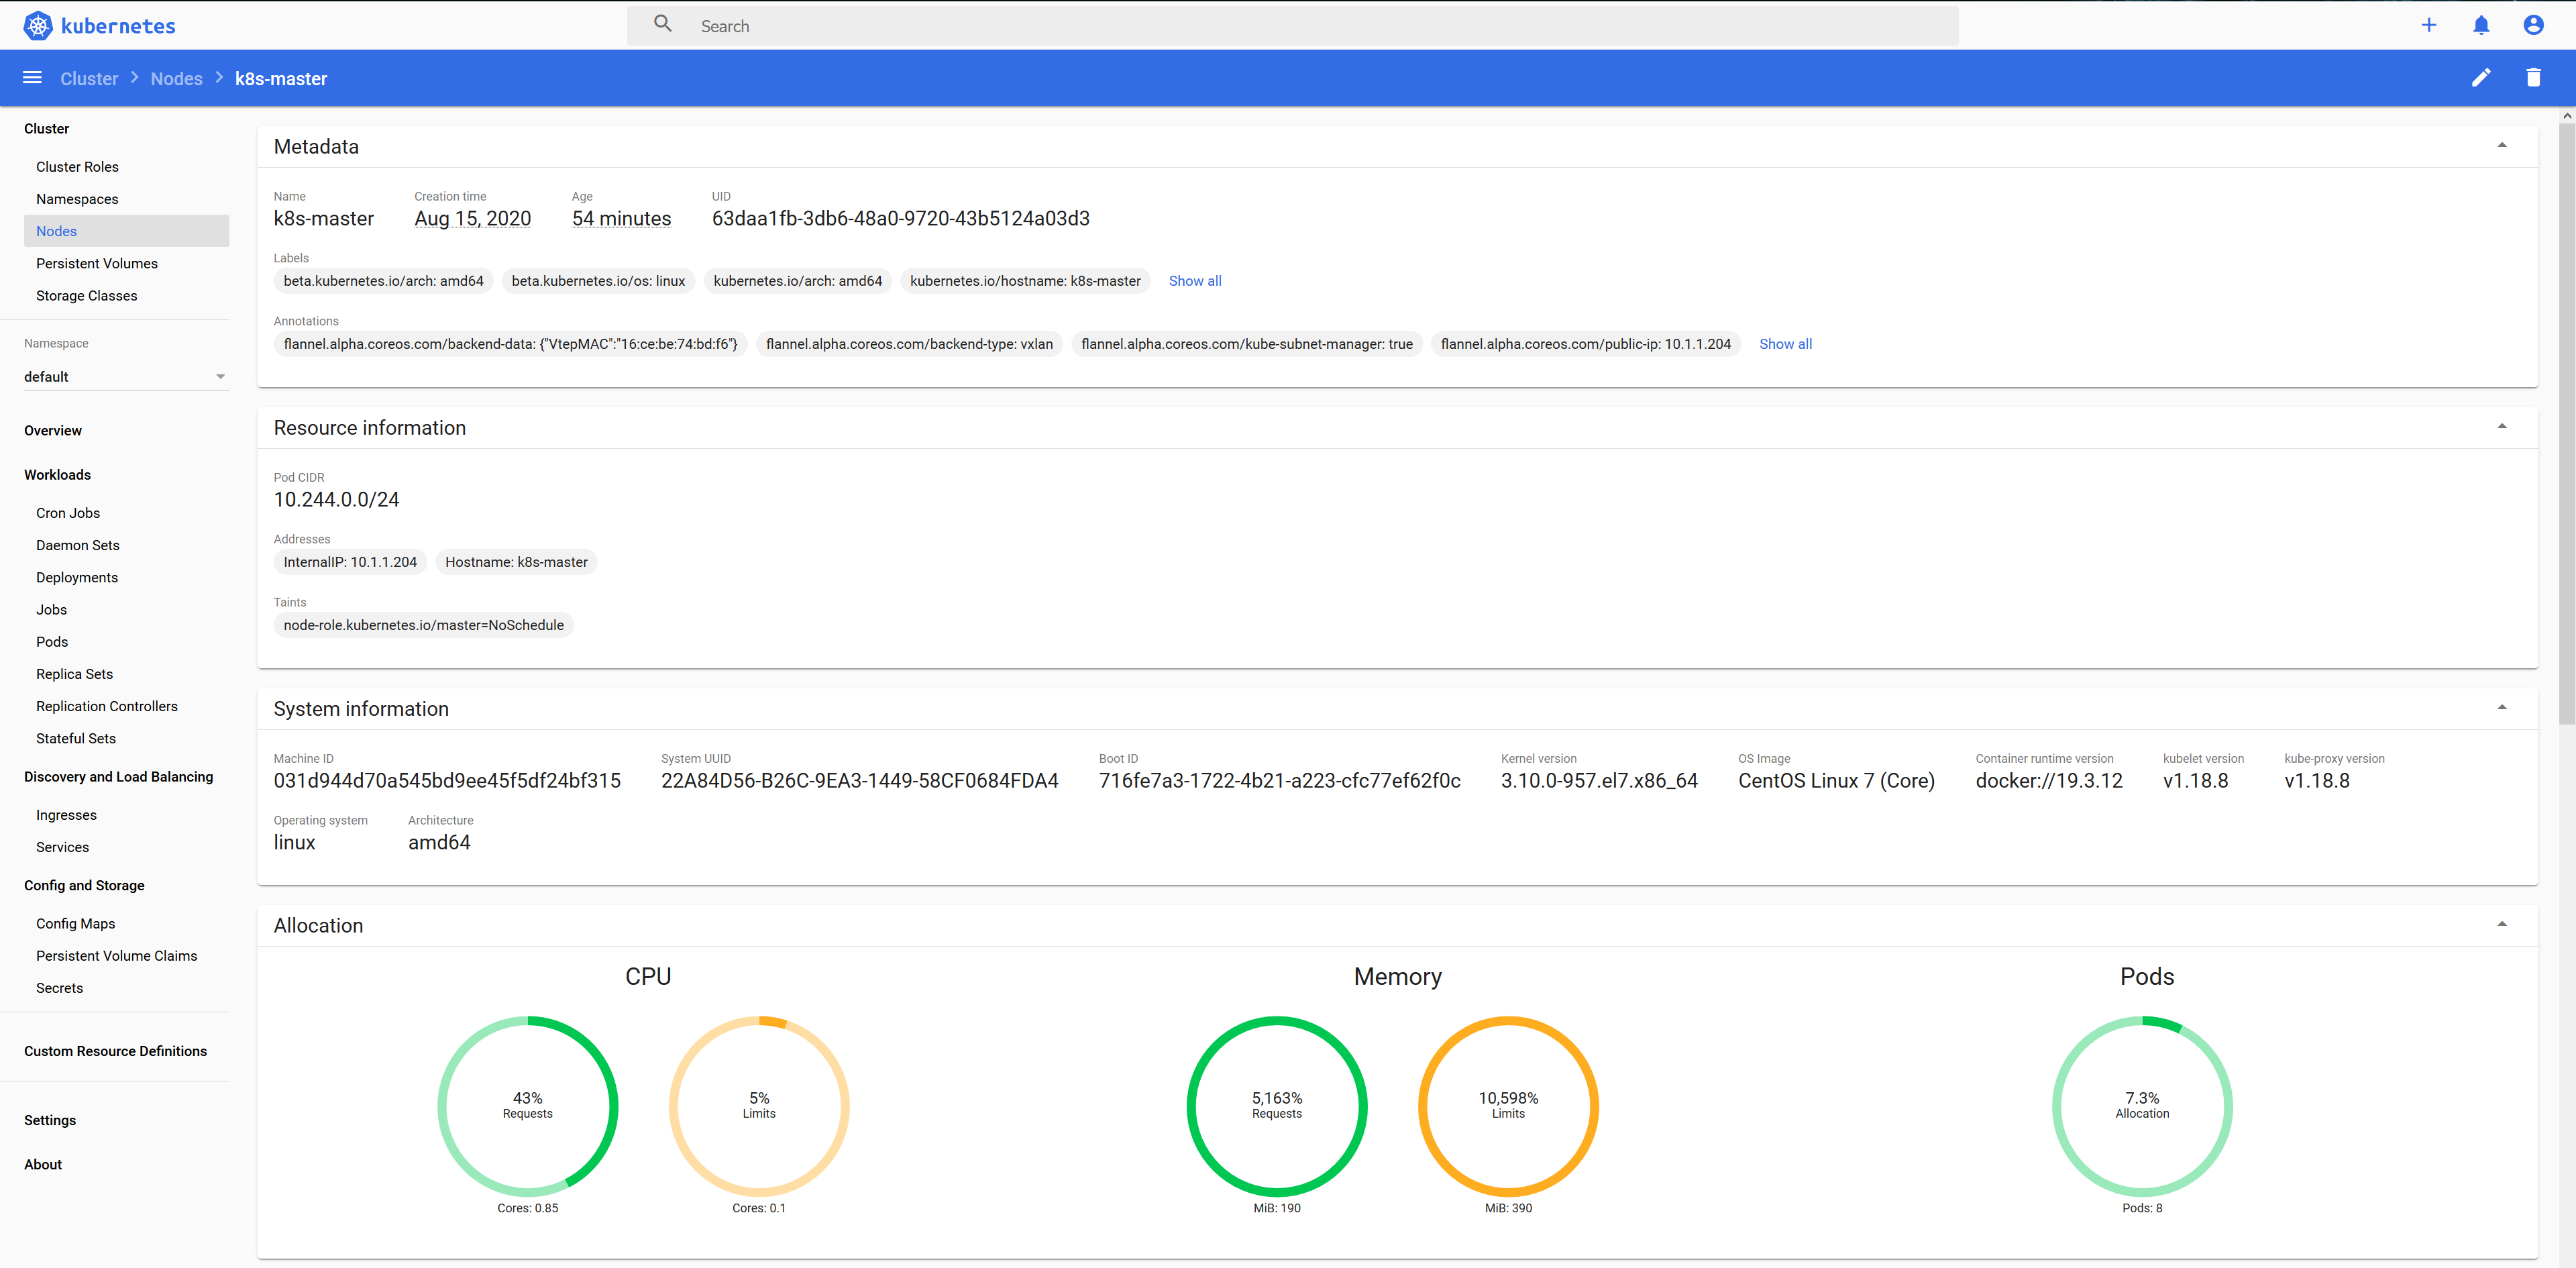
节点:

Master:
Master Pods: