【RHEL8】—SMBserver;【RHEL7】—SMBclient
!!!测试环境我们首关闭防火墙和selinux(SMBserver和SMBclient都需要)
[root@localhost ~]# systemctl stop firewalld
[root@localhost ~]# systemctl disable firewalld
[root@localhost ~]# sed -i 's/SELINUX=enforcing/SELINUX=disabled/g' /etc/selinux/config
[root@localhost ~]# setenforce 0
关于Samba配置文件的说明,访问:https://www.cnblogs.com/520qiangge/p/13413414.html
一、Samba服务端配置
1、首先查看服务端IP
[root@SMBserver ~]# ifconfig
ens160: flags=4163<UP,BROADCAST,RUNNING,MULTICAST>  mtu 1500
        inet 192.168.174.128  netmask 255.255.255.0  broadcast 192.168.174.255
        inet6 fe80::fa13:32e0:3b9f:2196  prefixlen 64  scopeid 0x20<link>
        ether 00:0c:29:cd:6a:1b  txqueuelen 1000  (Ethernet)
        RX packets 2779  bytes 211310 (206.3 KiB)
        RX errors 0  dropped 0  overruns 0  frame 0
        TX packets 1090  bytes 110886 (108.2 KiB)
        TX errors 0  dropped 0 overruns 0  carrier 0  collisions 0

lo: flags=73<UP,LOOPBACK,RUNNING>  mtu 65536
        inet 127.0.0.1  netmask 255.0.0.0
        inet6 ::1  prefixlen 128  scopeid 0x10<host>
        loop  txqueuelen 1000  (Local Loopback)
        RX packets 60  bytes 5208 (5.0 KiB)
        RX errors 0  dropped 0  overruns 0  frame 0
        TX packets 60  bytes 5208 (5.0 KiB)
        TX errors 0  dropped 0 overruns 0  carrier 0  collisions 0
2、SMBserver安装Samba服务,并设置开机自启
[root@SMBserver ~]# yum install -y samba
[root@SMBserver ~]# rpm -qa samba
samba-4.10.4-1.el8.x86_64
[root@SMBserver ~]# systemctl start smb
[root@SMBserver ~]# systemctl start nmb
[root@SMBserver ~]# systemctl enable smb
Created symlink /etc/systemd/system/multi-user.target.wants/smb.service → /usr/lib/systemd/system/smb.service.
[root@SMBserver ~]# systemctl enable nmb
Created symlink /etc/systemd/system/multi-user.target.wants/nmb.service → /usr/lib/systemd/system/nmb.service.
3、查看端口是否监听
[root@SMBserver ~]# netstat -tunlp
Active Internet connections (only servers)
Proto Recv-Q Send-Q Local Address           Foreign Address         State       PID/Program name
tcp        0      0 0.0.0.0:22              0.0.0.0:*               LISTEN      1083/sshd
tcp        0      0 0.0.0.0:445             0.0.0.0:*               LISTEN      24412/smbd
tcp        0      0 0.0.0.0:139             0.0.0.0:*               LISTEN      24412/smbd
tcp6       0      0 :::22                   :::*                    LISTEN      1083/sshd
tcp6       0      0 :::445                  :::*                    LISTEN      24412/smbd
tcp6       0      0 :::139                  :::*                    LISTEN      24412/smbd
udp        0      0 0.0.0.0:68              0.0.0.0:*                           1588/dhclient
udp        0      0 192.168.174.255:137     0.0.0.0:*                           24420/nmbd
udp        0      0 192.168.174.128:137     0.0.0.0:*                           24420/nmbd
udp        0      0 0.0.0.0:137             0.0.0.0:*                           24420/nmbd
udp        0      0 192.168.174.255:138     0.0.0.0:*                           24420/nmbd
udp        0      0 192.168.174.128:138     0.0.0.0:*                           24420/nmbd
udp        0      0 0.0.0.0:138             0.0.0.0:*                           24420/nmbd
4、创建共享资源目录,并给予完全共享的(给全部的权限)
[root@SMBserver ~]# mkdir -p /sambadir/share
[root@SMBserver ~]# chmod 777 /sambadir/share/
[root@SMBserver ~]# ll /sambadir/
总用量 0
drwxrwxrwx. 2 root root 6 8月   1 10:33 share
5、编辑配置文件
[root@SMBserver ~]# vim /etc/samba/smb.conf
[root@SMBserver ~]# cat /etc/samba/smb.conf
[global]
	workgroup = WORKGROUP            //这里换成WODGROUP
	security = user                  //这里不换成share,就用user,后面照样不用输入密码
	passdb backend = tdbsam
	printing = cups
	printcap name = cups
	load printers = yes
	cups options = raw
	map to guest = bad user          //匿名用户最主要就是添加这行,可以实现匿名访问

[homes]
	comment = Home Directories
	valid users = %S, %D%w%S
	browseable = No
	read only = No
	inherit acls = Yes

[printers]
	comment = All Printers
	path = /var/tmp
	printable = Yes
	create mask = 0600
	browseable = No

[print$]
	comment = Printer Drivers
	path = /var/lib/samba/drivers
	write list = @printadmin root
	force group = @printadmin
	create mask = 0664
	directory mask = 0775

[share]                                      //自己创建的共享文件名,也可以不一样
	comment = my first samba-file        //访问提示信息
	path = /sambadir/share               //文件路径
	browseable = yes                     //是否可以浏览(是否浏览权限(yes为可见共享,no为隐藏共享))
	public = yes                         //是否公开(指明该共享资源是否能给游客帐号访问)
	writable = yes                       //是否可以写入文件(是否有写权限)
6、测试smb.conf文件语法是否错误
[root@SMBserver ~]# testparm
Load smb config files from /etc/samba/smb.conf
Loaded services file OK.
Server role: ROLE_STANDALONE

Press enter to see a dump of your service definitions
 //这里提示这样的信息,叫你回车就会显示刚刚写的配置文件的内容,就代表没有语法错误,我就没回车了,节省时间
7、重启smb,nmb服务
[root@SMBserver ~]# systemctl restart smb
[root@SMBserver ~]# systemctl restart nmb
[root@SMBserver ~]# netstat -tunlp
Active Internet connections (only servers)
Proto Recv-Q Send-Q Local Address           Foreign Address         State       PID/Program name
tcp        0      0 0.0.0.0:22              0.0.0.0:*               LISTEN      1083/sshd
tcp        0      0 0.0.0.0:445             0.0.0.0:*               LISTEN      24631/smbd
tcp        0      0 0.0.0.0:139             0.0.0.0:*               LISTEN      24631/smbd
tcp6       0      0 :::22                   :::*                    LISTEN      1083/sshd
tcp6       0      0 :::445                  :::*                    LISTEN      24631/smbd
tcp6       0      0 :::139                  :::*                    LISTEN      24631/smbd
udp        0      0 0.0.0.0:68              0.0.0.0:*                           1588/dhclient
udp        0      0 192.168.174.255:137     0.0.0.0:*                           24642/nmbd
udp        0      0 192.168.174.128:137     0.0.0.0:*                           24642/nmbd
udp        0      0 0.0.0.0:137             0.0.0.0:*                           24642/nmbd
udp        0      0 192.168.174.255:138     0.0.0.0:*                           24642/nmbd
udp        0      0 192.168.174.128:138     0.0.0.0:*                           24642/nmbd
udp        0      0 0.0.0.0:138             0.0.0.0:*                           24642/nmbd
到这里匿名访问的服务端就配置完成
二、Samba客户端配置
1、SMBclient查看是否有安装samba-client,cifs-utils软件包
[root@smbclient ~]# yum info samba-client cifs-utils
已加载插件:product-id, search-disabled-repos, subscription-manager
This system is not registered with an entitlement server. You can use subscription-manager to register.
可安装的软件包
名称    :cifs-utils
架构    :x86_64
版本    :6.2
发布    :10.el7
大小    :85 k
源    :dvd
简介    : Utilities for mounting and managing CIFS mounts
网址    :http://linux-cifs.samba.org/cifs-utils/
协议    : GPLv3
描述    : The SMB/CIFS protocol is a standard file sharing protocol widely deployed
         : on Microsoft Windows machines. This package contains tools for mounting
         : shares on Linux using the SMB/CIFS protocol. The tools in this package
         : work in conjunction with support in the kernel to allow one to mount a
         : SMB/CIFS share onto a client and use it as if it were a standard Linux
         : file system.

名称    :samba-client
架构    :x86_64
版本    :4.6.2
发布    :8.el7
大小    :597 k
源    :dvd
简介    : Samba client programs
网址    :http://www.samba.org/
协议    : GPLv3+ and LGPLv3+
描述    : The samba-client package provides some SMB/CIFS clients to complement
         : the built-in SMB/CIFS filesystem in Linux. These clients allow access
         : of SMB/CIFS shares and printing to SMB/CIFS printers.
2、安装samba-client,cifs-utils软件包
[root@smbclient ~]# yum install -y samba-client cifs-utils
[root@smbclient ~]# rpm -qa samba-client cifs-utils
cifs-utils-6.2-10.el7.x86_64
samba-client-4.6.2-8.el7.x86_64
3、客户端查看samba服务器有哪些共享资源
[root@smbclient ~]# smbclient -L 192.168.174.128
Enter SAMBA
oot's password:                   //直接回车,不用输任何东西
OS=[Windows 6.1] Server=[Samba 4.10.4]

	Sharename       Type      Comment
	---------       ----      -------
	print$          Disk      Printer Drivers
	share           Disk      my first samba-file
	IPC$            IPC       IPC Service (Samba 4.10.4)
OS=[Windows 6.1] Server=[Samba 4.10.4]

	Server               Comment
	---------            -------

	Workgroup            Master
	---------            -------
	WORKGROUP            SMBSERVER
4、客户端创建挂载目录
[root@smbclient ~]# mkdir /smbdir
5、客户端挂载服务端共享的资源
[root@smbclient ~]# mount.cifs -rw //192.168.174.128/share /smbdir/
Password for root@//192.168.174.128/share:      //这里也是直接回车就行,不用输任何东西
[root@smbclient ~]#
6、查看是否挂载成功
[root@smbclient ~]# df -h
文件系统                 容量  已用  可用 已用% 挂载点
/dev/mapper/rhel-root     50G  1.1G   49G    3% /
devtmpfs                 901M     0  901M    0% /dev
tmpfs                    912M     0  912M    0% /dev/shm
tmpfs                    912M  8.7M  904M    1% /run
tmpfs                    912M     0  912M    0% /sys/fs/cgroup
/dev/sr0                 3.8G  3.8G     0  100% /mnt
/dev/mapper/rhel-home     27G   33M   27G    1% /home
/dev/sda1               1014M  143M  872M   15% /boot
tmpfs                    183M     0  183M    0% /run/user/0
//192.168.174.128/share   50G  2.0G   49G    4% /smbdir
 //最后一行说明挂载成功
三、测试
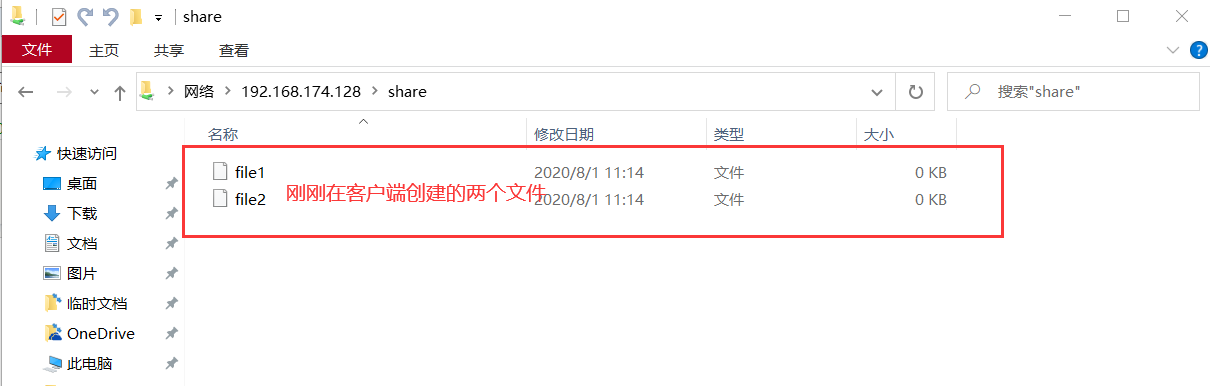
1、首先在客户端创建两个文件,然后在服务端查看
//SMBclient
[root@smbclient ~]# cd /smbdir/
[root@smbclient smbdir]# ls
[root@smbclient smbdir]# touch {file1,file2}
[root@smbclient smbdir]# ls
file1  file2
[root@smbclient smbdir]#

//SMBserver
[root@SMBserver ~]# cd /sambadir/share/
[root@SMBserver share]# ls
file1  file2
[root@SMBserver share]#
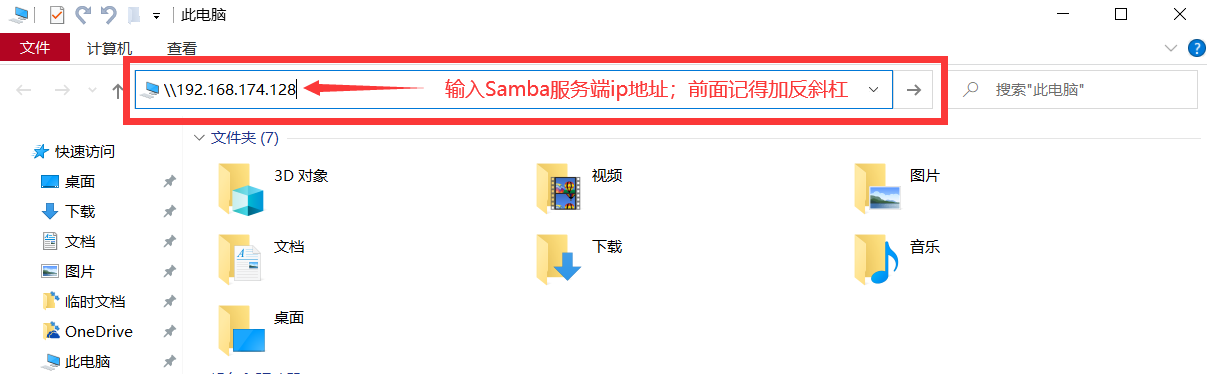
2、在windows的资源管理器上访问