jupyter安装,修改登录密码,启动
1.安装jupyter:
pip install jupyter
pip install jupyter notebook
2.生成jupyter的配置文件
jupyter notebook --generate-config
3.修改jupyter的配置文件
vim ~/.jupyter/jupyter_notebook_config.py将293行 #c.NotebookApp.token = '<generated>'修改为c.NotebookApp.token = 'password',则密码就改为password
4。启动jupyter
如果以root身份启动需要加入--allow-root
jupyter notebook --ip=127.0.0.1 --port 8000 --allow-root

其他方式修改如下:
对于一个jupyter编辑器使用的新手,更换浏览器或者Logout后,需要输入密码进行登陆时
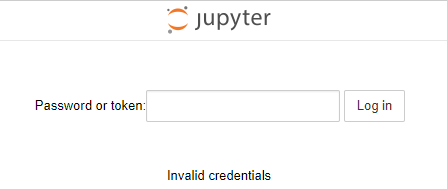
按照网上的教程怎么设置都不行,那么自己整理了一个适用于初学者的操作。
1.windows下,打开命令行,重新生成一个jupyter配置文件:
|
1
|
jupyter notebook --generate-config |
2.修个配置文件,找到这个新生成的文件:Windows: C:UsersUSERNAME.jupyterjupyter_notebook_config.py
搜索 NotebookApp.allow_password_change,改为:NotebookApp.allow_password_change=False ,记得去掉注释的#
3.回到windows命令行,运行jupyter notebook password
C:WindowsSystem32>jupyter notebook password
Enter password:             #键入密码,不显示的
Verify password:            #再次重复键入密码
[NotebookPasswordApp] Wrote hashed password to C:Users用户.jupyterjupyter_notebook_config.json     #密码生成的一串sha1,写入到了这个文件,等下要把这串sha1,复制到第一个生成的配置文件中
4.还差一步密码才可以生效使用,在第一个jupyter_notebook_config.py配置文件中找到“c.NotebookApp.password“,等于,刚生成的那个密码sha1,效果如下:去掉前面的”#“
c.NotebookApp.password = u'sha1:xxxxxxxxxxxxxxxxxxxxxxxxxxxxxxxxxx'
5.保险起见,把jupyter重启,之后,无论是更换浏览器还是Logout登陆,新密码都可以正常使用了。
≡≡≡≡≡≡≡≡≡≡≡≡≡≡≡≡≡≡≡≡≡≡≡≡≡≡≡≡≡≡≡≡≡≡≡≡≡≡≡≡≡≡≡≡≡≡≡≡≡≡≡≡≡≡≡≡≡≡≡≡≡≡≡≡≡≡≡≡≡≡≡≡≡≡≡
第3步也可以换成:ipython执行

C:WindowsSystem32>ipython
Python 3.6.4 |Anaconda, Inc.| (default, Jan 16 2018, 10:22:32) [MSC v.1900 64 bit (AMD64)]
Type 'copyright', 'credits' or 'license' for more information
IPython 6.2.1 -- An enhanced Interactive Python. Type '?' for help.

In [1]: from notebook.auth import passwd
In [2]: passwd()
Enter password:
Verify password:
Out[2]: 'sha1:xxxxxxxxxxxxxxxxxxxxxxxxxxxxxxxxxxxxxxx'