一、ELASTICSEARCH 数据结构
操作Elasticsearch6.4.3 类似于jpa 操作数据库一样,使用Crud 方式
Elasticsearch6.4.3 是基于文档保存数据,mysql是基于行列保存数据
关系数据库       ⇒ 数据库         ⇒ 表         ⇒ 行              ⇒ 列(Columns)
Elasticsearch   ⇒ 索引(Index)   ⇒ 类型(type)  ⇒ 文档(Docments)  ⇒ 字段(Fields)
Elasticsearch是文件存储,Elasticsearch是面向文档型数据库,一条数据在这里就是一个文档,用JSON作为文档序列化的格式,比如下面这条用户数据:
{
    "name" :     "wangsong",
    "sex" :      0,
    "age" :      25
}
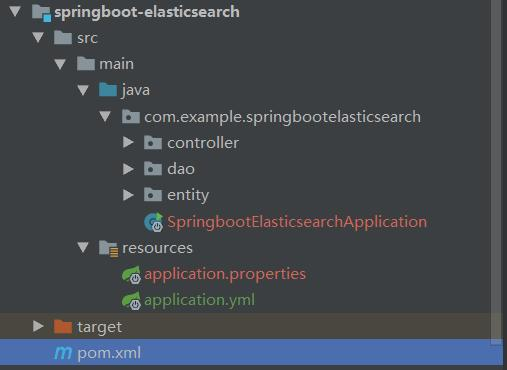
二、创建SPRINGBOOT 项目,结构如下
springboot2.0.0 到 2.2.2 配置都相同
搭建Elasticsearch 就想搭建web 环境一样,非常简单,也是dao,entity,controller层
三、MAVEN 依赖
<?xml version="1.0" encoding="UTF-8"?>
<project xmlns="http://maven.apache.org/POM/4.0.0" xmlns:xsi="http://www.w3.org/2001/XMLSchema-instance"
         xsi:schemaLocation="http://maven.apache.org/POM/4.0.0 https://maven.apache.org/xsd/maven-4.0.0.xsd">
    <modelVersion>4.0.0</modelVersion>
    <parent>
        <groupId>org.springframework.boot</groupId>
        <artifactId>spring-boot-starter-parent</artifactId>
        <version>2.2.2.RELEASE</version>
        <relativePath/> <!-- lookup parent from repository -->
    </parent>
    <groupId>com.example</groupId>
    <artifactId>springboot-elasticsearch</artifactId>
    <version>0.0.1-SNAPSHOT</version>
    <name>springboot-elasticsearch</name>
    <description>Demo project for Spring Boot</description>

    <properties>
        <java.version>1.8</java.version>
    </properties>

    <dependencies>
        <dependency>
            <groupId>org.springframework.boot</groupId>
            <artifactId>spring-boot-starter-web</artifactId>
        </dependency>

        <dependency>
            <groupId>org.springframework.boot</groupId>
            <artifactId>spring-boot-starter-data-elasticsearch</artifactId>
        </dependency>

        <dependency>
            <groupId>org.projectlombok</groupId>
            <artifactId>lombok</artifactId>
            <optional>true</optional>
        </dependency>
    </dependencies>
</project>
四、YML 配置
cluster-name 默认为 elasticsearch,等同与配置数据库地址
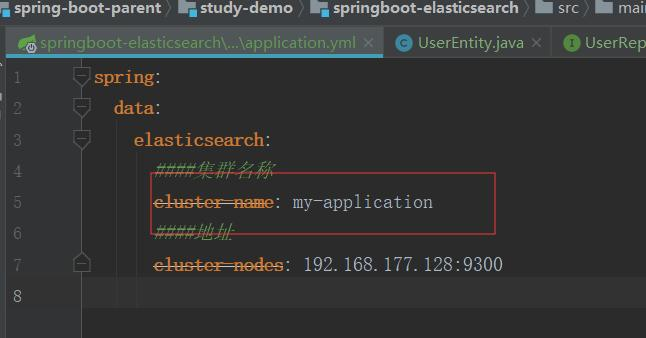
spring:
  data:
    elasticsearch:
      ####集群名称
      cluster-name: elasticsearch
      #### elasticsearch服务地址
      cluster-nodes: 192.168.177.128:9300
五、添加USERENTUITY
等同于配置实体类
package com.example.springbootelasticsearch.entity;

import lombok.Data;
import org.springframework.data.annotation.Id;
import org.springframework.data.elasticsearch.annotations.Document;

/**
 * TODO    添加文档 /索引名称/类型/id =》 indexName 索引名称(必须小写), type = 类型,@Id =id
 */
@Document(indexName = "estest", type = "user")
@Data
public class UserEntity {
    @Id
    private String id;
    private String name;
    private int sex;
    private int age;
}
六、添加USERREPOSIORY(类似于JPA)
等同于配置数据库的数据层
package com.example.springbootelasticsearch.dao;

import com.example.springbootelasticsearch.entity.UserEntity;
import org.springframework.data.repository.CrudRepository;

public interface UserReposiory extends CrudRepository<UserEntity, String> {

}
七、添加控制层ESCONTROLLER
mvc 的控制层
package com.example.springbootelasticsearch.controller;

import com.example.springbootelasticsearch.dao.UserReposiory;
import com.example.springbootelasticsearch.entity.UserEntity;
import org.springframework.beans.factory.annotation.Autowired;
import org.springframework.web.bind.annotation.RequestMapping;
import org.springframework.web.bind.annotation.RestController;

import java.util.Optional;

@RestController
public class EsController {

    @Autowired
    private UserReposiory userReposiory;

    /**
     * TODO    添加
     */
    @RequestMapping("/addUser")
    public UserEntity addUser() {
        UserEntity user = new UserEntity();
        user.setId("1");
        user.setName("wangsong");
        user.setSex(1);
        user.setAge(22);
        return userReposiory.save(user);
    }

    /**
     * TODO    查询
     */
    @RequestMapping("/findUser")
    public Optional<UserEntity> findUser(String id) {
        return userReposiory.findById(id);
    }
}
八、启动类
添加@EnableElasticsearchRepositories 注解,并添加数据层dao 扫包地址(数据层)
package com.example.springbootelasticsearch;

import org.springframework.boot.SpringApplication;
import org.springframework.boot.autoconfigure.SpringBootApplication;
import org.springframework.data.elasticsearch.repository.config.EnableElasticsearchRepositories;

@EnableElasticsearchRepositories(basePackages = "com.example.springbootelasticsearch.dao")
@SpringBootApplication
public class SpringbootElasticsearchApplication {

    public static void main(String[] args) {
        SpringApplication.run(SpringbootElasticsearchApplication.class, args);
    }
}
九、启动项目
添加:http://localhost:8080/addUser ,报错看步骤十处理

查询:http://localhost:8080/findUser?id=1
十 、NONE OF THE CONFIGURED NODES ARE AVAILABLE 错误处理
cluster_name 必须一致,不然会抛出 None of the configured nodes are available 错误,如图
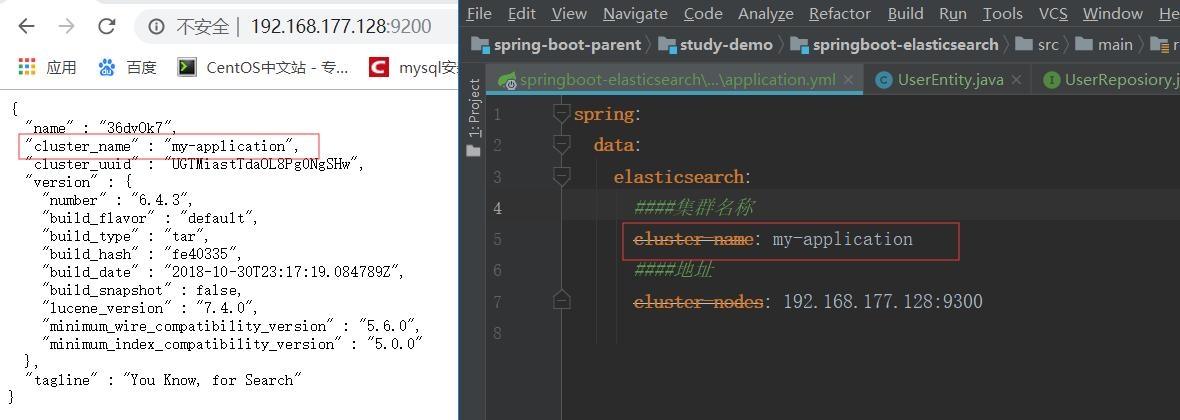
使用默认cluster_name 参数无视下方配置,默认elasticsearch
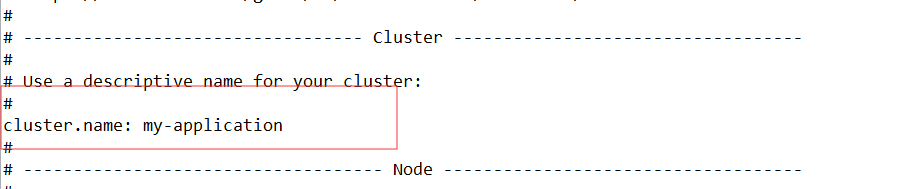
1、修改服务端CLUSTER_NAME
Vi /usr/local/elasticsearch-6.4.3/config/elasticsearch.yml
cluster.name: my-application # 服务端与客户端相同即可
2、修改后需重启服务(关闭重启)
ps -ef | grep lasticsearch  # 查看进程
kill -9 2382(进程号)        # 杀死进程
./elasticsearch -d          # 后台启动
访问 http://192.168.177.128:9200/ 查看cluster_name 参数是否修改成功
3、修改YML 配置CLUSTER_NAME
重启Elasticsearch服务和项目即可。
版权声明:本文为qq_41463655原创文章,遵循 CC 4.0 BY-SA 版权协议,转载请附上原文出处链接和本声明。