因为我接触的项目是Web的,所以优先从创建一个web test plan入手。
官方教程地址:
http://jmeter.apache.org/usermanual/build-web-test-plan.html
In this section, we will learn how to create a basic Test plan to test a web site. You will create five users that send requests to two pages on the Jmeter Web site. Also, you will tell the user to run their tests twice. So, the total number of requests is (5 users)*(2 requests)*(repeat 2 times)=20 HTTP requests. To construct the Test Plan, you will use the following elements: Thread Group, HTTP Request, HTTP Request Defaults, and Graph Results.
1. Adding users
The first step you want to do with every JMeter Test Plan is to add a Thread Group element. The Thread Group tells JMeter the number of users you want to simulate, how often the users should send requests, and the how many requests they should send.
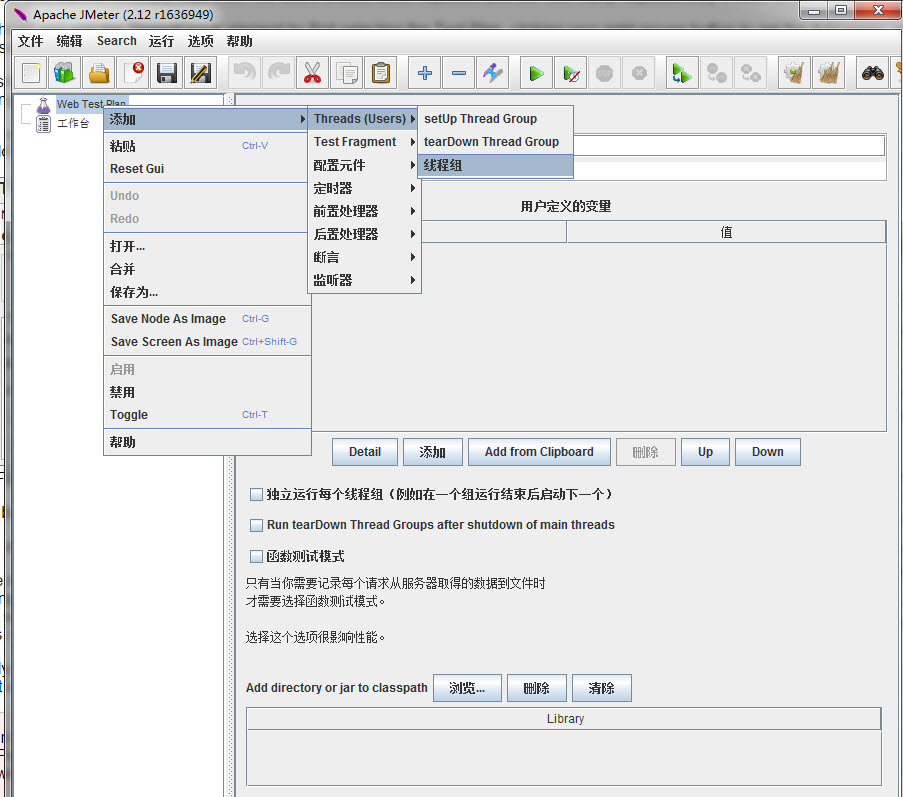
Go ahead and add the Thread Group element by first selecting the Test Plan, clicking your right mouse button to get the Add menu, and then select Add->ThreadGroup.
You should now see the Thread Group element under Test Plan. If you do not see the element, then "expand" the Test Plan tree by clicking on the Test Plan element.
Next, you need to modify the default properties. Select the Thread Group element in the tree, if you have not already selected it. You should now see the Thread Group Control Panel in the right section of the JMeter window.
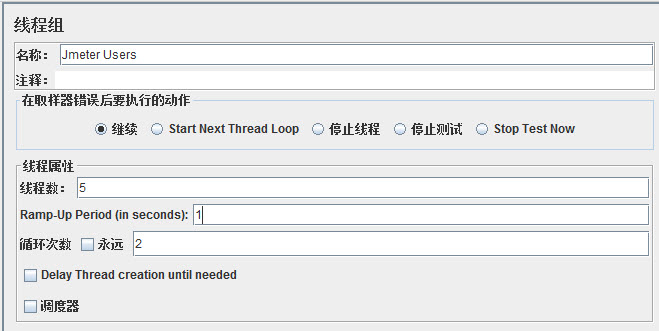
Start by providing a more descriptive name for our Thread Group. In the name field, enter Jmeter Users.
Next, increse the number of users (called threads) to 5.
In the next field, the Ramp-up Period, leave the default value of 1 seconds. This property tells Jmeter how long to delay between starting each user. For example, if you enter a Ramp-up Period of 5 seconds, Jmeter will finish starting all of your users by the end of the 5 seconds. So, if we have 5 users and a 5 second Ramp-up Period, then the delay between starting users would be 1 second ( 5 users/ 5 seconds = 1 user per second). If you set the value to 0, then Jmeter will immediately start all of your users.
Finally enter a value of 2 in the loop count field. This prepertly telss Jmeter hwo many times to repeat your test. If you enter a loop count value of 1, then JMeter will run your test only once. To have JMeter repeatly run your Test Plan, select the Forver checkbox.
note: in most applications, you have to manually accept changes you make in a Control Panel. However, in JMeter, the control panel automatically accepts your changes as you make them. If you change the name of an element, the tree will be updated with the new text after you leave the Control Panel( for example, when selecting another tree element).
See below Figure for the completed JMeter Users Thread Group.
2. Adding Default HTTP Request Properties
Now that we have defined our users, it is time to define the tasks that they will be performing. In this section, you will specify the default settings for your HTTP requests. And then, in next section, you will add HTTP Request elements which use some of the default settings you sepcified here.
Begin by selecting the Jmeter users( Thread Group) element. Click your right mouse button to get the Add menu, and then select Add- -> Config Element --> HTTP Request Defaults. Then, select this new element to view its Control Panel.
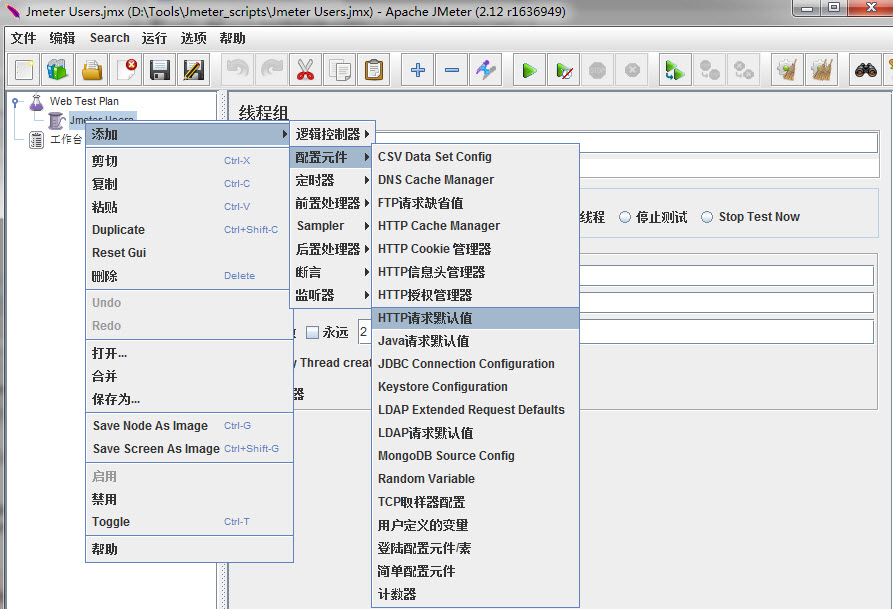
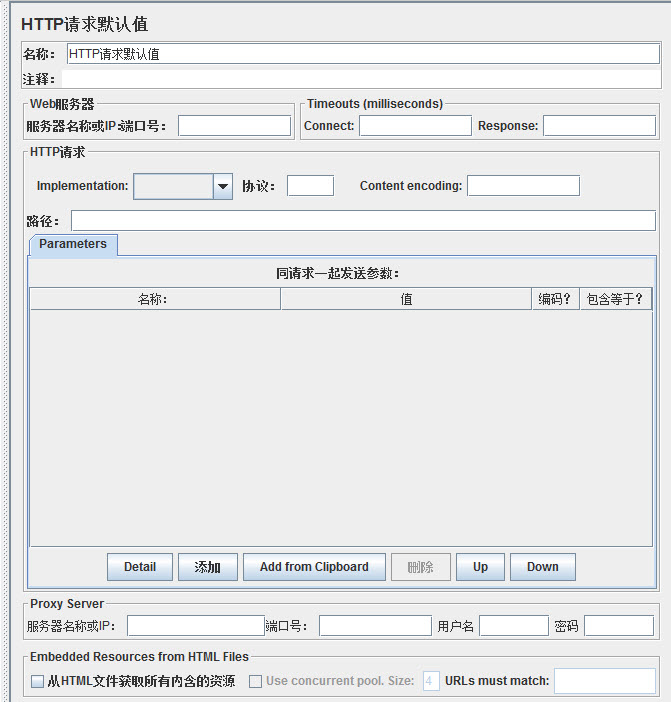
Like most JMeter elements, the HTTP Request Defaults Control Panel has a name field that you c an modify. In this example, leave this field with the default value.
Skip to the next field, which is the Web Server Name/IP. For the Test Plan that you are building, all HTTP requests will be sent to the same Web server, jmeter.apache.org. Enter this domain name into the field. This is the only field that we will specifiy a default, so leave the remaining fields with their default values.
note: The HTTP Request Defaults element does not tell JMeter to send an HTTP request. It simply defines the default values that the HTTP Request elements use.
