我是Mike Ash的Let’s Build…系列文章的忠实粉丝,在这一系列文章中他从头设计Cocoa的控件来解释他们的工作原理。在这里我要做一点类似的事情,用几行代码来实现我自 己的滚动试图。不过首先,让我们先来了解一下UIKit中的坐标系是怎么工作的。如果你只对滚动试图的代码实现感兴趣可以放心跳过下一小节。UIKit坐 标系每一个View都定义了他自己的坐标系统。如下图所示,x轴指向右方,y轴指向下方:
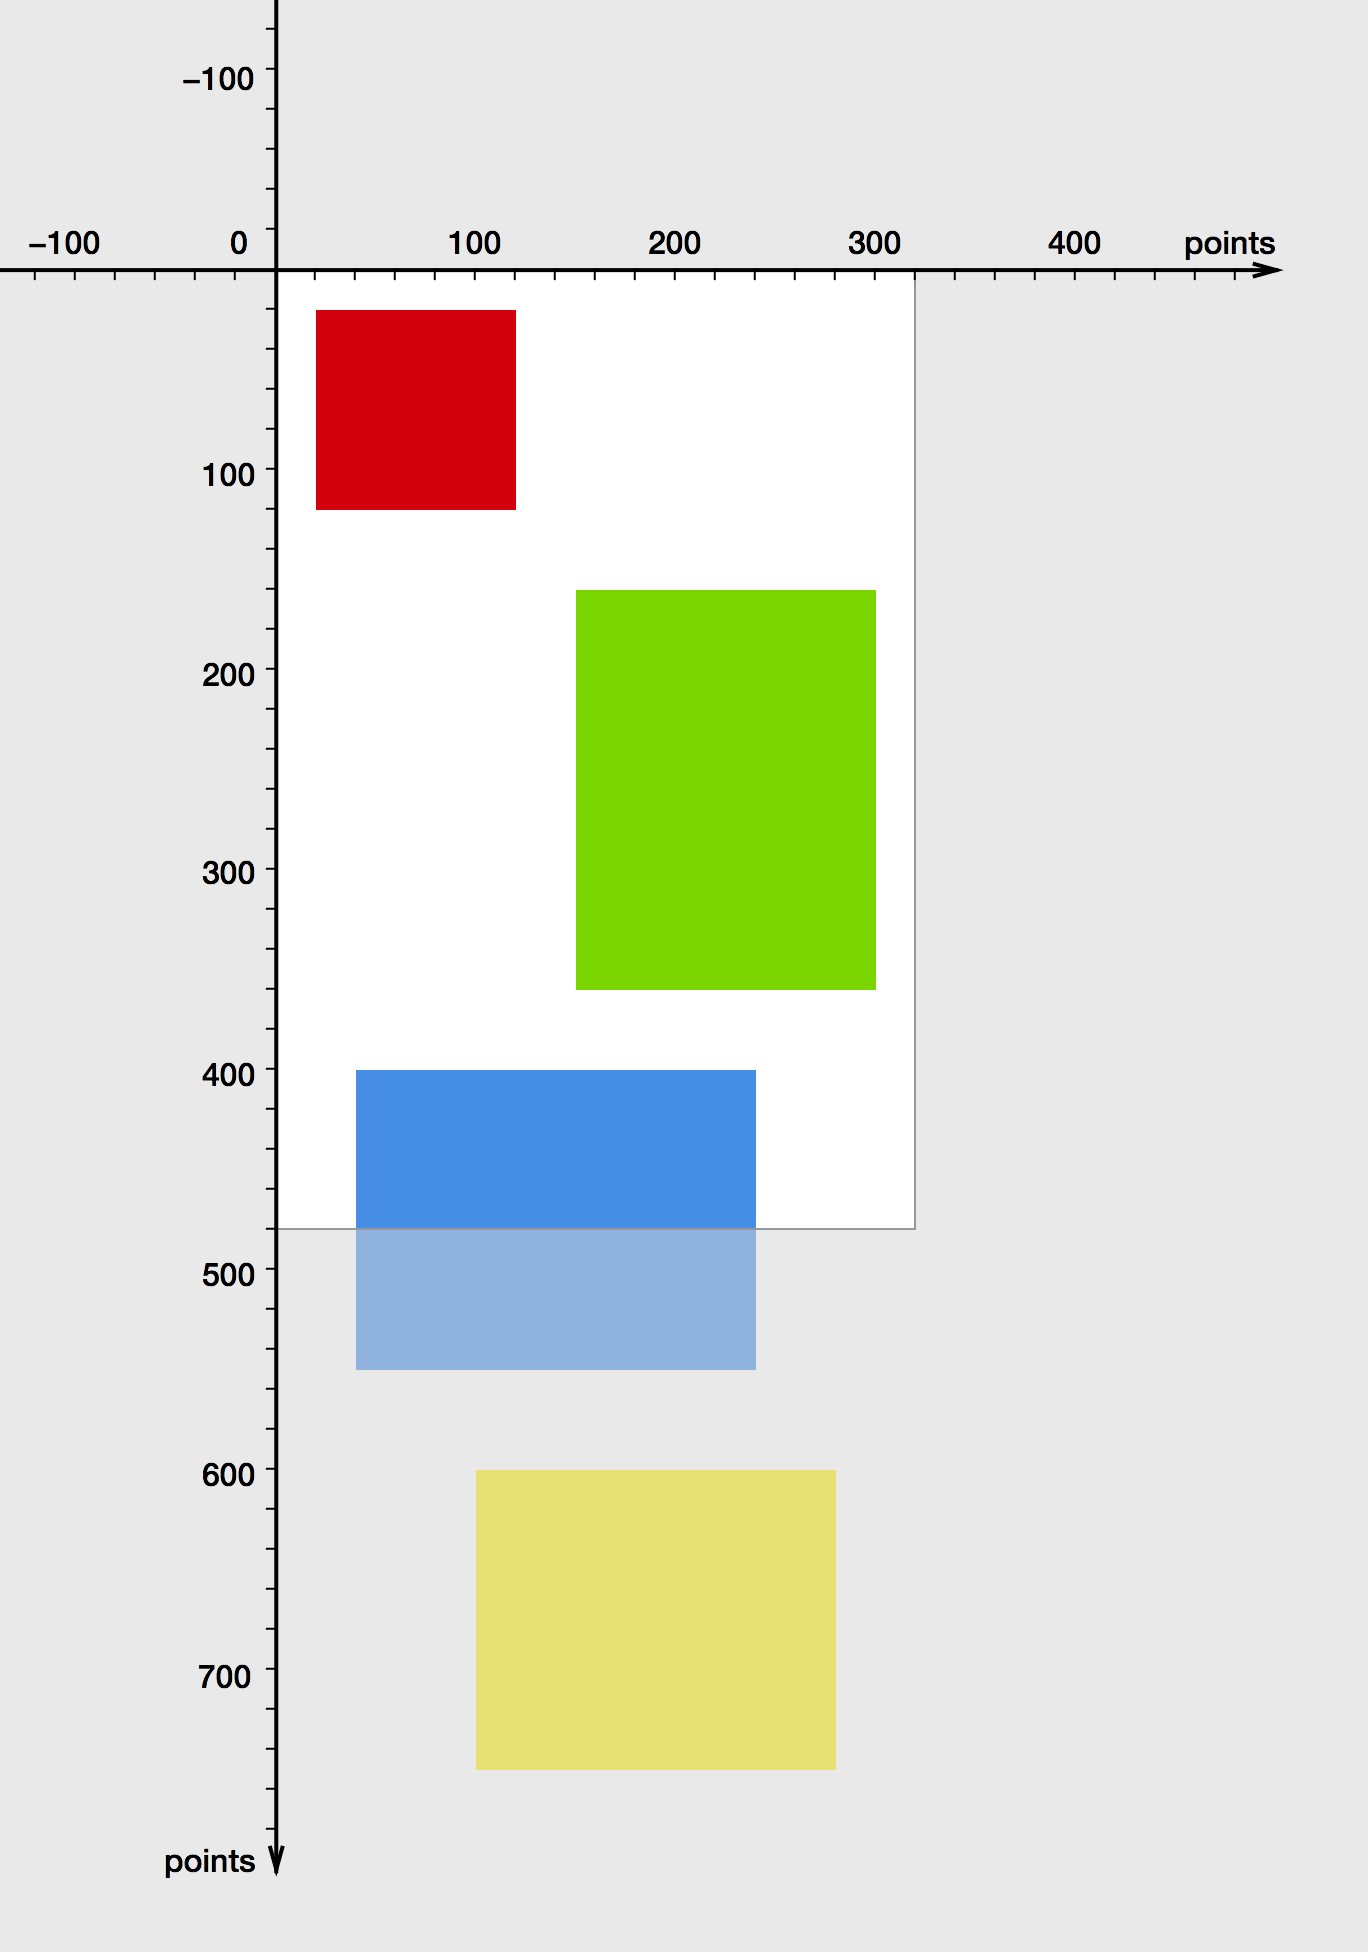
一个View提供了其所在平面的一个观察口。View的bounds矩形描述了这个可是区域的位置和大小。
Frame
接下来我们来试着修改bounds的原点坐标:
CGRect bounds = mainView.bounds;
bounds.origin = CGPointMake(0, 100);
mainView.bounds = bounds;
当我们把bound原点设为(0,100)后,整个画面看起来就像这样:
修改bounds的原点就相当与在平面上移动这个可视区域。
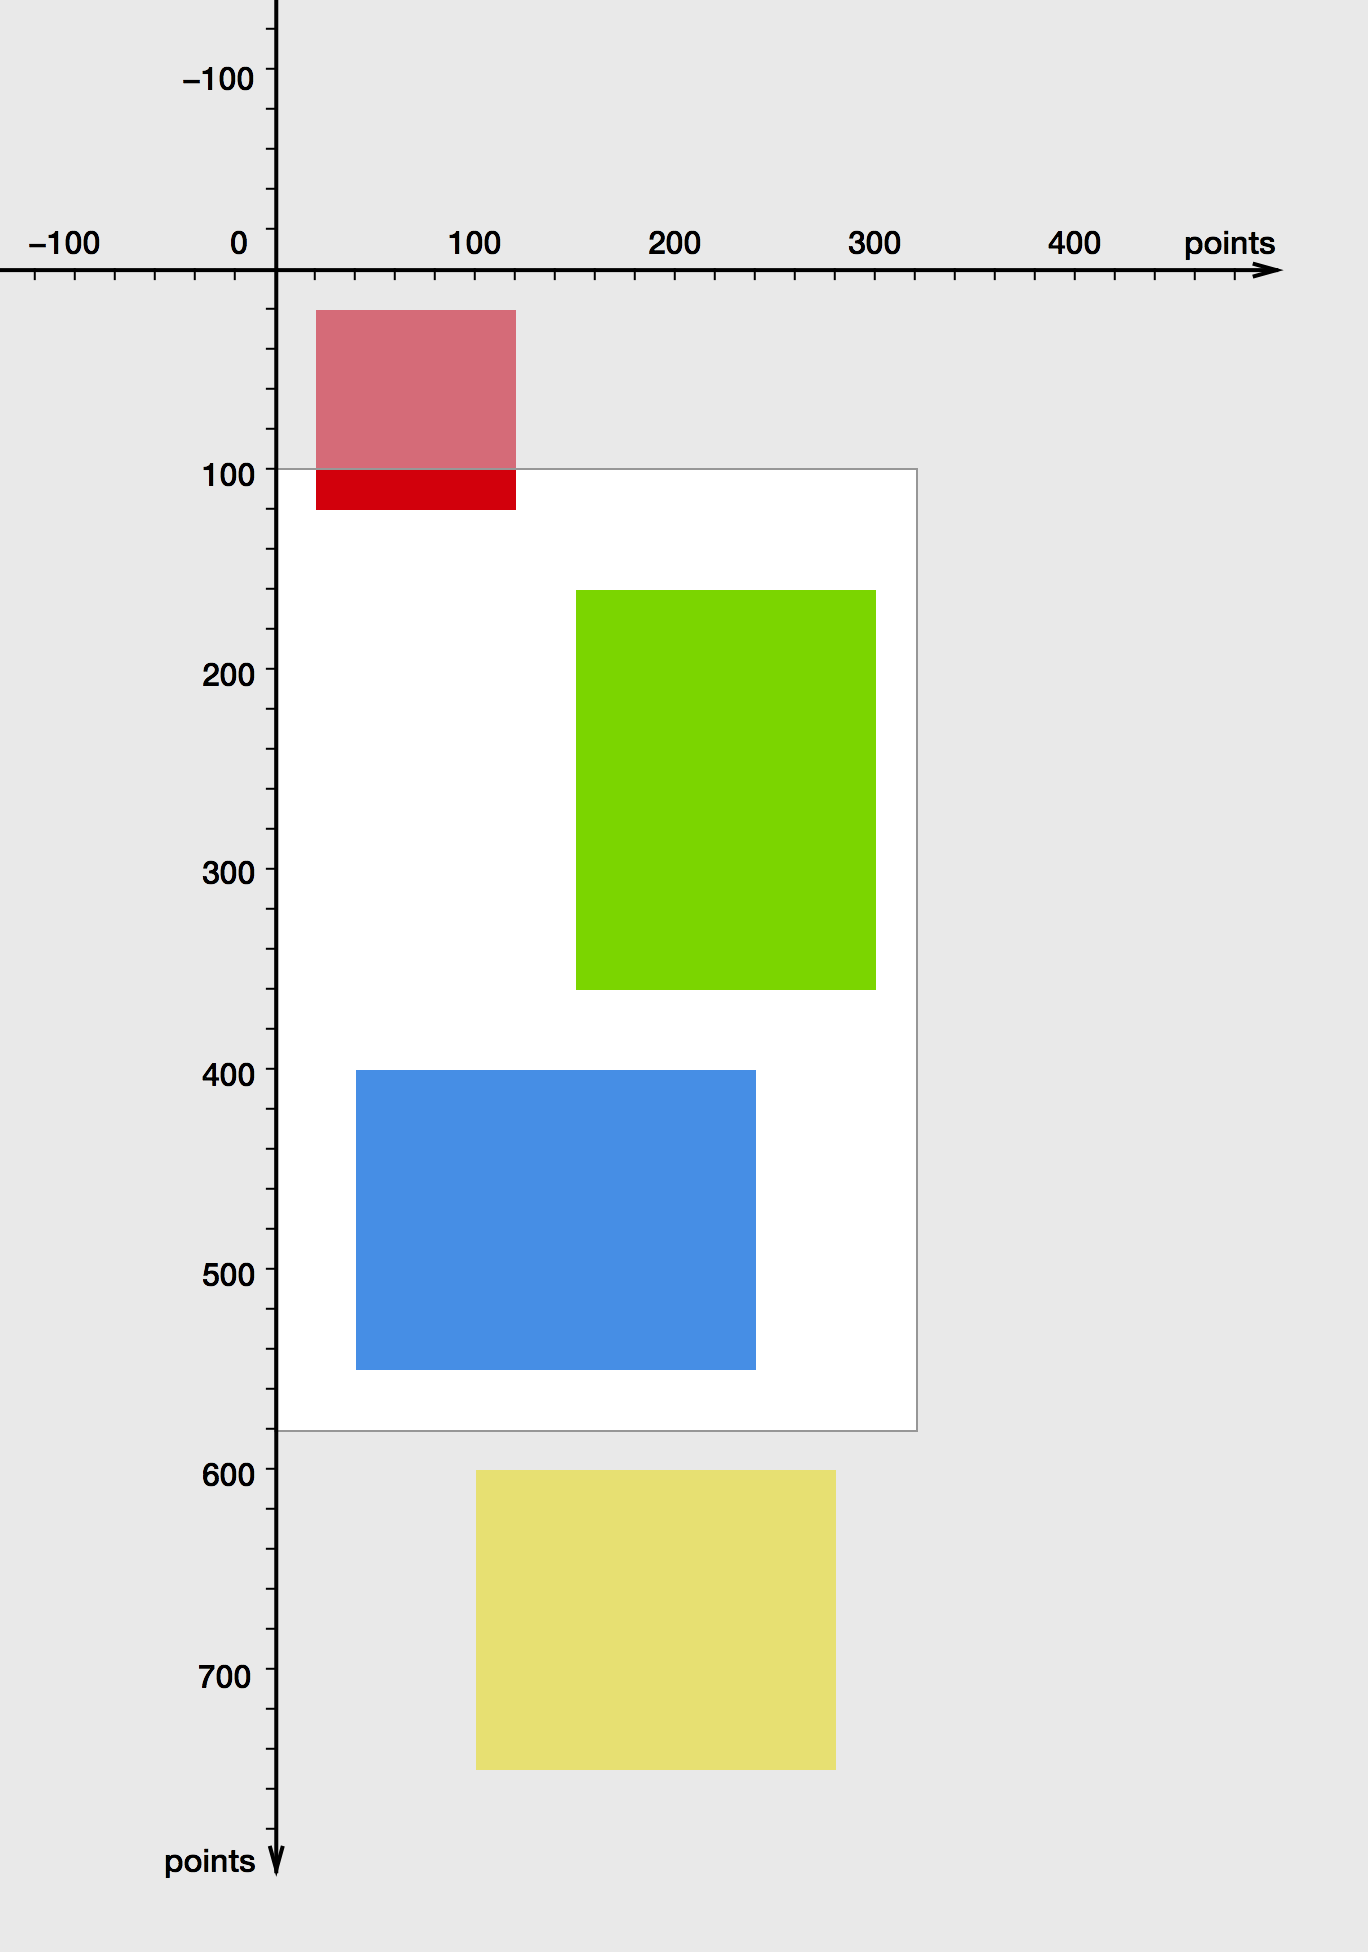
看起来好像是这个View向下移动了100像素,在这个View自己的坐标系中这确实没错。不过这个View真正位于屏幕上的位置(更准确的说在其父View上的位置)其实没有改变,因为这是由View的frame属性决定的,它并没有改变:
frame矩形…定义了这个View在其父View坐标系中的位置和大小。
由于View的位置是相对固定的,你可以把整个坐标平面想象成我们可以上下拖动的透明幕布,把这个View想象成我们观察坐标平面的窗口。调整View的Bounds属性就相当于拖动这个幕布,那么下方的内容就能在我们View中被观察到:
Since the view’s position is fixed (from its own perspective), think of the coordinate system plane as a piece of transparent film we can drag around, and of the view as a fixed window we are looking through. Adjusting the bounds’s origin is equivalent to moving the transparent film such that another part of it becomes visible through the view:
修改bounds的原点坐标也相当于把整个坐标系向上拖动,因为View的frame没由变过,所以它相对于父View的位置没有变化过。
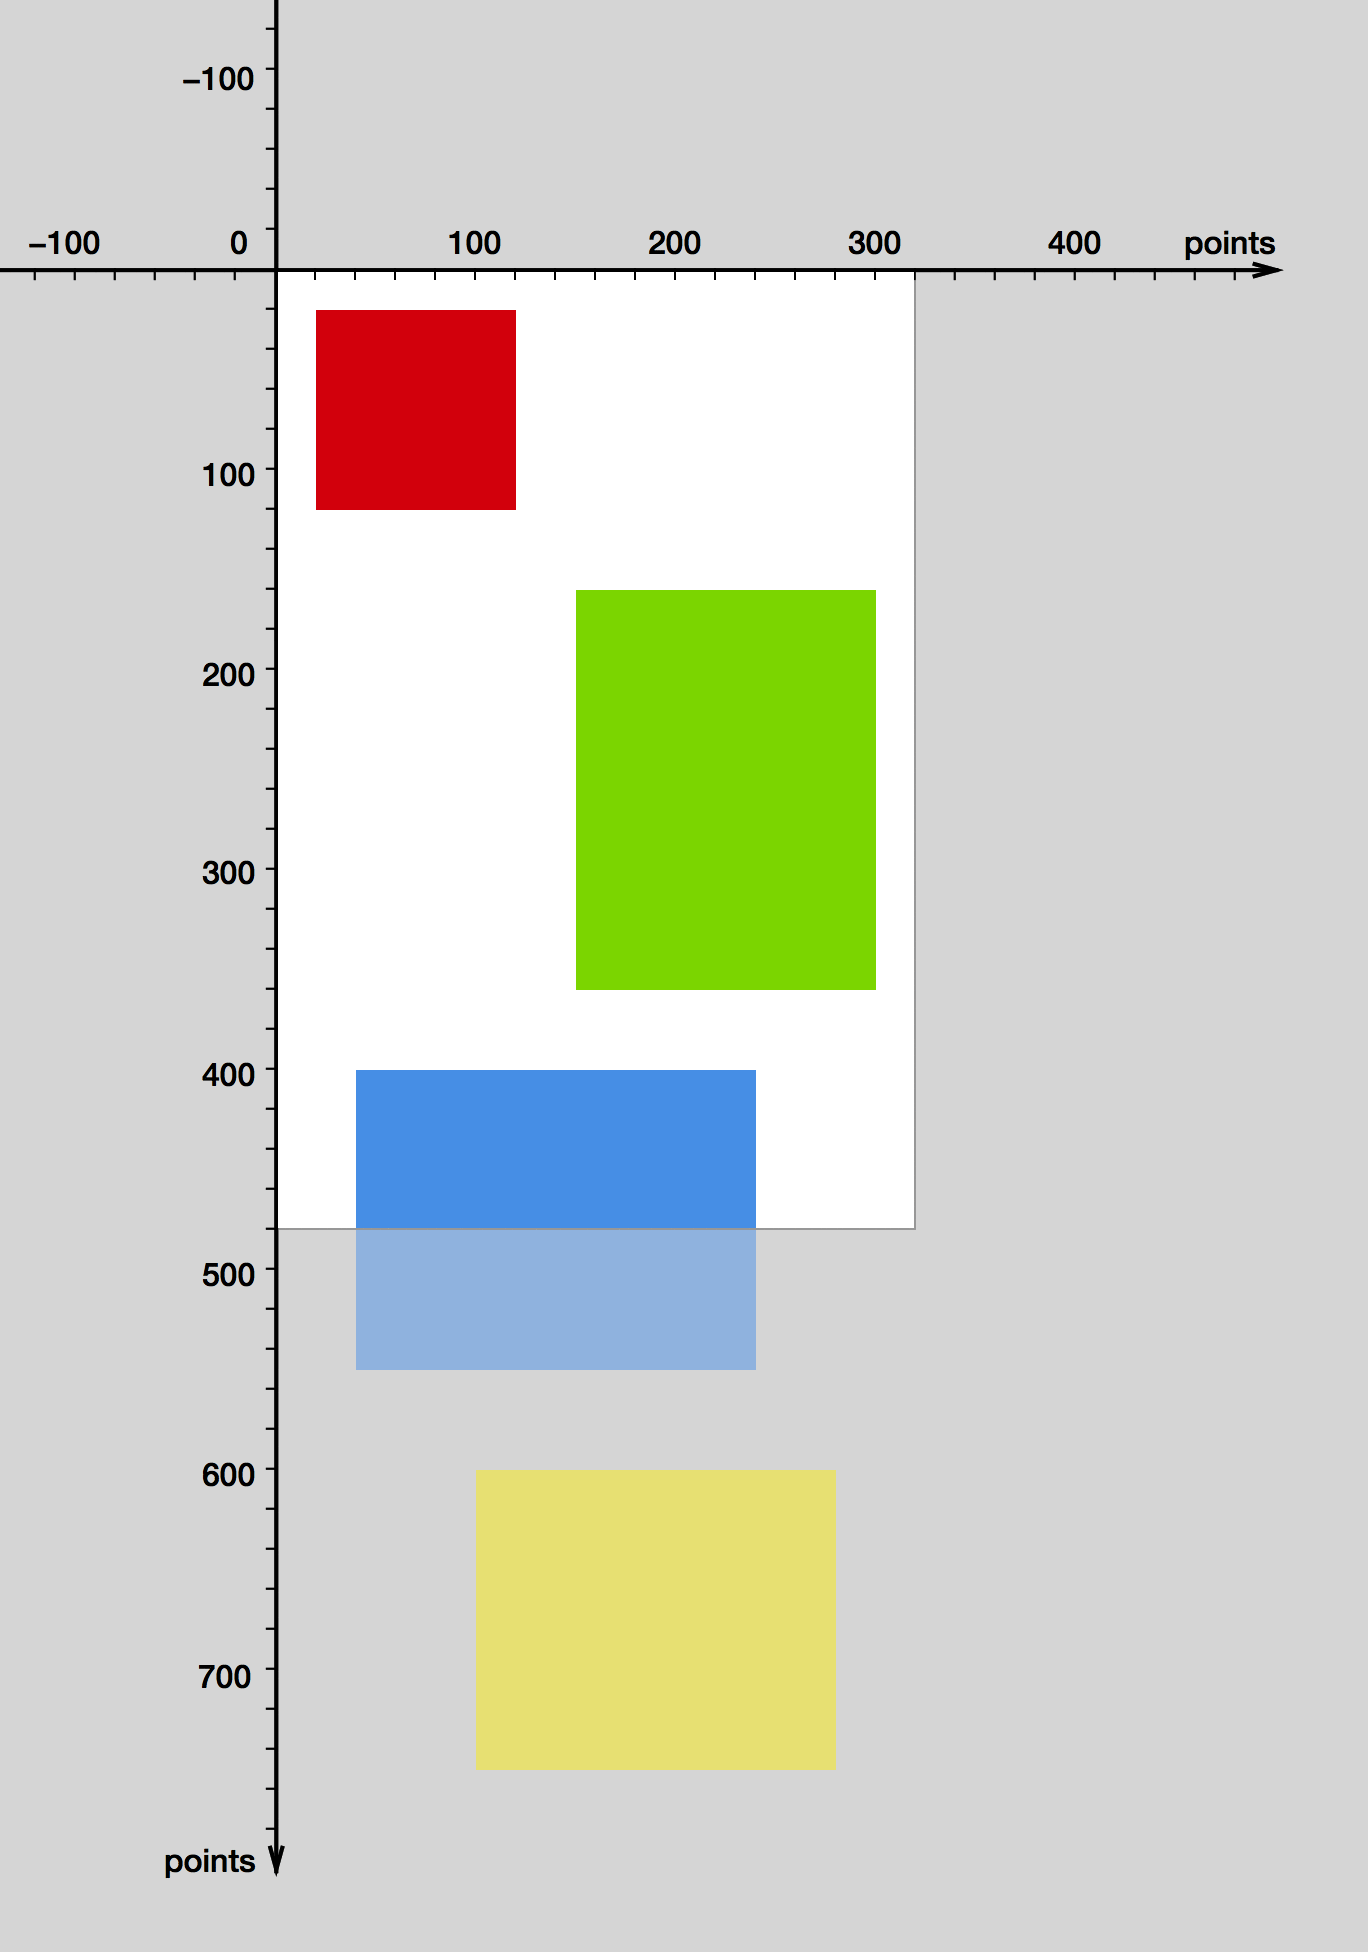
其实这就是UIScrollView滑动时所发生的事情。注意从一个用户的角度来看,他以为时这个View中的子View在移动,其实他们的在坐标系中位置(他们的frame)没有发生过变化。
打造你的UIScrollView
一个scroll view并不需要其中子View的坐标来使他们滚动。唯一要做的就是改变他的bounds属性。知道了这一点,实现一个简单的scroll view就没什么困难了。我们用一个gesture recognizer来识别用户的拖动操作,根据用户拖动的偏移量来改变bounds的原点:
// CustomScrollView.h
@import UIKit;

@interface CustomScrollView : UIView

@property (nonatomic) CGSize contentSize;

@end

// CustomScrollView.m
#import "CustomScrollView.h"

@implementation CustomScrollView

- (id)initWithFrame:(CGRect)frame
{
    self = [super initWithFrame:frame];
    if (self == nil) {
        return nil;
    }
    UIPanGestureRecognizer *gestureRecognizer = [[UIPanGestureRecognizer alloc]
        initWithTarget:self action:@selector(handlePanGesture:)];
    [self addGestureRecognizer:gestureRecognizer];
    return self;
}

- (void)handlePanGesture:(UIPanGestureRecognizer *)gestureRecognizer
{
    CGPoint translation = [gestureRecognizer translationInView:self];
    CGRect bounds = self.bounds;

    // Translate the view's bounds, but do not permit values that would violate contentSize
    CGFloat newBoundsOriginX = bounds.origin.x - translation.x;
    CGFloat minBoundsOriginX = 0.0;
    CGFloat maxBoundsOriginX = self.contentSize.width - bounds.size.width;
    bounds.origin.x = fmax(minBoundsOriginX, fmin(newBoundsOriginX, maxBoundsOriginX));

    CGFloat newBoundsOriginY = bounds.origin.y - translation.y;
    CGFloat minBoundsOriginY = 0.0;
    CGFloat maxBoundsOriginY = self.contentSize.height - bounds.size.height;
    bounds.origin.y = fmax(minBoundsOriginY, fmin(newBoundsOriginY, maxBoundsOriginY));

    self.bounds = bounds;
    [gestureRecognizer setTranslation:CGPointZero inView:self];
}

@end
和真正的UIScrollView一样,我们的类也有一个contentSize属性,你必须从外部来设置这个值来指定可以滚动的区域,当我们改变bounds的大小时我们要确保设置的值是有效的。
结果:
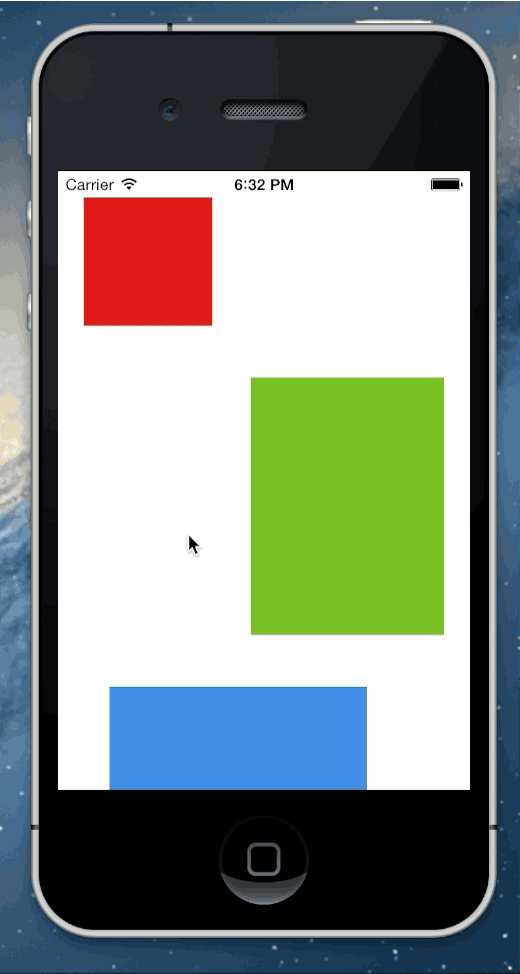
我们的scroll view已经能够工作了,不过还缺少动量滚动,反弹效果还有滚动提示符。
总结
感谢UIKit的坐标系统特性,使我们之花了30几行代码就能重现UIScrollView的精华,当然真正的UIScrollView要比我们所做的复杂的多,反弹效果,动量滚动,放大试图,还有代理方法,这些特性我们没有在这里涉及到。