ElasticSearch2.3/2.4升级到ElasticSearch5.0
参考文档(排名不分先后)
https://www.elastic.co/guide/en/elasticsearch/reference/5.0/setup-upgrade.html
https://github.com/elastic/elasticsearch-migration/
http://www.infoq.com/cn/news/2016/08/Elasticsearch-5-0-Elastic
http://hnr520.blog.51cto.com/4484939/1867033
注意最好用elasticsaerch-migration跑一下注意事项,我这里是抱着丢数据index的目的来升级的。
近日,Elastic在官方博客中宣布,Elasticsearch 5.0正式发布。该版本基于Lucene 6.2.0,已经在Elastic Cloud上完成了部署。据称,这是迄今为止最快、最安全、最易用的版本。
Elasticsearch 5.0带来了许多增强功能和新特性,主要包括:
索引性能:得益于多项改进,其中包括更好的数值型数据结构,索引吞吐量大幅提升。根据应用场景的不同,索引吞吐量提升在25%到80%之间。
Ingest节点:向Elasticsearch添加数据更简单了。Logstash是一个强大的工具,而一些较小的用户只需要过滤器,不需要它所提供的众多路由选项。因此,Elastic将一些最流行的Logstash过滤器(如grok、split)直接在Elasticsearch中实现为处理器。多个处理器可以组合成一个管道,在索引时应用到文档上。
Painless脚本:Elasticsearch中很多地方用到了脚本,而出于安全考虑,脚本在默认情况下是禁用的,这令人相当失望。为此,Elastic开发了一种新的脚本语言Painless。该语言更快、更安全,而且默认是启用的。不仅如此,它的执行速度是Groovy的4倍,而且正在变得更快。Painless已经成为默认脚本语言,而Groovy、Javascript和Python都遭到弃用。要了解有关这门新语言的更多信息,请点击这里。
新数据结构:Lucene 6带来了一个新的Points 数据结构K-D树,用于存储数值型和地理位置字段,彻底改变了数值型值的索引和搜索方式。基准测试表明,Points将查询速度提升了36%,将索引速度提升了71%,而占用的磁盘和内存空间分别减少了66%和85%(参见“在5.0中搜索数值”)。
搜索和聚合:借助即时聚合,Kibana图表生成速度显著提升。Elastic用一年的时间对搜索API进行了重构,Elasticsearch现在可以更巧妙地执行范围查询,只针对已经发生变化的索引重新计算聚合,而不是针对每个查询从头开始重新计算。在搜索方面,默认的相关性计算已经由TF/IDF换成了更先进的BM25。补全建议程序经过了完全重写,将已删除的文档也考虑了进来。
更友好:Elasticsearch 5.0更安全、更易用。他们采用了“尽早提示”的方法。如果出现了问题,则新版本会及早给出提示。例如,Elasticsearch 5.0会严格验证设置。如果它不能识别某项设置的值,就会给出提示和建议。不仅如此,集群和索引设置现在可以通过null进行解除。此外,还有其他的一些改进,例如,rollover和shrink API启用了一种新的模式来管理基于时间的索引,引入新的cluster-allocation-explain API,简化索引创建。
弹性:Elasticsearch分布式模型的每一部分都被分解、重构和简化,提升了可靠性。集群状态更新现在会等待集群中的所有节点确认。如果一个“复制片(replica shard)”被“主片(primary)”标记为失败,则主片会等待“主节点(master)”的响应。索引现在使用数据路径中的UUID,而不是索引名,避免了命名冲突。另外,Elasticsearch现在进行启动检查,确保系统配置没有问题。配置比较麻烦,但如果只是试用,开发人员也可以选择localhost-only模式,避免繁琐的配置。另外,新版本还增加了断路器及其他一些软限制,限制请求使用的内存大小,保护集群免受恶意用户攻击。
此外,该版本还提供了一个底层的Java REST/HTTP客户端,可以用于监听、日志记录、请求轮询、故障节点重试等。它使用Java 7,将依赖降到了最低,比Transport客户端的依赖冲突少。而在基准测试中,它的性能并不输于Transport客户端。不过,这是一个底层客户端,目前还没有提供任何查询构建器或辅助器。它的输入参数和输出结果都是JSON。
需要注意的是,该版本引入了许多破坏性更改,好在他们提供了一个迁移辅助插件,可以帮助开发人员从Elasticsearch 2.3.x/2.4.x迁移到Elasticsearch 5.0。如果是从更早的Elasticsearch版本向最新的5.0版本迁移,则请查阅升级文档。
1,卸载原软件安装新软件
cd /usr/local/src
rpm -e elasticsearch
rpm -e kibana
rpm -ivh elasticsearch-5.0.0.rpm kibana-5.0.0-x86_64.rpm
2,大概看了下配置文件没什么改动就直接用原来的
diff elasticsearch.yml elasticsearch.yml.rpmsave
mv elasticsearch.yml elasticsearch.yml.default
cp -f elasticsearch.yml.rpmsave elasticsearch.yml
chown elasticsearch:elasticsearch /etc/elasticsearch/elasticsearch.yml
3,根据官网建议添加了如下配置到elasticsearc.yml主配置文件
http.cors.enabled: true
http.cors.allow-origin: "*"
4,启动新的elasticsearch
启动过程一直失败,通过查看错误日志发现如下问题总结如下:
问题一
[2016-11-07T11:37:54,191][WARN ][o.e.b.JNANatives ] Unable to lock JVM Memory: error=12, reason=Cannot allocate memory
[2016-11-07T11:37:54,191][WARN ][o.e.b.JNANatives ] This can result in part of the JVM being swapped out.
[2016-11-07T11:37:54,191][WARN ][o.e.b.JNANatives ] Increase RLIMIT_MEMLOCK, soft limit: 65536, hard limit: 65536
[2016-11-07T11:37:54,191][WARN ][o.e.b.JNANatives ] These can be adjusted by modifying /etc/security/limits.conf, for example:
# allow user 'elasticsearch' mlockall
elasticsearch soft memlock unlimited
elasticsearch hard memlock unlimited
解决方法:
/etc/security/limits.conf
elasticsearch soft memlock unlimited
elasticsearch hard memlock unlimited
问题二
Found index level settings on node level configuration.
Since elasticsearch 5.x index level settings can NOT be set on the nodes
configuration like the elasticsearch.yaml, in system properties or command line
arguments.In order to upgrade all indices the settings must be updated via the
/${index}/_settings API. Unless all settings are dynamic all indices must be closed
in order to apply the upgradeIndices created in the future should use index templates
to set default values.
解决方法:
注释主配置文件里面的,官方建议生成索引时再设置
# index.number_of_shards: 5
# index.number_of_replicas: 1
Please ensure all required values are updated on all indices by executing:
curl -XPUT 'http://localhost:9200/_all/_settings?preserve_existing=true' -d '{
"index.number_of_replicas" : "1",
"index.number_of_shards" : "10"
}'
问题三
java.lang.IllegalArgumentException: unknown setting [node.rack] please check that any required plugins are installed, or check the breaking changes documentation for removed settings
解决方法:
这个是diff时唯一不同的地方,至于为啥这样改官网有介绍
# node.rack: r1
node.attr.rack: r1
问题四
[2016-11-07T12:26:05,957][ERROR][o.e.b.Bootstrap ] Exception
java.lang.IllegalArgumentException: unknown setting [script.indexed] did you mean any of [script.inline, script.ingest]?
解决方法:
目前我注释了,这个应该是语法错误,后续再查官网
#script.inline: true
#script.indexed: true
问题五,
max file descriptors [65535] for elasticsearch process likely too low, increase to at least [65536]
max number of threads [1024] for user [elasticsearch] likely too low, increase to at least [2048]
解决方法:
报错信息直接提示了修改limits.conf的相关参数
elasticsearch soft nofile 65536
elasticsearch hard nofile 131072
elasticsearch soft nproc 2048
elasticsearch hard nproc 4096
==================================================================
01.Elasticsearch5.0安装
(1)下载地址:
wget https://artifacts.elastic.co/downloads/elasticsearch/elasticsearch-5.0.0.zip
(2)jdk安装
tar xf jdk-8u101-linux-x64.tar.gz
mv jdk1.8.0_101 /usr/local/.
cd /usr/local/
ln -sf jdk1.8.0_101 jdk
vi /etc/profile
最后添加:
export JAVA_HOME=/usr/local/jdk
export JAVA_BIN=$JAVA_HOME/bin
export PATH=$PATH:$JAVA_HOME/bin
export CLASSPATH=.:$JAVA_HOME/lib/dt.jar:$JAVA_HOME/lib/tools.jar
export PATH=$JAVA_HOME/bin:$JRE_HOME/bin:$PATH
重新加载profile配置
source /etc/profile
检测jdk是否安装成功.
java -version
(2)安装Elasticsearch
unzip elasticsearch-5.0.0.zip
mkdir /data
mv elasticsearch-5.0.0 /data/.
cd /data/
ln -sf elasticsearch-5.0.0 elasticsearch
useradd nginx
chown -R nginx.nginx elasticsearch*
配置系统最大文件数
vi /etc/security/limits.conf
* soft nofile 65536
* hard nofile 65536
修改最大线程数的配置
vi /etc/security/limits.d/90-nproc.conf
* soft nproc 4096
root soft nproc unlimited
内存太小需要修改
vi /data/elasticsearch/config/jvm.options
将-Xmx2g改成-Xmx512m
将-Xms2g改成-Xms512m
-Xms512m
-Xmx512m
vi /etc/sysctl.conf
vm.max_map_count=262144
sysctl -p
(3)启动elasticsearch
vi elasticsearch.yml
配置
network.host: 本机IP地址
http.port: 9200
启动
su - nginx
/data/elasticsearch/bin/elasticsearch -d
其他安装资料汇总
设置内核参数
vi /etc/sysctl.conf
# 增加下面的内容
fs.file-max=65536
vm.max_map_count=262144
设置资源参数
vi /etc/security/limits.conf
# 修改
* soft nofile 32768
* hard nofile 65536
修改进程数
ulimit -u 2048
这个瞎jb整了半天.准备把es2.4升级到5.0,结果老报错
环境:centos6.5+es2.4是ok的换成es5就出毛病.也不能说啥 ,我用的是最新的

源码解压启动时候报错,具体错误forget already.
折腾了下,没什么心情了.放弃了.
心想,难道es5高大上了?只能跑c7了?
可能性不大.能有时间再搞.
不过搞的过程中收获了点东西
1,修改ulimit 我们一般是65535,而我启动es5时候要求我改成65536
cat /etc/security/limits.conf
* soft nproc 65536
* hard nproc 65536
* soft nofile 65536
* hard nofile 65536
cat /etc/sysctl.conf
vm.max_map_count= 262144
sysctl -p
2,跨用户启动es. es本只能在普通用户下启动.
致使我一度要切到普通用户然后启动,这样给开机自启动造成了困扰.
su - elasticsearch -c "/usr/local/elasticsearch/bin/elasticsearch &"
3,
本文主要介绍elasticsearch5.0安装及head插件安装。
确保系统已经安装好jdk1.8.0_73以上,操作系统centos6以上。
原文:
http://hnr520.blog.51cto.com/4484939/1867033
一、elasticsearch安装配置
1.官网下载源码包
https://artifacts.elastic.co/downloads/elasticsearch/elasticsearch-5.0.0.tar.gz
2.解压安装
|
1 2 3 4 5 6 |
useradd elasticsearch tar xf elasticsearch-5.0.0.tar.gz -C /usr/local cd /usr/local ln -sv elasticsearch-5.0.0 elasticsearch mkdir -pv /data/elasticsearch/{data,logs} chown -R elasticsearch.elasticsearch /data/elasticsearch |
3.修改配置文件
|
1 2 3 4 5 6 |
cat /usr/local/elasticsearch/config/elasticsearch.yml path.data:/data/elasticsearch/data path.logs:/data/elasticsearch/logs network.host:192.168.1.12 http.cors.enabled:true http.cors.allow-origin:"*" |
4.修改系统参数
|
1 2 3 4 5 6 7 8 |
cat /etc/security/limits.conf * soft nproc 65536 * hard nproc 65536 * soft nofile 65536 * hard nofile 65536 cat /etc/sysctl.conf vm.max_map_count= 262144 sysctl -p |
5.启动服务
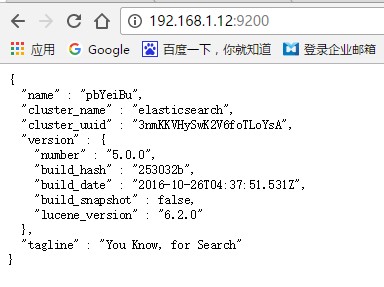
su - elasticsearch -c "/usr/local/elasticsearch/bin/elasticsearch &"
浏览器访问:http://192.168.1.12:9200/
二、head插件的安装
在5.0版本中不支持直接安装head插件,需要启动一个服务
1.下载插件安装
git clone git://github.com/mobz/elasticsearch-head.git
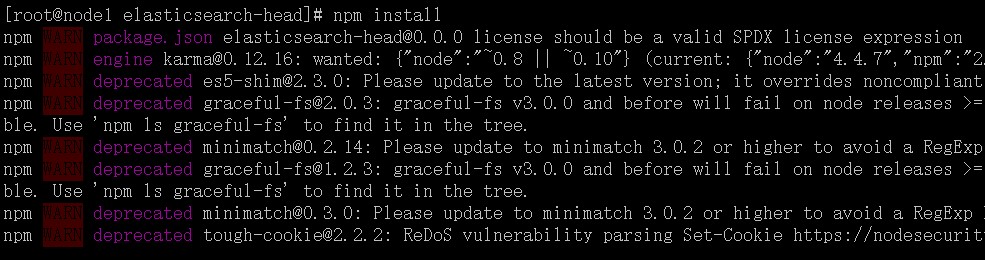
cd elasticsearch-head
npm install
在elasticsearch-head目录下node_modules/grunt下如果没有grunt二进制程序,需要执行
cd elasticsearch-head
npm install grunt --save
2.修改配置
修改elasticsearch-head下Gruntfile.js文件,默认监听在127.0.0.1下9200端口

3.启动服务
/usr/local/elasticsearch-head/node_modules/grunt/bin/gruntserver

浏览器访问 http://192.168.1.12:9100/
