《陈翔六点半之废话少说》。。。。
Spring WEB MVC 的请求流程:

Spring WEB MVC架构:

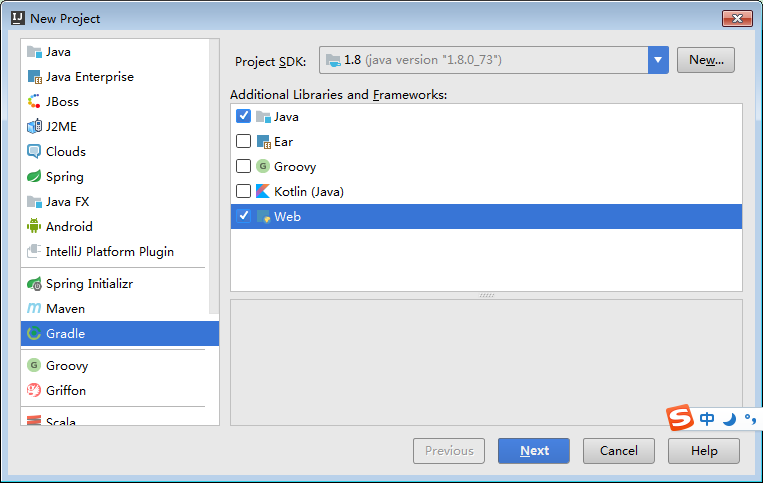
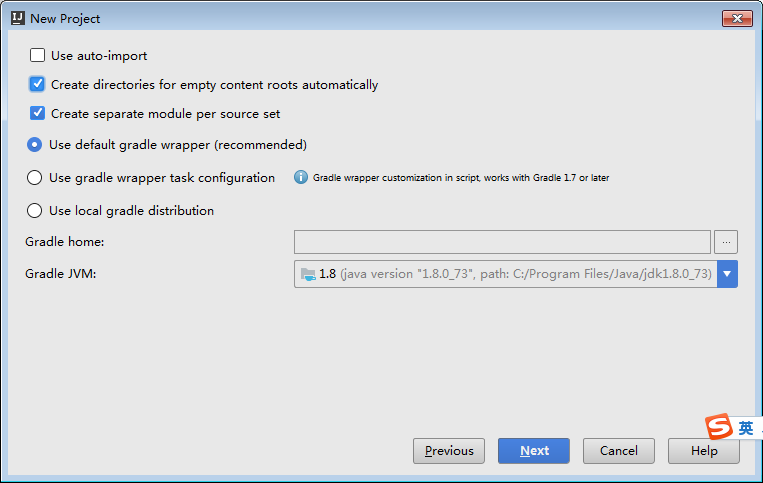
开始创建、配置gradle项目
1.在gralde项目中,选择SDK 和框架、包。点击NEXT
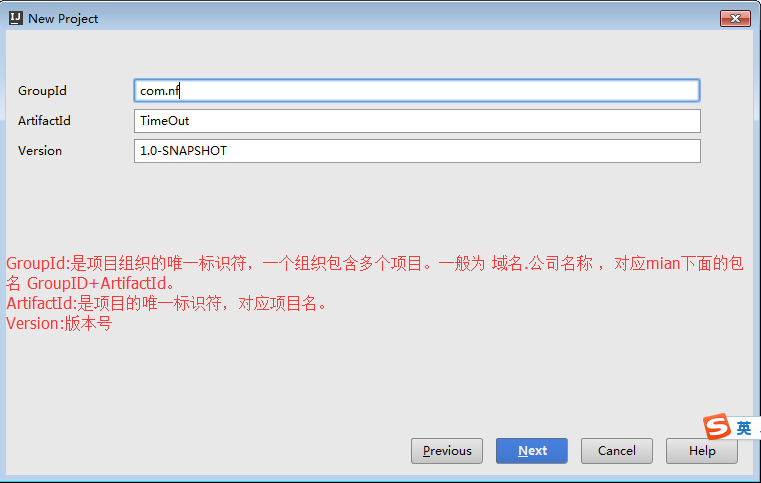
2.配置 build.gradle
group 'com.nf'
version '1.0-SNAPSHOT'

apply plugin: 'java'
apply plugin: 'war'

sourceCompatibility = 1.5

repositories {
    mavenCentral()
    jcenter()
}
// 配置需要的 jar 包依赖
dependencies {

    // 定义两个局部变量
    // 这里代表我们需要的 hibernate 和 spring 的版本
    def hibernateVersion = "5.1.0.Final"
    def springVersion = "4.3.5.RELEASE"

    // 在 test 中需要用到的 jar 包
    testCompile (
            "junit:junit:4.12"
    )

    // 指明 Tomcat 上已经自带的 jar 包,这样发布的时候才不会重复
    providedCompile (
            "javax:javaee-web-api:7.0",
    )

    // 配置我们项目需要用到的所有 jar 包,即 compile 环节需要的 jar 包
    compile (

            // OJDBC 包,数据库 Orcale
            "com.github.noraui:ojdbc7:12.1.0.2",

            // 用来管理数据源的知名 jar 包
            "c3p0:c3p0:0.9.1.2",

            // jsp 中 jstl 标签的支持 jar 包
            "javax.servlet:jstl:1.2",

            // log4j 日志支持的 jar 包
            "log4j:log4j:1.2.17",

            // 配置 hibernate
            "org.hibernate:hibernate-core:$hibernateVersion",
            "org.hibernate:hibernate-validator:5.4.0.Final",

            // 配置 spring
            "org.springframework:spring-web:$springVersion",
            "org.springframework:spring-orm:$springVersion",
            "org.springframework:spring-aop:$springVersion",
            "org.springframework:spring-webmvc:$springVersion",
            "com.fasterxml.jackson.core:jackson-databind:2.5.1",
    )
}


// 为编译器配置编码,防止某些情况下编译出现乱码的情况
// 相应的,我们所有的代码应该保存成 UTF-8 格式
tasks.withType(JavaCompile) {
    options.encoding = "UTF-8"
}


// 自定义任务,将工程所需要的 jar 包拷贝到项目下的 lib 文件夹下
// 需要手动执行这个 task 才会有效果。这是为了方便导出 jar 包
task copyJars(type: Copy) {
    // 指明我们导出的是 compile 和 test 所依赖的 jar 包
    from configurations.compile, configurations.testCompile
    // 指明导出到 "lib" 文件夹下
    into "lib"
}
切记:包不可少,也不可重复。可以去 Maven Repository 查阅。
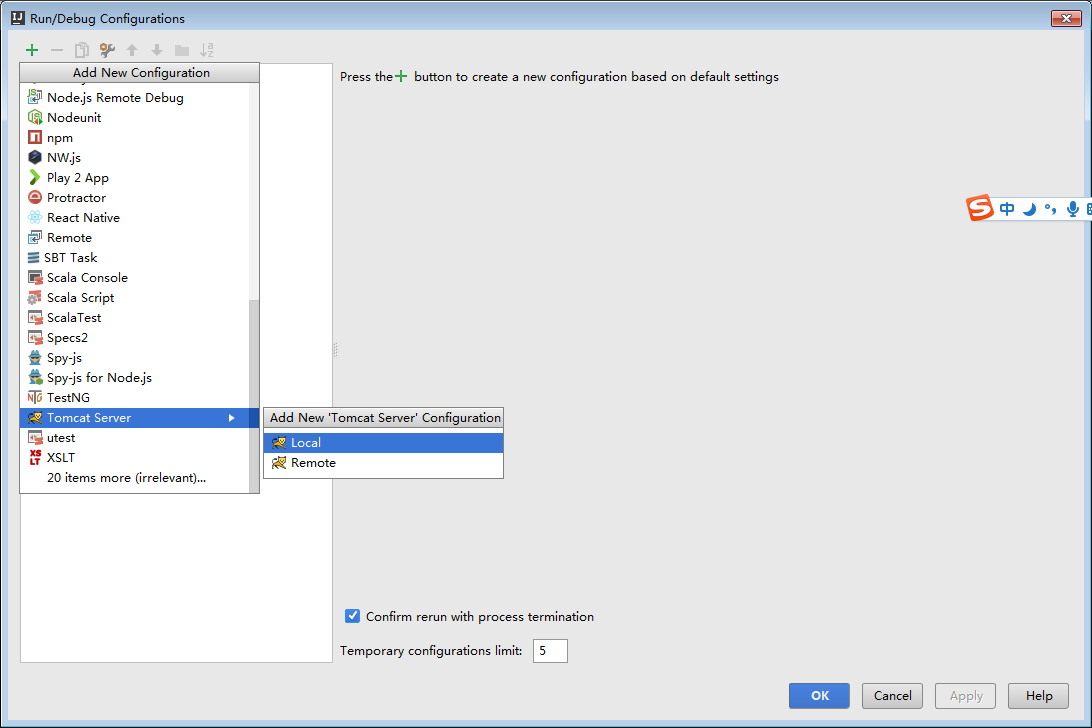
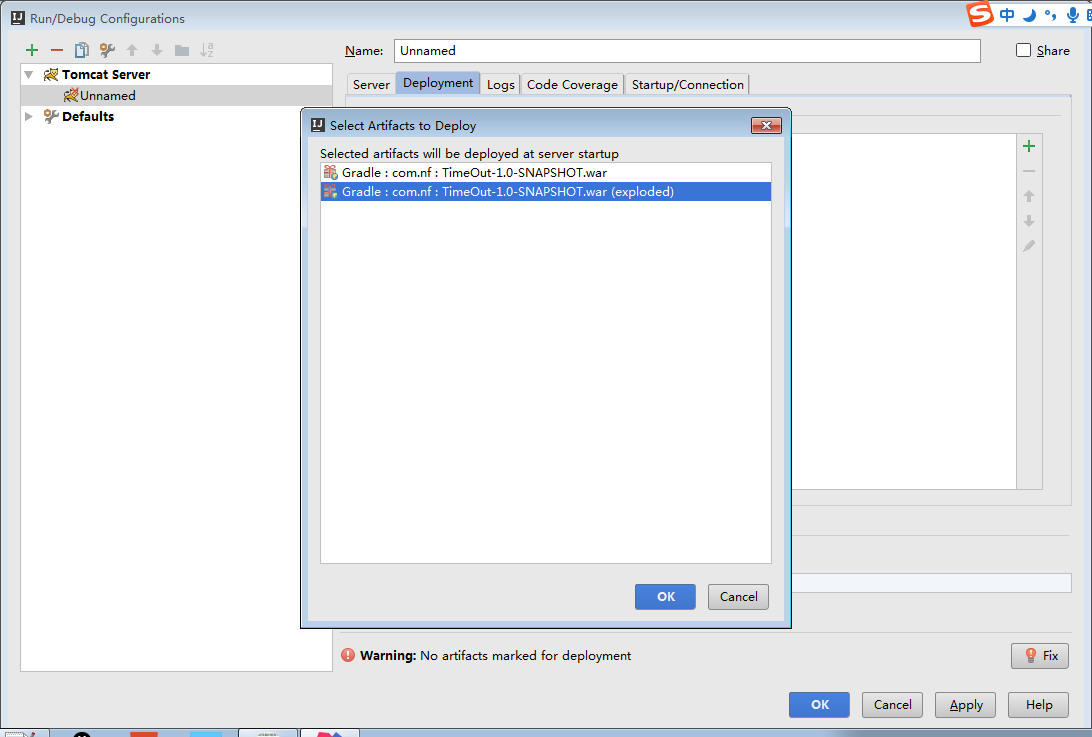
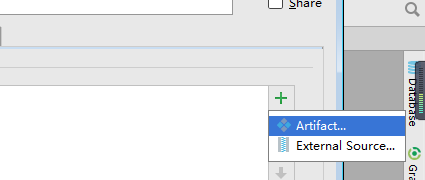
配置tomcat
web.xml
<?xml version="1.0" encoding="UTF-8"?>
<web-app xmlns="http://xmlns.jcp.org/xml/ns/javaee"
         xmlns:xsi="http://www.w3.org/2001/XMLSchema-instance"
         xsi:schemaLocation="http://xmlns.jcp.org/xml/ns/javaee http://xmlns.jcp.org/xml/ns/javaee/web-app_3_1.xsd"
         version="3.1">
    <!-- 如果使用 RESTful 风格的编程,需要加上这个过滤器 -->
    <!-- 它能使得 FORM 提交支持 PUT/DELETE 等方法 -->
    <filter>
        <filter-name>forRESTful</filter-name>
        <filter-class>org.springframework.web.filter.HiddenHttpMethodFilter</filter-class>
    </filter>
    <filter-mapping>
        <filter-name>forRESTful</filter-name>
        <servlet-name>springmvc</servlet-name>
    </filter-mapping>


    <!-- 配置 SpringMVC 的 DispatcherServlet  context (child) -->
    <!-- 它会为 SpringMVC 创建一个独立的容器 -->
    <!-- 如果使用 SpringMVC,这里必须要配置 -->
    <!-- 它的父容器是下面配置的 root Context -->
    <!-- 可以在 init-param 中指定配置文件路径,如果不配置,默认是 "WEB-INF/miniblog-servlet.xml" -->
    <servlet>
        <servlet-name>springmvc</servlet-name>
        <servlet-class>org.springframework.web.servlet.DispatcherServlet</servlet-class>
        <init-param>
            <param-name>contextConfigLocation</param-name>
            <param-value>classpath:spring_MVC.xml</param-value>
        </init-param>
    </servlet>
    <servlet-mapping>
        <servlet-name>springmvc</servlet-name>
        <url-pattern>/</url-pattern>
    </servlet-mapping>


    <!-- 配置 spring 的 root application context (parent) -->
    <!-- 创建一个根容器 -->
    <!-- 如果只是使用 SpringMVC 但不使用 Spring 其他功能,这里可以不配置 -->
    <!-- 在这个容器里,配置一些全局的东西 -->
    <!-- 比如 dao/service 的依赖,数据源,sessionFactory,声明式事务之类 -->
    <!-- 可以通过 context-param 指定配置文件路径,如果不指定,默认是 "WEB-INF/applicationContext.xml" -->
    <listener>
        <listener-class>org.springframework.web.context.ContextLoaderListener</listener-class>
    </listener>
    <context-param>
        <param-name>contextConfigLocation</param-name>
        <param-value>classpath:spring_Hibernate.xml</param-value>
    </context-param>

</web-app>
spring_MVC.xml
<?xml version="1.0" encoding="UTF-8"?>
<beans xmlns="http://www.springframework.org/schema/beans"
       xmlns:xsi="http://www.w3.org/2001/XMLSchema-instance"
       xmlns:mvc="http://www.springframework.org/schema/mvc"
       xmlns:context="http://www.springframework.org/schema/context"
       xsi:schemaLocation="http://www.springframework.org/schema/beans http://www.springframework.org/schema/beans/spring-beans.xsd
       http://www.springframework.org/schema/mvc http://www.springframework.org/schema/mvc/spring-mvc.xsd
       http://www.springframework.org/schema/context http://www.springframework.org/schema/context/spring-context.xsd">

    <!-- 注意,要引入正确的命名空间!!! -->

    <!-- mvc 版本的 context:annotation-driven -->
    <!-- 针对 mvc 增加了一些其他支持,需要开启 -->
    <mvc:annotation-driven />

    <!-- 配置扫描发现所有具有 @Controller 注解的类,加载到容器 -->
    <!-- 注意,在 SpringMVC 的配置文件中,不要扫描 @Controller 之外的类 -->
    <context:component-scan base-package="edu.action"/>

    <!-- 配置视图解析器,将 Controller 返回的字符串组织成全路径 -->
    <bean id="viewResolver" class="org.springframework.web.servlet.view.InternalResourceViewResolver">
        <property name="prefix" value="/WEB-INF/view/"/>
        <property name="suffix" value=".jsp"/>
    </bean>

    <!-- 配置资源文件,如下配置,资源文件则为 resource 文件夹下的 message*.properties 或 message*.xml -->
    <!-- 注意,要把资源文件保存成 UTF-8 格式,否则,需要在这里通过 defaultEncoding 指定编码 -->
    <!--<bean id="messageSource" class="org.springframework.context.support.ReloadableResourceBundleMessageSource">-->
    <!--<property name="basename" value="message" />-->
    <!--<property name="defaultEncoding" value="GBK" />-->
    <!--</bean>-->
    <!-- 开启事务相关的注解 -->
    <!-- 然后,就可以在 Service 相关的类或方法上通过 @Transactional 开启事务支持了 -->
    <!--<tx:annotation-driven proxy-target-class="true"/>-->
</beans>
spring_Hibernate.xml
<?xml version="1.0" encoding="UTF-8"?>
<beans xmlns="http://www.springframework.org/schema/beans"
       xmlns:xsi="http://www.w3.org/2001/XMLSchema-instance"
       xmlns:mvc="http://www.springframework.org/schema/mvc"
       xmlns:context="http://www.springframework.org/schema/context" xmlns:tx="http://www.springframework.org/schema/tx"
       xsi:schemaLocation="http://www.springframework.org/schema/beans http://www.springframework.org/schema/beans/spring-beans.xsd
       http://www.springframework.org/schema/mvc http://www.springframework.org/schema/mvc/spring-mvc.xsd
       http://www.springframework.org/schema/context http://www.springframework.org/schema/context/spring-context.xsd
       http://www.springframework.org/schema/tx http://www.springframework.org/schema/tx/spring-tx.xsd">


        <!-- 启用注解,让 spring 在加载的时候自动扫描指定包 -->
        <!-- 这样会将含有 @Service/@Repository/@Component 等注解的类在容器中实例化 -->
        <context:component-scan base-package="edu.dao,edu.service" />


                <!-- 使用外部的 properties 文件 -->
                <!-- 我们一般会将经常要改动的一些参数提取出来放到外部 -->
        <context:property-placeholder location="classpath:db.properties" />


                <!-- 配置 Hibernate 的 Sessionfactory -->
        <bean id="sessionFactory" class="org.springframework.orm.hibernate5.LocalSessionFactoryBean">
        <property name="dataSource">
            <bean class="com.mchange.v2.c3p0.ComboPooledDataSource" destroy-method="close">
                <property name="user" value="${user}" />
                <property name="password" value="${password}" />
                <property name="jdbcUrl" value="${url}" />
                <property name="driverClass" value="${driver}" />
            </bean>
        </property>
        <property name="hibernateProperties">
            <props>
                <prop key="hibernate.show_sql">true</prop>
                <prop key="hibernate.format_sql">true</prop>
                <prop key="hibernate.hbm2ddl.auto">update</prop>
                <prop key="hibernate.dialect">${dialect}</prop>
            </props>
        </property>
        <property name="packagesToScan" value="edu.model" />
        </bean>


         <!-- 配置事务管理器 -->
        <bean id="transactionManager" class="org.springframework.orm.hibernate5.HibernateTransactionManager">
        <property name="sessionFactory" ref="sessionFactory"/>
        </bean>


        <!-- 开启事务相关的注解 -->
        <!-- 然后,就可以在 Service 相关的类或方法上通过 @Transactional 开启事务支持了 -->
        <tx:annotation-driven proxy-target-class="true"/>

</beans>
db.properties
user = vip
password = vip
url = jdbc:oracle:thin:localhost:1521:orcl
driver = oracle.jdbc.driver.OracleDriver

dialect = org.hibernate.dialect.Oracle10gDialect
日志文件配置(详解请看 http://blog.csdn.net/azheng270/article/details/2173430)
log4j.rootLogger=WARN, console
log4j.appender.console=org.apache.log4j.ConsoleAppender
log4j.appender.console.layout=org.apache.log4j.PatternLayout
log4j.appender.console.layout.conversionPattern=[%p] (%F:%L) - %m%n
注意一下几点:
1.Hibernate 自动创表及表结构: 加以相关注释 @Entity、@Id @GeneratedValue、@Column
2.dao包中 加入IOC容器 @Repository ,以及自动注入 SessionFactory @Autowired
3.service包中 加入IOC容器 @Service , 事务开启 [ springframework ]@Transactional ,以及自动注入 dao @Resource
4.controller包中 实现页面接收、处理、跳转页面 @Controller ,请求路径 @RequestMapper("/xx") ,return "页面"
5.参数接收页面数据写get、set 方法