一、前言
浮动元素以脱离标准流的方式来实现元素的向左或向右浮动,并且浮动元素还是在原来的行上进行浮动的。float浮动属性的四个参数:left:元素向左浮动;right:元素向右浮动;none:默认值,元素不浮动;inherit:继承父元素的float属性值。
举两个栗子
父元素是否注意到自己有个浮动的子div呢?
<div style=" 400px; height: auto; border: 2px solid black;">
    <div style=" 50px; height: 100px; background-color: green; float: right;"></div>
    我才不知道有没有浮动框,我只显示文字的高度
</div>
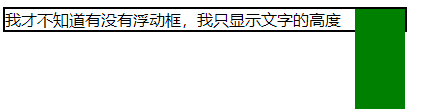
从中我们可以发现,处于标准流中的父div并不知道浮动元素的存在,而浮动元素却知道它父元素的边界,它一直向右浮动直到撞到了父框的右边界为止。
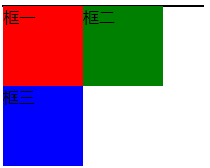
<div style=" 240px; height: auto; border: solid 1px black;">
    <div style=" 80px; height: 80px; background-color: red;">
        框一
    </div>
    <div style=" 80px; height: 80px; background-color: green; float: right;">
        框二
    </div>
</div>
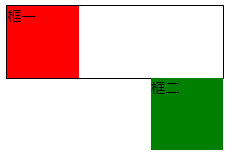
我们发现框二并没有跑到框一这一行的右侧去,而浮动到了原来这行的的右侧。
下面我们一起逐步学习CSS中的浮动属性float。
二、浮动之于文本
CSS参考手册上对float的说明:
float 属性定义元素在哪个方向浮动。以往这个属性总应用于图像,使文本围绕在图像周围,不过在 CSS 中,任何元素都可以浮动。浮动元素会生成一个块级框,而不论它本身是何种元素。
如果浮动非替换元素,则要指定一个明确的宽度;否则,它们会尽可能地窄。
1.实现文本环绕图像
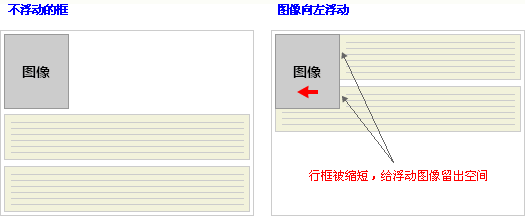
浮动框虽然脱离了标准流,但标准流中的文本依旧会做相应的移动,为浮动框留出空间。浮动框旁边的行框被缩短,从而给浮动框留出空间,行框围绕浮动框。
因此,创建浮动框可以使文本围绕图像:
举两个小栗子
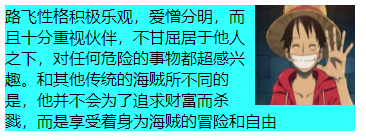
<div style=" 350px; background-color: #33FFFF;">
    <img src="http://h5ip.cn/ge0w" style=" 100px; height: 100px; float: right;">
    <span>
    路飞性格积极乐观,爱憎分明,而且十分重视伙伴,不甘屈居于他人之下,对任何危险的事物都超感兴趣。和其他传统的海贼所不同的是,他并不会为了追求财富而杀戮,而是享受着身为海贼的冒险和自由
    </span>
</div>
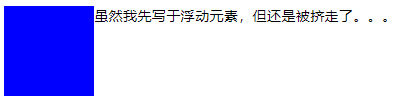
<span>虽然我先写于浮动元素,但还是被挤到了右边。。。</span>
<div style=" 100px; height: 100px; background: blue;  float: left;"></div>
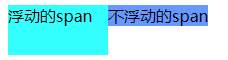
2.任何元素浮动后都将生成块级框
首先应当注意块级框不等同于块状元素,块级元素会独占一行而块级框却不会,浮动元素产生的效果类似于行内块元素。对行内非替换元素设置width和height是无效的,但生成浮动元素之后width和height将有效,并且不会单独占一行,所以说它类似于行内块元素。
<span style=" 100px; height: 50px; background-color: #6699FF;">
    不浮动的span
</span>
<span style=" 100px; height: 50px; background-color: #33FFFF; float: left;">
    浮动的span
</span>
三、浮动之于块
浮动的框可以向左或向右移动,直到它的外边缘碰到包含框或另一个浮动框的边框为止。由于浮动框不在文档的普通流中,所以文档的普通流中的块框表现得就像浮动框不存在一样。
不浮动的div为块级元素,各自独占一行
<!-- 不浮动 -->
<div style=" 240px; height: auto; border: solid 1px black;">
    <div style=" 80px; height: 80px; background-color: red;">
        框一
    </div>
    <div style=" 80px; height: 80px; background-color: green;">
        框二
    </div>
    <div style=" 80px; height: 80px; background-color: blue;">
        框三
    </div>
</div>

<!-- 框一右浮 -->
<div style=" 240px; height: auto; border: solid 1px black;">
    <div style=" 80px; height: 80px; background-color: red; float: right;">
        框一
    </div>
    <div style=" 80px; height: 80px; background-color: green;">
        框二
    </div>
    <div style=" 80px; height: 80px; background-color: blue;">
        框三
    </div>
</div>
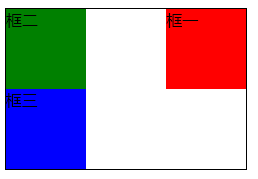
当框 1 向左浮动时,它脱离文档流并且向左移动,直到它的左边缘碰到包含框的左边缘。因为它不再处于文档流中,所以它不占据空间,实际上覆盖住了框 2,使框 2 从视图中消失。
<!-- 框一左浮,覆盖框二 -->
<div style=" 240px; height: auto; border: solid 1px black;">
    <div style=" 80px; height: 80px; background-color: red; float: left;">
        框一
    </div>
    <div style=" 80px; height: 80px; background-color: green;">
        框二
    </div>
    <div style=" 80px; height: 80px; background-color: blue;">
        框三
    </div>
</div>

如果把所有三个框都向左移动,那么框 1 向左浮动直到碰到包含框,另外两个框向左浮动直到碰到前一个浮动框,这时父框的高度为0
<!-- 三框左浮 -->
<div style=" 240px; height: auto; border: solid 1px black;">
    <div style=" 80px; height: 80px; background-color: red; float: left;">
        框一
    </div>
    <div style=" 80px; height: 80px; background-color: green; float: left;">
        框二
    </div>
    <div style=" 80px; height: 80px; background-color: blue; float: left;">
        框三
    </div>
</div>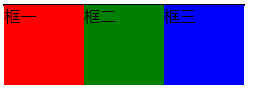
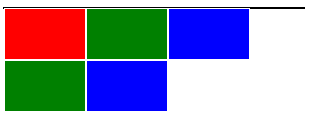
如果包含框太窄,无法容纳水平排列的三个浮动元素,那么其它浮动块向下移动,直到有足够的空间。
<!-- 三框左浮,父框太窄 -->
<div style=" 200px; height: auto; border: solid 1px black;">
    <div style=" 80px; height: 80px; background-color: red; float: left;">
        框一
    </div>
    <div style=" 80px; height: 80px; background-color: green; float: left;">
        框二
    </div>
    <div style=" 80px; height: 80px; background-color: blue; float: left;">
        框三
    </div>
</div>
如果浮动元素的高度不同,那么当它们向下移动时可能被其它浮动元素“卡住”
<!-- 三框左浮,框一卡框三 -->
<div style=" 200px; height: auto; border: solid 1px black;">
    <div style=" 80px; height: 100px; background-color: red; float: left;">
        框一
    </div>
    <div style=" 80px; height: 80px; background-color: green; float: left;">
        框二
    </div>
    <div style=" 80px; height: 80px; background-color: blue; float: left;">
        框三
    </div>
</div>

四、浮动的副作用及处理
通过上面的介绍可以总结出浮动的两个副作用:1.页面塌陷,也就是子元素不能将父元素撑开;2.元素覆盖,浮动元素不在标准流中因此可能会覆盖标准流中的元素。四种解决方案如下:
1.手动给父元素添加高度
这种方法用来解决父元素的页面塌陷问题,应当注意的是,为保证父框的高度等于最高浮动元素的高度应当充分考虑浮动元素的边框以及内外边距。
<!-- 对于有边框的浮动子元素,父元素的height = 子元素的height + 2*子元素的边框大小 -->
<div style=" 300px; height: 52px; border: solid 1px black;">
    <div style=" 80px; height: 50px; background-color: red; float: left; border: solid 1px #FFF;"></div>
    <div style=" 80px; height: 50px; background-color: green; float: left; border: solid 1px #FFF;"></div>
    <div style=" 80px; height: 50px; background-color: blue; float: left; border: solid 1px #FFF;"></div>
</div>
这种方式治标不治本,当浮动子元素增加时,页面塌陷问题重现

2.通过clear属性清除内部和外部浮动
clear 属性规定元素的哪一侧不允许其他浮动元素。clear属性的四个参数:none(默认值)、left、right、both;如果声明为左边或右边清除,会使元素的上外边框边界刚好在该边上浮动元素的下外边距边界之下。
none:允许两边都可以有浮动对象;left:不允许左边有浮动对象;right:不允许右边有浮动对象;both:不允许有浮动对象。
添加clear属性之前

<!-- 如果后一个div未添加clear属性,它将被红色div覆盖 -->
<div style=" 300px; height: auto; border: solid 1px black; clear: both;">
    <div style=" 80px; height: 50px; background-color: red; float: left; border: solid 1px #FFF;"></div>
    <div style=" 80px; height: 50px; background-color: green; border: solid 1px #FFF; clear: left; "></div>
</div>

添加之后

添加clear前
<!-- 在最后增加一个具有clear属性的空div -->
<div style=" 300px; height: auto; border: solid 1px black; clear: both;">
    <div style=" 80px; height: 50px; background-color: red; float: left; border: solid 1px #FFF;"></div>
    <div style=" 80px; height: 50px; background-color: green; float: left; border: solid 1px #FFF;"></div>
    <div style=" 80px; height: 50px; background-color: blue; float: left; border: solid 1px #FFF;"></div>
    <div style=" 80px; height: 50px; background-color: green; float: left; border: solid 1px #FFF;"></div>
    <div style=" 80px; height: 50px; background-color: blue; float: left; border: solid 1px #FFF;"></div>
    <div style=" clear: both;"></div>
</div>

添加之后

3.给父元素添加overflow属性并结合zoom:1使用
<!-- 使用overfloat和zoom代替clear -->
<div style=" 300px; height: auto; border: solid 1px black; clear: both; overflow: hidden; zoom: 1;">
    <div style=" 80px; height: 50px; background-color: red; float: left; border: solid 1px #FFF;"></div>
    <div style=" 80px; height: 50px; background-color: green; float: left; border: solid 1px #FFF;"></div>
    <div style=" 80px; height: 50px; background-color: blue; float: left; border: solid 1px #FFF;"></div>
    <div style=" 80px; height: 50px; background-color: green; float: left; border: solid 1px #FFF;"></div>
    <div style=" 80px; height: 50px; background-color: blue; float: left; border: solid 1px #FFF;"></div>
</div>

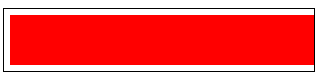
overflow属性是用来修剪溢出的元素,所以使用此种方案会使溢出元素被截掉
使用overflow前

<div style=" 300px; height: auto; border: solid 1px black; clear: both; padding: 5px; overflow: hidden;">
    <div style=" 500px; height: 50px; background-color: red; border: solid 1px #FFF; float: left;"></div>
</div>
使用后
zoom是IE浏览器专用的属性,通过子元素的高度来设置父元素的高度,添加该属性用来兼容IE浏览器
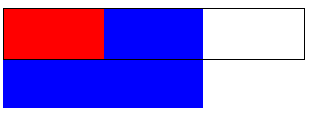
4.给父元素添加浮动
这是一种”以毒攻毒“的方法,因为父元素浮动后虽然消除了浮动子元素对其的影响,但父元素下面的元素就可能就会受该浮动父元素的影响。
<div style=" 300px; height: auto; border: solid 1px black; clear: both; float: left;">
  <div style=" 100px; height: 50px; background-color: red; float: left;"></div>
</div>
<div style=" 200px; height: 100px; background-color: blue;"></div>
这四种常用的清除浮动解决办法可以根据实际情况进行使用,当然还有一些也比较好的解决办法,例如使用before伪类清除浮动,等进一步学习之后再补充。
五、最后
感谢博主谦行的博客:CSS布局 ——从display,position, float属性谈起以及W3School提供的学习资料!所学不深,如有错误或不足之处还望留言指出,十分感谢!