在上篇文章中,在文章最后附上了主要的思路分析.本篇通过代码实现view,imageview,label,button的添加,加载plist数据,使用for循环来完成.
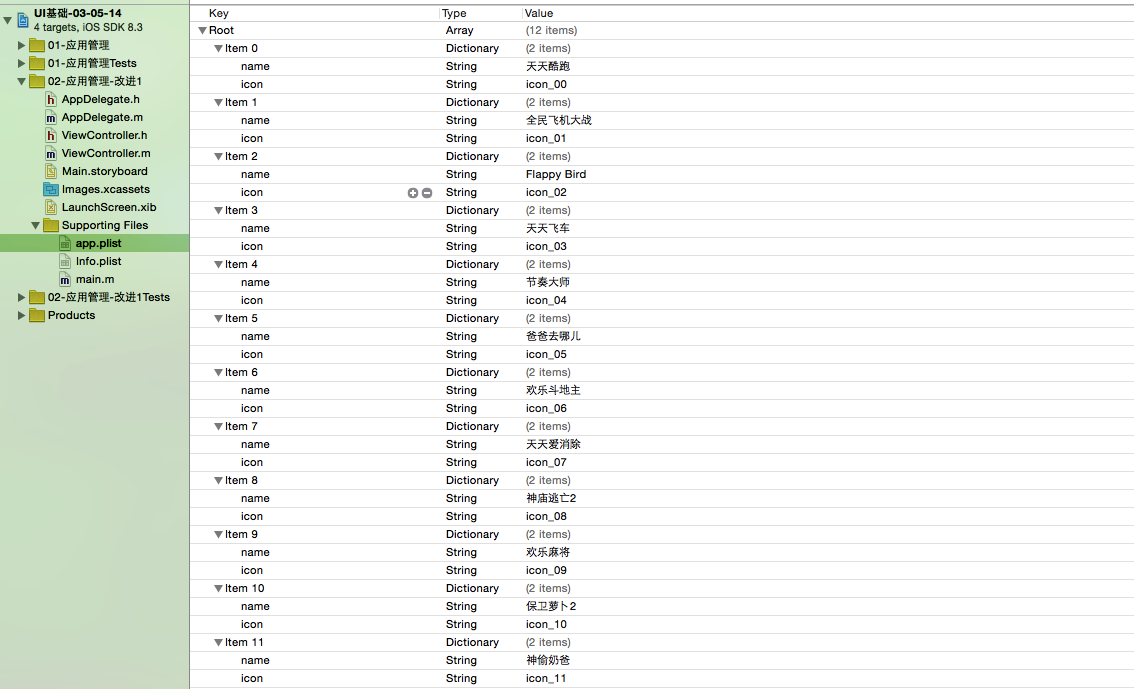
应用代码结构及plist文件截图:
下面附上源代码:
viewController.m
  1 //
  2 //  ViewController.m
  3 //  02-应用管理
  4 //
  5 //  Created by hukezhu on 15/5/14.
  6 //
  7 //
  8
  9 #import "ViewController.h"
 10
 11 @interface ViewController ()
 12 @property (nonatomic,strong)NSArray *apps;
 13 @end
 14
 15 @implementation ViewController
 16
 17 - (void)viewDidLoad {
 18     [super viewDidLoad];
 19
 20     //每一行的应用的个数
 21     int totalCol = 3;
 22
 23
 24     //添加一个小的view
 25     CGFloat appW = 80;
 26     CGFloat appH = 100;
 27     CGFloat marginX = 20;
 28     CGFloat marginY = 20;
 29     CGFloat hightMargin = 30;
 30     CGFloat leftMargin = (self.view.frame.size.width - totalCol * appW - (totalCol - 1) *marginX)* 0.5;
 31
 32
 33
 34     for (int i = 0; i < self.apps.count; i++) {
 35
 36
 37         //计算行号和列号
 38         int row = i / totalCol;
 39         int col = i % totalCol;
 40
 41         CGFloat appX = leftMargin + (marginX + appW)* col;
 42         CGFloat appY = hightMargin + (marginY + appH)* row;
 43
 44         //1.添加view
 45
 46         //1.1新建一个UIView
 47         UIView *appView = [[UIView alloc]init];
 48         //1.2设置frame
 49         appView.frame = CGRectMake(appX, appY, appW, appH);
 50         //1.3设置背景色(便于代码阶段验证,之后会删除)
 51         //appView.backgroundColor = [UIColor redColor];
 52         //1.4将这个appView添加到view中
 53         [self.view addSubview:appView];
 54
 55         //加载数据
 56         NSDictionary *dict = self.apps[i];
 57
 58         //2.添加图片UIImageView
 59         CGFloat imageW = 60;
 60         CGFloat imageH = 50;
 61         CGFloat imageX = (appW - imageW)*0.5;
 62         CGFloat imageY = 0;
 63         UIImageView *imageView = [[UIImageView alloc]init];
 64         imageView.frame = CGRectMake(imageX, imageY, imageW, imageH);
 65         //imageView.backgroundColor = [UIColor blueColor];
 66         imageView.image = [UIImage imageNamed:dict[@"icon"]];
 67         [appView addSubview:imageView];
 68
 69
 70         //3.添加应用名称
 71
 72         CGFloat labelW = 80;
 73         CGFloat labelH = 25;
 74         CGFloat labelX = 0;
 75         CGFloat labelY = imageH;
 76         UILabel *label = [[UILabel alloc]init];
 77         label.frame = CGRectMake(labelX, labelY, labelW, labelH);
 78         //label.backgroundColor = [UIColor grayColor];
 79         label.text = dict[@"name"];
 80         //设置字体大小
 81         label.font = [UIFont systemFontOfSize:13];
 82         //设置字体居中
 83         label.textAlignment = NSTextAlignmentCenter;
 84         [appView addSubview:label];
 85
 86         //4.添加下载按钮
 87
 88         CGFloat downloadW = 60;
 89         CGFloat downloadH = 25;
 90         CGFloat downloadX = 10;
 91         CGFloat downloadY = labelH + labelY;
 92         UIButton *downloadBtn = [[UIButton alloc]init];
 93         downloadBtn.frame = CGRectMake(downloadX, downloadY, downloadW, downloadH);
 94         //downloadBtn.backgroundColor = [UIColor yellowColor];
 95         //设置背景图片
 96         [downloadBtn setBackgroundImage:[UIImage imageNamed:@"buttongreen"] forState:UIControlStateNormal];
 97         [downloadBtn setBackgroundImage:[UIImage imageNamed:@"buttongreen_highlighted"] forState:UIControlStateHighlighted];
 98         //设置字体
 99         [downloadBtn setTitle:@"下载" forState:UIControlStateNormal];
100
101         //设置字体大小
102         downloadBtn.titleLabel.font = [UIFont systemFontOfSize:15];
103         [appView addSubview:downloadBtn];
104
105
106         [downloadBtn addTarget:self action:@selector(btnOnClick:) forControlEvents:UIControlEventTouchUpInside];
107     }
108
109
110
111
112
113 }
114 /**
115  *  按钮的点击方法
116  *
117  *  @param btn 将按钮本身传入方法中,哪个按钮被点击就调用这个方法
118  */
119 - (void)btnOnClick:(UIButton *)btn{
120
121     //NSLog(@"------%@",btn);
122     btn.enabled = NO;
123     [btn setTitle:@"已下载" forState:UIControlStateNormal];
124
125     CGFloat labelW = 120;
126     CGFloat labelH = 30;
127     CGFloat labelX = (self.view.frame.size.width - labelW)* 0.5;
128     CGFloat labelY = (self.view.frame.size.height - labelH)*0.5;
129     UILabel *label = [[UILabel alloc]init];
130     label.frame = CGRectMake(labelX, labelY, labelW, labelH);
131     label.text = @"正在下载";
132     //设置字体颜色
133     label.textColor = [UIColor redColor];
134     //设置字体居中
135     label.textAlignment = NSTextAlignmentCenter;
136     //设置 背景色
137     label.backgroundColor = [UIColor blackColor];
138
139     //设置圆角的半径
140     label.layer.cornerRadius = 8;
141     //将多余的部分减掉
142     label.layer.masksToBounds = YES;
143     //设置透明度
144     label.alpha = 0.0;
145     //将label添加到view中
146     [self.view addSubview:label];
147     //使用block动画,动画持续时间2秒
148     [UIView animateWithDuration:2.0 animations:^{
149         label.alpha = 0.5;
150     } completion:^(BOOL finished) {
151         if (finished) {
152             [UIView animateWithDuration:2.0 delay:0.1 options:UIViewAnimationOptionCurveLinear animations:^{
153                 label.alpha = 0.0;
154             } completion:^(BOOL finished) {
155                 //上面将透明度设置为0,界面上已经不显示这个label,但是它仍然在内存中,所以为了节约内存,仍要将其从内存中删除
156                 [label removeFromSuperview];
157
158             }];
159         }
160     }];
161
162 }
163 /**
164  *  "懒加载",加载应用数据
165  *
166  */
167 - (NSArray *)apps{
168
169     //如果_apps为空,才加载数据
170     if (_apps == nil) {
171         //获取全路径
172         NSString *path = [[NSBundle mainBundle]pathForResource:@"app.plist" ofType:nil];
173         //将取出的数据放到_apps中
174         _apps = [NSArray arrayWithContentsOfFile:path];
175     }
176     return _apps;
177 }
178
179 - (void)didReceiveMemoryWarning {
180     [super didReceiveMemoryWarning];
181     // Dispose of any resources that can be recreated.
182 }
183
184 @end
主要知识点分析:
1."懒加载"
在前几篇文章中已经介绍过这个知识点,这种方式其实就是重写get方法,当用到数据的时候才去加载,可以提高性能.实现思路是:首先判断是否为空,如果为空则去加载,否则直接返回
2.代码中的常量数据
在代码中用到的常量数据,最好能够提取出来,便于扩展和修改.
3.UILabel设置字体方面的方法
1         UILabel *label = [[UILabel alloc]init];
2         //设置背景色
3         label.backgroundColor = [UIColor grayColor];
4         //label.text = dict[@"name"];
5         //设置字体大小
6         label.font = [UIFont systemFontOfSize:13];
7         //设置字体居中(枚举)
8         label.textAlignment = NSTextAlignmentCenter;
4.UIButton
我们可以发现在UIButton中可以显示图片和文字,这是因为UIButton中有两个属性为UIImageView和UILabel
1 // return title and image views. will always create them if necessary. always returns nil for system buttons
2 @property(nonatomic,readonly,retain) UILabel     *titleLabel NS_AVAILABLE_IOS(3_0);
3 @property(nonatomic,readonly,retain) UIImageView *imageView  NS_AVAILABLE_IOS(3_0);
假设我们需要修改UIButton上的文字字体大小的时候,可以取出其中的UILabel属性,修改,例如;
        //设置字体大小
        downloadBtn.titleLabel.font = [UIFont systemFontOfSize:15];
注意点:
通过上述分析,我们可以知道,现在修改UIButton上的文字可以有两种方法,第一种是我们之前常用的setTitle:的方法,第二种就是取出其 中的UILabel,给其设置文字,但是我们不推荐使用第二种方法,因为这个不能设置显示字体的状态(普通,高亮,不可用等),如下:
1         //设置字体第一种方法
2         [downloadBtn setTitle:@"下载" forState:UIControlStateNormal];
3
4         //设置字体第二种方法(不推荐使用)
5         downloadBtn.titleLabel.text = @"下载";
5.设置空间的透明度,调用alpha方法(o为全透明,1为不透明)
6.设置空间为圆角矩形
1     //设置圆角的半径(此时赋值不宜过大,数字越大,控件图形两侧越尖)
2     label.layer.cornerRadius = 8;
3     //将多余的部分减掉
4     label.layer.masksToBounds = YES;
7.block动画
前面文章中也大体提到过block动画,这种方式使用起来比头尾式简单,好用
1     //使用block动画,动画持续时间2秒
2     [UIView animateWithDuration:2.0 animations:^{
3         //执行动画的代码块
4     } completion:^(BOOL finished) {
5
6       //动画结束之后执行的操作(仍然可以嵌套block)
7     }];
总结:这份代码是使用加载plist数据,使用字典来操作数据,这种方式有一定的弊端,在前面文章中已经介绍过(写代码的时候字典的键没有智能提示; "键"是字符串, 如果写错了, 编译器不报错(在编译的时候不报错), 运行时可能出错, 出错了很难排查)。所以下一篇文章,使用字典转模型,使用模型来操作数据,进行改进.