需求
线上前端web静态页面部署,希望通过开发人员SVN提交的方式进行自动部署。
解决方案
| 主机IP | 用途 |
|---|---|
| 192.168.118.14 | WEB服务器 |
| 192.168.118.15 | SVN服务器 |
192.168.118.14 目前存在的静态资源如下:
[root@ngx-node1 /www]#ls
index.html  test10.html  test1.html  test2.html  test3.html  test4.html  test5.html  test6.html  test7.html  test8.html  test9.html
首先在 192.168.118.15 上搭建 svn 服务器
[root@svn ~]#yum install subversion -y
[root@svn ~]#mkdir -pv /svn/ngx_web/
[root@svn ~]#svnadmin create /svn/www/

分别修改三个配置文件: authz、 passwd、svnserve.conf
[root@svn /svn/ngx_web/conf]#cat authz
...
admin = ngxWeb
[/]
@admin = rw


[root@svn /svn/ngx_web/conf]#cat passwd
...
ngxWeb = ngxWeb

[root@svn /svn/ngx_web/conf]#egrep -v "^#|^$" svnserve.conf
[general]
anon-access = read
auth-access = write
password-db = passwd
authz-db = authz
[sasl]

[root@svn /svn/ngx_web/conf]#vim /etc/sysconfig/svnserve

# OPTIONS is used to pass command-line arguments to svnserve.
#
# Specify the repository location in -r parameter:
OPTIONS="-r /svn/"


修改完成重启服务
[root@svn /svn/ngx_web/conf]#systemctl start svnserve
注意:这里的定义 /svn/[www] 这里的 www 必须和已经存在的 web目录 一致。
到此,svn服务器搭建完成。
svn链接:svn://192.168.118.15/www
svn用户名:ngxWeb
svn密码:ngxWeb
接下来的思路就是:
- 首先将192.168.118.14 已经存在的web页面提交到svn中
- 在本地电脑上拉取线上已经存在的web页面
- 在 192.168.118.14 设置自动拉取
首先提交现有的web页面(192.168.118.14)
[root@ngx-node1 ~]#svn --username=ngxWeb --password=ngxWeb checkout svn://192.168.118.15/www /www/

-----------------------------------------------------------------------
ATTENTION!  Your password for authentication realm:

   <svn://192.168.118.15:3690> 733127ad-8eef-4a55-ae41-21a9cf92e057

can only be stored to disk unencrypted!  You are advised to configure
your system so that Subversion can store passwords encrypted, if
possible.  See the documentation for details.

You can avoid future appearances of this warning by setting the value
of the 'store-plaintext-passwords' option to either 'yes' or 'no' in
'/root/.subversion/servers'.
-----------------------------------------------------------------------
Store password unencrypted (yes/no)? yes
Checked out revision 0.

# svn 成功会在 /www/ 目录下生成一个 .svn 的隐藏目录
[root@ngx-node1 /www]#ls -a
.  ..  index.html  .svn  test1.html  test2.html  test3.html  test4.html  test5.html  test6.html  test7.html  test8.html  test9.html

[root@ngx-node1 /www]#svn add *
A         index.html
A         test1.html
A         test2.html
A         test3.html
A         test4.html
A         test5.html
A         test6.html
A         test7.html
A         test8.html
A         test9.html
[root@ngx-node1 /www]#svn commit -m 'first commit.'
Adding         index.html
Adding         test1.html
Adding         test2.html
Adding         test3.html
Adding         test4.html
Adding         test5.html
Adding         test6.html
Adding         test7.html
Adding         test8.html
Adding         test9.html
Transmitting file data ..........
Committed revision 1.
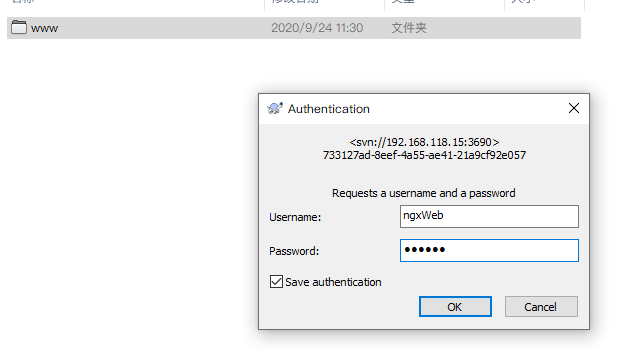
接下来在本地电脑上建立SVN

到这里, web服务器和本地目录的web文件是一致了。接下来为服务器端编写一个定时任务,每分钟都去 update 一次。
web 服务器:192.168.118.14
[root@ngx-node1 ~]#crontab -l
*/1   *   *   *   *   svn --username=ngxWeb --password=ngxWeb checkout svn://192.168.118.15/www /www/ &>> /tmp/svn_checkout_ngxweb.log

# 监控这个文件,每分钟都会进行一次 checkout
[root@ngx-node1 /tmp]#tailf  svn_checkout_ngxweb.log
Checked out revision 1.
Checked out revision 1.
本地添加一个页面提交:

查看日志文件是否checkout到 web服务器目录
[root@ngx-node1 /tmp]#tailf  svn_checkout_ngxweb.log
Checked out revision 1.
Checked out revision 1.
A    /www/hello.html
Checked out revision 2.

# 进入目录查看
[root@ngx-node1 /tmp]#ls /www/
# hello.html 已经存在
hello.html  index.html  test1.html  test2.html  test3.html  test4.html  test5.html  test6.html  test7.html  test8.html  test9.html
这样,一个简易的svn 自动部署静态页面的提交需求就完成,当然还有诸多的不够完善的地方,比如:两个人同一个svn可能会发生冲突,导致提交不成功,或者一些异常情况。但是这样的方式,对于测试环境来说,应该能够应付使用了。