1. 前言
2 台 nginx 需要做集群, 静态文件和php文件都在nginx服务器本地。
有三种方案:
(1)NFS
(2)Rsync + inotify
(3)共享存储服务器
第一种:当 nfs server端宕机,全部完蛋,第三种:共享存储服务器单点,如果宕机也完蛋。因此采用 第二种方式:rsync + inotify
2. 环境配置
2.1 环境介绍
系统:Centos 7.2 x64
server端:192.168.118.14
client端(同步端):192.168.118.15
2.2 搭建过程
默认防火墙和selinux 关闭,这里采用 http web服务器测试。
client 端(同步端)配置:
[root@192.168.118.15 ~]#yum install rsync httpd -y

[root@192.168.118.15 ~]#egrep ^[a-z] /etc/rsyncd.conf
uid = root        # 设置rsync运行权限为root
gid = root        # 设置rsync运行权限为root
use chroot = no    # 默认为true,修改为no,增加对目录文件软连接的备份
max connections = 200    # 最大连接数
timeout = 300    # 设置超时时间
pid file = /var/run/rsyncd.pid    # pid文件的存放位置
log file = /var/log/rsyncd.log    # 日志文件位置,启动rsync后自动产生这个文件,无需提前创建
path = /var/www/html    # rsync服务端数据目录路径
read only = false    # 设置rsync服务端文件为读写权限
hosts allow = 192.168.118.15    # 允许进行数据同步的客户端IP地址,可以设置多个,用英文状态下逗号隔开
auth users = rsync    # 执行数据同步的用户名,可以设置多个,用英文状态下逗号隔开
secrets file = /etc/rsync.password    # 用户认证配置文件,里面保存用户名称和密码,后面会创建这个文件


[root@192.168.118.15 ~]#echo "rsync:123456" > /etc/rsync.password    # 用户认证配置文件,里面保存用户名称和密码,后面会创建这个文件
[root@192.168.118.15 ~]#chmod 0600 /etc/rsync.password    # 配置文件权限,如果这里没修改权限,后续会报错
[root@192.168.118.15 ~]#systemctl start rsyncd ; systemctl enable rsyncd
Created symlink from /etc/systemd/system/multi-user.target.wants/rsyncd.service to /usr/lib/systemd/system/rsyncd.service.
到此,客户端(同步端)配置完毕。
server 端配置:
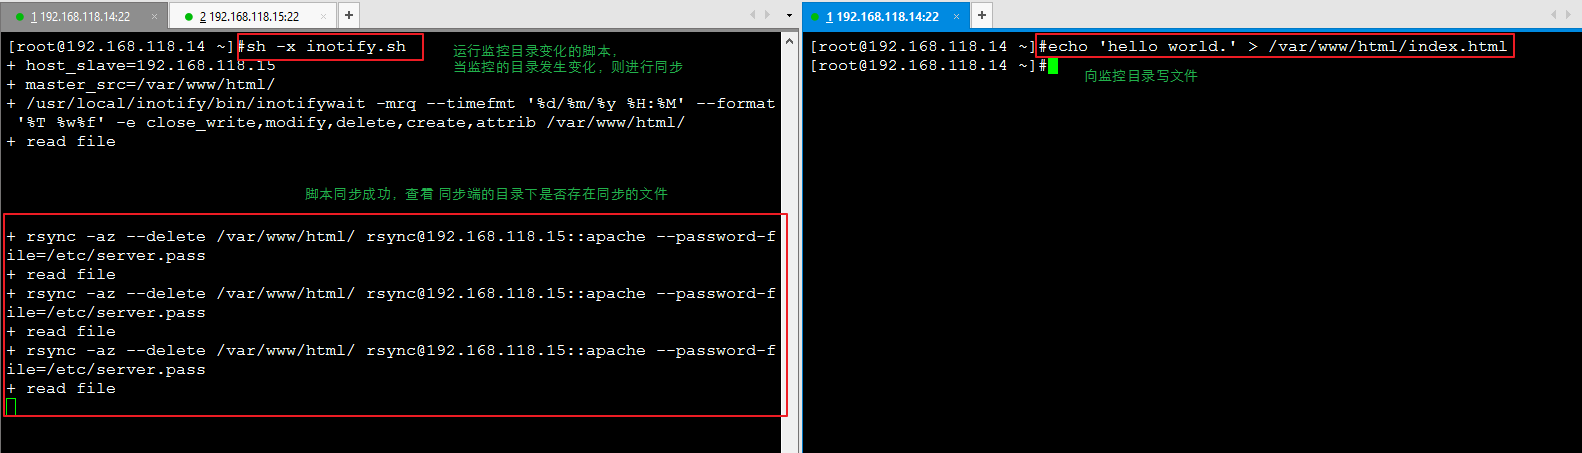
[root@192.168.118.14 ~]#yum install httpd rsync -y

下载 inotify 并编译安装:

下载地址:https://sourceforge.net/projects/inotify-tools/


[root@192.168.118.14 /usr/local/src]#yum install gcc* -y
[root@192.168.118.14 /usr/local/src]#tar xf inotify-tools-3.13.tar.gz
[root@192.168.118.14 /usr/local/src]#cd inotify-tools-3.13
[root@192.168.118.14 /usr/local/src/inotify-tools-3.13]#./configure --prefix=/usr/local/inotify/
[root@192.168.118.14 /usr/local/src/inotify-tools-3.13]#make && make install
[root@192.168.118.14 /usr/local/src/inotify-tools-3.13]#echo "export PATH=$PATH:/usr/local/inotify/bin" > /etc/profile.d/inotify.sh
[root@192.168.118.14 /usr/local/src/inotify-tools-3.13]#. /etc/profile.d/inotify.sh
[root@192.168.118.14 ~]#echo 123456 > /etc/server.pass
[root@192.168.118.14 ~]#chmod 0600 /etc/server.pass
# 编写同步脚本
[root@192.168.118.14 ~]#vim inotify.sh

#!/bin/bash

# 同步端的ip
host_slave=192.168.118.15
# 需要同步的目录
master_src=/var/www/html/

/usr/local/inotify/bin/inotifywait -mrq --timefmt '%d/%m/%y %H:%M' --format '%T %w%f' -e close_write,modify,delete,create,attrib /var/www/html/ | while read file
do
 rsync -az --delete ${master_src} rsync@${host_slave}::apache --password-file=/etc/server.pass
done
3. 测试
4. 配置过程常见错误
报错1:
ERROR: password file must not be other-accessible
rsync error: syntax or usage error (code 1) at authenticate.c(175) [sender=3.0.9]
处理办法:
检查服务端的 /etc/server.pass 权限是否是 600
[root@localhost html]# chmod 600 /etc/server.pass
[root@localhost html]# ll /etc/server.pass
-rw-------. 1 root root 7 Apr 18 11:00 /etc/server.pass
报错2:
@ERROR: Unknown module 'apache'
rsync error: error starting client-server protocol (code 5) at main.c(1516) [sender=3.0.9]
处理办法:
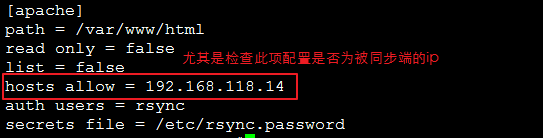
检查 client端 rsyncd.conf ,[apache] 模块内的配置