vue2.0中使用百度编辑器(仅适用于2.0,与3.0有所不同,3.0版本使用者可略过)
1、yarn add vue-ueditor-wrap   //下载此包可实现双向绑定功能

2、将去官网下载百度编辑器包(jsp版本),将名字改为UEditor放在项目的static文件夹下(与src同级)

3、在src/components文件夹下新建文件Ueditor.vue并写入以下代码(提醒:注意下方代码中的UEDITOR_HOME_URL: '/static/UEditor/',
这个路径一般情况下是这样的,但是有时候如果因为跨域问题做了代理,项目地址改变了,这时候这个地址就得换,具体换成什么样的要去控制台审查过后才能得知。
比如这一次我的项目地址代理后成了http://localhost/hs/.....这种,多了个hs,所以我就得把此地址改成UEDITOR_HOME_URL: '/hs/static/UEditor/'。
没换之前百度编辑器请求地址http://localhost/static/UEditor/...因此很多文件请求不到,疯狂报错。
换了之后百度编辑器请求地址是http://localhost/hs/static/UEdior/...就可以了。
另外static/UEditor/ueditor.config.js文件里也有一处是这个地址,也需要同步换。还有一点值得注意,项目上线后没有跨域问题了。
因此项目上线后这两处地址还得再换成原来的static/UEditor。总之根据项目灵活配置路径是一个关键)以下代码可实现图片上传功能,
这里的图片上传功能(点击左边图片图标即可上传)是自己定义的而非百度编辑器自带的。百度编辑器自带的单图和多图上传已被注释。
<template>
  <div>
    <vue-ueditor-wrap v-model="content" :config="myConfig" @beforeInit="addCustomButtom"></vue-ueditor-wrap>
    <a-modal
      title="图片上传"
      :visible="dialogVisible"
      @ok="insertImage"
      @cancel="handleCancel"
      okText="确定"
      cancelText="取消"
      :centered='true'
    >
      <div class="uploadContent">
        <a-upload
            name="file"
            listType="picture-card"
            class="uploader"
            :showUploadList="false"
            accept="image/png, image/jpeg"
            :action="uploadBase"
            @change="handleChange"
        >
            <img class="personImg" v-if="imageUrl" :src="imageUrl" alt="avatar" />
            <div v-else>
              <a-icon :type="loading ? 'loading' : 'plus'" />
              <div class="ant-upload-text">上传图片</div>
            </div>
        </a-upload>
      </div>
    </a-modal>
  </div>

</template>

<script>
  import common from '../api/common.js'   //这个common.js文件是自己写的,里面是接口地址,文件内容是export default{base:'http://localhost/apis',}
  import '../../static/UEditor/ueditor.config.js'
  import '../../static/UEditor/ueditor.all.js'
  import '../../static/UEditor/lang/zh-cn/zh-cn.js'
  import VueUeditorWrap from 'vue-ueditor-wrap'

    function getBase64(img, callback) {
        const reader = new FileReader();
        reader.addEventListener('load', () => callback(reader.result));
        reader.readAsDataURL(img);
    }

  export default {
    name: "Ueditor",
    components: {
      VueUeditorWrap,
    },
    props: {
      value: {
        type: String,
        default: ''
      },
      myConfig: {
        type: Object,
        default: () => ({
            // 编辑器不自动被内容撑高
            autoHeightEnabled: false,
            // 初始容器高度
            initialFrameHeight: 400,
            // 初始容器宽度
            initialFrameWidth: '100%',
            // UEditor 资源文件的存放路径,如果你使用的是 vue-cli 生成的项目,通常不需要设置该选项,vue-ueditor-wrap 会自动处理常见的情况,如果需要特殊配置,参考下方的常见问题2
            UEDITOR_HOME_URL: '/static/UEditor/'
          }
        )
      }
    },
    data(){
      return{
        uploadBase: `${common.base}/uploadimg`,//图片上传地址
        dialogVisible: false,
        imageList: [],
        editorHandler: null,
        content: this.value,

        imageUrl:'',  //upload框里图片的url
        loading: false,   //图片上传加载
        contentImg:'',   //转换过后的url链接
      }
    },
    watch: {
      value (newValue) {
        this.content = newValue
      },
      content (newValue) {
        this.$emit('input', newValue)
      }
    },
    methods:{
      handleCancel(){
        this.dialogVisible=false
        this.imageUrl=''
        this.contentImg=''
      },
      handleChange(info) {
            if (info.file.status === 'uploading') {
                this.loading = true;
                return;
            }
            if (info.file.status === 'done') {
                getBase64(info.file.originFileObj, imageUrl => {
                    this.imageUrl = imageUrl;
                    this.loading = false;
                });
                // console.log(info.file)
                if(info.file.response.code==200){
                    this.contentImg=info.file.response.msg
                }else if(info.file.response.code==401){
                    this.$message.warning("登录超时,请重新登录!")
                    this.$router.push({name:'Login'})
                }
            }
        },
      insertImage () {
        if(this.contentImg==''){
            this.$message.warning("您还未上传图片!")
            return
        }
        let imgUrl = this.contentImg;
        let imageHtml = "";
        imageHtml = imageHtml + "<p><img src="" + imgUrl + ""/></p>";
        if (imageHtml != "") {
          this.editorHandler.execCommand('inserthtml', imageHtml);
        }
        this.dialogVisible = false;
        this.imageUrl=''
        this.contentImg=''
      },
      addCustomButtom (editorId) {
        let _this = this;
        window.UE.registerUI('test-button', function (editor, uiName) {
          // 注册按钮执行时的 command 命令,使用命令默认就会带有回退操作
          editor.registerCommand(uiName, {
            execCommand: () => {
              _this.imageList = [];
              _this.dialogVisible = true;
              _this.editorHandler = editor;
              //editor.execCommand('inserthtml', `<span>这是一段由自定义按钮添加的文字</span>`)
            }
          })

          // 创建一个 button
          var btn = new window.UE.ui.Button({
            // 按钮的名字
            name: uiName,
            // 提示
            title: '鼠标悬停时的提示文字',
            // 需要添加的额外样式,可指定 icon 图标,图标路径参考常见问题 2
            cssRules: "background-position: -380px 0;",
            // 点击时执行的命令
            onclick: function () {
              // 这里可以不用执行命令,做你自己的操作也可
              editor.execCommand(uiName)
            }
          })

          // 当点到编辑内容上时,按钮要做的状态反射
          editor.addListener('selectionchange', function () {
            var state = editor.queryCommandState(uiName)
            if (state === -1) {
              btn.setDisabled(true)
              btn.setChecked(false)
            } else {
              btn.setDisabled(false)
              btn.setChecked(state)
            }
          })
          // 因为你是添加 button,所以需要返回这个 button
          return btn
        }, 47 /* 指定添加到工具栏上的哪个位置,默认时追加到最后 */, editorId /* 指定这个 UI 是哪个编辑器实例上的,默认是页面上所有的编辑器都会添加这个按钮 */)
      }
    },
  }
</script>

<style scoped>
    .uploadContent{
        100%;
        text-align: center;
    }
    .uploader{
        display: inline-block;
    }
    .personImg{
        200px;
    }
</style>

4、在main.js中全局注册组件
import Ueditor from './components/Ueditor.vue'   //百度编辑器组件
Vue.component('Ueditor',Ueditor)

5、使用
<Ueditor v-model="intro"></Ueditor>

6、修改编辑器css样式,使其更加美观,在static/UEditor/themes/default/css/ueditor.css里添加以下代码

.edui-default.edui-editor-toolbarbox{
    box-shadow: none!important;
}
.edui-default.edui-editor-toolbarboxouter{
    background-image:-webkit-linear-gradient(top,#fff,#fff)!important;
    box-shadow:none!important;
}
.edui-default.edui-editor{
    border-radius: 0!important;
}
解决百度图片伸缩框错位的问题
1、找到staticUEditorindex.html并将其<script type="text/javascript" charset="utf-8" src="ueditor.all.min.js"> </script>改为<script type="text/javascript" charset="utf-8" src="ueditor.all.js"> </script>
2、找到apiueditorueditor.all.js(视后台编辑器引入文件进行修改),查找attachTo: function (targetObj)字段
3、将
attachTo: function (targetObj) {
    var me = this,
    target = me.target = targetObj,
    resizer = this.resizer,
    imgPos = domUtils.getXY(target),
    iframePos = domUtils.getXY(me.editor.iframe),
    editorPos = domUtils.getXY(resizer.parentNode);

    domUtils.setStyles(resizer, {
        'width': target.width + 'px',
        'height': target.height + 'px',
        'left': iframePos.x + imgPos.x - me.editor.document.body.scrollLeft - editorPos.x - parseInt(resizer.style.borderLeftWidth) + 'px',
        'top': iframePos.y + imgPos.y - me.editor.document.body.scrollTop - editorPos.y - parseInt(resizer.style.borderTopWidth) + 'px'
    })
}
修改为
attachTo: function (a) {
    var b = this,
    c = b.target = a,
    d = this.resizer,
    e = domUtils.getXY(c),
    f = domUtils.getXY(b.editor.iframe),
    g = domUtils.getXY(d.parentNode),
    h = b.editor.document;
    domUtils.setStyles(d, {
         c.width + "px",
        height: c.height + "px",
        left: f.x + e.x - (h.documentElement.scrollLeft || h.body.scrollLeft || 0) - g.x - parseInt(d.style.borderLeftWidth) + "px",
        top: f.y + e.y - (h.documentElement.scrollTop || h.body.scrollTop || 0) - g.y - parseInt(d.style.borderTopWidth) + "px"
    })
}
4、重新加载项目,大功告成
解决因百度编辑器自动保存功能引起的回撤等相关功能失效的问题
--出现原因:
百度编辑器自动保存是保存在localStorage里的。当内容过多时,会溢出localStorage储存范围。导致报错

--解决方法:
1、将ueditor.config.js文件中
enableAutoSave的注释去掉,并设置成false,
saveInterval的注释也去掉,并设置成0;
2、在ueditor.all.js文件中
在'contentchange': function () {   函数的第一行添加以下一段代码:

    if (!me.getOpt('enableAutoSave')) {
        return;
    }
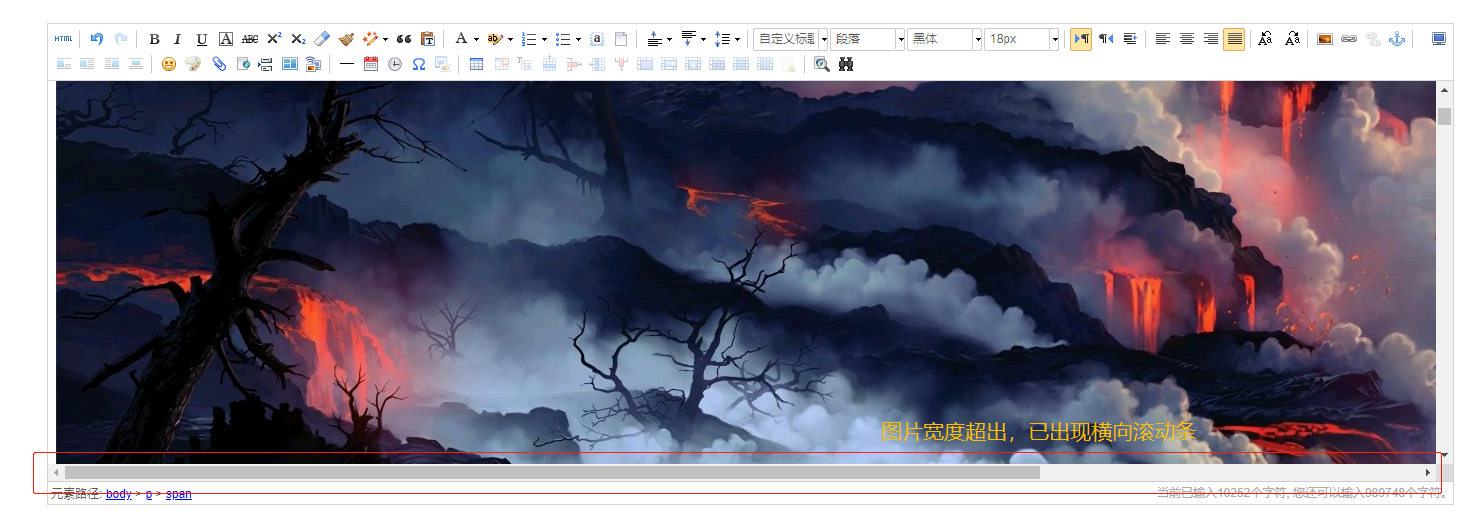
百度编辑器上传超大图片时,图片宽度会超出编辑器宽度
--问题:当上传一个超大图片时,比如3840*2160,假设编辑器的宽度只有1200px。此时上传此图片后,图片会超出编辑器宽度,样式如下
解决:
找到themes/iframe.css文件
在里面加入以下代码
img {
max- 100%; /*图片自适应宽度*/
}
body {
overflow-y: scroll !important;
}
.view {
word-break: break-all;
}
.vote_area {
display: block;
}
.vote_iframe {
background-color: transparent;
border: 0 none;
height: 100%;
}
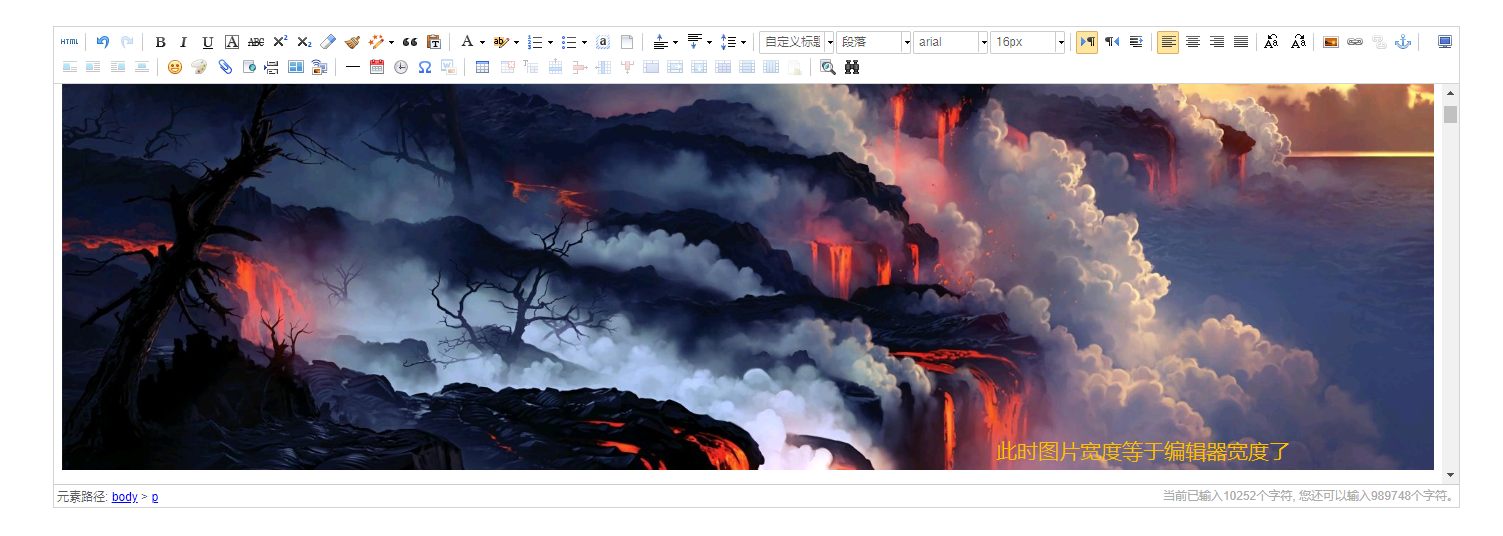
--解决后:上传的图片宽度若超过编辑器宽度,则设置图片宽度等于编辑器宽度
百度编辑器里设置图片最小宽度和高度
为什么这样做:百度编辑器图片宽高设置存在选定问题。有时会导致图片瞬间宽高接近0,变成一个点。这里需要设置一下最小宽高来兼容一下这个问题。等后续解决图片选定问题,可以不用此方法兼容。
同上,在iframe.css文件里
img {
    max- 100%; /*图片自适应宽度*/
    min- 100px;
    min-height: 100px;
}
解决内容无法居中或者居中一片区域时,未选中区域也被居中问题
归根结底可能是因为编辑器内文档是从别的地方直接复制进来的。
问题1:内容里的最外层标签可能带有属性,如section带有了inline-block属性。
问题2:复制的内容里有多个内容放在一个标签内。

问题1:当最外层标签带属性会导致的问题:如img放在section标签里,而section又被设置了inline-block属性。此时设置图片居中则无效的。
解决:复制此内容,删除此内容,再在同一位置上重新粘贴此内容,section标签就会消失了

问题2:此外,若多个内容放在一个标签内,比如此时居中第一个内容,会导致给父标签添加text-align:center属性,会导致此标签下其他内容也被居中,目前未找到较好解决办法
编辑器过滤section样式,导致微信或其他地方编辑好的内容复制到百度编辑器里不生效的问题
原因:发现ueditor中有xss过滤器,默认启用,按照配置文件中的白名单列表,不在其中的将去除。

解决:
ueditor.config.js文件下
找到whitList,更改以下代码
-  section:[],
+  section:['class', 'style'],

给
解决编辑器表格拖拽选中的问题
原因:是编辑器为了区分用户是单击表格还是双击,对表格拖拽做了延时处理。这也导致了如改变表格宽度等拖拽操作的识别不灵敏的问题。默认是360ms的延时
解决:
1、将延时处理时间变短,变成20以下,使得用户无法完成双击操作。此时用户无论单击,双击都能选中边框了
2、将表格边框变宽一些,增加识别范围
3、将边框选中颜色变明显一些,提高识别度

1、延时时间变短
搜索dblclickTime,将dblclickTime = 360 设置为 dblclickTime = 20
2、表格边框变宽
搜索cellBorderWidth,将cellBorderWidth = 5 修改为cellBorderWidth = 10
3、见下方
修改表格拖拽选中边框时的边框颜色,使其更明显,更容易识别
在ueditor.all.js里搜索dragLine.style.cssText
找到如下两行,其中opacity为透明度,background-color是选中表格边框颜色。如图

修改前:
修改后:

解决编辑器里表格居中问题
百度编辑器里选定表格->右键->表格对齐方式->居中显示。完成此操作后,会在table属性里添加align="center"以实现居中效果。
但是这个align="center"貌似并没有那么好用。所以我在ueditor.all.js里做了一下改动
在ueditor.all.js里搜索“表格对齐方式”查询到以下代码,做出相关改动即可
//表格对齐方式
    UE.commands['tablealignment'] = {
        queryCommandState: function () {
            if (browser.ie && browser.version < 8) {
                return -1;
            }
            return getTableItemsByRange(this).table ? 0 : -1
        },
        execCommand: function (cmd, value) {
            var me = this,
                start = me.selection.getStart(),
                table = start && domUtils.findParentByTagName(start, ["table"], true);

            if (table) {
                table.setAttribute("align",value);
+                if(value=="center"){
+                    table.style.margin="0 auto"  //通过设置margin:0 auto来实现居中效果
+                }else{
+                    table.style.margin="0"
+                }
            }
        }
    };
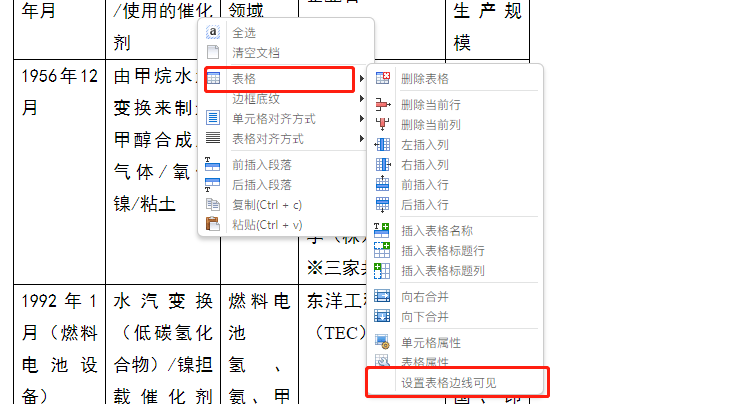
解决表格边框在编辑器里可见,但在页面里却失效的问题
如下图
选中表格->右击->设置表格边线可见。即可
全选后设置字体为黑体,会有部分设置失效
记录一下,还未解决
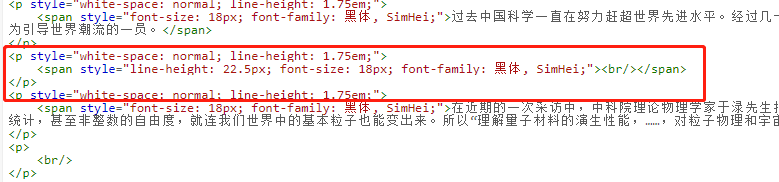
解决百度编辑器段间距过大,但是设置行间距以及段间距无效的问题
问题:
当你在段落与段落之间enter换行时。百度编辑器会生成一个包裹span标签的p标签。然后你设置了行间距,但是无效,为什么呢。因为你的行间距设置在了外层的p标签上,而span标签却有一个默认的line-height。p标签被span撑开了。

怎么办:enter换行之后,键入一个空格或者文字,再删除此空格或文字。span标签就会随着空格或文字的删除而删除。此时就剩一个p标签了,就可以设置行间距以及段前距段后距了。
百度编辑器多图上传完整代码(配合antd-vue组件库,此页最上方代码改进版)
<template>
  <div>
    <vue-ueditor-wrap v-model="content" :config="myConfig" @beforeInit="addCustomButtom"></vue-ueditor-wrap>
    <a-modal
      	title="图片上传"
      	:visible="dialogVisible"
	  	width="550px"
      	@ok="insertImage"
      	@cancel="handleCancel"
      	okText="确定"
      	cancelText="取消"
      	:centered='true'
    >
		<div class="imgContent" >
			<ul>
				<li class="everyImg" v-for="(item,index) in imageList" :key="index">
					<div class="imgBody">
						<img :src="item" alt="avatar" />
						<div class="mask">
							<div class="leftmove" @click="moveLeft(index)"><a-icon type="left-circle" /></div>
							<div class="delimg" @click="imgDelete(index)"><a-icon type="delete" /></div>
							<div class="rightmove" @click="moveRight(index)"><a-icon type="right-circle" /></div>
						</div>
					</div>
				</li>
			</ul>
		</div>
      	<div class="uploadContent">
        	<a-upload
        	    name="file"
        	    listType="picture-card"
        	    class="uploader"
        	    :showUploadList="false"
        	    accept="image/png, image/jpeg"
        	    :action="uploadBase"
        	    @change="handleChange"
        	>
            	<div>
              		<a-icon :type="loading ? 'loading' : 'plus'" />
              		<div class="ant-upload-text">上传图片</div>
            	</div>
        	</a-upload>
      </div>
    </a-modal>
  </div>

</template>

<script>
  import common from '../api/common.js'  //这个common.js文件是自己写的,里面是接口地址,文件内容是export default{base:'http://localhost/apis',}
  import '../../static/UEditor/ueditor.config.js'
  import '../../static/UEditor/ueditor.all.js'
  import '../../static/UEditor/lang/zh-cn/zh-cn.js'
  import VueUeditorWrap from 'vue-ueditor-wrap'

    function getBase64(img, callback) {
        const reader = new FileReader();
        reader.addEventListener('load', () => callback(reader.result));
        reader.readAsDataURL(img);
    }

  export default {
    name: "Ueditor",
    components: {
      VueUeditorWrap,
    },
    props: {
      value: {
        type: String,
        default: ''
      },
      myConfig: {
        type: Object,
        default: () => ({
            // 编辑器不自动被内容撑高
            autoHeightEnabled: false,
            // 初始容器高度
            initialFrameHeight: 200,
            // 初始容器宽度
            initialFrameWidth: '100%',
            // UEditor 资源文件的存放路径,如果你使用的是 vue-cli 生成的项目,通常不需要设置该选项,vue-ueditor-wrap 会自动处理常见的情况,如果需要特殊配置,参考下方的常见问题2
            UEDITOR_HOME_URL: '/static/UEditor/'
          }
        )
      }
    },
    data(){
      return{
        uploadBase: `${common.base}/uploadimg`,//图片上传地址
        dialogVisible: false,
        imageList: [],   //图片列表
        editorHandler: null,
        content: this.value,
        loading: false,   //图片上传加载
      }
    },
    watch: {
      value (newValue) {
        this.content = newValue
      },
      content (newValue) {
        this.$emit('input', newValue)
      }
    },
    methods:{
	//取消上传图片弹框
    handleCancel(){
    	this.dialogVisible=false
      	this.imageList=[]
	},
	//删除图片
	imgDelete(i){
		this.imageList.splice(i,1)
	},
	//图片向左移动
	moveLeft(i){
		let a=this.imageList
		if(i!=0){
			a[i]=a.splice(i-1,1,a[i])[0]
		}else{
			this.$message.warning("已经是最左边了")
		}
		console.log(this.imageList)
	},
	//图片向右移动
	moveRight(i){
		let a=this.imageList
		if(i!=a.length-1){
			a[i]=a.splice(i+1,1,a[i])[0]
		}else{
			this.$message.warning("已经是最右边了")
		}
	},
	//进行图片上传
    handleChange(info) {
        if (info.file.status === 'uploading') {
            this.loading = true;
            return;
        }
        if (info.file.status === 'done') {
            getBase64(info.file.originFileObj, imageUrl => {
                this.loading = false;
            });
            // console.log(info.file)
            if(info.file.response.code==200){
				this.imageList.push(info.file.response.msg)
            }else if(info.file.response.code==401){
                this.$message.warning("登录超时,请重新登录!")
                this.$router.push({name:'Login'})
            }
        }
    },
    insertImage () {
        if(this.imageList.length==0){
            this.$message.warning("您还未上传图片!")
            return
        }
        let imageHtml = "";
		for(let item of this.imageList){
			imageHtml = imageHtml + "<p><img src="" + item + ""/></p>";
		}
        if (imageHtml != "") {
          this.editorHandler.execCommand('inserthtml', imageHtml);
        }
        this.dialogVisible = false;
		this.imageList=[]
      },
      addCustomButtom (editorId) {
        let _this = this;
        window.UE.registerUI('test-button', function (editor, uiName) {
          // 注册按钮执行时的 command 命令,使用命令默认就会带有回退操作
          editor.registerCommand(uiName, {
            execCommand: () => {
              _this.imageList = [];
              _this.dialogVisible = true;
              _this.editorHandler = editor;
              //editor.execCommand('inserthtml', `<span>这是一段由自定义按钮添加的文字</span>`)
            }
          })

          // 创建一个 button
          var btn = new window.UE.ui.Button({
            // 按钮的名字
            name: uiName,
            // 提示
            title: '鼠标悬停时的提示文字',
            // 需要添加的额外样式,可指定 icon 图标,图标路径参考常见问题 2
            cssRules: "background-position: -380px 0;",
            // 点击时执行的命令
            onclick: function () {
              // 这里可以不用执行命令,做你自己的操作也可
              editor.execCommand(uiName)
            }
          })

          // 当点到编辑内容上时,按钮要做的状态反射
          editor.addListener('selectionchange', function () {
            var state = editor.queryCommandState(uiName)
            if (state === -1) {
              btn.setDisabled(true)
              btn.setChecked(false)
            } else {
              btn.setDisabled(false)
              btn.setChecked(state)
            }
          })
          // 因为你是添加 button,所以需要返回这个 button
          return btn
        }, 47 /* 指定添加到工具栏上的哪个位置,默认时追加到最后 */, editorId /* 指定这个 UI 是哪个编辑器实例上的,默认是页面上所有的编辑器都会添加这个按钮 */)
      }
    },
  }
</script>

<style scoped>
	.imgContent ul{
		margin-bottom: 15px;
	}
	.imgContent .everyImg{
		list-style: none;
		padding:5px;
		border:1px dashed #dcdcdc;
		margin:0 10px 10px 0;
		border-radius: 4px;
		cursor: pointer;
		transition: all 0.2s;
		display:inline-block;
		vertical-align:top;
    }
	.imgContent .everyImg:hover{
		border:1px dashed #1890FF;
		transition: all 0.2s;
	}
	.imgBody{
		position: relative;
	}
	.imgBody:hover .mask{
		opacity: 1;
	}
	.imgBody img{
		100px;
		height:auto;
		border-radius: 4px;
	}
	.mask{
		transition: all .3s;
		opacity: 0;
		100%;
		height:100%;
		position: absolute;
		border-radius: 4px;
		top:0;
		left:0;
		background-color: rgba(0,0,0,.4);
	}
	.leftmove,.delimg,.rightmove{
		color:#dcdcdc;
		font-size: 22px;
		position: absolute;
		top:50%;
		transform: translateY(-50%);
		transition: all .2s;
	}
	.leftmove{
		left:2px;
	}
	.leftmove:hover{
		color:#1890FF;
	}
	.delimg{
		left:40px;
	}
	.delimg:hover{
		color:#1890FF;
	}
	.rightmove{
		right:2px;
	}
	.rightmove:hover{
		color:#1890FF;
	}
    .uploadContent{
        100%;
        text-align: center;
    }
    .uploader{
        display: inline-block;
    }
</style>