原文链接:http://blog.csdn.net/skertone/article/details/7046447
第一步编辑 TOOLS.ini
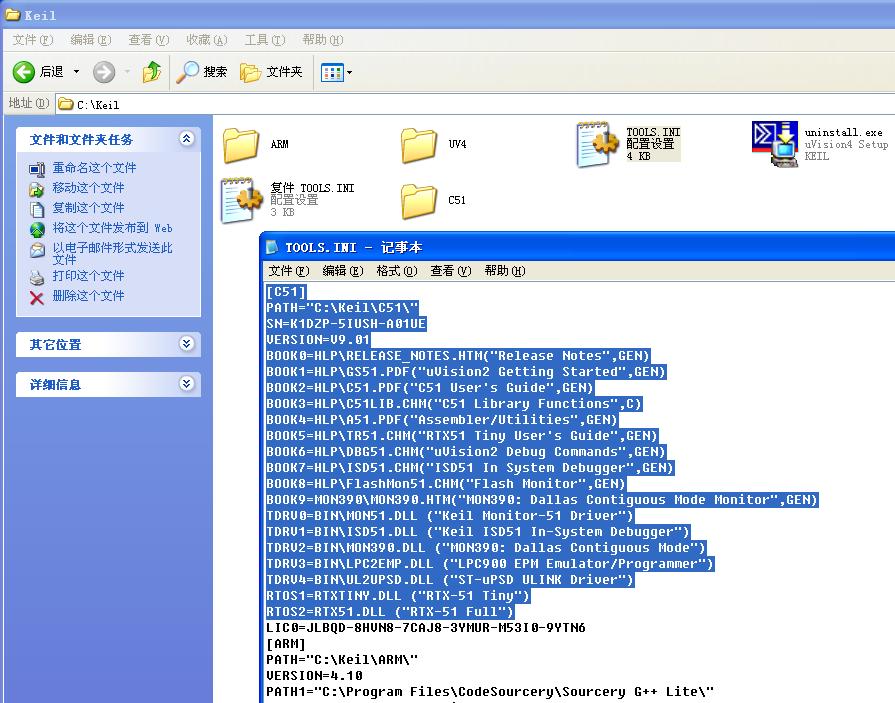
找到Keil安装目录, 用记事本修改 TOOLS.ini
在 [ARM] 段前面增加 [C51]段,需增加的内容如下, 注意 PATH路径可能需修改为实际路径
[C51]
PATH="C:KeilC51"
SN=K1DZP-5IUSH-A01UE
VERSION=V9.01
BOOK0=HLPRELEASE_NOTES.HTM("Release Notes",GEN)
BOOK1=HLPGS51.PDF("uVision2 Getting Started",GEN)
BOOK2=HLPC51.PDF("C51 User's Guide",GEN)
BOOK3=HLPC51LIB.CHM("C51 Library Functions",C)
BOOK4=HLPA51.PDF("Assembler/Utilities",GEN)
BOOK5=HLPTR51.CHM("RTX51 Tiny User's Guide",GEN)
BOOK6=HLPDBG51.CHM("uVision2 Debug Commands",GEN)
BOOK7=HLPISD51.CHM("ISD51 In System Debugger",GEN)
BOOK8=HLPFlashMon51.CHM("Flash Monitor",GEN)
BOOK9=MON390MON390.HTM("MON390: Dallas Contiguous Mode Monitor",GEN)
TDRV0=BINMON51.DLL ("Keil Monitor-51 Driver")
TDRV1=BINISD51.DLL ("Keil ISD51 In-System Debugger")
TDRV2=BINMON390.DLL ("MON390: Dallas Contiguous Mode")
TDRV3=BINLPC2EMP.DLL ("LPC900 EPM Emulator/Programmer")
TDRV4=BINUL2UPSD.DLL ("ST-uPSD ULINK Driver")
RTOS1=RTXTINY.DLL ("RTX-51 Tiny")
RTOS2=RTX51.DLL ("RTX-51 Full")
修改后效果如图所示:
这一步之后,就可以 用keygen 算注册码授权了, 新建工程时就能选择C5x器件了
第二步 下载并解压C51编译器放在 Keil安装目录下即可
可以去这个地址下载
http://download.csdn.net/detail/skertone/3887373
或者去别人装了Keil For C51的机器上Copy一份