前言
学习总结使用,博客如中有错误的地方,请指正。改系列文章主要记录了搭建一个管后台的步骤,主要实现的功能有:使用路由模拟登录、退出、以及切换不同的页面;使用redux实现面包屑;引入使用其他常用的组件,比如highchart、富文本等,后续会继续完善。
github地址:https://github.com/huangtao5921/react-antDesgin-admin (欢迎Star)
项目展示地址:https://huangtao5921.github.io/react-admin/
一、处理登录
上一篇文章中 react + react-router + redux + ant-Desgin 搭建管理后台 -- 页面布局(五)我们已经将整个首页的布局呈现了出来,并且点击不同的侧边栏能跳转到不同的页面,移入头部的用户头像,有退出登录的下拉选项,但是功能并没有实现,并且我们随便输入一个路由,比如用户列表的,侧边栏默认选中的一直是首页,我们接下来处理这2个问题。
首先,浏览器输入http://localhost:3000/login,跳转到登录页,我们来进行页面布局,并书写基本的逻辑,由于我们是本地模拟登录,所以登录验证成功之后,我在本地缓存了一个登录成功的信息 loggedIn:true。为 true 代表登录成功,false或不存在代表未登录,其实就相当于我们真实项目中的token。思路是:每次进入登录页的时候,我们获取一下本地缓存的loggedIn,如果是登录的状态,直接跳转到首页。样式写在src/pages/login/login.css中,接下来,将src/pages/login/Login.js代码改写如下:
import React from 'react';
import { Form, Icon, Input, Button, message } from 'antd';
import { Redirect } from 'react-router-dom';
import './login.css';
class Login extends React.Component {
  handleSubmit = e => {
    e.preventDefault();
    this.props.form.validateFields((err, values) => {
      if (!err) {
        if (values.username === 'admin' && values.password === '123') {
          window.localStorage.setItem('loggedIn', true);
          this.props.history.push('/');
        } else {
          message.error('账号或密码错误', 1);
        }
      }
    });
  };
  render() {
    const { getFieldDecorator } = this.props.form;
    const loggedIn = window.localStorage.getItem('loggedIn');
    const LoginForm = (
      <div className="login-container">
        <Form onSubmit={this.handleSubmit} className="login-form">
          <div className="sub-title">登 录</div>
          <Form.Item>
            { getFieldDecorator('username', {
              rules: [{ required: true, message: '请输入用户名!' }],
            })(
              <Input prefix={<Icon type="user" className='login-icon' />} placeholder="用户名admin"/>,
            )}
          </Form.Item>
          <Form.Item>
            { getFieldDecorator('password', {
              rules: [{ required: true, message: '请输入密码!' }],
            })(
              <Input prefix={<Icon type="lock" className='login-icon'/>} type="password" placeholder="密码123"/>,
            )}
          </Form.Item>
          <Form.Item>
            <Button type="primary" htmlType="submit" className="login-form-button">登录</Button>
          </Form.Item>
        </Form>
      </div>
    );
    return (
      loggedIn ? (
        <Redirect to="/"/>
      ) : LoginForm
    );
  }
}
const WrappedNormalLoginForm = Form.create({ name: 'normal_login' })(Login);
export default WrappedNormalLoginForm;
此时,访问http://localhost:3000/login如果我们没有登录,会展示如下,如果我们登录过了一次之后,在浏览器输入http://localhost:3000/login,会直接跳转到首页,除非清除掉缓存的loggedIn,这样说明我们的登录已经简单的实现了。

二、处理退出登录
接下来我们再处理一下退出登录,还记得退出登录按钮在哪里吗?打开我们的src/component/layout/HeaderBar.js,找到退出登录按钮,加上退出登录的逻辑。被<Route>引入的组件才能读取到this.props.history,所以我们需要把this.props.history或者将事件传递到子组件中。基于此,我们需要改变以下文件的代码:
routes/index.js中将history对象传递到子组件中:
<HeaderBar></HeaderBar>
改为
<HeaderBar history={this.props.history}></HeaderBar>
src/component/layout/HeaderBar.js组件中改变以下代码:
HeaderBar中的
<UserInfo/>
改为
<UserInfo history={ props.history }/>

UserInfo组件中加处理函数
handleMenuClick = e => {
  if (e.key === 'outLogin') {
    this.setState({
      visible: false
    });
    window.localStorage.removeItem('loggedIn');
    this.props.history.push('/login');
  }
};

<Menu>
  <Menu.Item key="outLogin">退出登录</Menu.Item>
</Menu>
改为
<Menu onClick={ this.handleMenuClick }>
  <Menu.Item key="outLogin">退出登录</Menu.Item>
</Menu>
最后HeaderBar.js的代码呈现为:
import React from 'react';
import { Layout, Menu, Dropdown, Icon, Breadcrumb } from 'antd';
import customUrl from '../../images/custom.jpeg';
const { Header } = Layout;

class UserInfo extends React.Component {
  state = {
    visible: false,   // 菜单是否显示
  };
  handleMenuClick = e => {
    if (e.key === 'outLogin') {
      this.setState({
        visible: false
      });
      window.localStorage.removeItem('loggedIn');
      this.props.history.push('/login');
    }
  };
  handleVisibleChange = flag => {
    this.setState({ visible: flag });
  };
  render() {
    const menu = (
      <Menu onClick={ this.handleMenuClick }>
        <Menu.Item key="outLogin">退出登录</Menu.Item>
      </Menu>
    );
    return (
      <Dropdown overlay={ menu } onVisibleChange={ this.handleVisibleChange } visible={ this.state.visible }>
        <div className="ant-dropdown-link">
          <img className="custom-img" src={ customUrl } alt=""/>
          <Icon type="caret-down" />
        </div>
      </Dropdown>
    );
  }
}
const HeaderBar = (props) => {
  return (
    <Header>
      <Breadcrumb>
        <Breadcrumb.Item>首页</Breadcrumb.Item>
      </Breadcrumb>
      <UserInfo history={ props.history }/>
    </Header>
  );
};
export default HeaderBar;
现在我们点退出登录,可以回到登录页,从登录点登录可以跳转到首页,但是在么有登录的情况下我们在浏览器中输入http://localhost:3000/还是可以访问到首页,这是不正常的,只有登录成功之后才有权限查看首页,没有登录直接输入地址,我们应该重置到登录页,这里类似在登录页处理逻辑。所以我们改变一下routes/index.js中的代码,引入Redirect:
// 引入Redirect
import { Route, Switch, Redirect } from 'react-router-dom';

// render函数改成如下:
render() {
    const loggedIn = window.localStorage.getItem('loggedIn');
    const mainPage = (
      <Layout>
        <SiderBar></SiderBar>
        <Layout>
          <HeaderBar history={this.props.history}></HeaderBar>
          <div className="layout-content">
            <Switch>
              <Route exact path="/" component={ Home }/>
              <Route path="/user/connect" component={ Connect }/>
              <Route path="/user/list" component={ List }/>
              <Route path="/tool/rich" component={ Rich }/>
              <Route component={ NotFind }/>
            </Switch>
          </div>
        </Layout>
      </Layout>
    );
    return (
      loggedIn ? (
        mainPage
      ) : (
        <Redirect to="/login"/>
      )
    );
  }
此时,在没有登录的情况下,在浏览器中输入首页或者其他页面的url时,会被重置到登录页,登录的情况下进入到正确的页面。
二、处理默认选中侧边栏
接下来处理另外一个问题,当我们在浏览器中输入http://localhost:3000/user/list时,侧边栏默认选中的还是首页,这是因为我们在侧边栏组件里面将默认选中和默认展开写死了。这里我们处理一下,思路是根据每次打开的url的pathname来找到我们目前访问页面的对应的侧边栏。
defaultOpenKeys: [],       // 默认展开
defaultSelectedKeys: ['/'],   // 默认选中
接下来,改写src/component/layout/SiderBar.js代码,这里处理的比较死板,只能处理2级的路由,有好的方法可以改写。
  // 新增handleDefaultSelect,每次刷新执行一遍
  componentWillMount() {
    this.handleDefaultSelect();
    const menuList = this.setMenu(menuConfig);
    this.setState({
      menuList
    });
  }

  // 刷新页面,处理默认选中
  handleDefaultSelect = () => {
    let menuConfigKeys = [];
    menuConfig.forEach((item) => {
      menuConfigKeys.push(item.key);
    });
    const pathname = window.location.pathname;
    const currentKey = '/' + pathname.split('/')[1];
    if (menuConfigKeys.indexOf(currentKey) === 1) {
      this.setState({
        defaultOpenKeys: [currentKey],
        defaultSelectedKeys: [pathname],
      });
    }
  }
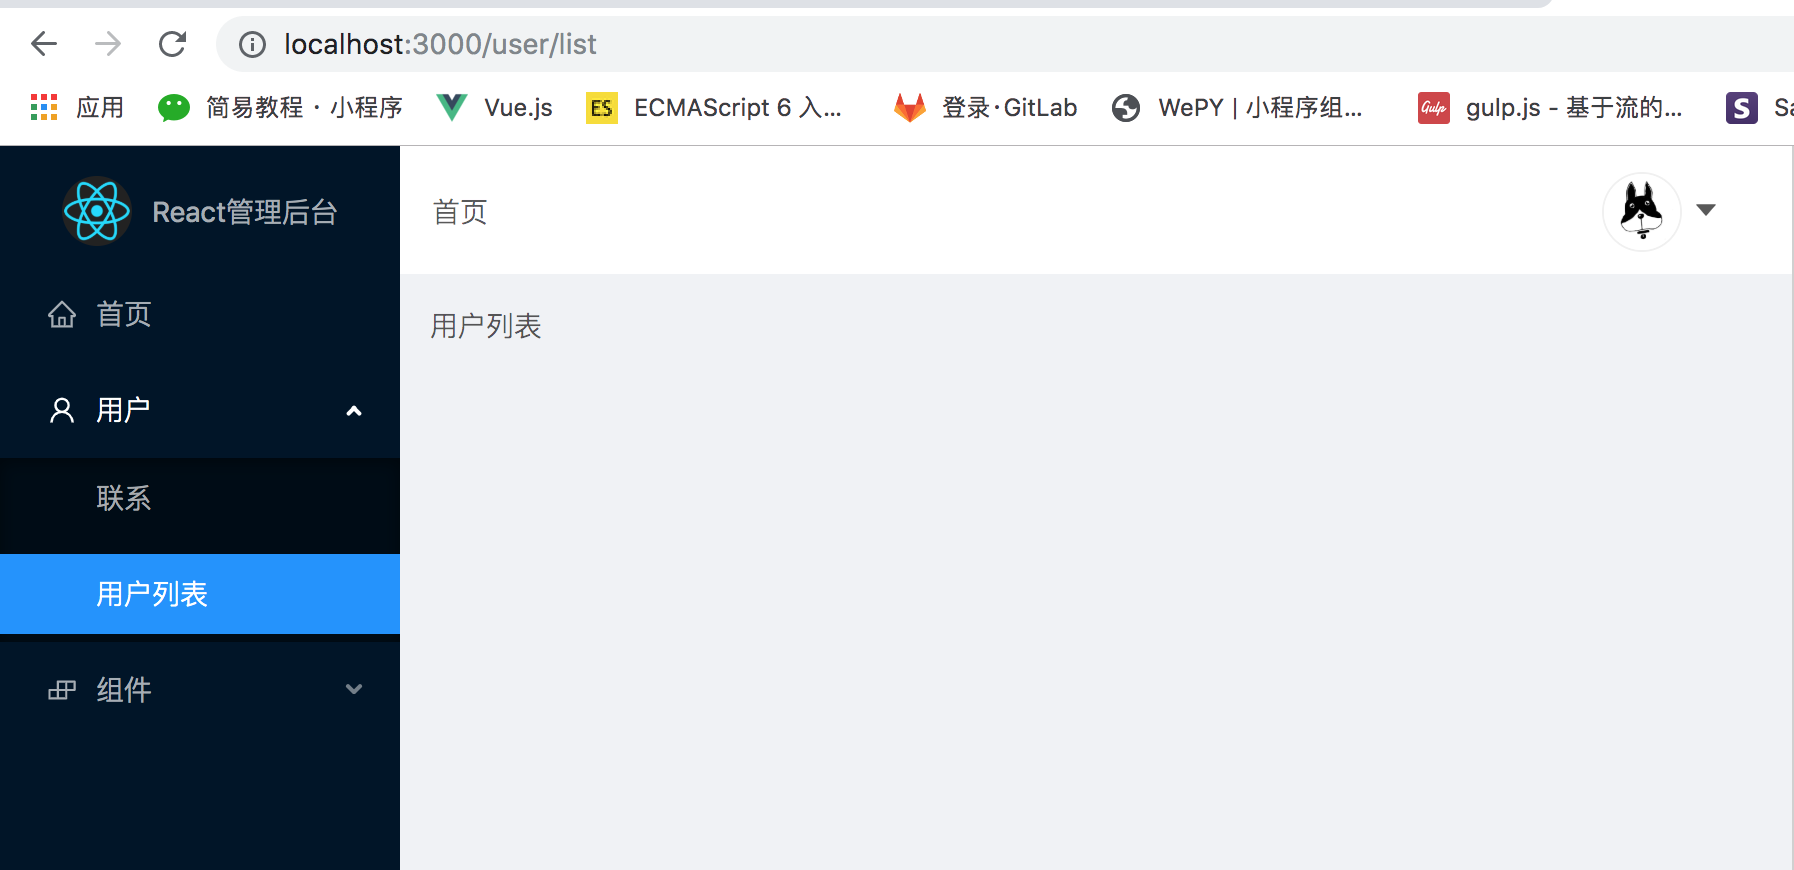
此时,在页面输入http://localhost:3000/user/list,会发现用户那一栏被打开,用户列表被选中了。
目前为止,首页里面处理面包屑部分不会随着路由改变,其他的地方包括登录以及退出登录均已经正常了。
注:交流问题的可以加QQ群:531947619

下一篇:react + react-router + redux + ant-Desgin 搭建react管理后台 -- 引入rudex并处理面包屑(七)