做为一个刚转java不到两个月的.net 程序员,第一个拿到的任务就是把一个以前的eclipse项目迁移到spring-boot,我的内心是崩溃的。eclipse我都还用的不是很熟,spring也才是限于能看懂,对于那一大堆的配置文件更是,更是一脸懵逼,好吧,工作还是得做。记录下整个过程中踩到的各式各样的坑。
第一步加了maven做项目构建,唉,都是现学现卖。在转换过程中出现了各种错误。
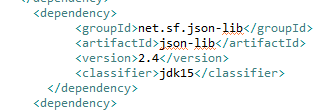
a).net.sf.json-lib引用报错,解决方案是指定JDK版本
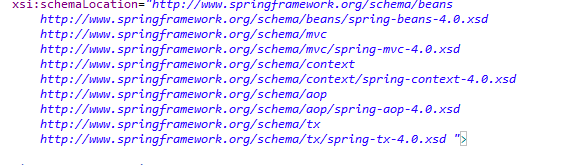
b) spring配置的 xml文件一直报错:发现时xml中写的spring版本和实际maven安装的不一致,maven暗转的是spring-4.39,xml中写的是4.0,
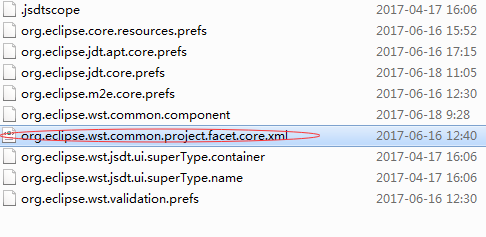
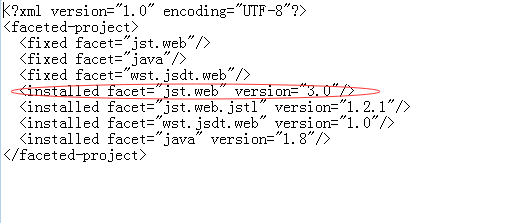
c)"Cannot change version of project facet Dynamic web module to 2.5",这个主要是两个地方版本不一致导致的,一个是web.xml

另一个地方是主目录下.setting 文件夹下的“org.eclipse.wst.common.project.facet.core.xml”文件里面的jst.web的版本,这两个要保持一致
中间还碰到过一个问题,忘了是啥,解决方案是添加spring-tx的依赖,怕又碰到
 <dependency>
            <groupId>org.springframework</groupId>
            <artifactId>spring-tx</artifactId>
            <version>4.3.7.RELEASE</version>
</dependency>
下面是转springboot的基本步骤和踩到的坑
1.修改配置文件,增加springboot的配置
添加继承的parent
<!--继承spring boot的parent-->
<parent>
        <groupId>org.springframework.boot</groupId>
        <artifactId>spring-boot-starter-parent</artifactId>
        <version>1.5.2.RELEASE</version>
  </parent>
<!--添加spring boot maven 插件用做项目编译-->
   <plugin>
        <groupId>org.springframework.boot</groupId>
        <artifactId>spring-boot-maven-plugin</artifactId>
     </plugin>

    <plugin>
        <groupId>org.apache.maven.plugins</groupId>
        <artifactId>maven-jar-plugin</artifactId>
        <configuration>
            <archive>
                <manifest>
                    <addClasspath>true</addClasspath>
                    <classpathPrefix></classpathPrefix>
                    <mainClass>com.seaskylight.kaow.Application</mainClass><!--指定启动文件-->
                </manifest>
            </archive>
        </configuration>
    </plugin>
添加依赖
    <dependency>
            <groupId>org.springframework.boot</groupId><!--web项目需要的依赖-->
            <artifactId>spring-boot-starter-web</artifactId>
        </dependency>
            <dependency>
            <groupId>org.springframework.boot</groupId>
            <artifactId>spring-boot-starter-test</artifactId><!--单元测试需要的依赖-->
            <scope>test</scope>
        </dependency>
2.编写Application,完成上述这些操作基本上就可以讲项目作为一个springboot项目进项启动了,当然了可能会报一大堆的错误。
@EnableAutoConfiguration
@ComponentScan
@SpringBootApplication
public class Application {

    public static void main(String[] args) {
        SpringApplication.run(Application.class, args);
    }
}
整合mybatis到springboot
1.添加依赖
<!--springboot mybatis的依赖项-->
<dependency>
        <groupId>org.mybatis.spring.boot</groupId>
        <artifactId>mybatis-spring-boot-starter</artifactId>
        <version>1.0.0</version>
</dependency>
<!--jdbc的驱动,这个是必须有的,不然会抛驱动不能加载的异-->
<dependency>
        <groupId>mysql</groupId>
        <artifactId>mysql-connector-java</artifactId>
        <version>5.1.6</version>
</dependency>
2.定义datasource ,sqlSessionFactory,这个需要定义到刚刚的Application中,修改Applicaiton文件 ,配置好数据库,项目应该是能够正常启动了
@EnableAutoConfiguration
@ComponentScan
@SpringBootApplication
public class Application {


  //DataSource配置
    @Bean
    @ConfigurationProperties(prefix="spring.datasource")
    @Primary
    public DataSource dataSource() {
        //DataSource dataSource = new DataSource();
        return DataSourceBuilder.create().type(com.mchange.v2.c3p0.ComboPooledDataSource.class).build();
        //com.mchange.v2.c3p0.ComboPooledDataSource
        //return new org.apache.tomcat.jdbc.pool.DataSource();
    }

    //提供SqlSeesion
    @Bean
    public SqlSessionFactory sqlSessionFactoryBean() throws Exception {

        SqlSessionFactoryBean sqlSessionFactoryBean = new SqlSessionFactoryBean();
        sqlSessionFactoryBean.setDataSource(dataSource());

        PathMatchingResourcePatternResolver resolver = new PathMatchingResourcePatternResolver();

        sqlSessionFactoryBean.setMapperLocations(resolver.getResources("classpath:/com/seaskylight/kaow/dao/*.xml"));

        return sqlSessionFactoryBean.getObject();
    }

    @Bean
    public PlatformTransactionManager transactionManager() {
        return new DataSourceTransactionManager(dataSource());
    }
    public static void main(String[] args) {
        SpringApplication.run(Application.class, args);
    }
}
这里的线程池用的是c3p0,需要添加对应的依赖,并且在springboot的配置文件中配置好参数
<dependency>
      <groupId>c3p0</groupId>
      <artifactId>c3p0</artifactId>
      <version>0.9.1.2</version>
</dependency>
配置文件
spring.datasource.jdbcUrl=jdbc:mysql://localhost:3306/zxtk?characterEncoding=UTF-8&characterSetResults=UTF-8&zeroDateTimeBehavior=convertToNull
spring.datasource.user=user
spring.datasource.password=password
spring.datasource.driverClass=com.mysql.jdbc.Driver
spring.datasource.initialPoolSize=5
spring.datasource.minPoolSize=5
spring.datasource.maxPoolSize=50
spring.datasource.maxIdleTime=600
spring.datasource.acquireIncrement=5
spring.datasource.acquireRetryDelay=1000
spring.datasource.acquireRetryAttempts=30
spring.datasource.checkoutTimeout=2000
spring.datasource.maxStatements=50
spring.datasource.idleConnectionTestPeriod=60
spring.datasource.preferredTestQuery=SELECT SYSDATE()
spring.datasource.numHelperThreads=3
因为这个项目是个web项目,所以有一些静态资源。springboot默认的静态资源是放在/resources,/resources/static,等默认文件夹下的(还有几个忘记了),这里我是在resources下面建了个static文件夹,然后再将静态资源移动到改文件夹下。这样就能进行静态文件的访问。